
Riffraff Diesel 7.3L Coolant Filter Kit 99-03 - How To Install
Aug 1st 2025
Full PDF Instructions can be downloaded here: Riffraff Diesel 7.3L Coolant Filter Kit 99-03
INSTALLATION INSTRUCTIONS
Product Link: https://www.riffraffdiesel.com/riffraff-diesel-coolant-filtration-system-filter-kit-99-03/
Required Parts: (Make sure all items are accounted for before starting)
(1) Donaldson coolant filter
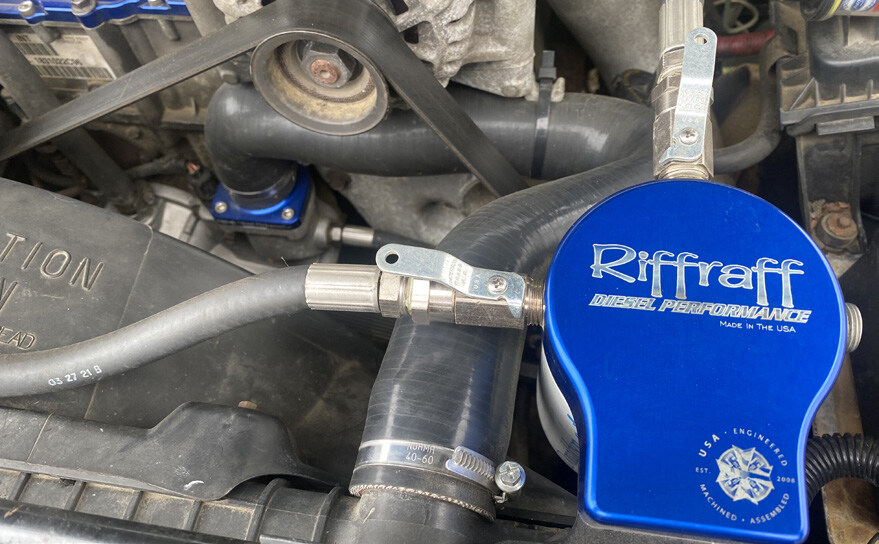
(1) Billet coolant filter head
(1) Coolant filter bracket
(1) Outlet hose with tee fitting
(1) Inlet hose
(2) Spring band hose clamps
(1) Temperature sensor port allen plug
(2) Ball valves
(2) Allen bolts
(2) Washers
(1) Tube of Gasoila® thread sealant
(3) Pages of instructions
Recommended Tools: Basic hand tools
1 WARNING: Never work on a vehicle that has been driven
recently. The coolant system is pressurized and contains
hot liquid. Allow sufficient time for the vehicle to cool before
working on the coolant system.
2. Disconnect batteries for safety.
3. Open the petcock at the bottom of the radiator to drain
coolant and reduce coolant loss during installation.
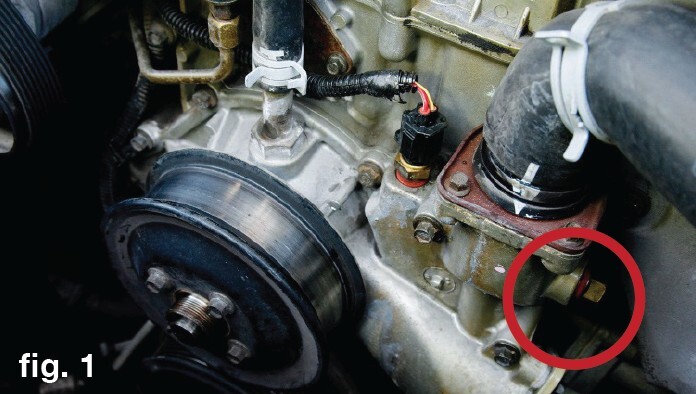
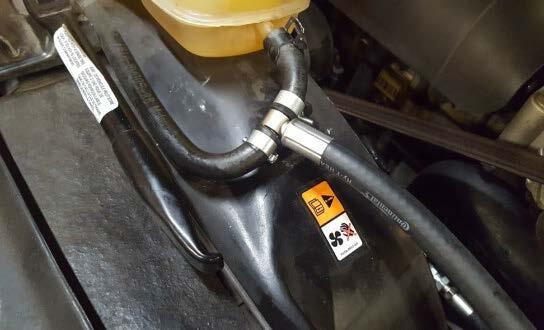
4. Remove the plug from the side of the water pump housing
at the upper radiator hose neck to drain coolant. The coolant
filter inlet hose will connect to this port in step 10. (fig. 1)
5. Remove the jacking tools from the top of the radiator.
6. Remove the two bolts from the driver’s side radiator bracket
and remove the bracket and rubber isolator from the radiator.
Set aside bolts and isolator for reuse in step 12. (fig. 2)
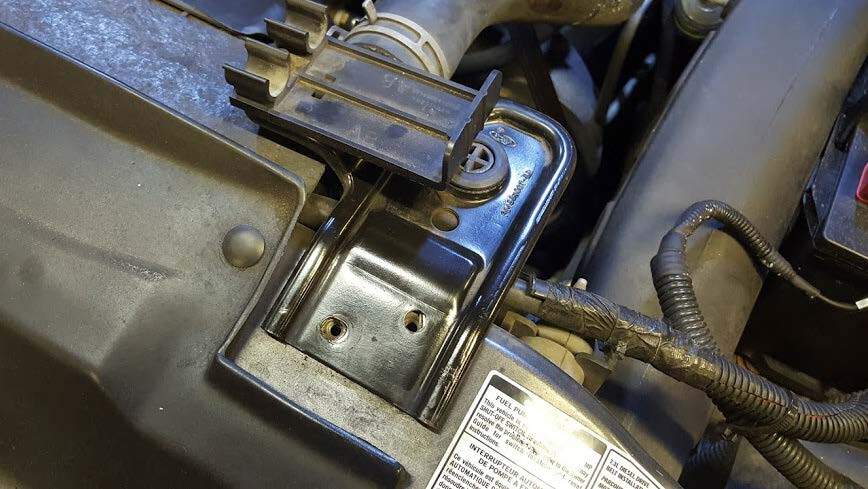
7. Remove the plastic tool holding clip from the radiator support
bracket and transfer to the new support bracket using
existing hardware. Do NOT over-tighten. (fig. 3)
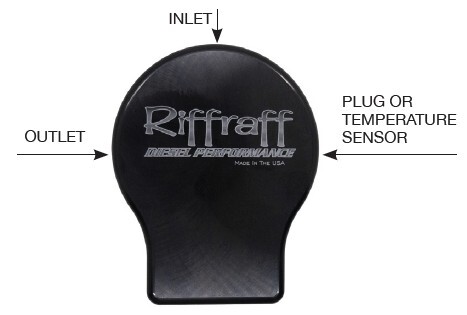
8. If you are not using an aftermarket coolant temperature
sensor, apply Gasoila® thread sealant to the allen plug
provided and install into the coolant filter head on the side closest
to the battery.
9. Apply Gasoila® to the threads of the smaller fitting on the
coolant filter inlet hose (longer included hose) and thread
the fitting into the coolant filter head on the side facing the
firewall. Once snug, tighten fully with a wrench.
10. Apply Gasoila® to the threads of the remaining fitting on the
hose connected to the coolant filter head. Thread this fitting
into the water pump housing port from which coolant was
drained in step 4. Turn the coolant filter head to thread it in
properly. Once snug, tighten fully with a wrench.
11. Using the provided allen head bolts (2) and washers (2),
assemble the coolant filter head to the support bracket as
shown.

12. Insert the rubber radiator isolator into the coolant filter
radiator support bracket and install onto the radiator using
existing hardware.
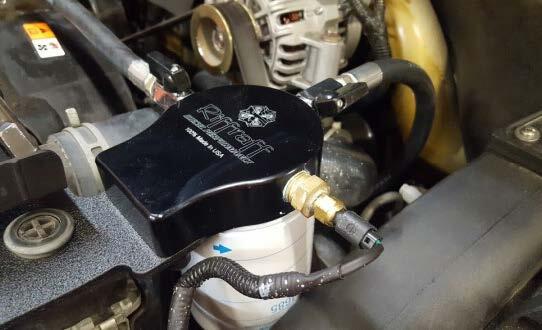
13. Install the provided coolant filter onto the filter head. Apply a
small amount of coolant to the o-ring on the filter for lubrication.
14. Apply Gasoila® thread sealant to the inlet hose with the
“tee fitting” and insert into the coolant filter head facing the
degas bottle. Tighten the hose while noting the tee fitting
orientation. The tee fitting needs to align with the degas
bottle hose.
15. Cut the degas bottle hose in the U section to allow the tee
fitting to be inserted.
16. Slide one of the provided hose clamps onto each side of
the cut degas bottle hose. Insert the tee fitting ends into the
degas bottle hose and tighten clamps to secure the fitting into
the hose.
17. Open up the ball valves at the coolant filter head.

18. If you are using an aftermarket coolant temperature sensor,
insert it into the remaining port on the filter head using thread
sealant.
19. Re-connect the batteries.
20. Refill the degas bottle with coolant of your choice.
21. Start the vehicle and check for leaks.
22. After several minutes of running, you should see coolant
entering the degas bottle via the degas bottle hose. As RPMs
are increased, coolant flow will increase.


