
7.3 Powerstroke HPOP Resealing - Step By Step How To
Mar 31st 2026
“If your Ford isn’t leaking oil, it’s time to add more oil.” It’s a common saying, and as far as we’re concerned, it’s false. At least for the 7.3 HPOP. Leaks from the high pressure oil system are common, but you don’t need to spend your mortgage money on replacing every fitting just to stop that leak in the valley. Most of these fittings have O-ring seals just like anything else and most of them are extremely easy to replace. Luckily we have seal kits for everything you could need. So lets dive into HPOP oil leaks and how to replace the affected seals.
Notes:
- Before removing the HPOP or performing any service on it, drain the HPOP reservoir using a fluid evacuator of some sort. An old soap bottle pump will also work here if it’s draw straw is long enough (make sure to clean any soap off it first).
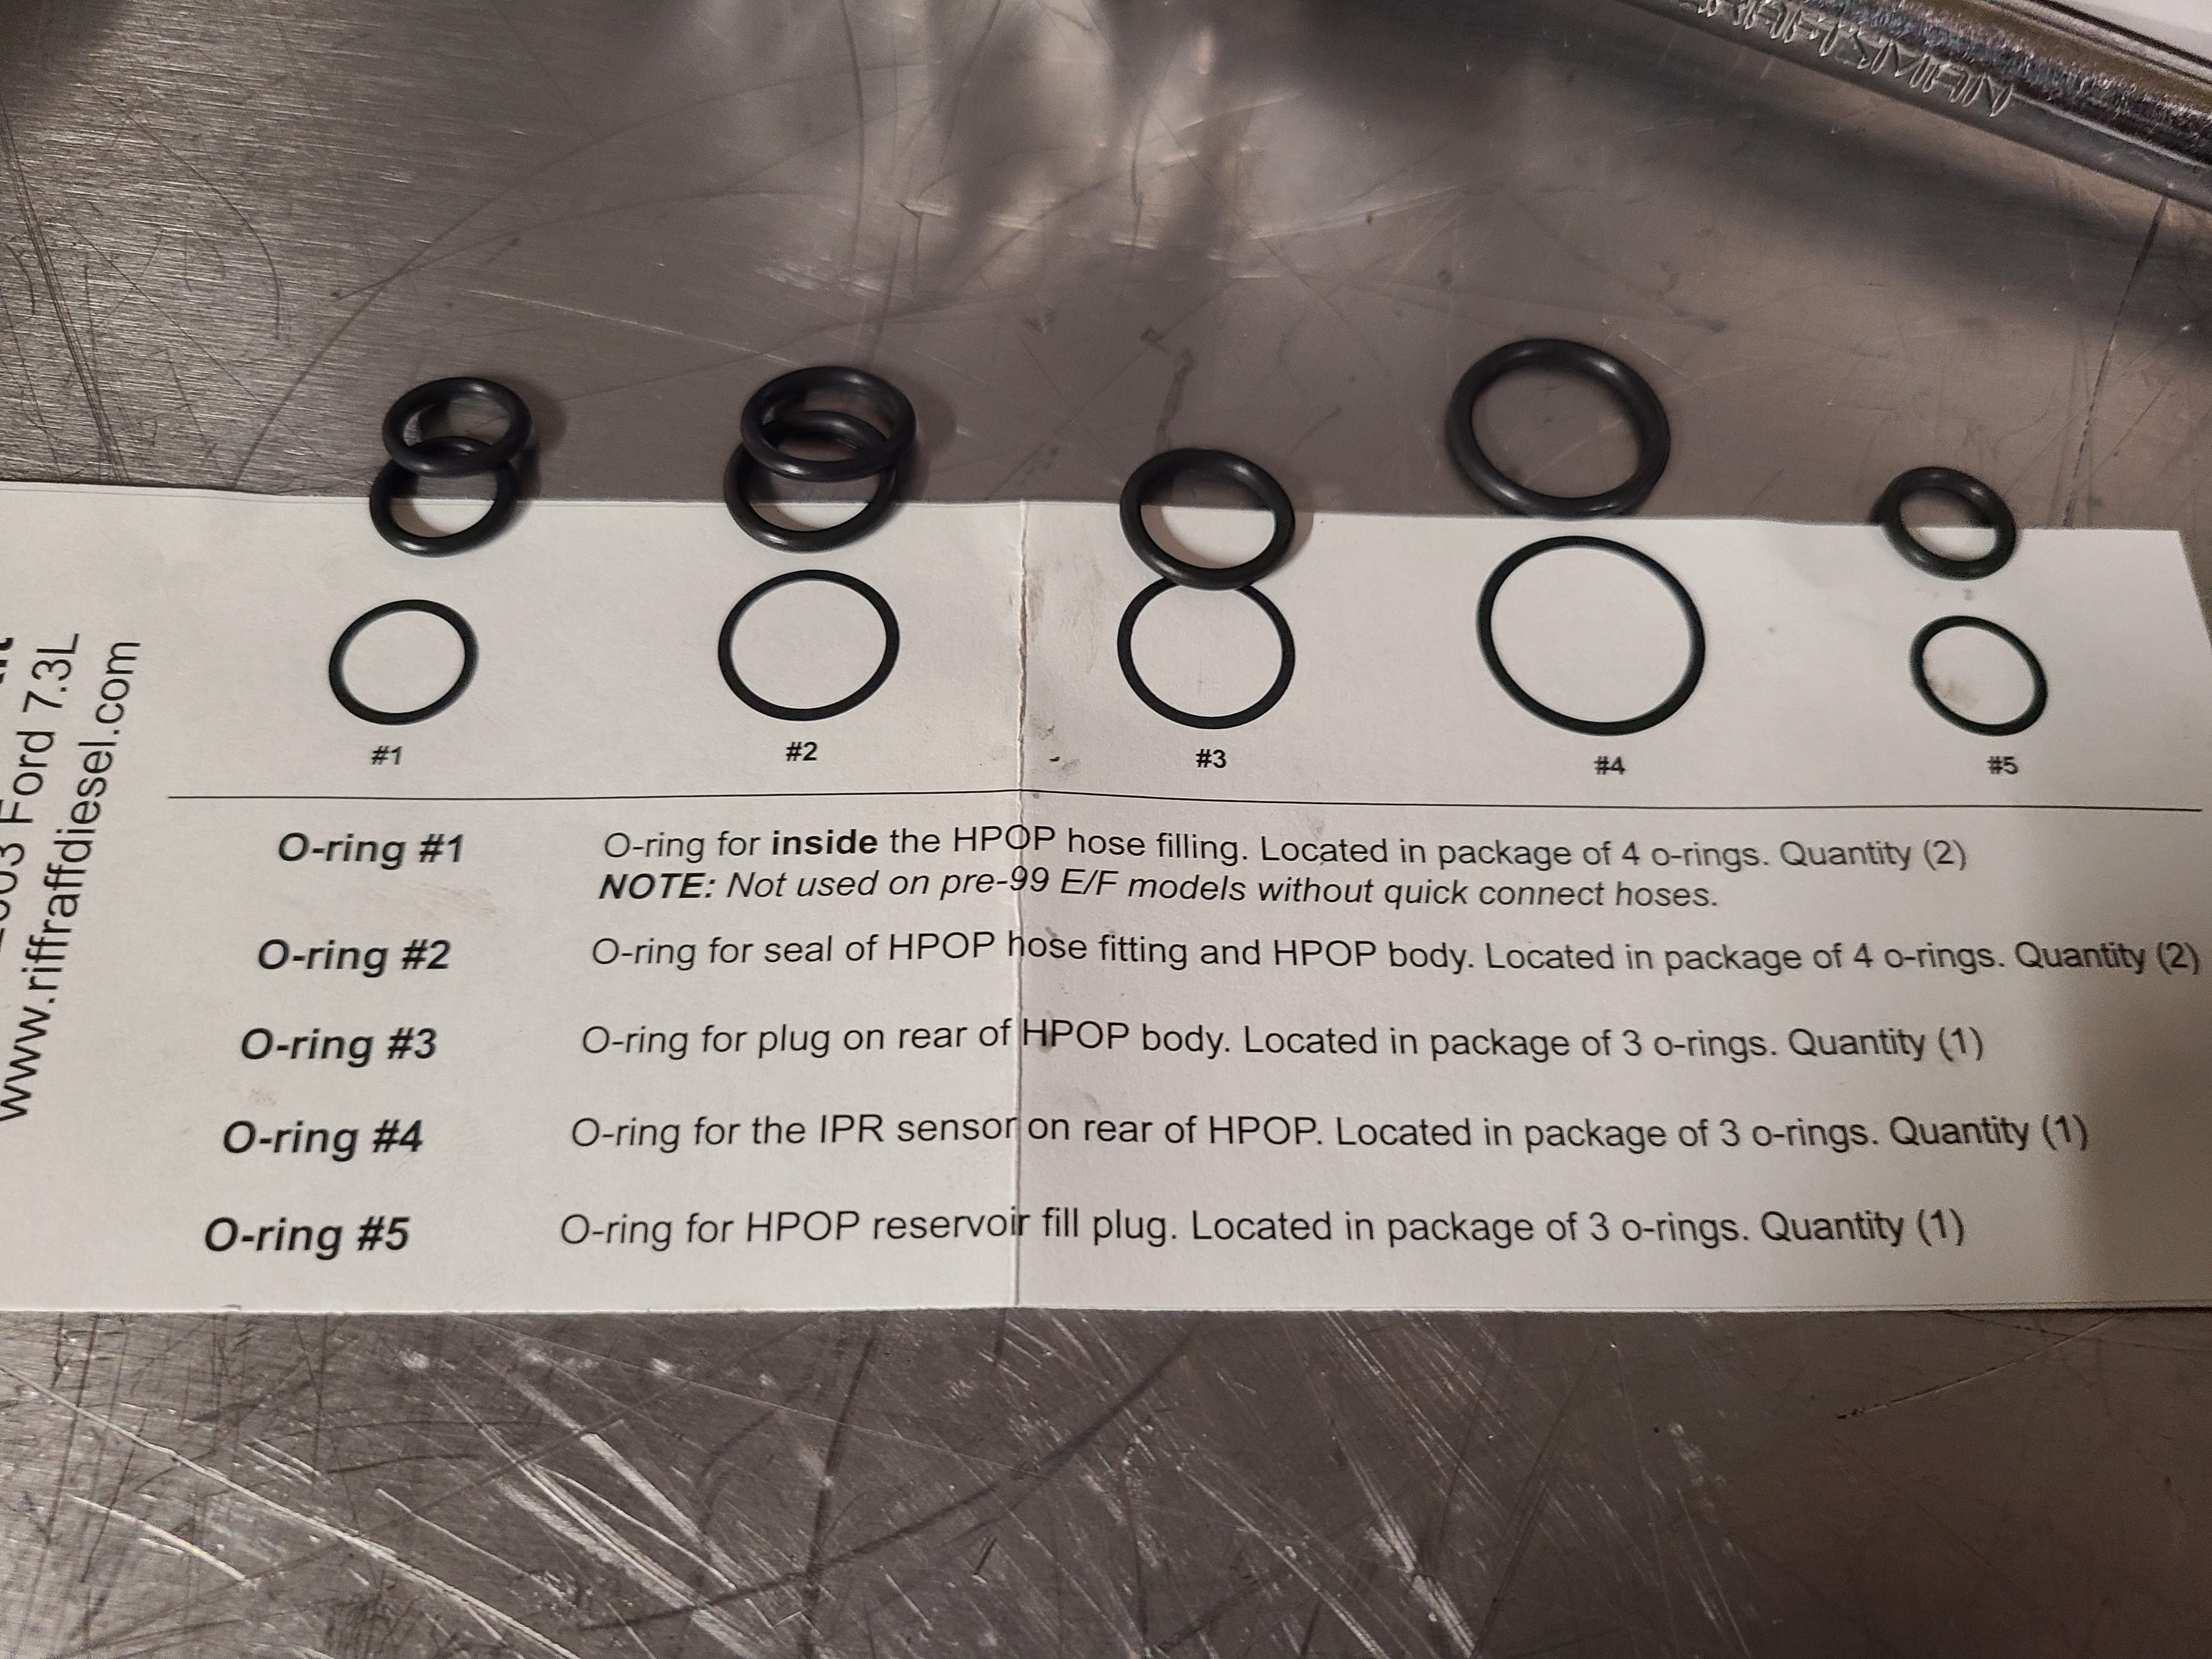
- We’ll be using three different kits. For the larger of the three, the "7 O-ring/seal kit" includes a quick size guide to eliminate confusion. The other two kits are specific to one seal respectively. Combined with these instructions, it couldn’t get much easier.
- For many of these seals, replacement can be done with the HPOP installed in the vehicle. For some, however, it must be removed. We’ll call out each where applicable.
- We’ll say this now so we don’t have to say it for every step: clean everything thoroughly before reassembly. Contamination kills seals.
Parts List:
HPOP Quick Disconnect Hose Removal Tool 99-03: https://www.riffraffdiesel.com/hpop-quick-disconnect-hose-removal-tool-99-03/
HPOP O-ring kit w/ 7 O-rings: https://www.riffraffdiesel.com/hpop-o-ring-kit-w-7-o-rings/
HPOP Rear Plate O-ring Seal: https://www.riffraffdiesel.com/hpop-rear-plate-o-ring-seal/
Serviceable Long Threaded HPOP Plug: https://www.riffraffdiesel.com/serviceable-long-threaded-hpop-plug/
Torque Ratings (pay attention to lb-ft or in-ft notations):
- High-pressure oil pump drive gear mounting bolt: 95 lb-ft
- High-pressure oil pump mounting bolts: 18 lb-ft
- High-pressure oil pump reservoir mounting bolts: 18 lb-ft
- High-pressure oil line connector at the cylinder head: 19 lb-ft
- High-pressure oil line connector at the HPOP: 25 lb-ft
- Drive gear access cover retaining bolts: 20 lb-ft
- Serviceable Plug: 75 lb-in
- IPR to HPOP: 35 lb-ft
- HPOP End Plug: 25 lb-ft
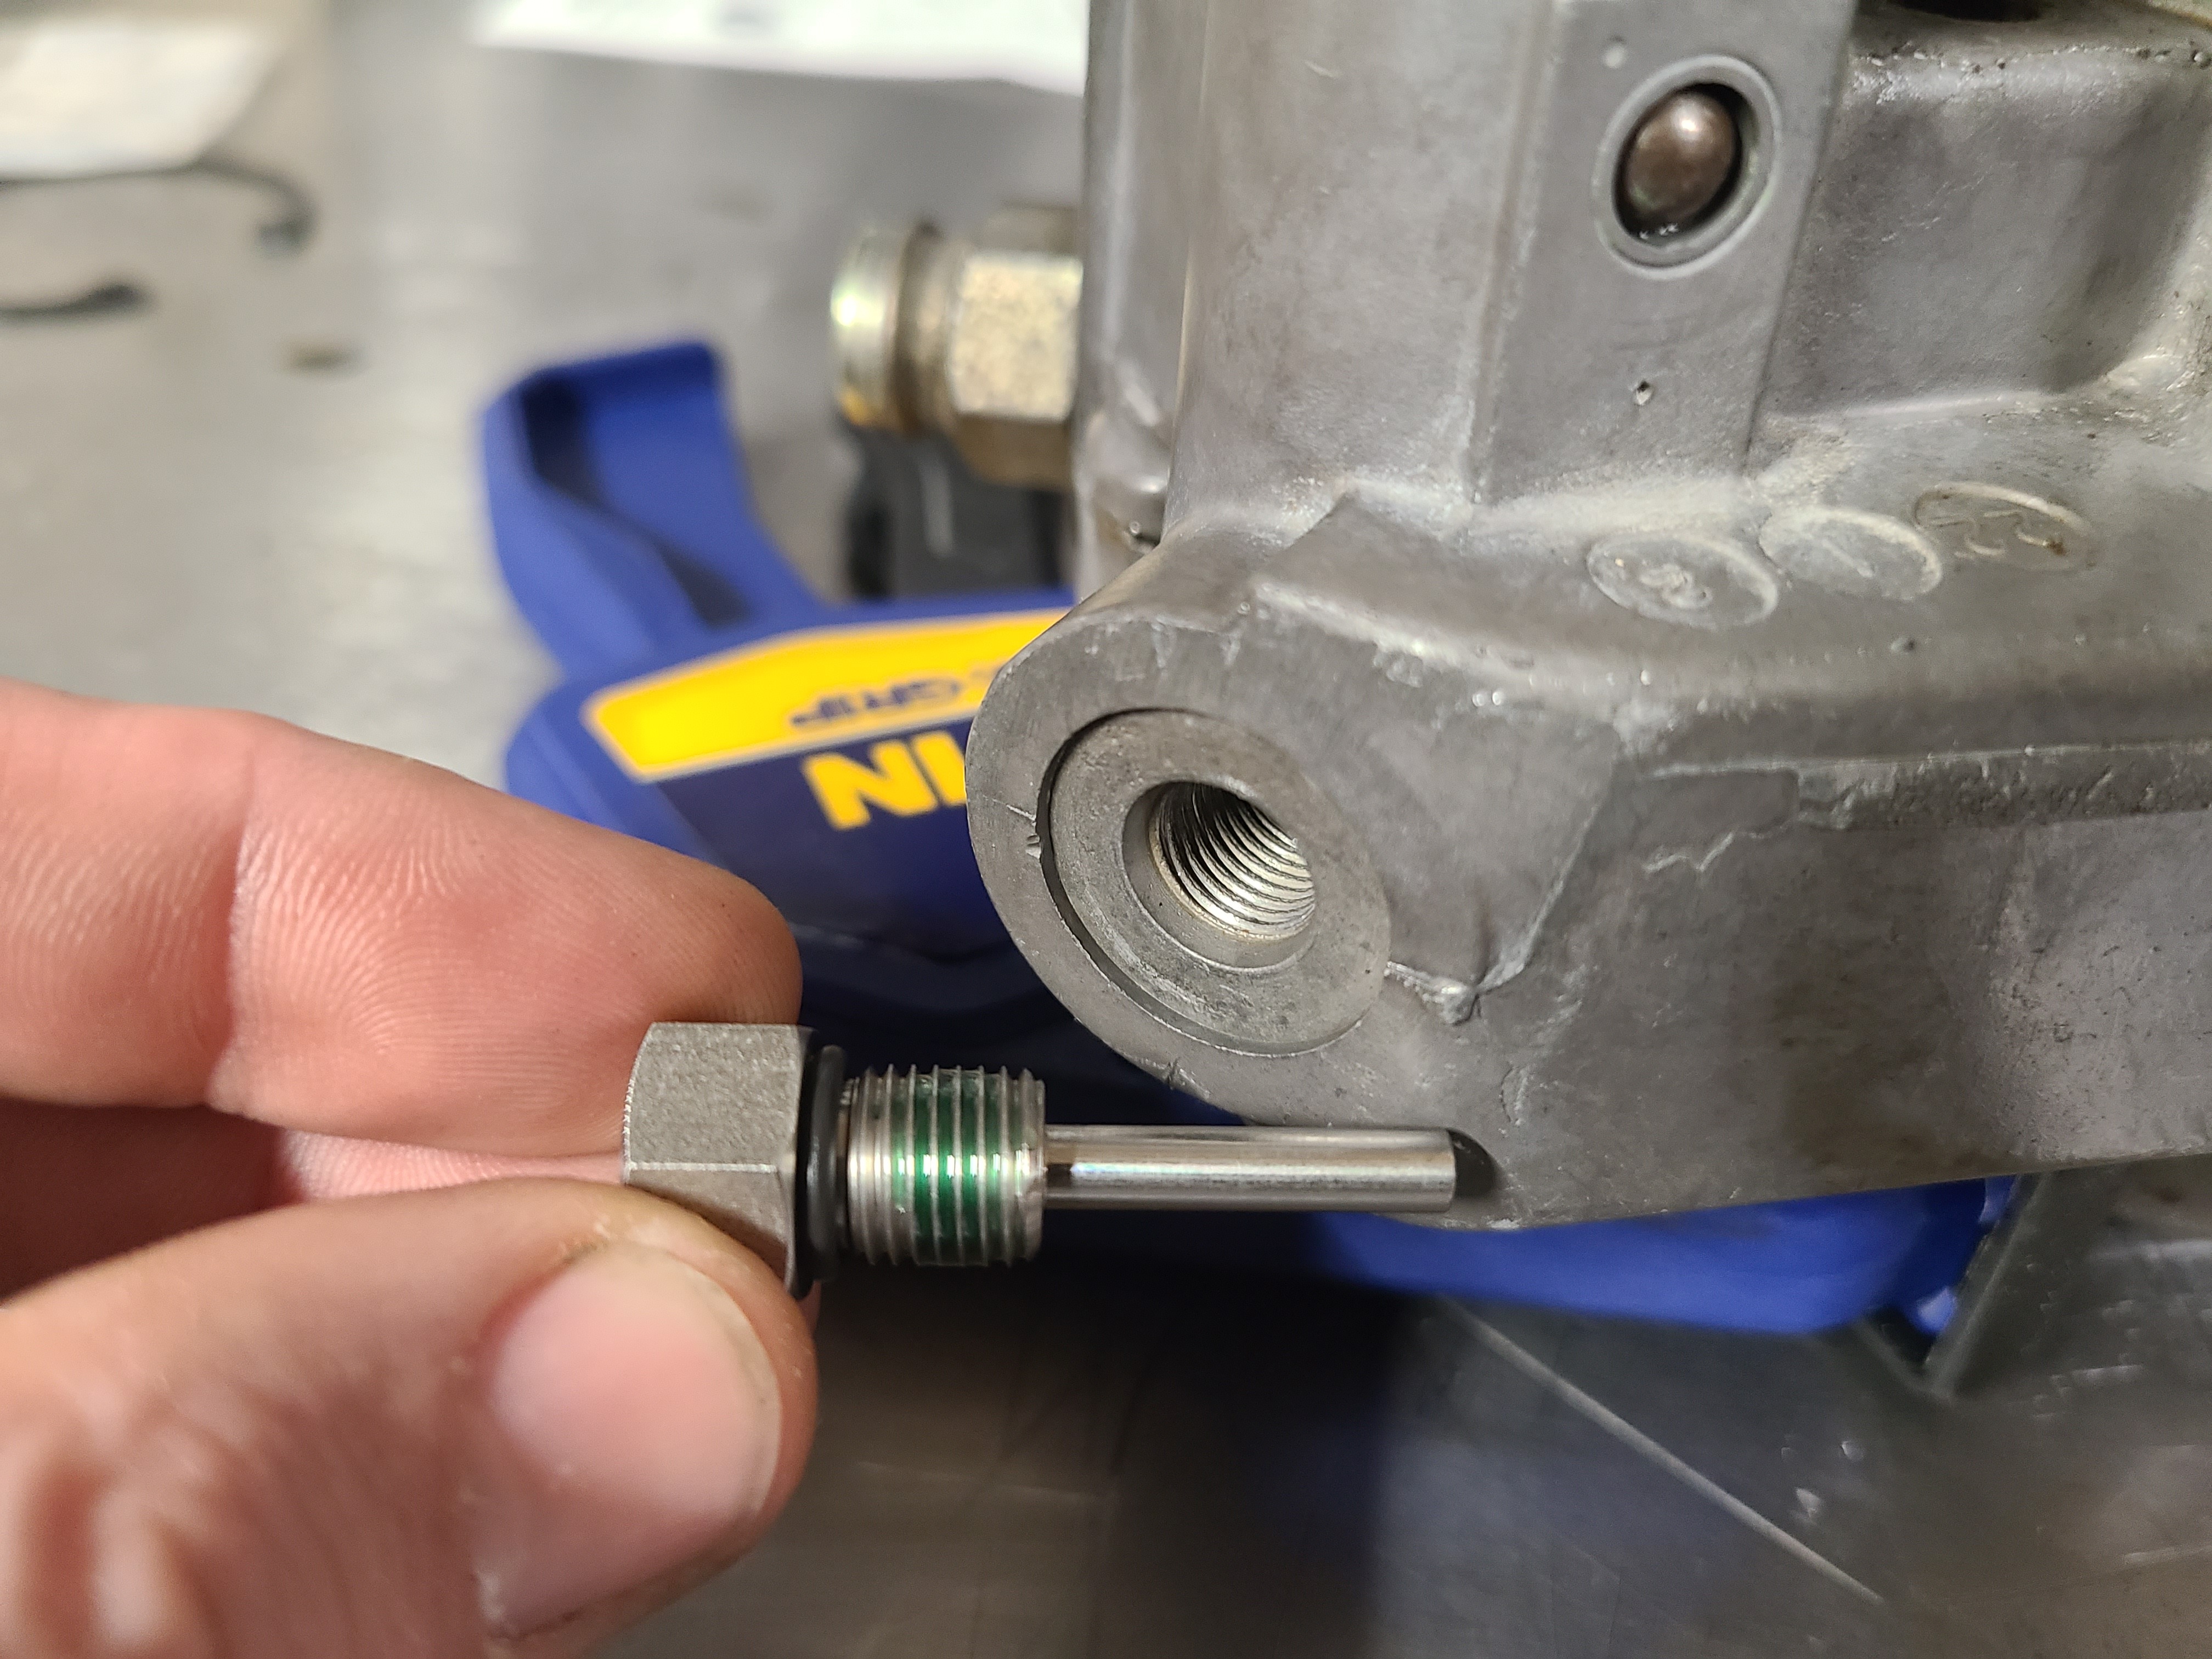
HPOP Line Fittings
We’ll start with the HPOP line fittings that feed oil galleries in either cylinder head. Heat and vibration, as well as improper removal or installation, make these seals high on the leak list. Using the right O-rings, removal tool (link HERE) and some care makes all the difference.
These can be done while the HPOP is installed in the vehicle.
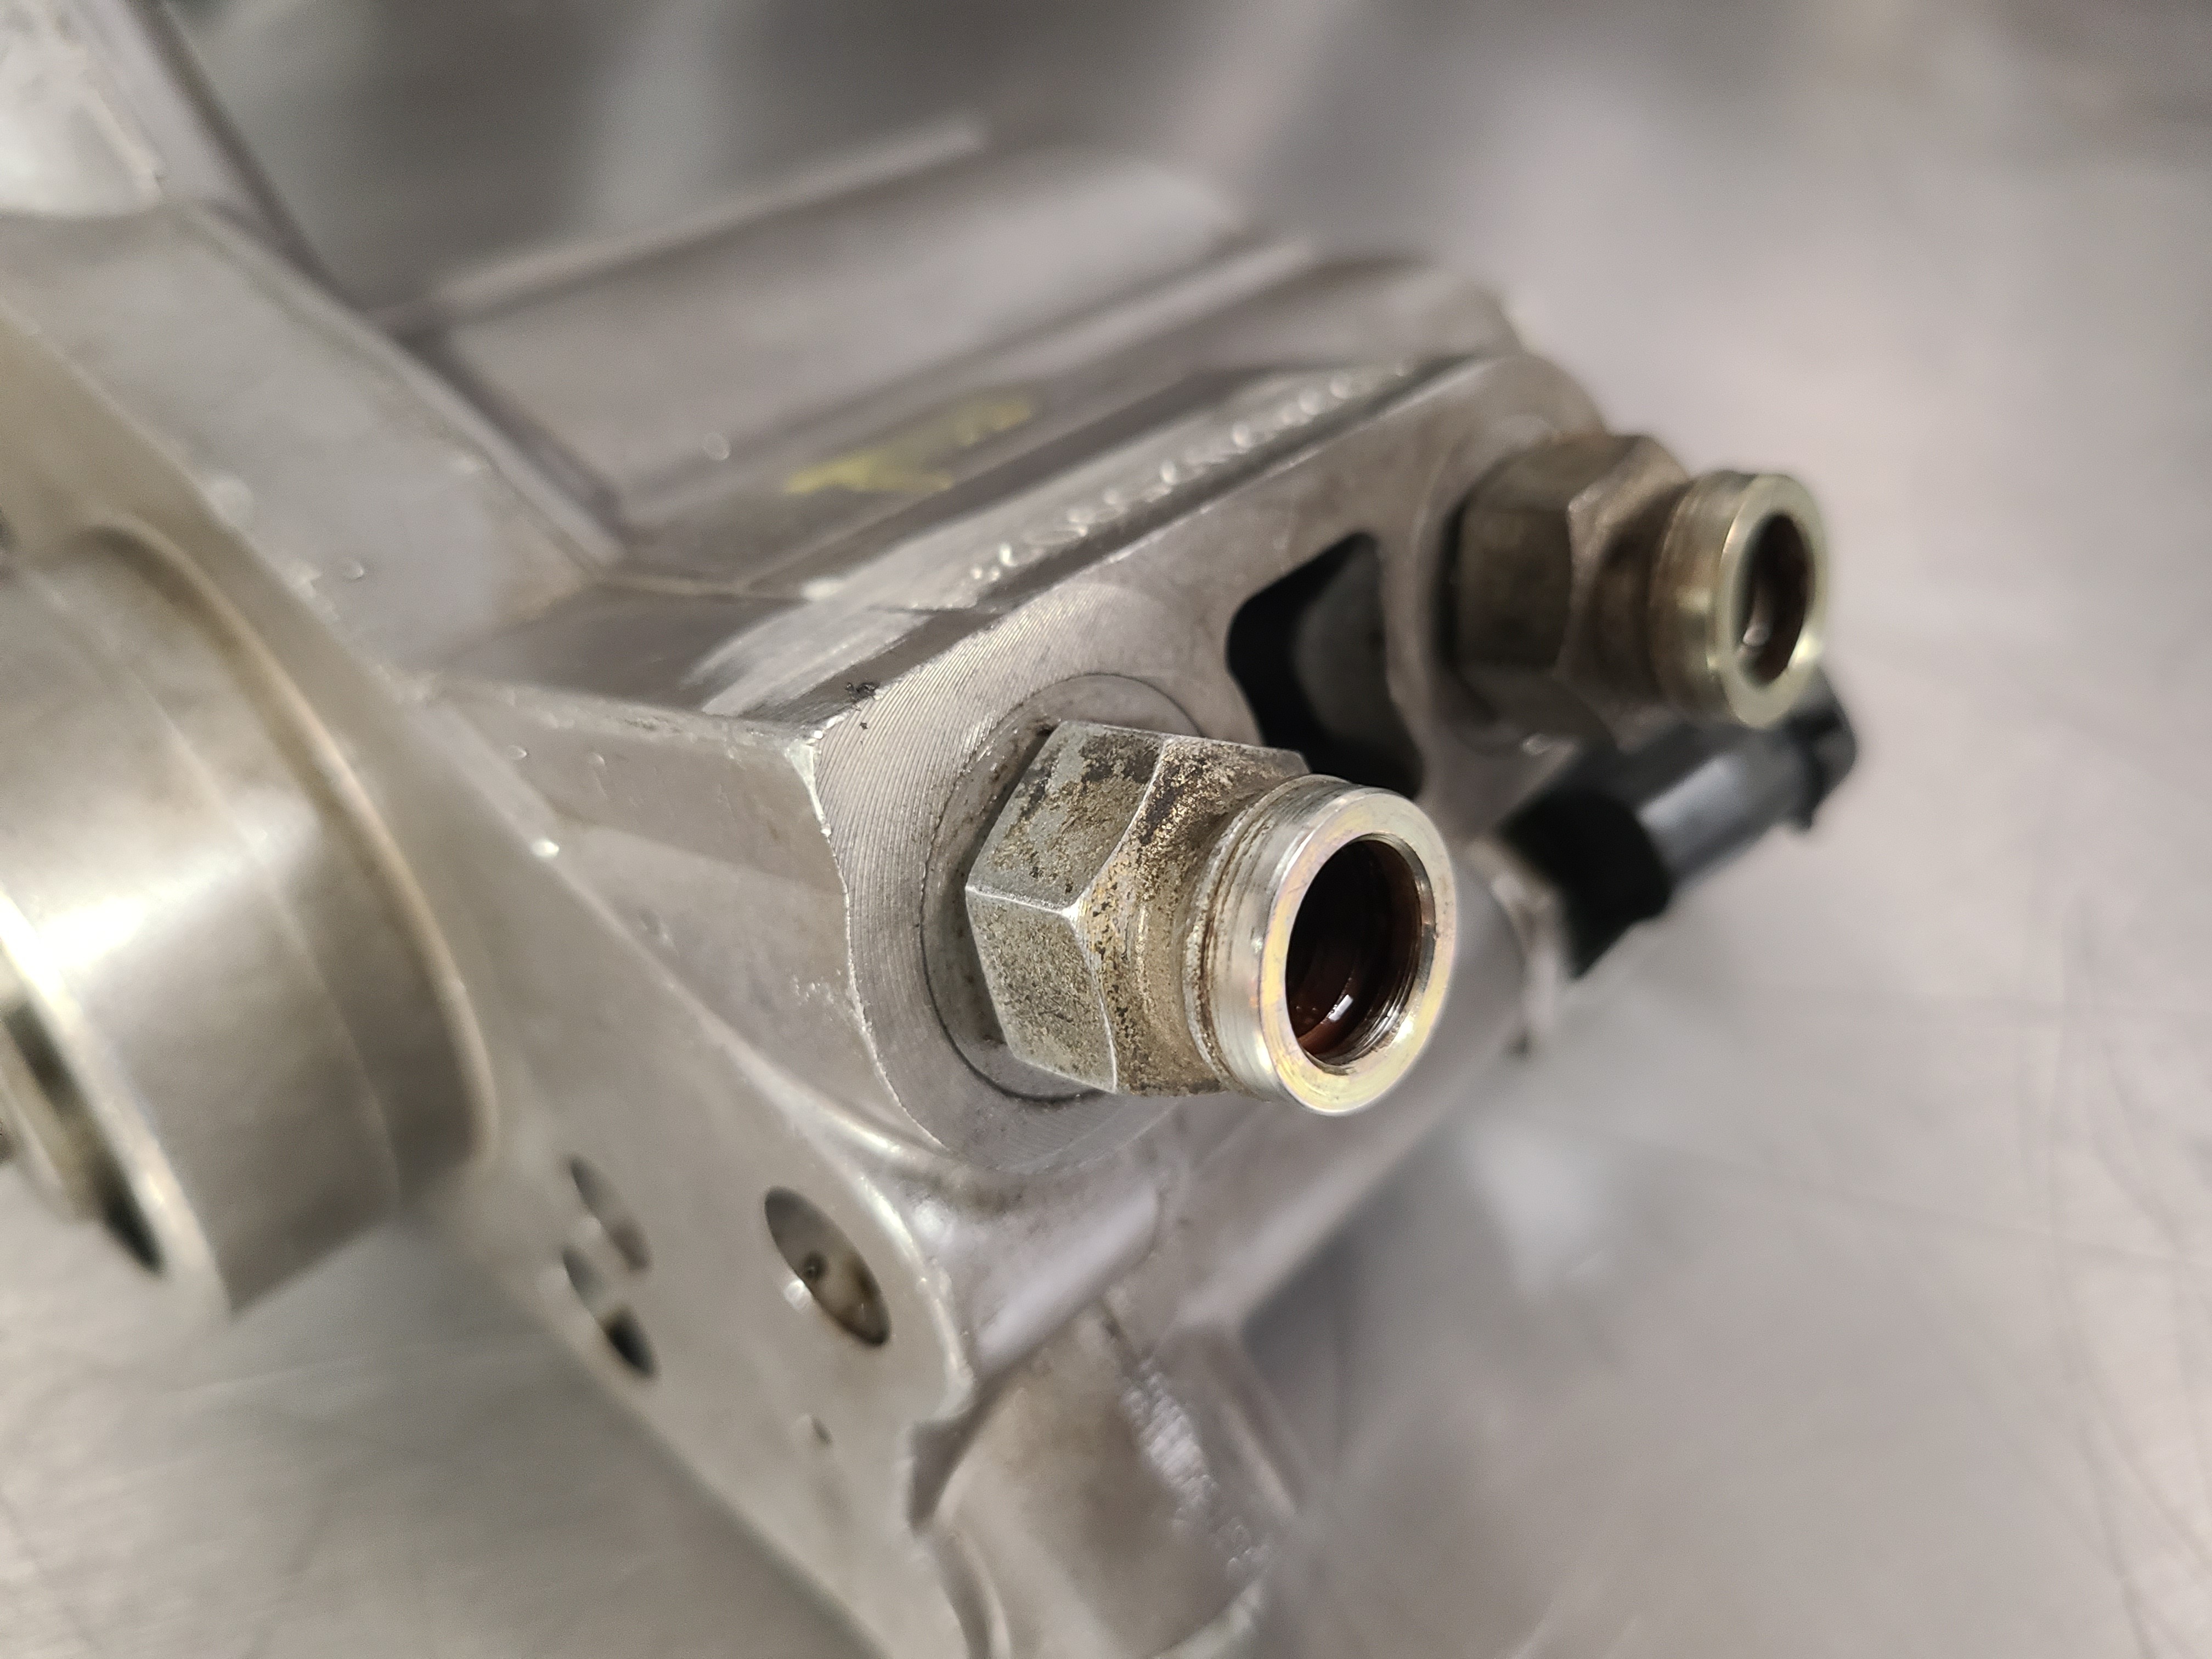
01 – Removing these fittings requires a ¾-inch wrench. When pulling them make sure not to disturb the spring behind them.
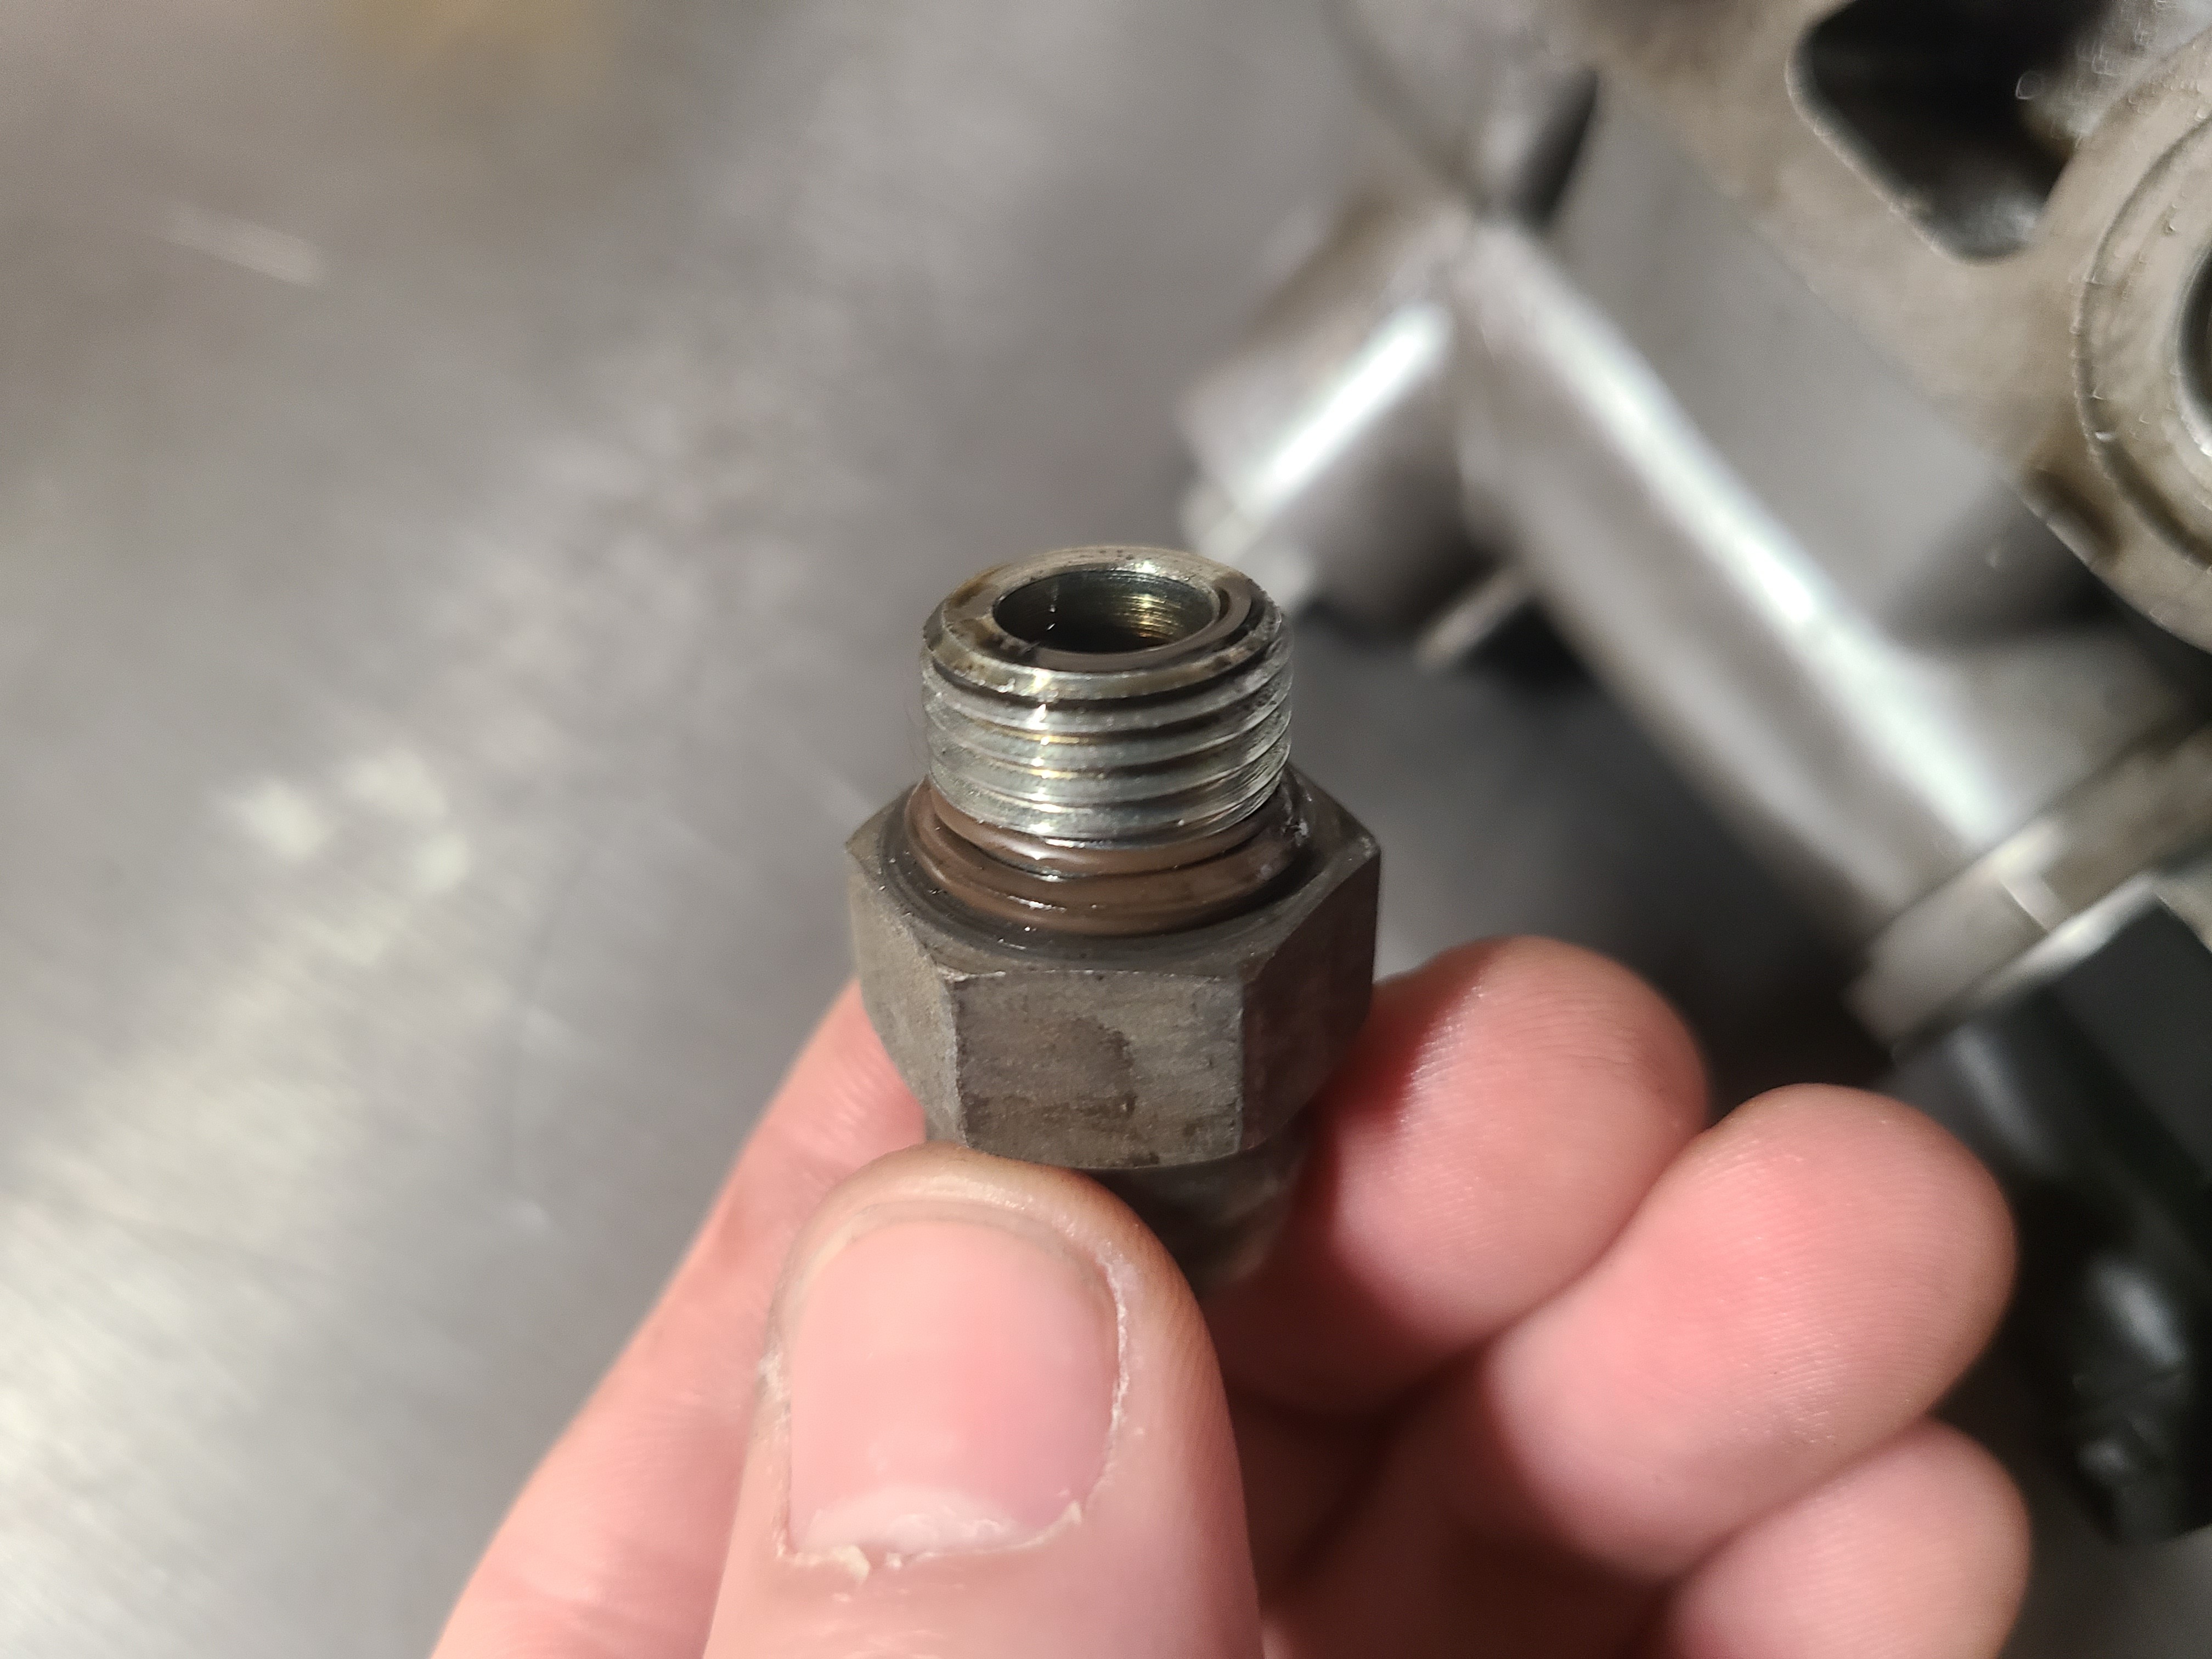
02 – The first O-ring is at the base of the threads, here. Use a pick tool to remove it, and replace it with the O-ring from the “7 O-ring” kit.
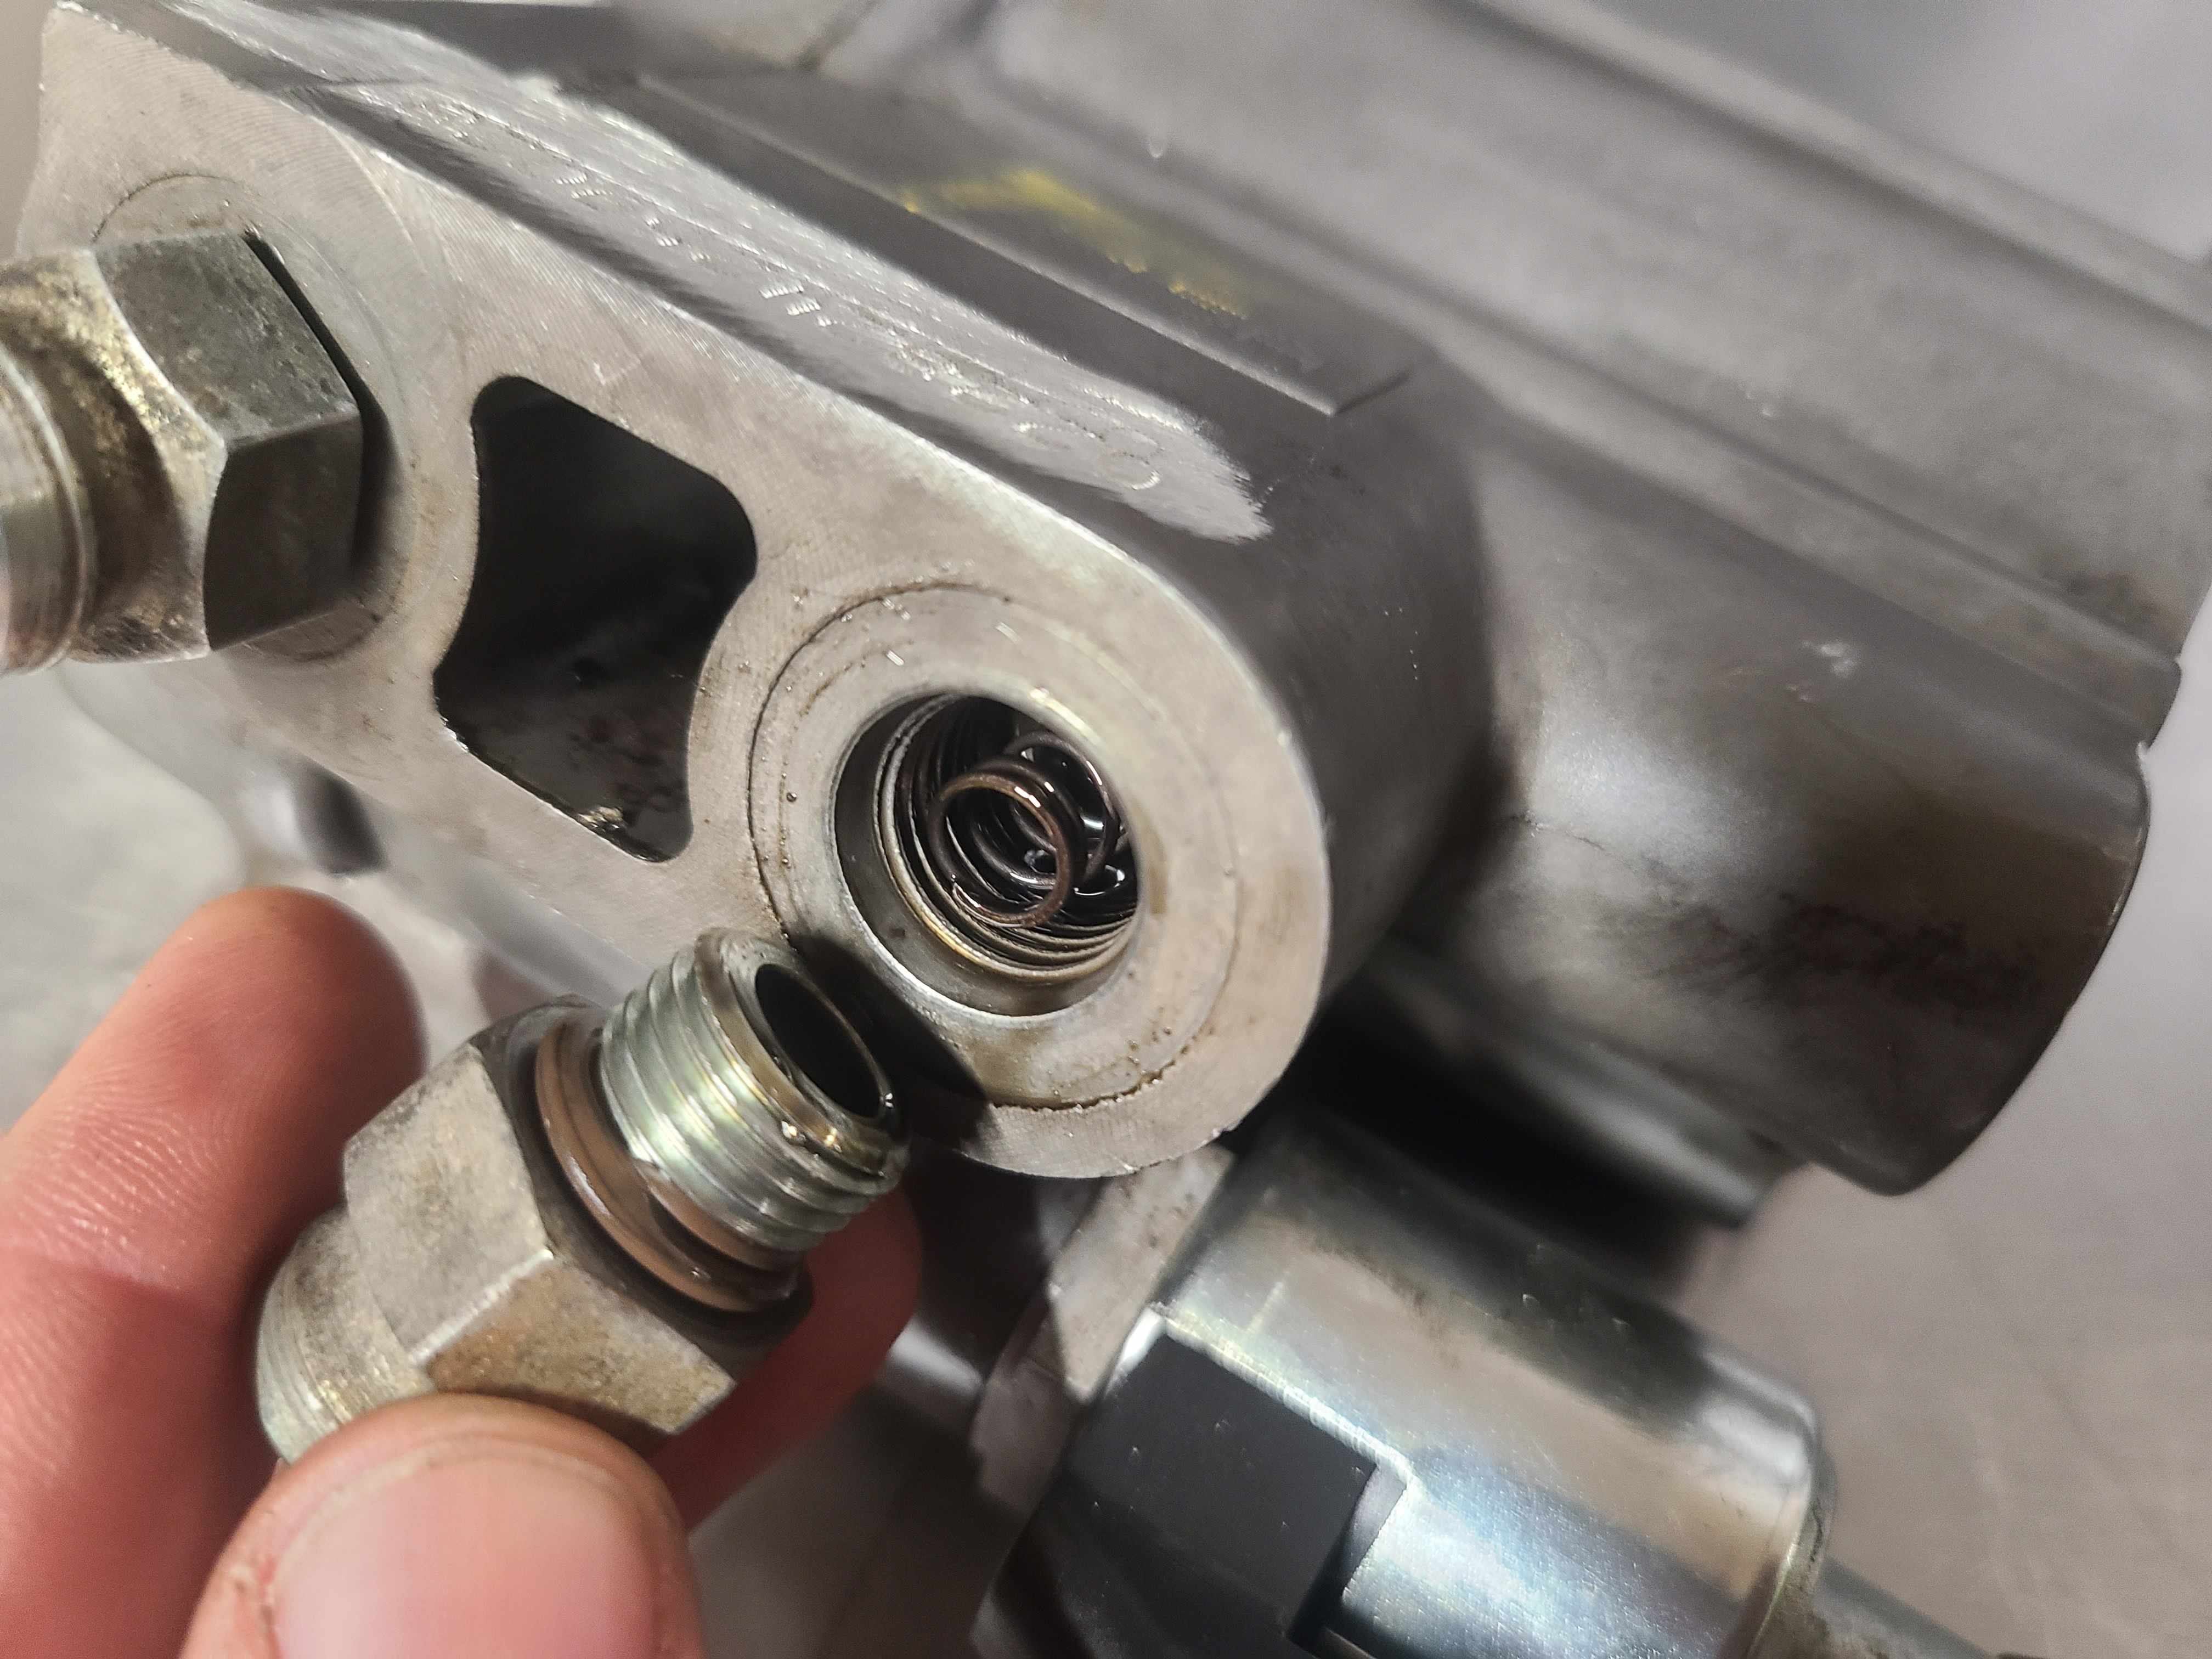
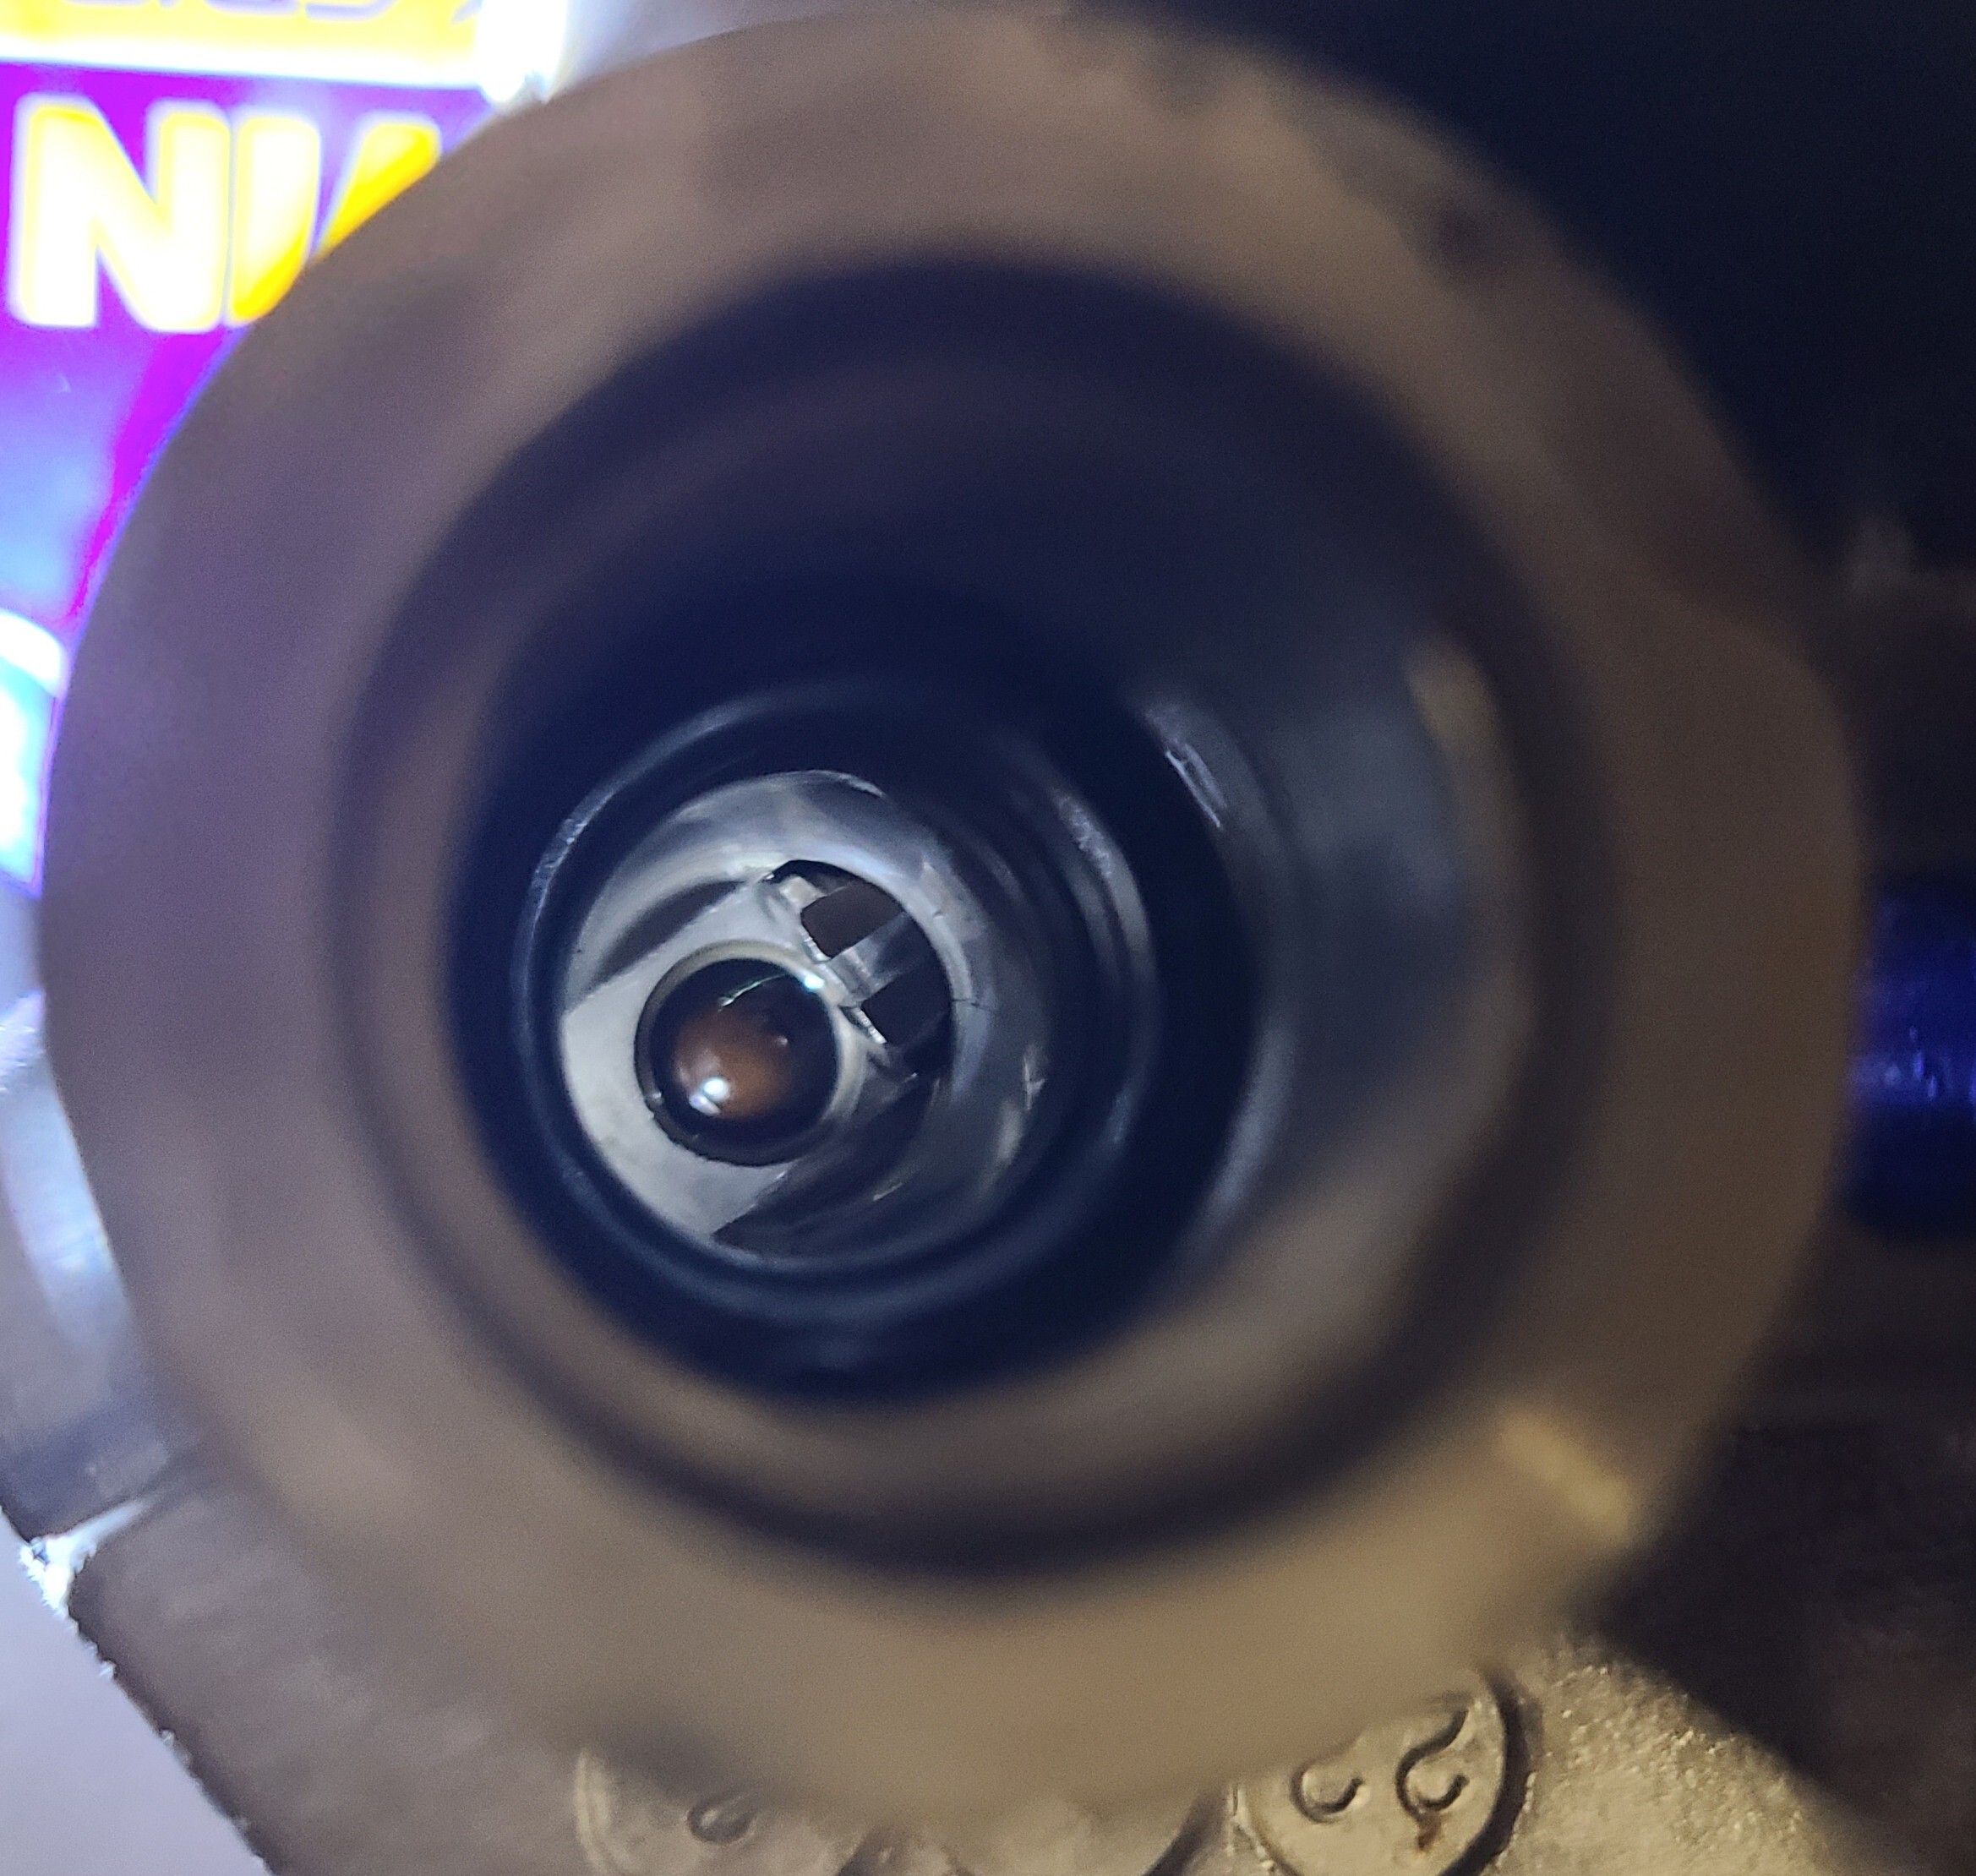
03 – The harder one which many skip, is inside the fitting. At the top is a steel retaining ring, this is NOT the seal you’ll be replacing, however make sure it is in good condition. About a quarter inch below the retaining ring, is the O-ring. Again, use a pick to fish it out. Installing the new seal will require some fine work with the pick to get it seated correctly. No tricks here, just take your time.
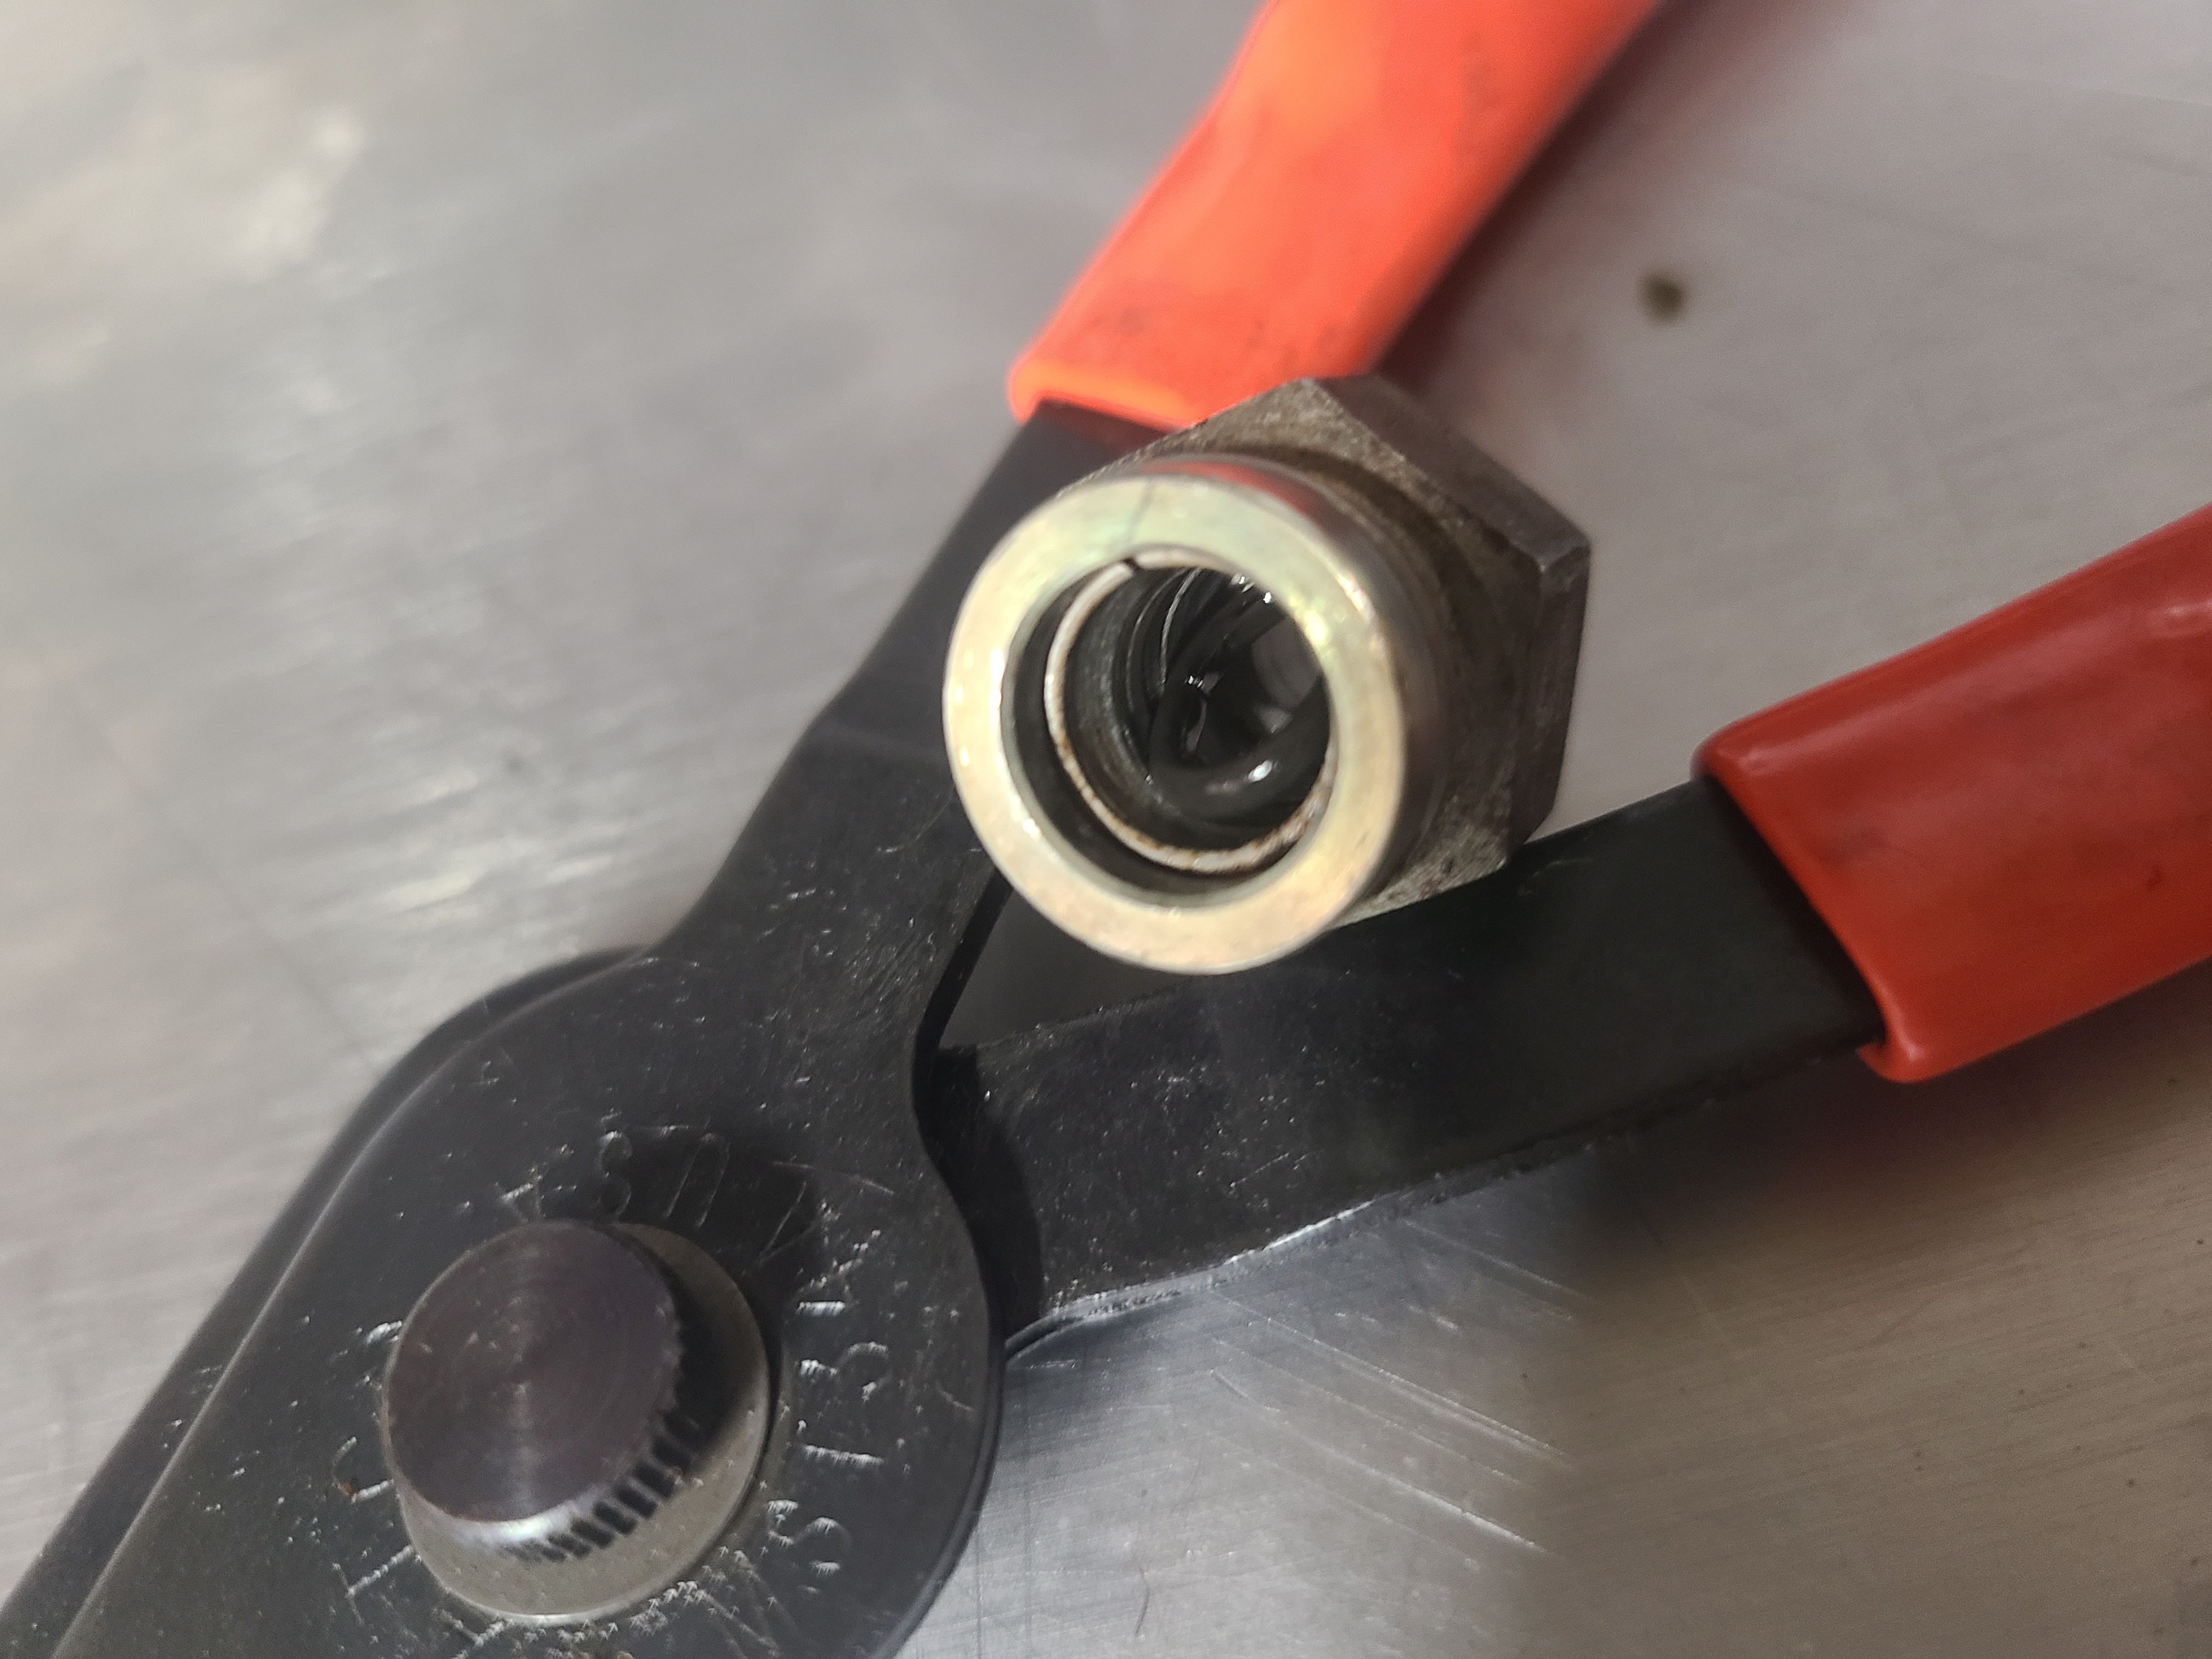
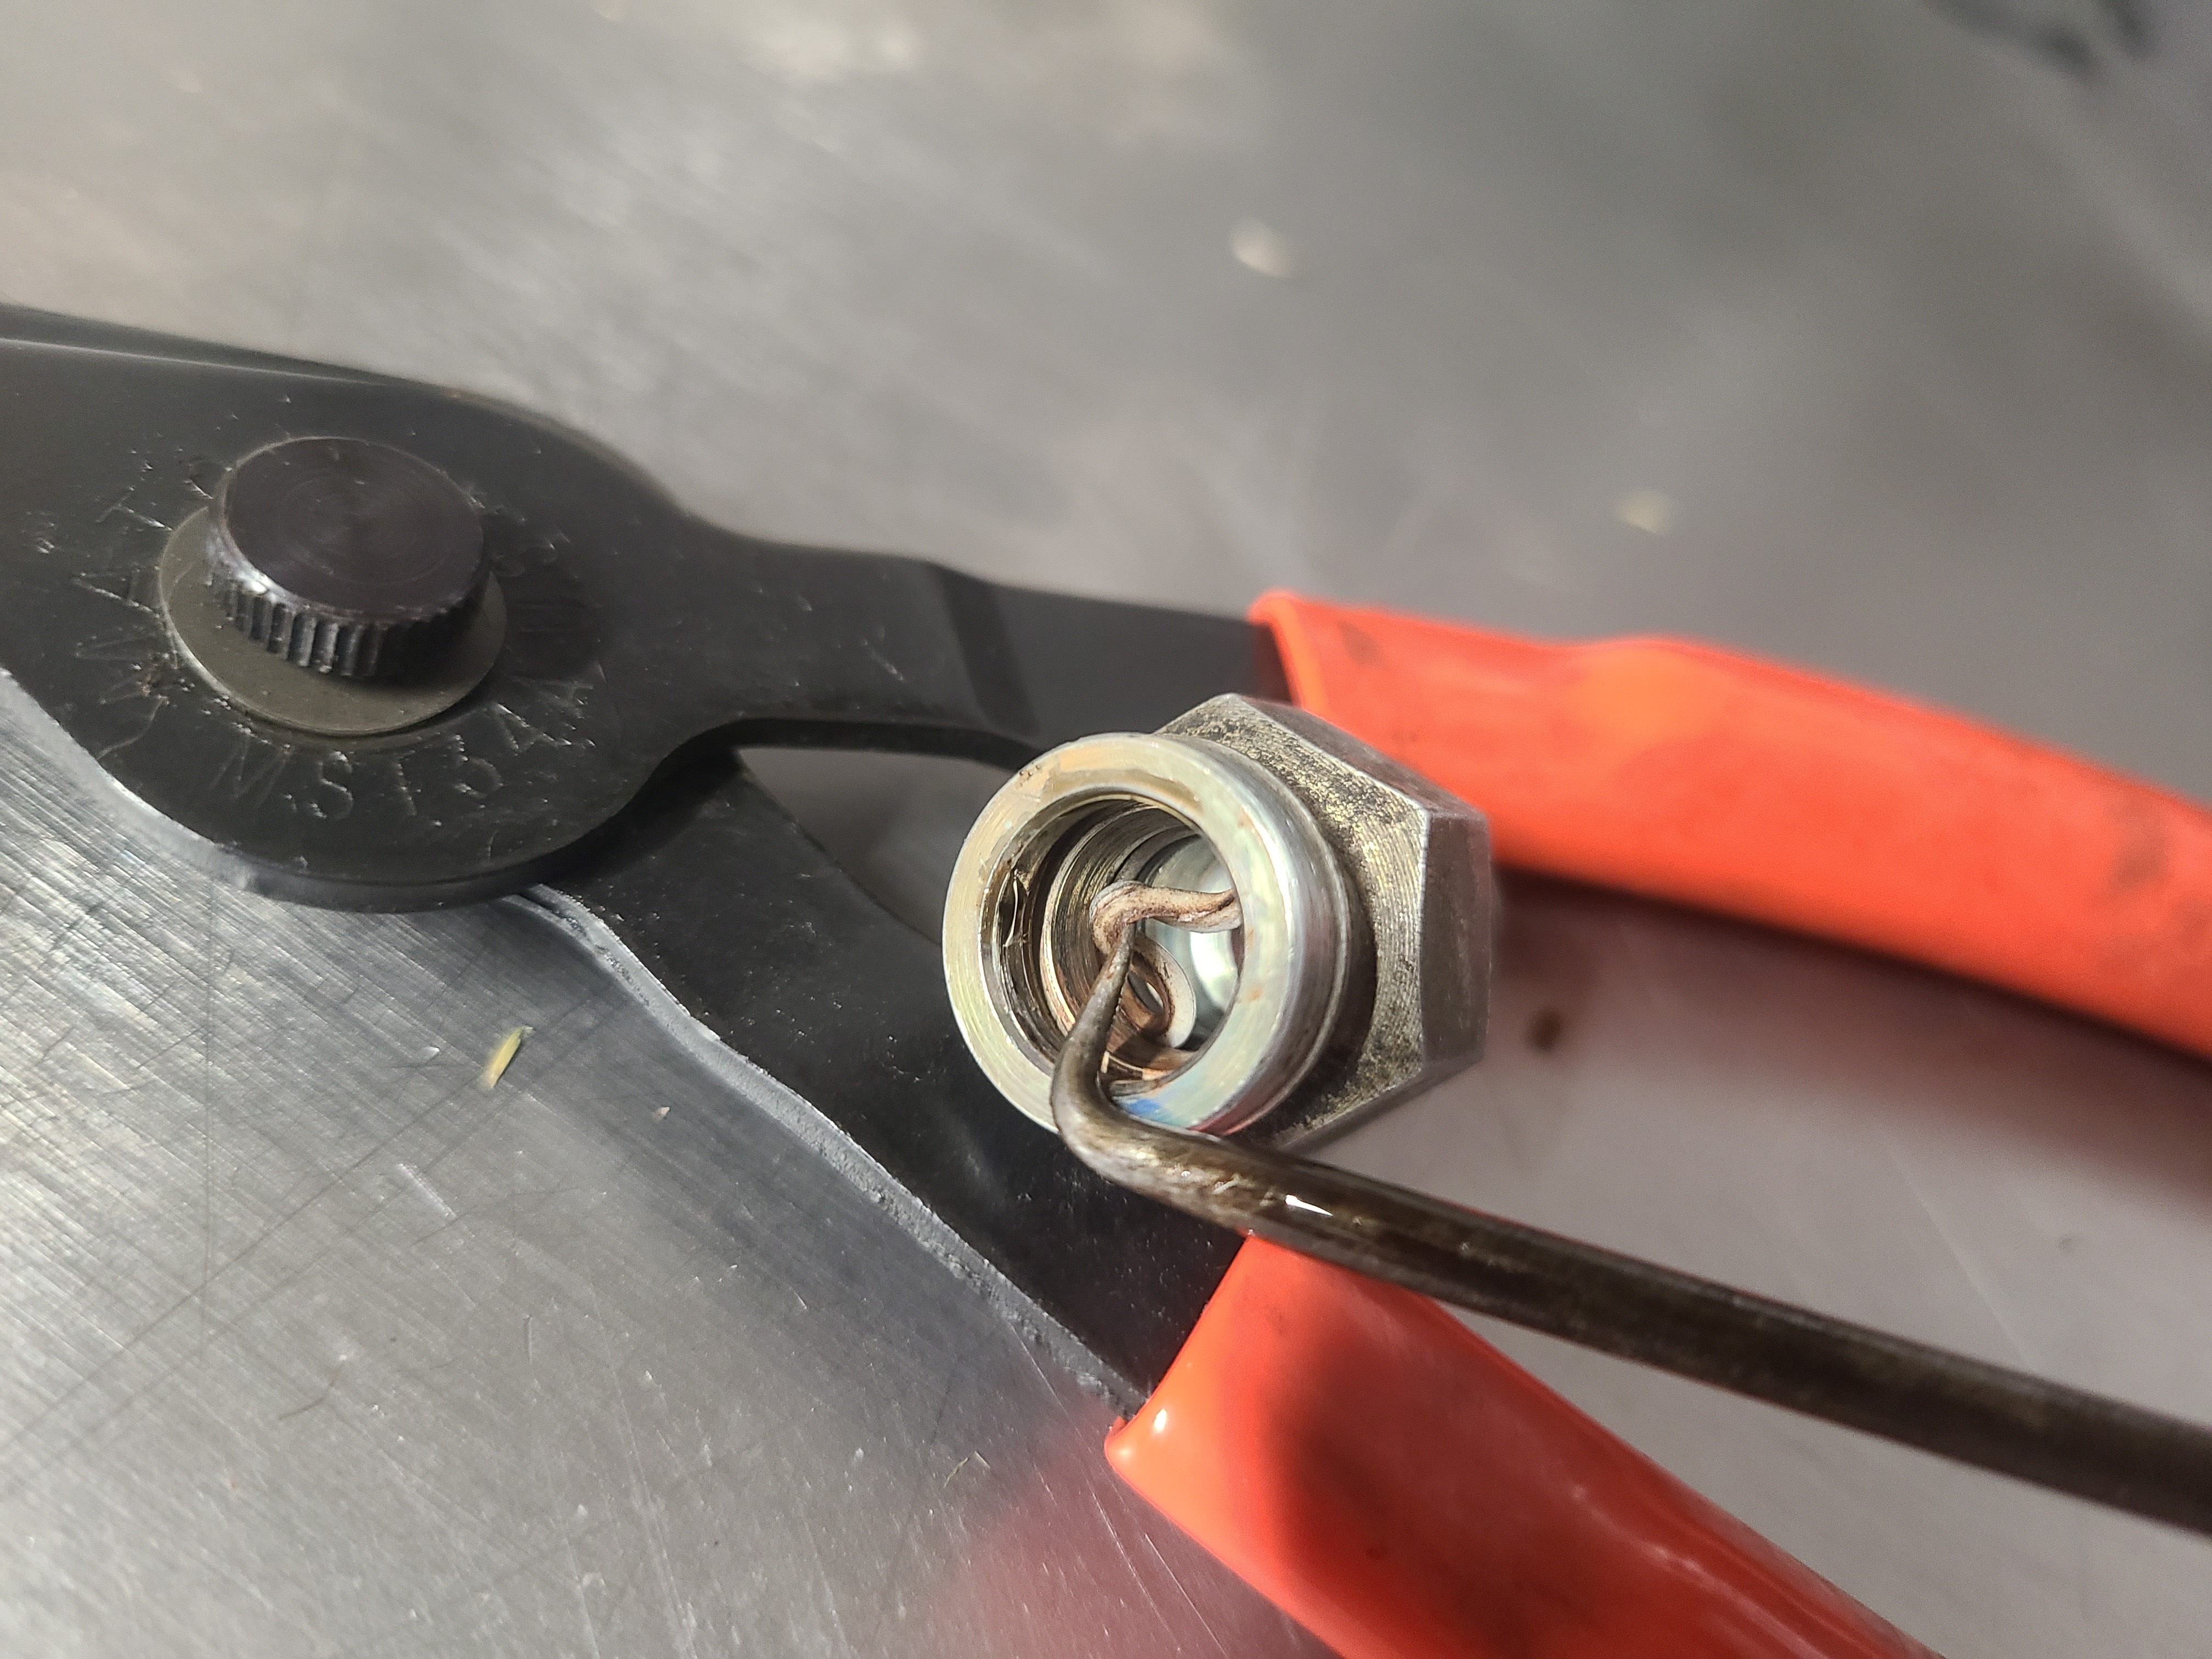
04 – Photo of a good condition retaining ring, with a new O-ring install in progress.
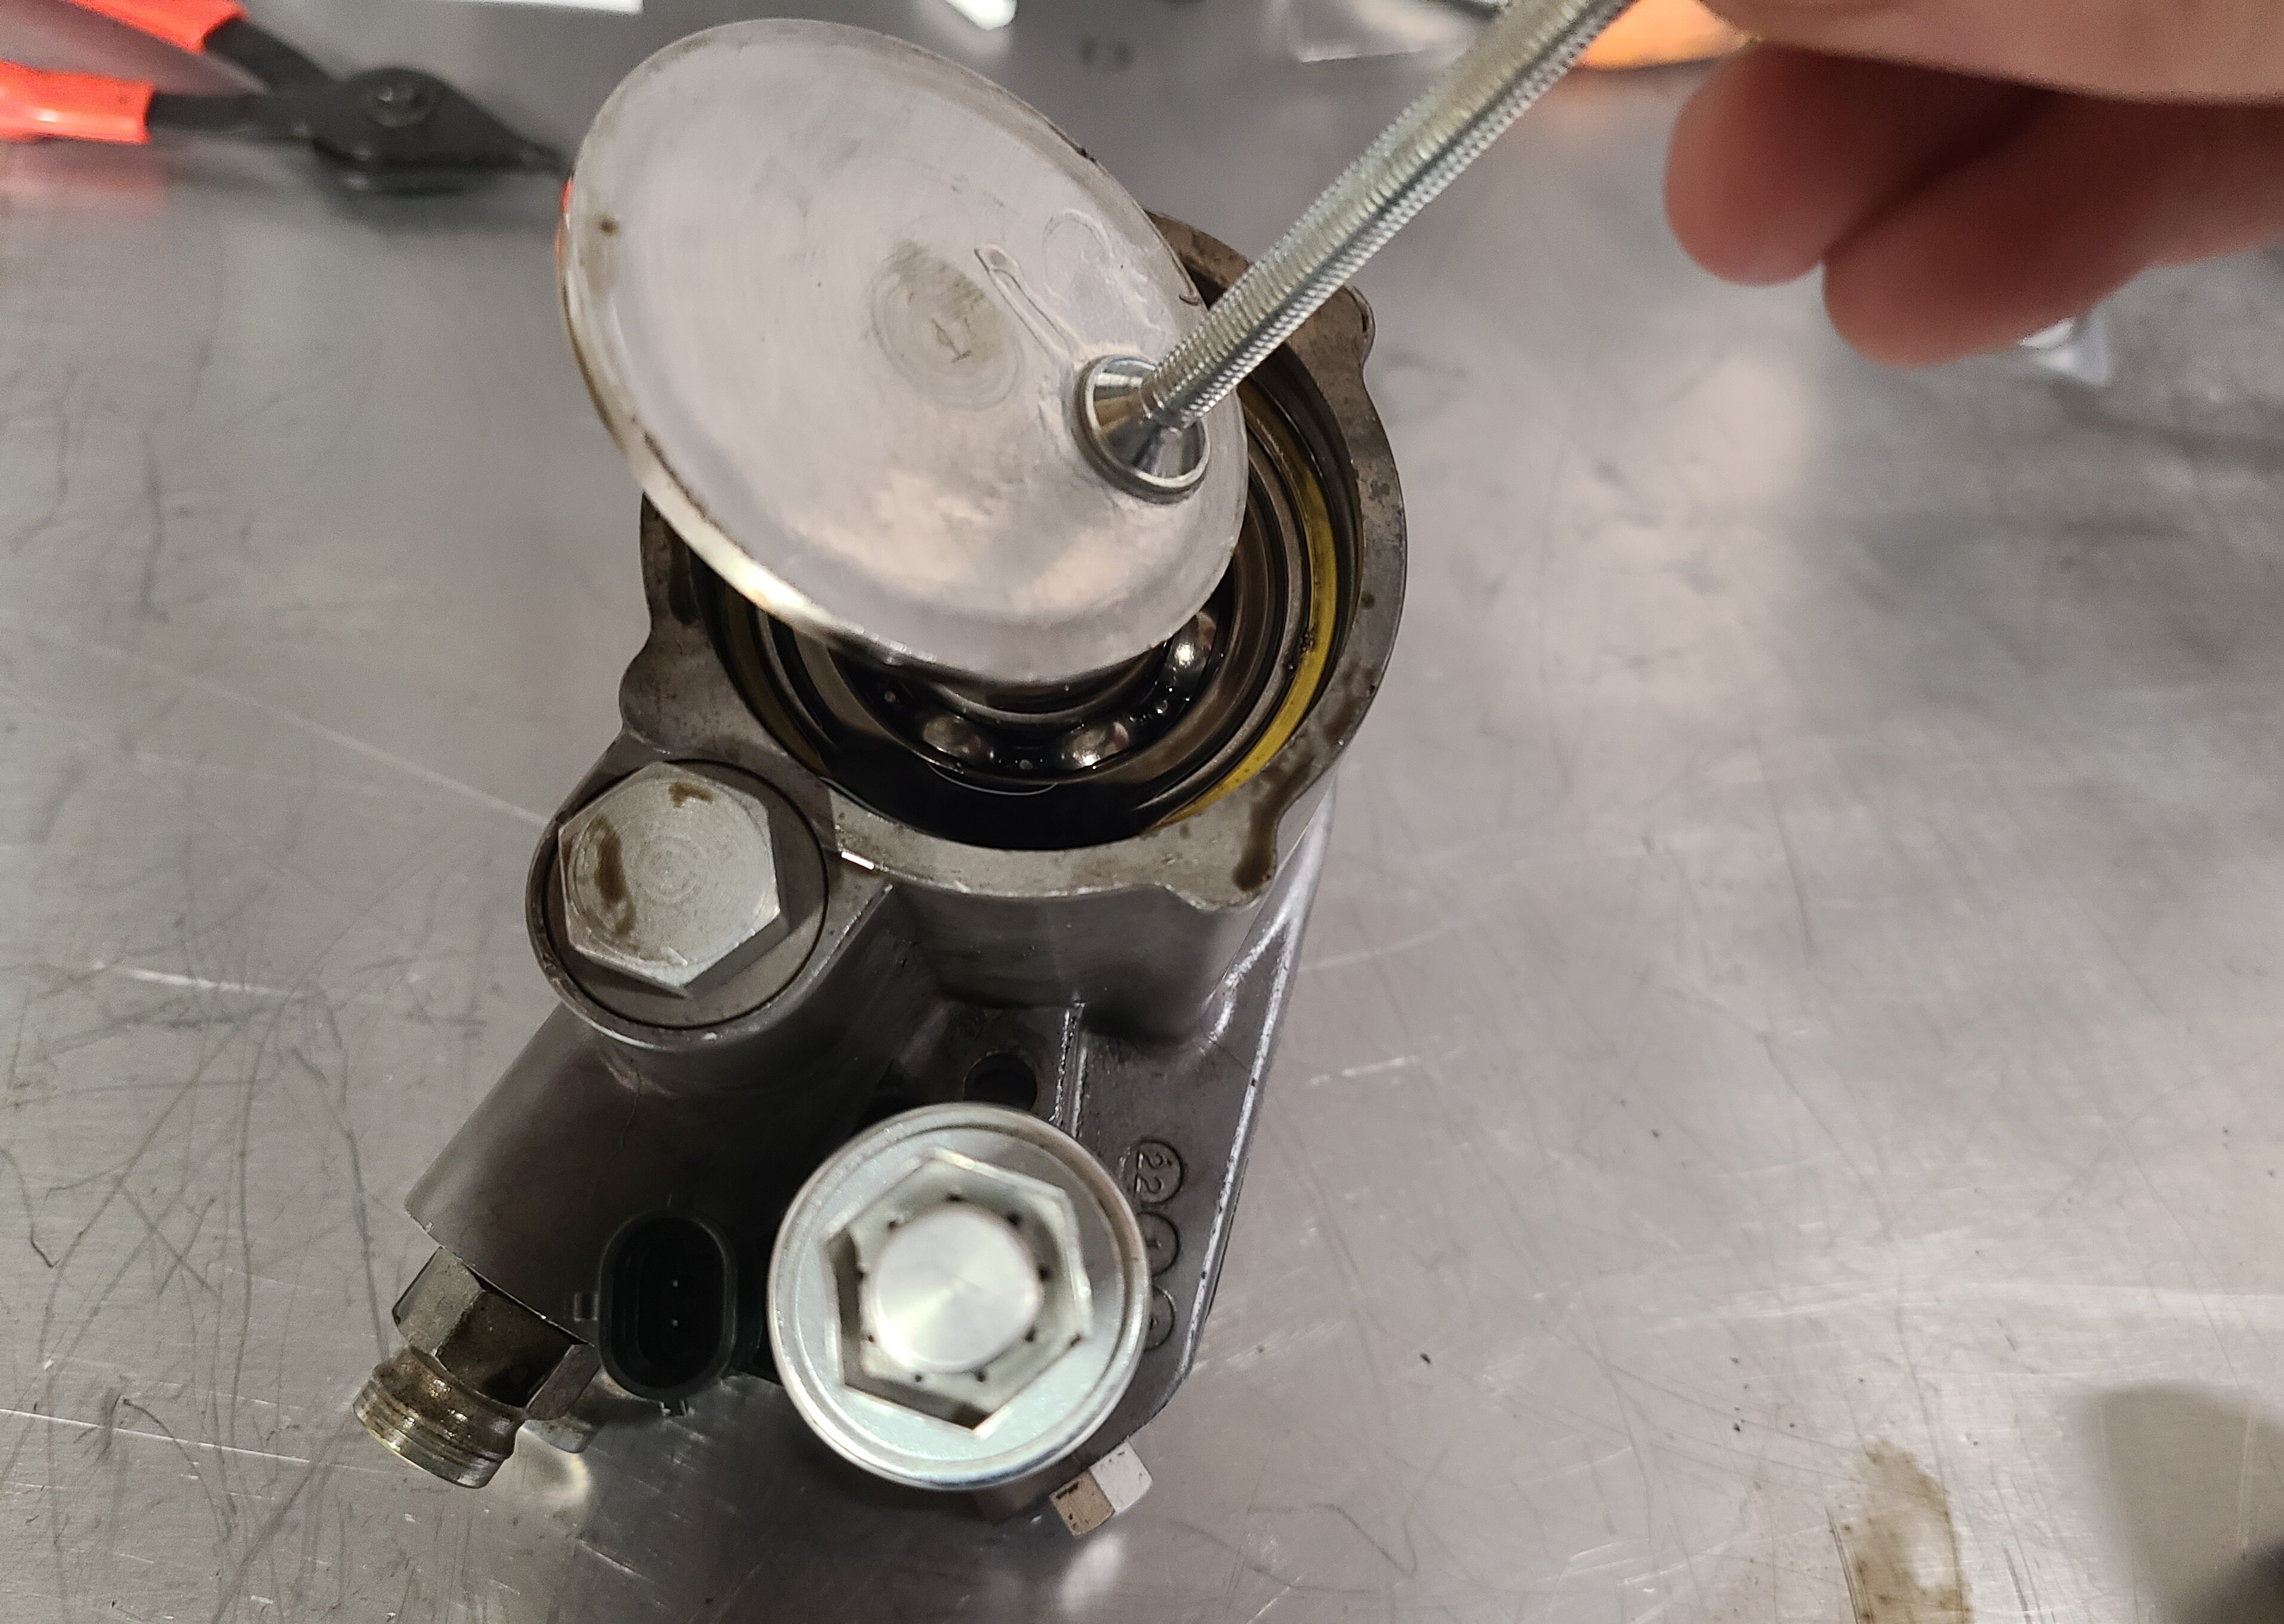
Injection Pressure Regulator (IPR)
The IPR controls flow to the injectors. If yours is acting up, don’t buy a new one until you take a look at our cleaning instructions HERE. It may save you some cash. For this article we’ll concentrate only on external leaks which will require replacing only one O-ring.
These can be done while the HPOP is installed in the vehicle.
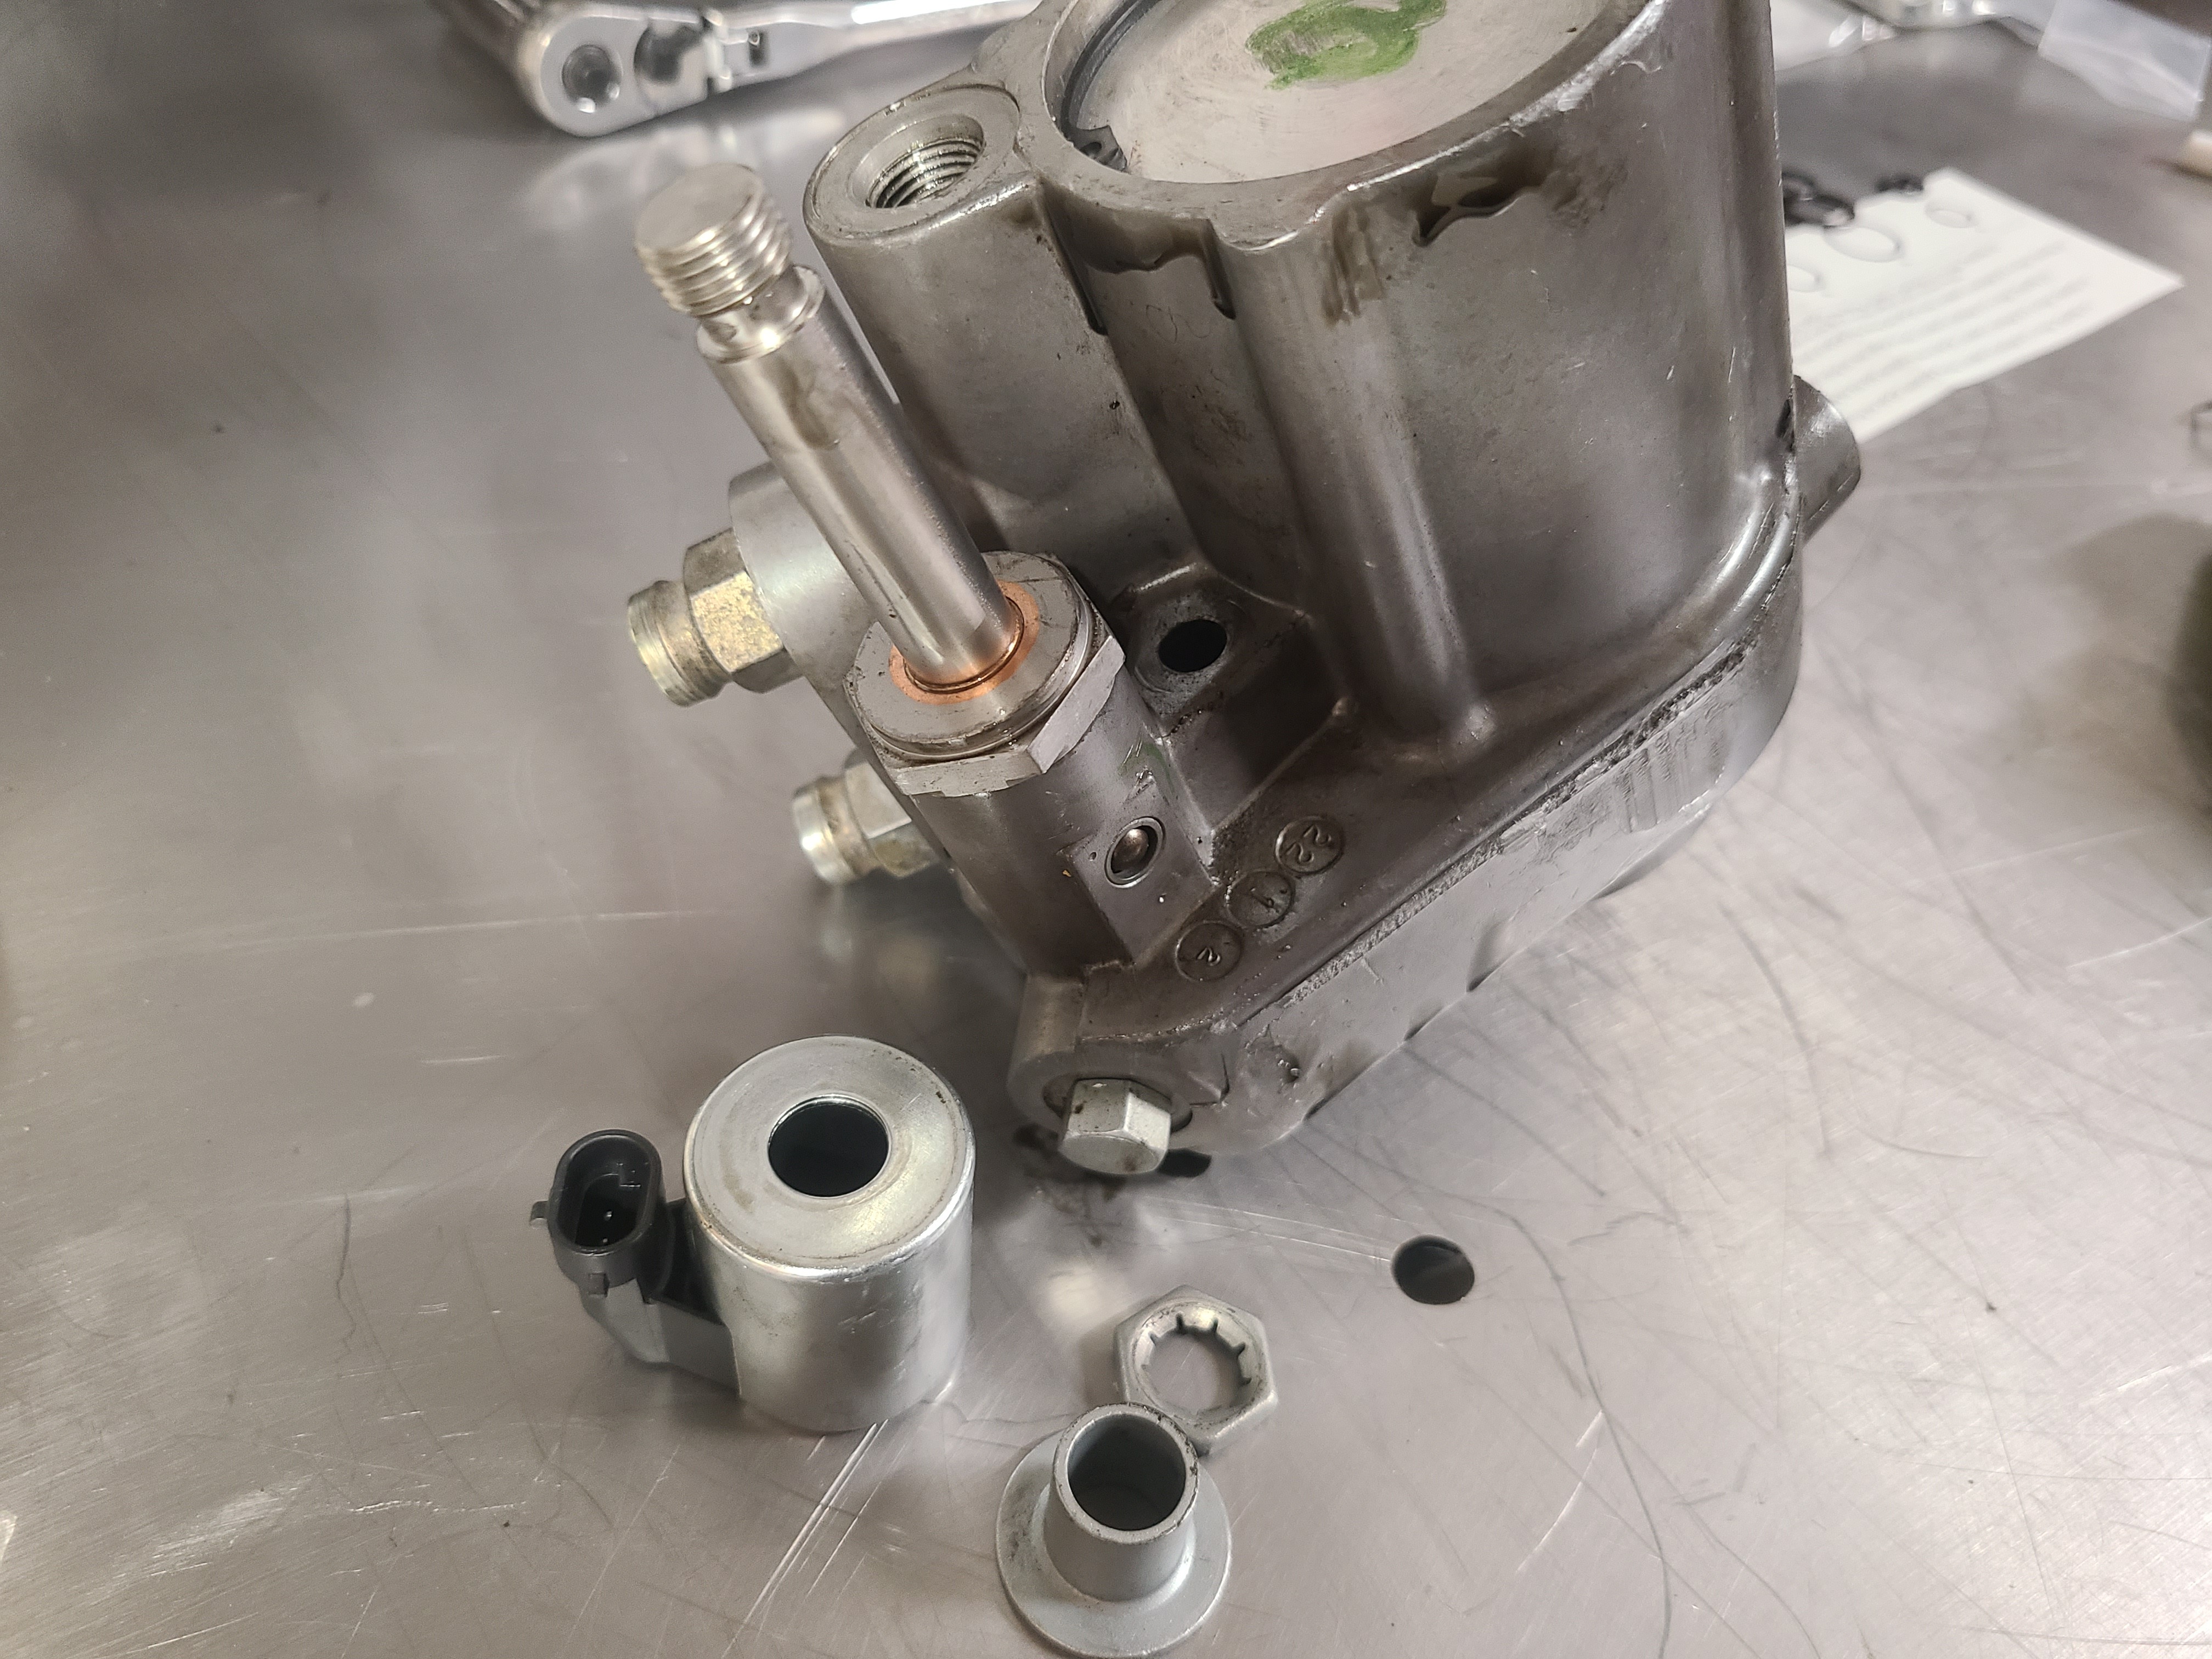
05 – Removal of the IPR requires first removing the 3/4-inch “tin nut”, followed by sliding the spacer and solenoid off the IPR body; and last, the body/armature itself.
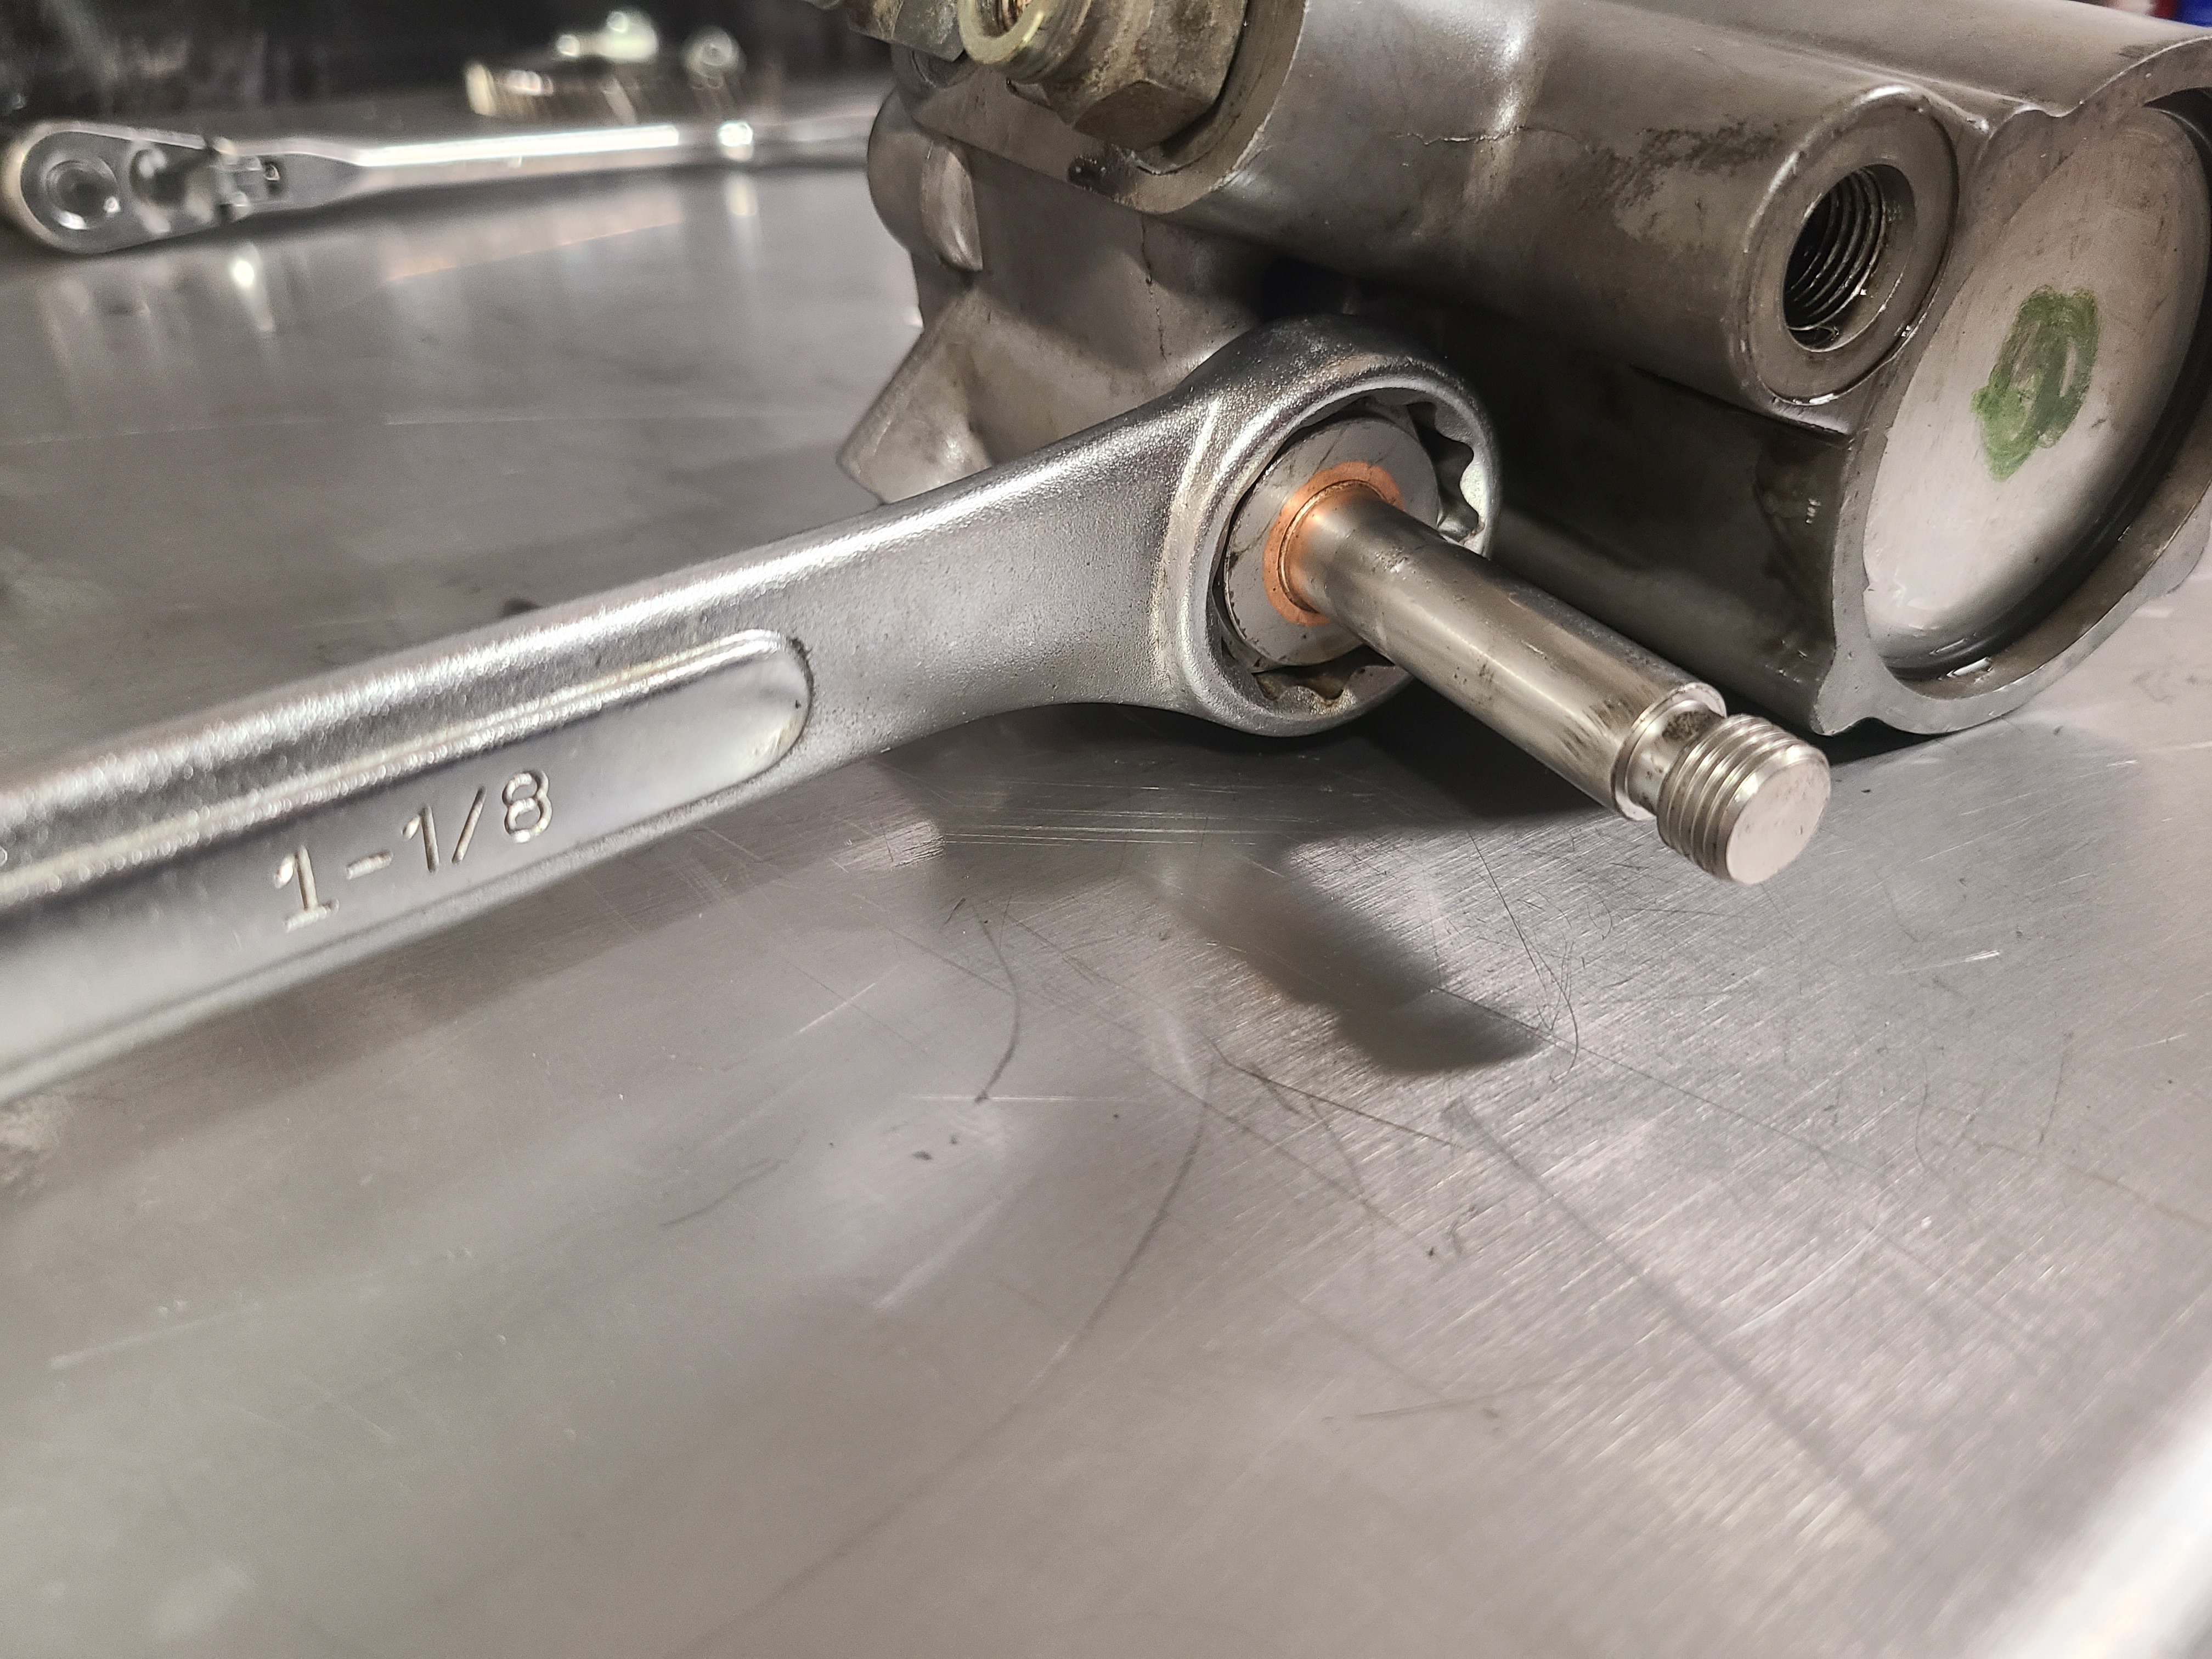
06 – Some deep sockets have enough clearance internally to reach the 1-1/8-inch bolt head on the IPR. If you have a socket that will work, great, if not, a wrench will work here as well (but only if the HPOP has been removed from the vehicle first).
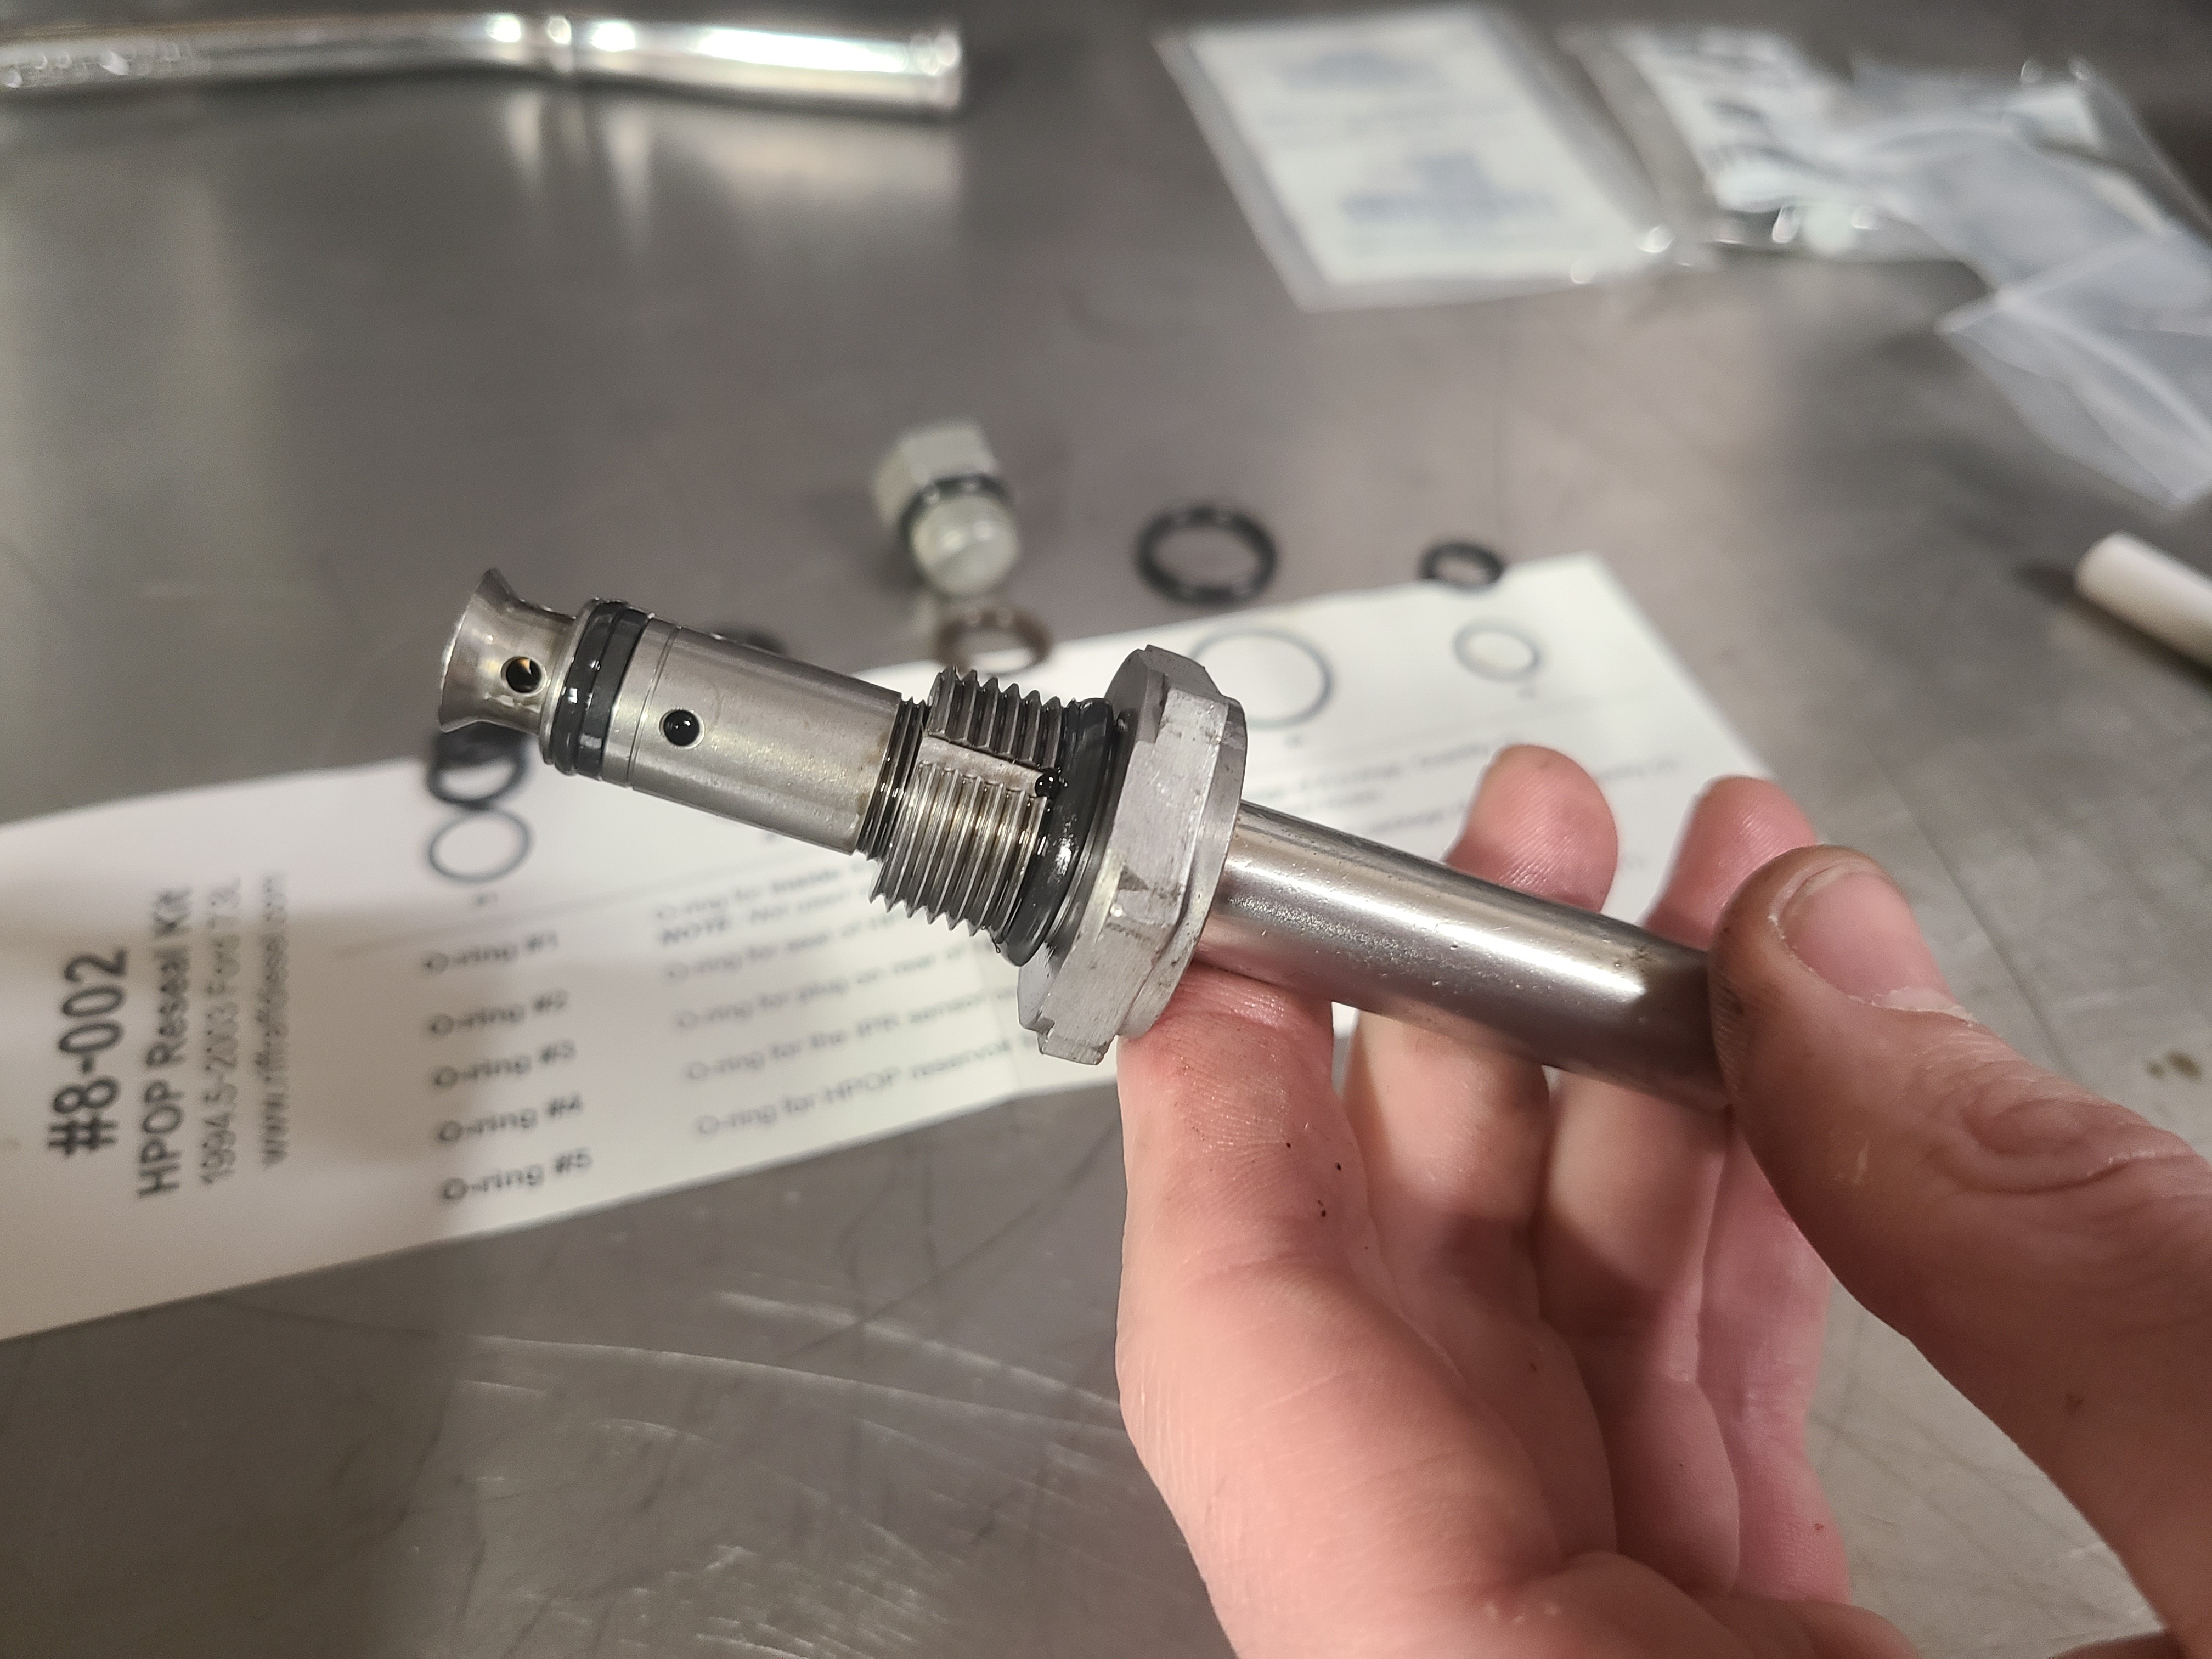
07 – Remove and replace the large O-ring with the new one in the kit and reinstall the IPR. All other O-rings are not included but if you need them, you can find them HERE.
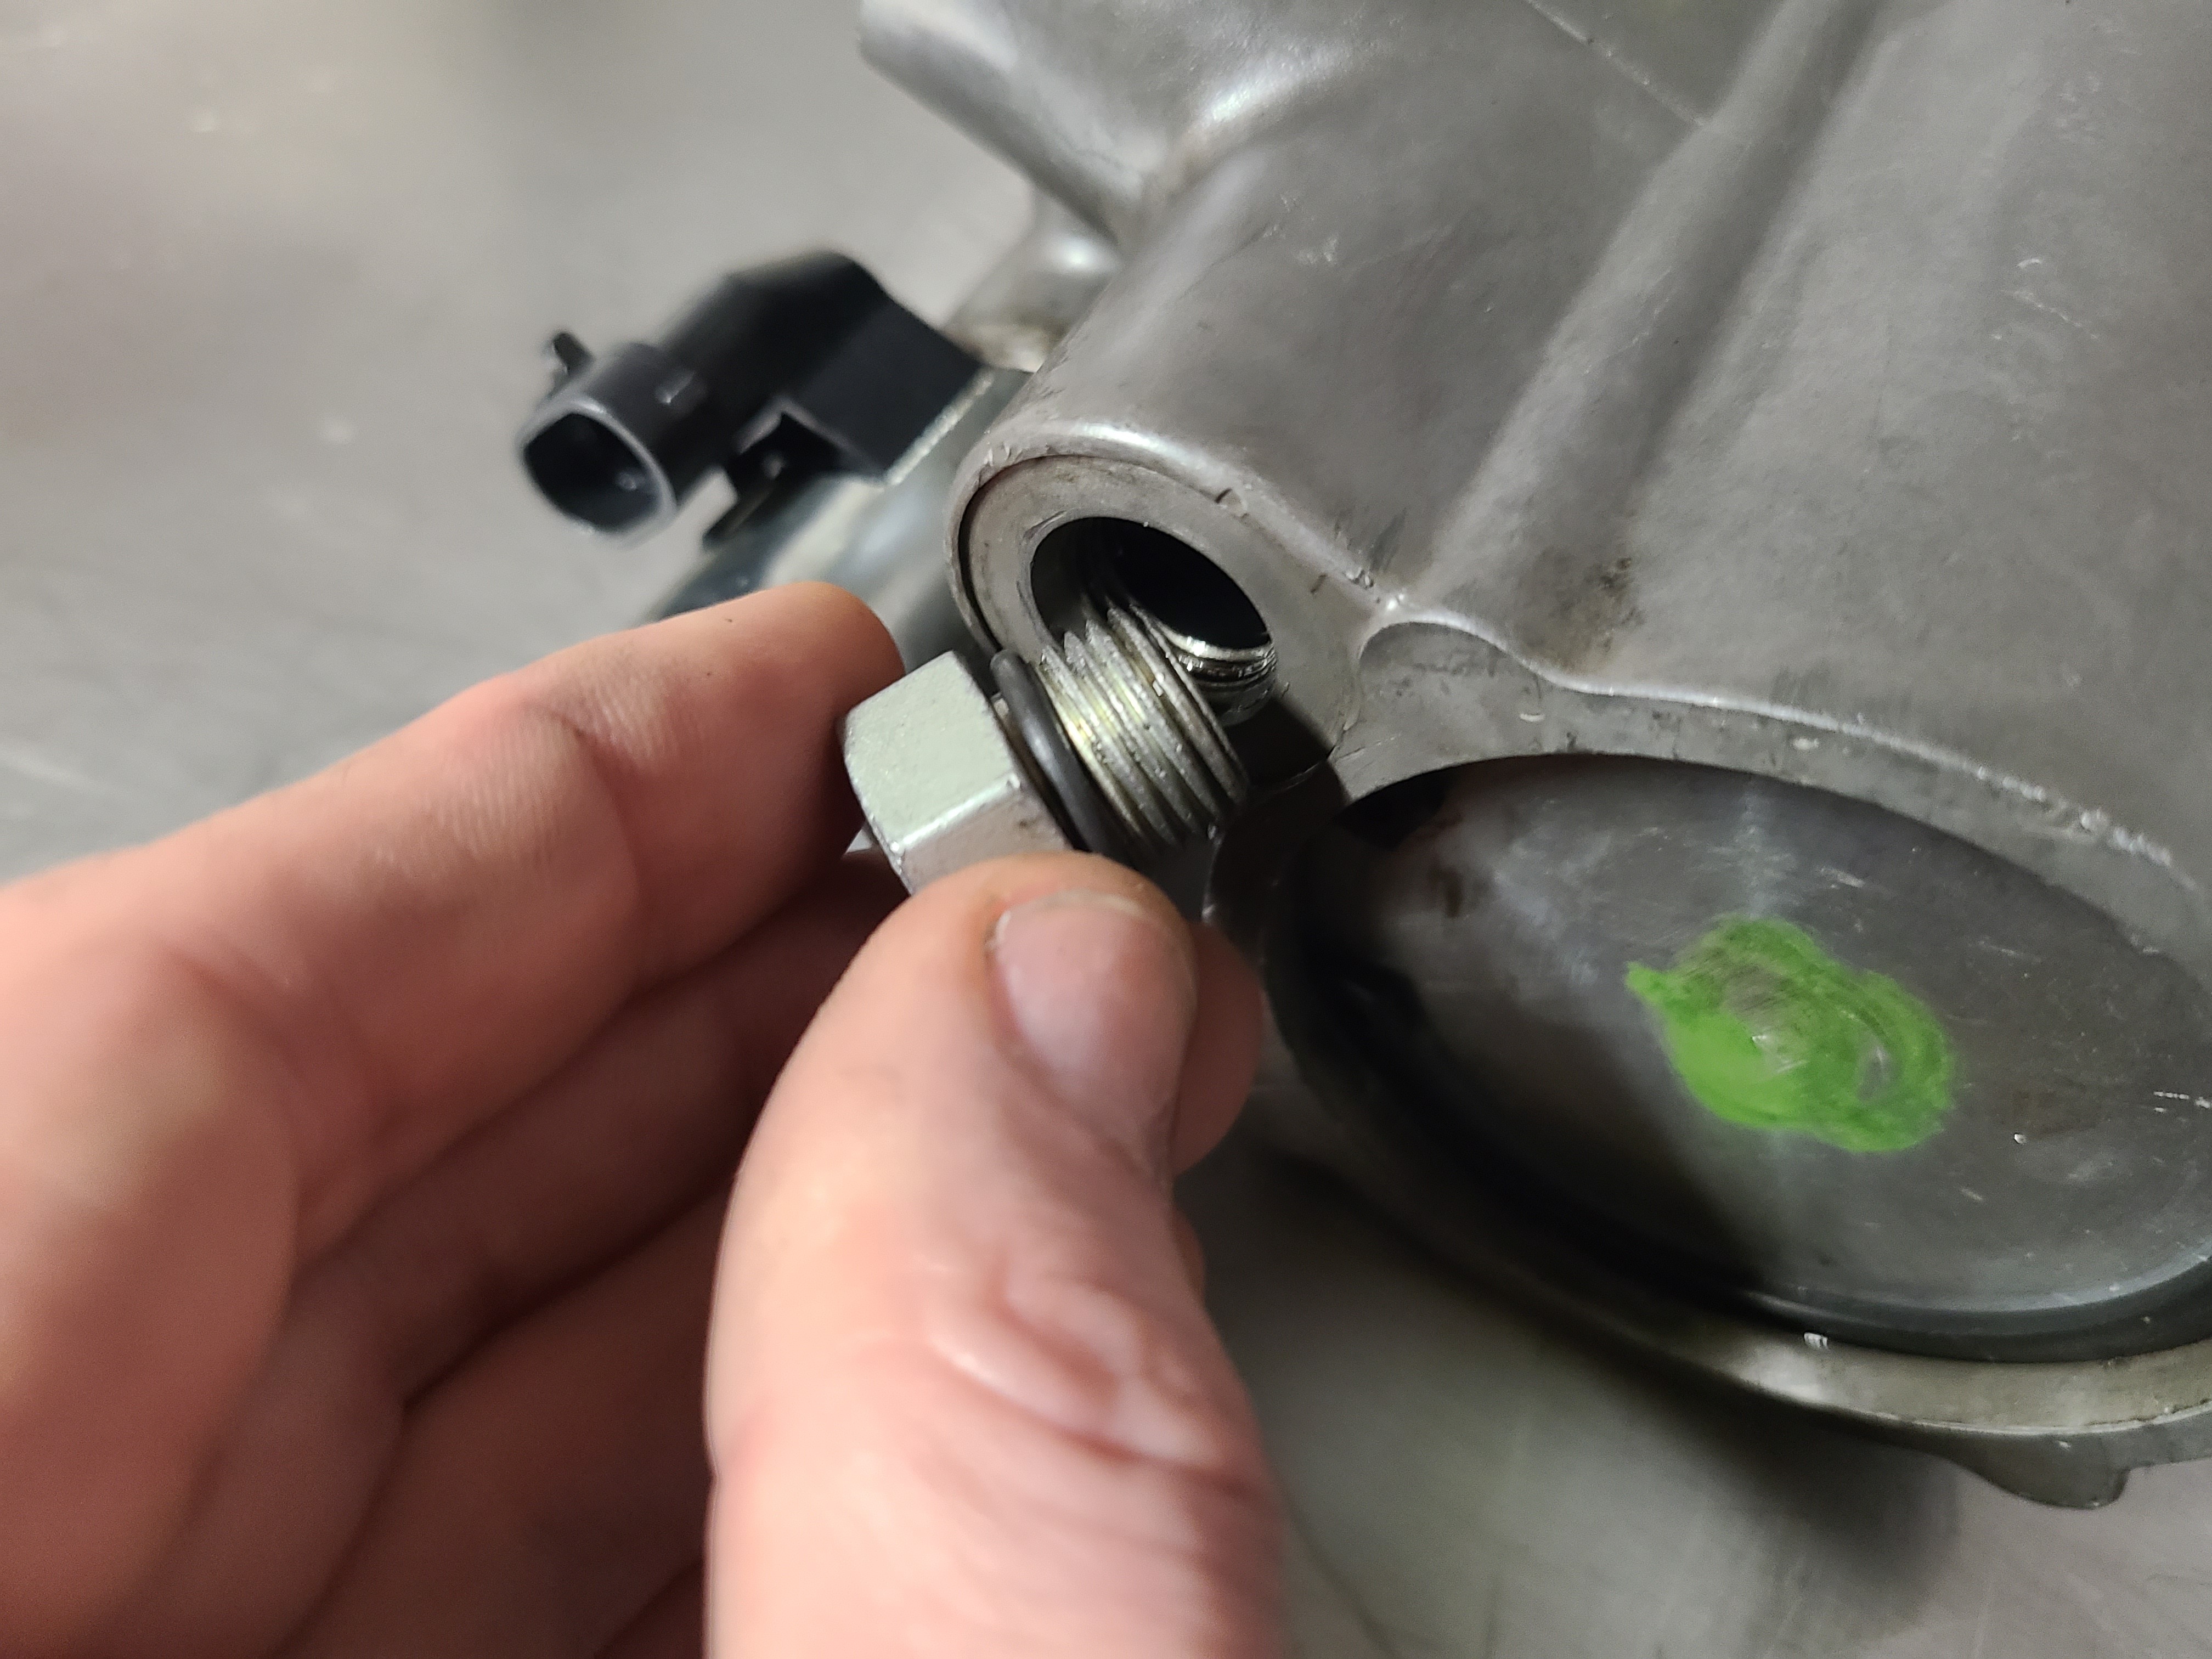
“Non-Serviceable” Plug
Known as the “Non-Serviceable” plug, that is until we created the serviceable kit. For this part the HPOP must be removed and it’s orientation must be strictly followed else internal parts will fall out of alignment. Place the HPOP in a soft jawed vice or similar, with the large rear plate facing up. Below is the quick method assuming everything stays where it needs to be (and minimal contamination present). For more detail see this LINK.
This can NOT be done while the HPOP is installed in the vehicle.
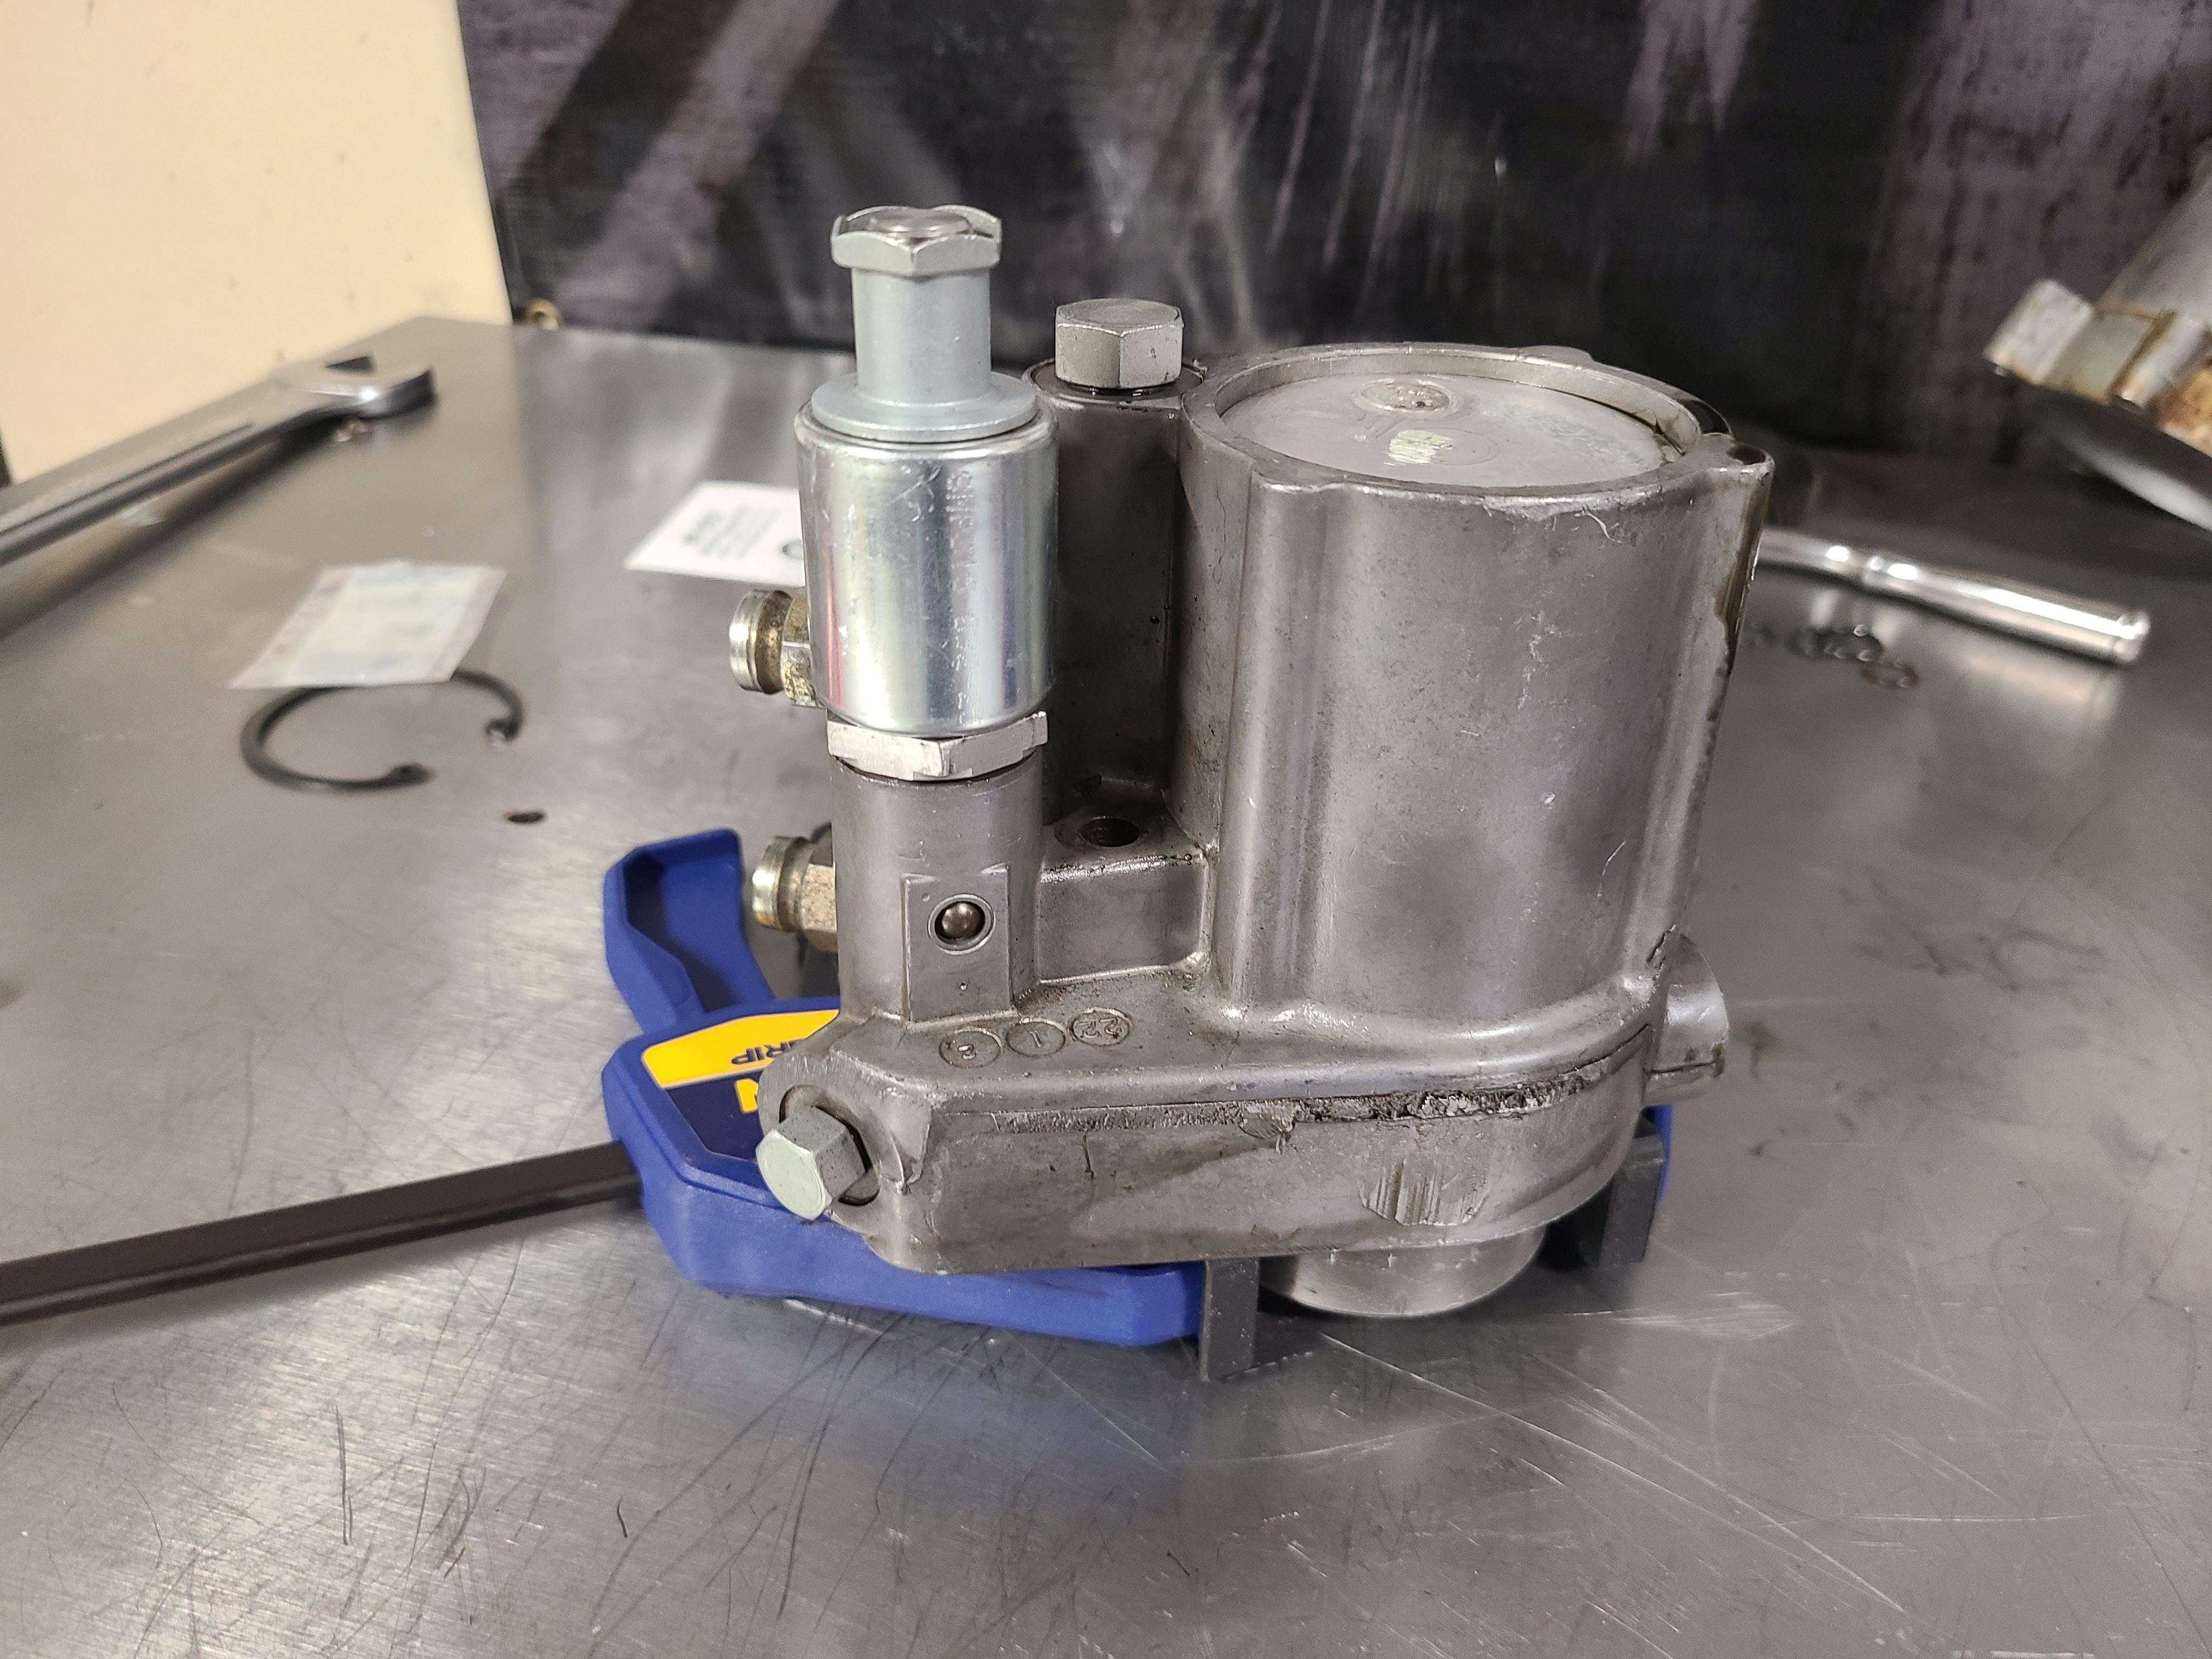
08 – Correct HPOP Orientation
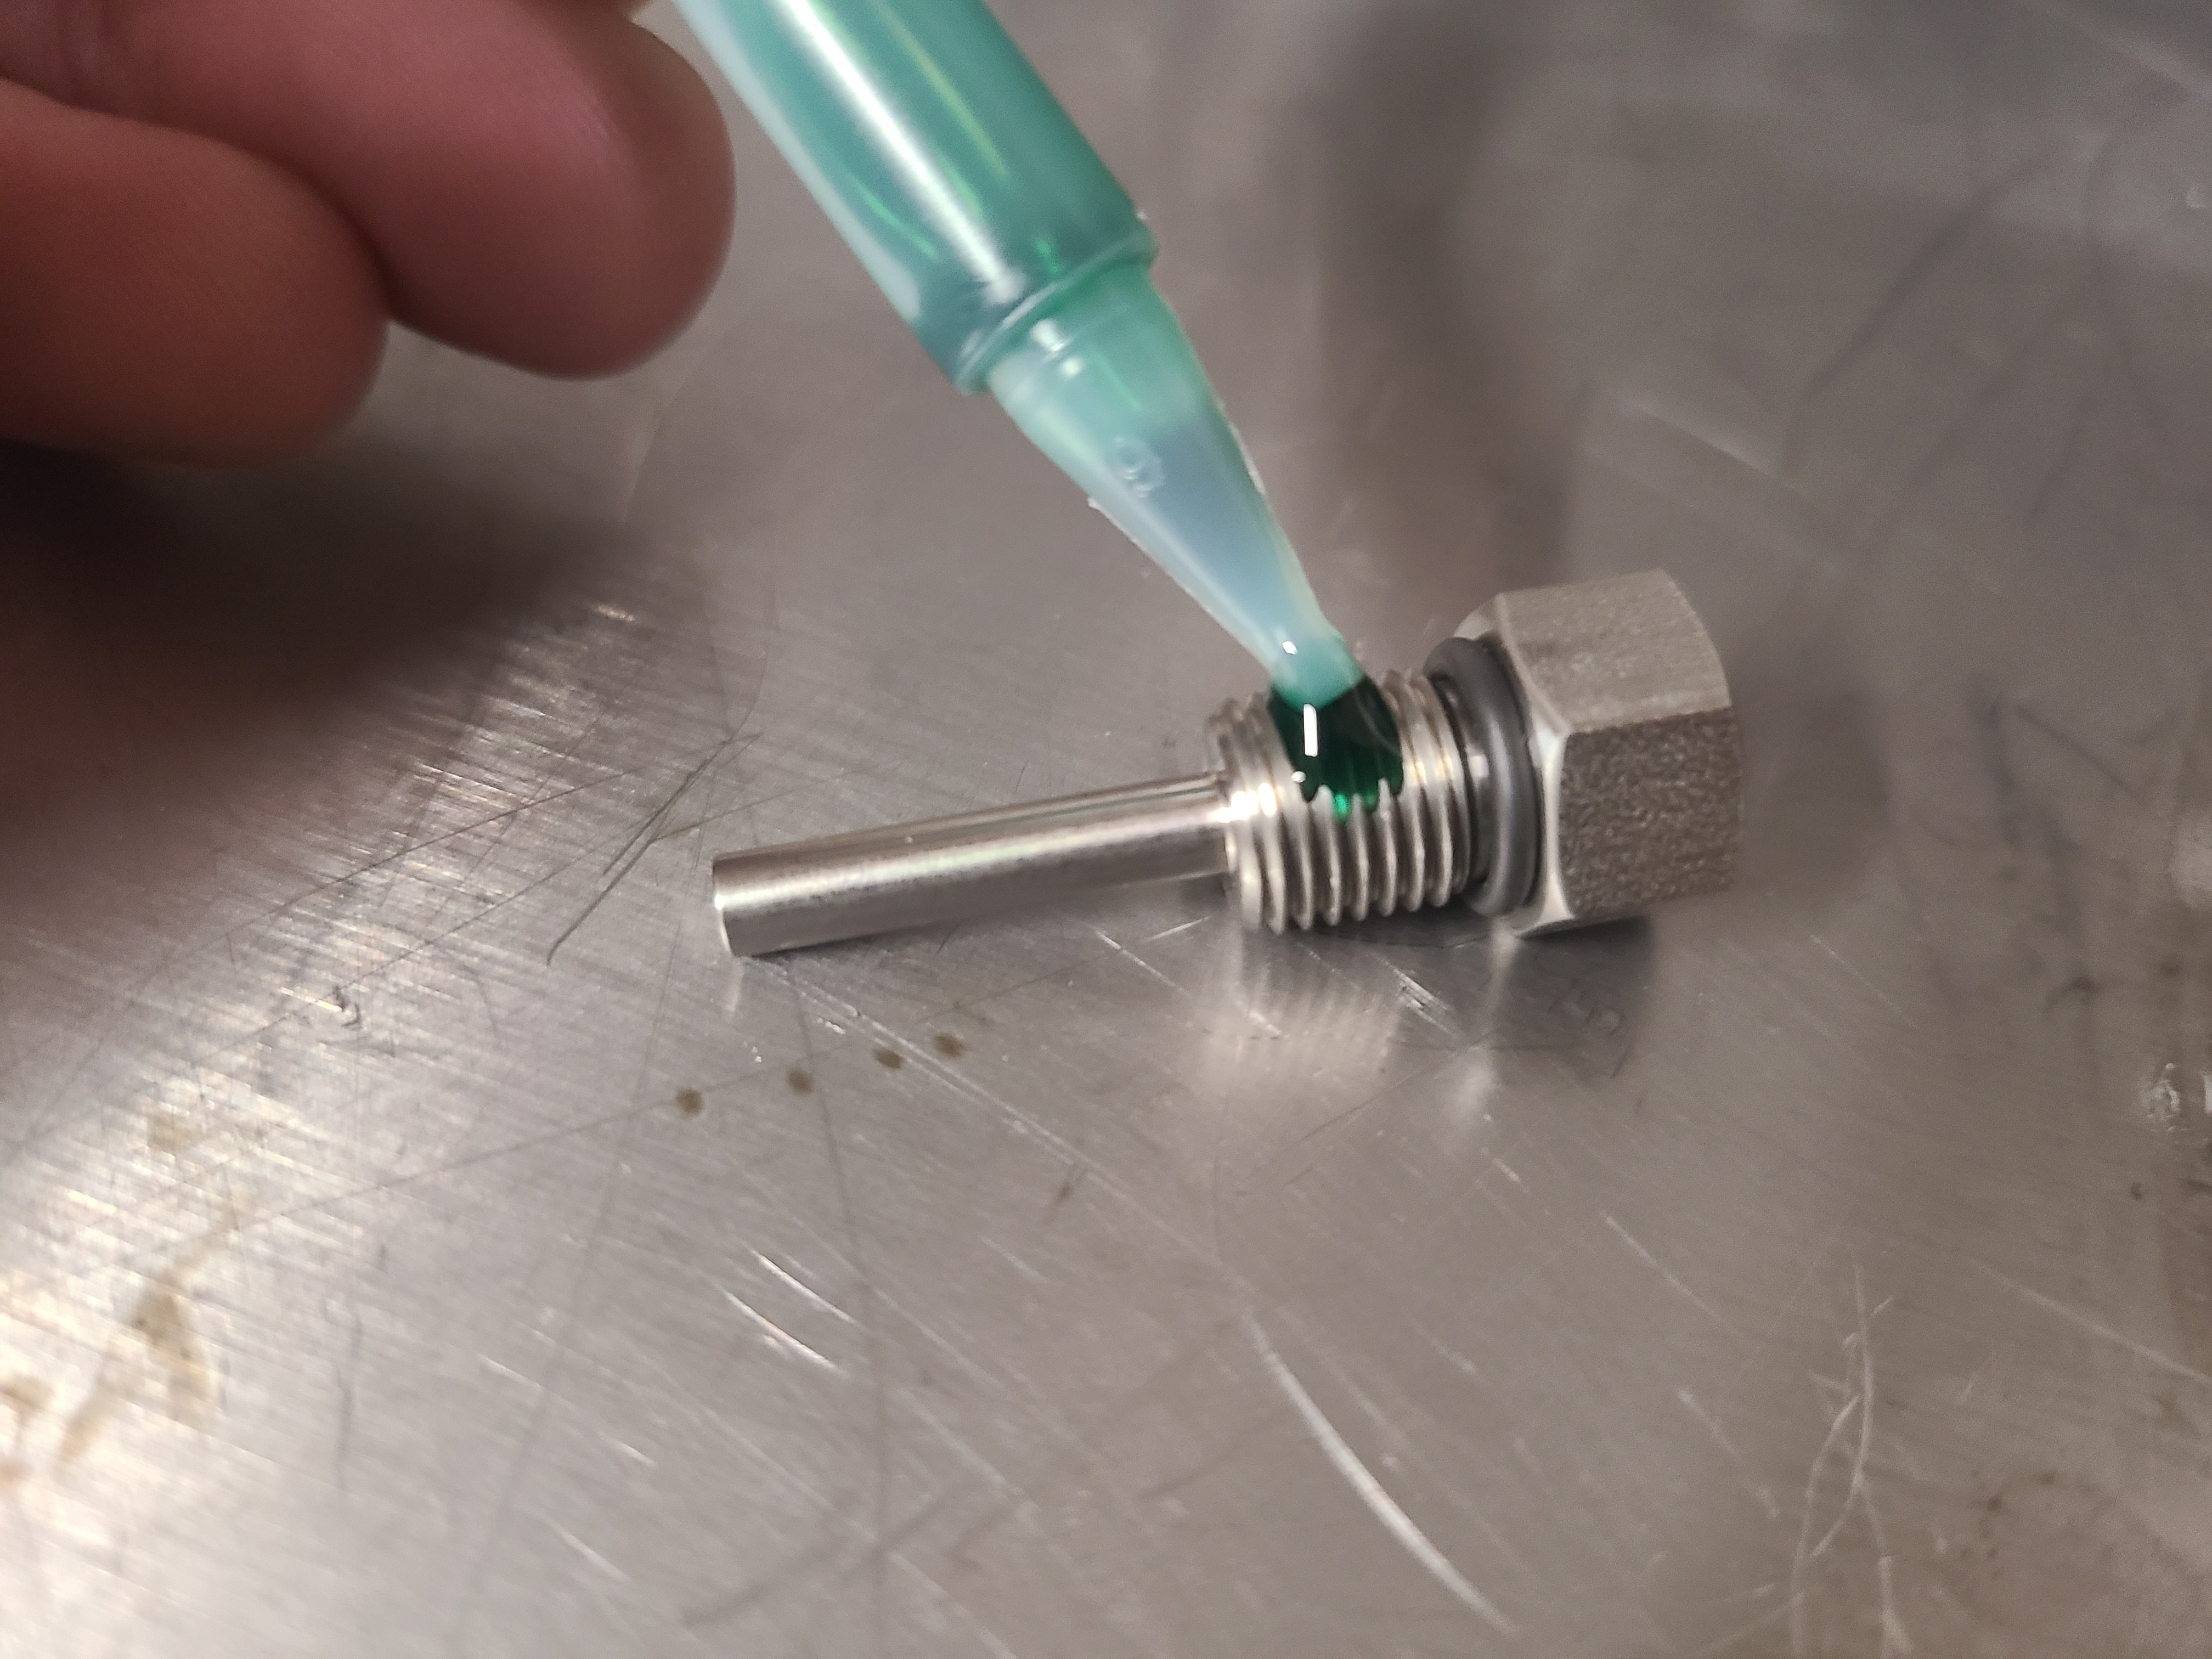
09 – After removing the plug with a 1/2-inch wrench or socket, allow any excess oil to drain thoroughly. The Riffraff kit includes a new “Serviceable Plug”. Install the supplied O-ring onto it, then apply the supplied threadlocker onto it's threads.
10 - After thoroughly cleaning the threads in the HPOP (these must be perfectly clean to allow for correct sealing), install the new Serviceable Plug into the HPOP and torque to spec. This plug should torque down easily. If any binding is present, the check ball and edge filter may have fallen out of alignment. Refer to the detailed instructions listed previously. Make sure to give the threadlocker ample time (24 hours) to cure properly before reintroducing oil into the pump.
Note: You can remove the IPR to view the orientation of the edge filter and check ball. The ball should be located recessed below the path of the edge filter as shown. The edge filter in this image is off to the right.
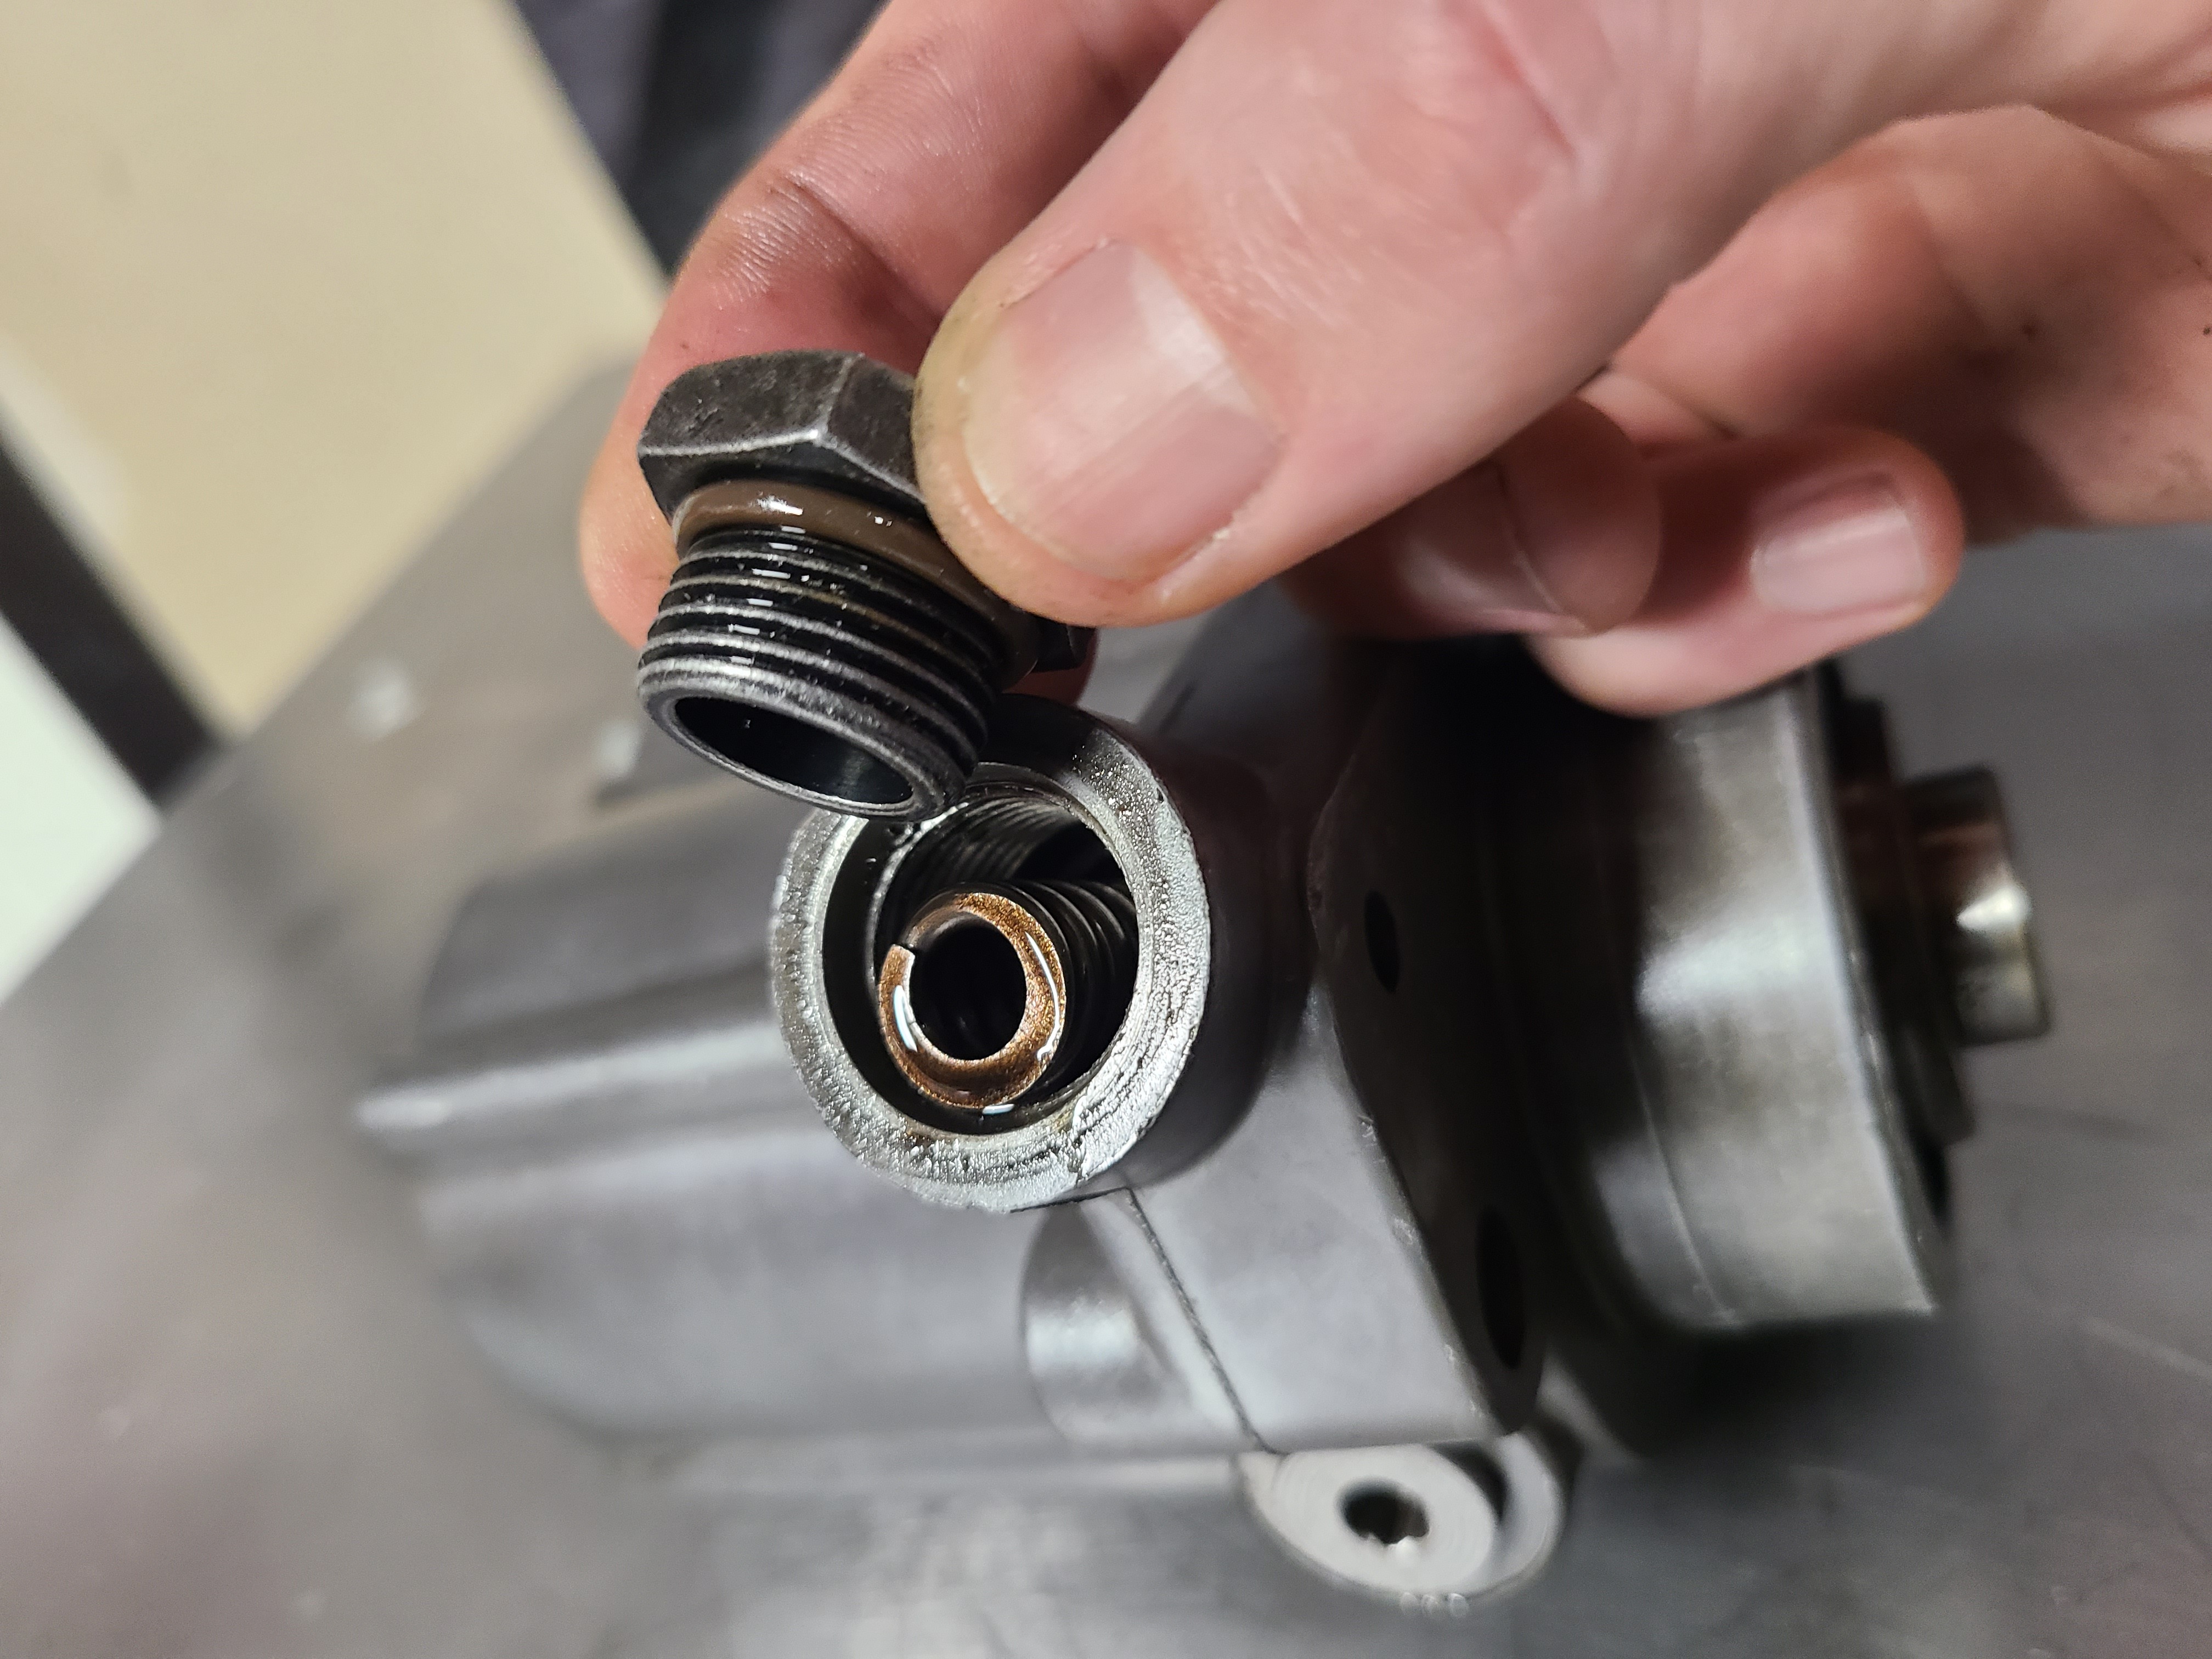
Rear Plug (next to the big flat plate)
This can be done while the HPOP is installed in the vehicle.
11 - No big description is necessary here. Remove the plug, pull the old O-ring off it, replace the O-ring with new, and reinstall.
Rear Plate Seal
This rear plate is held in place with a snap ring, an nothing else. It is however somewhat hard to remove after the snap ring has been removed due to the surface tension of the oil behind it (and sometimes due to corrosion).
This can be done while the HPOP is installed in the vehicle.
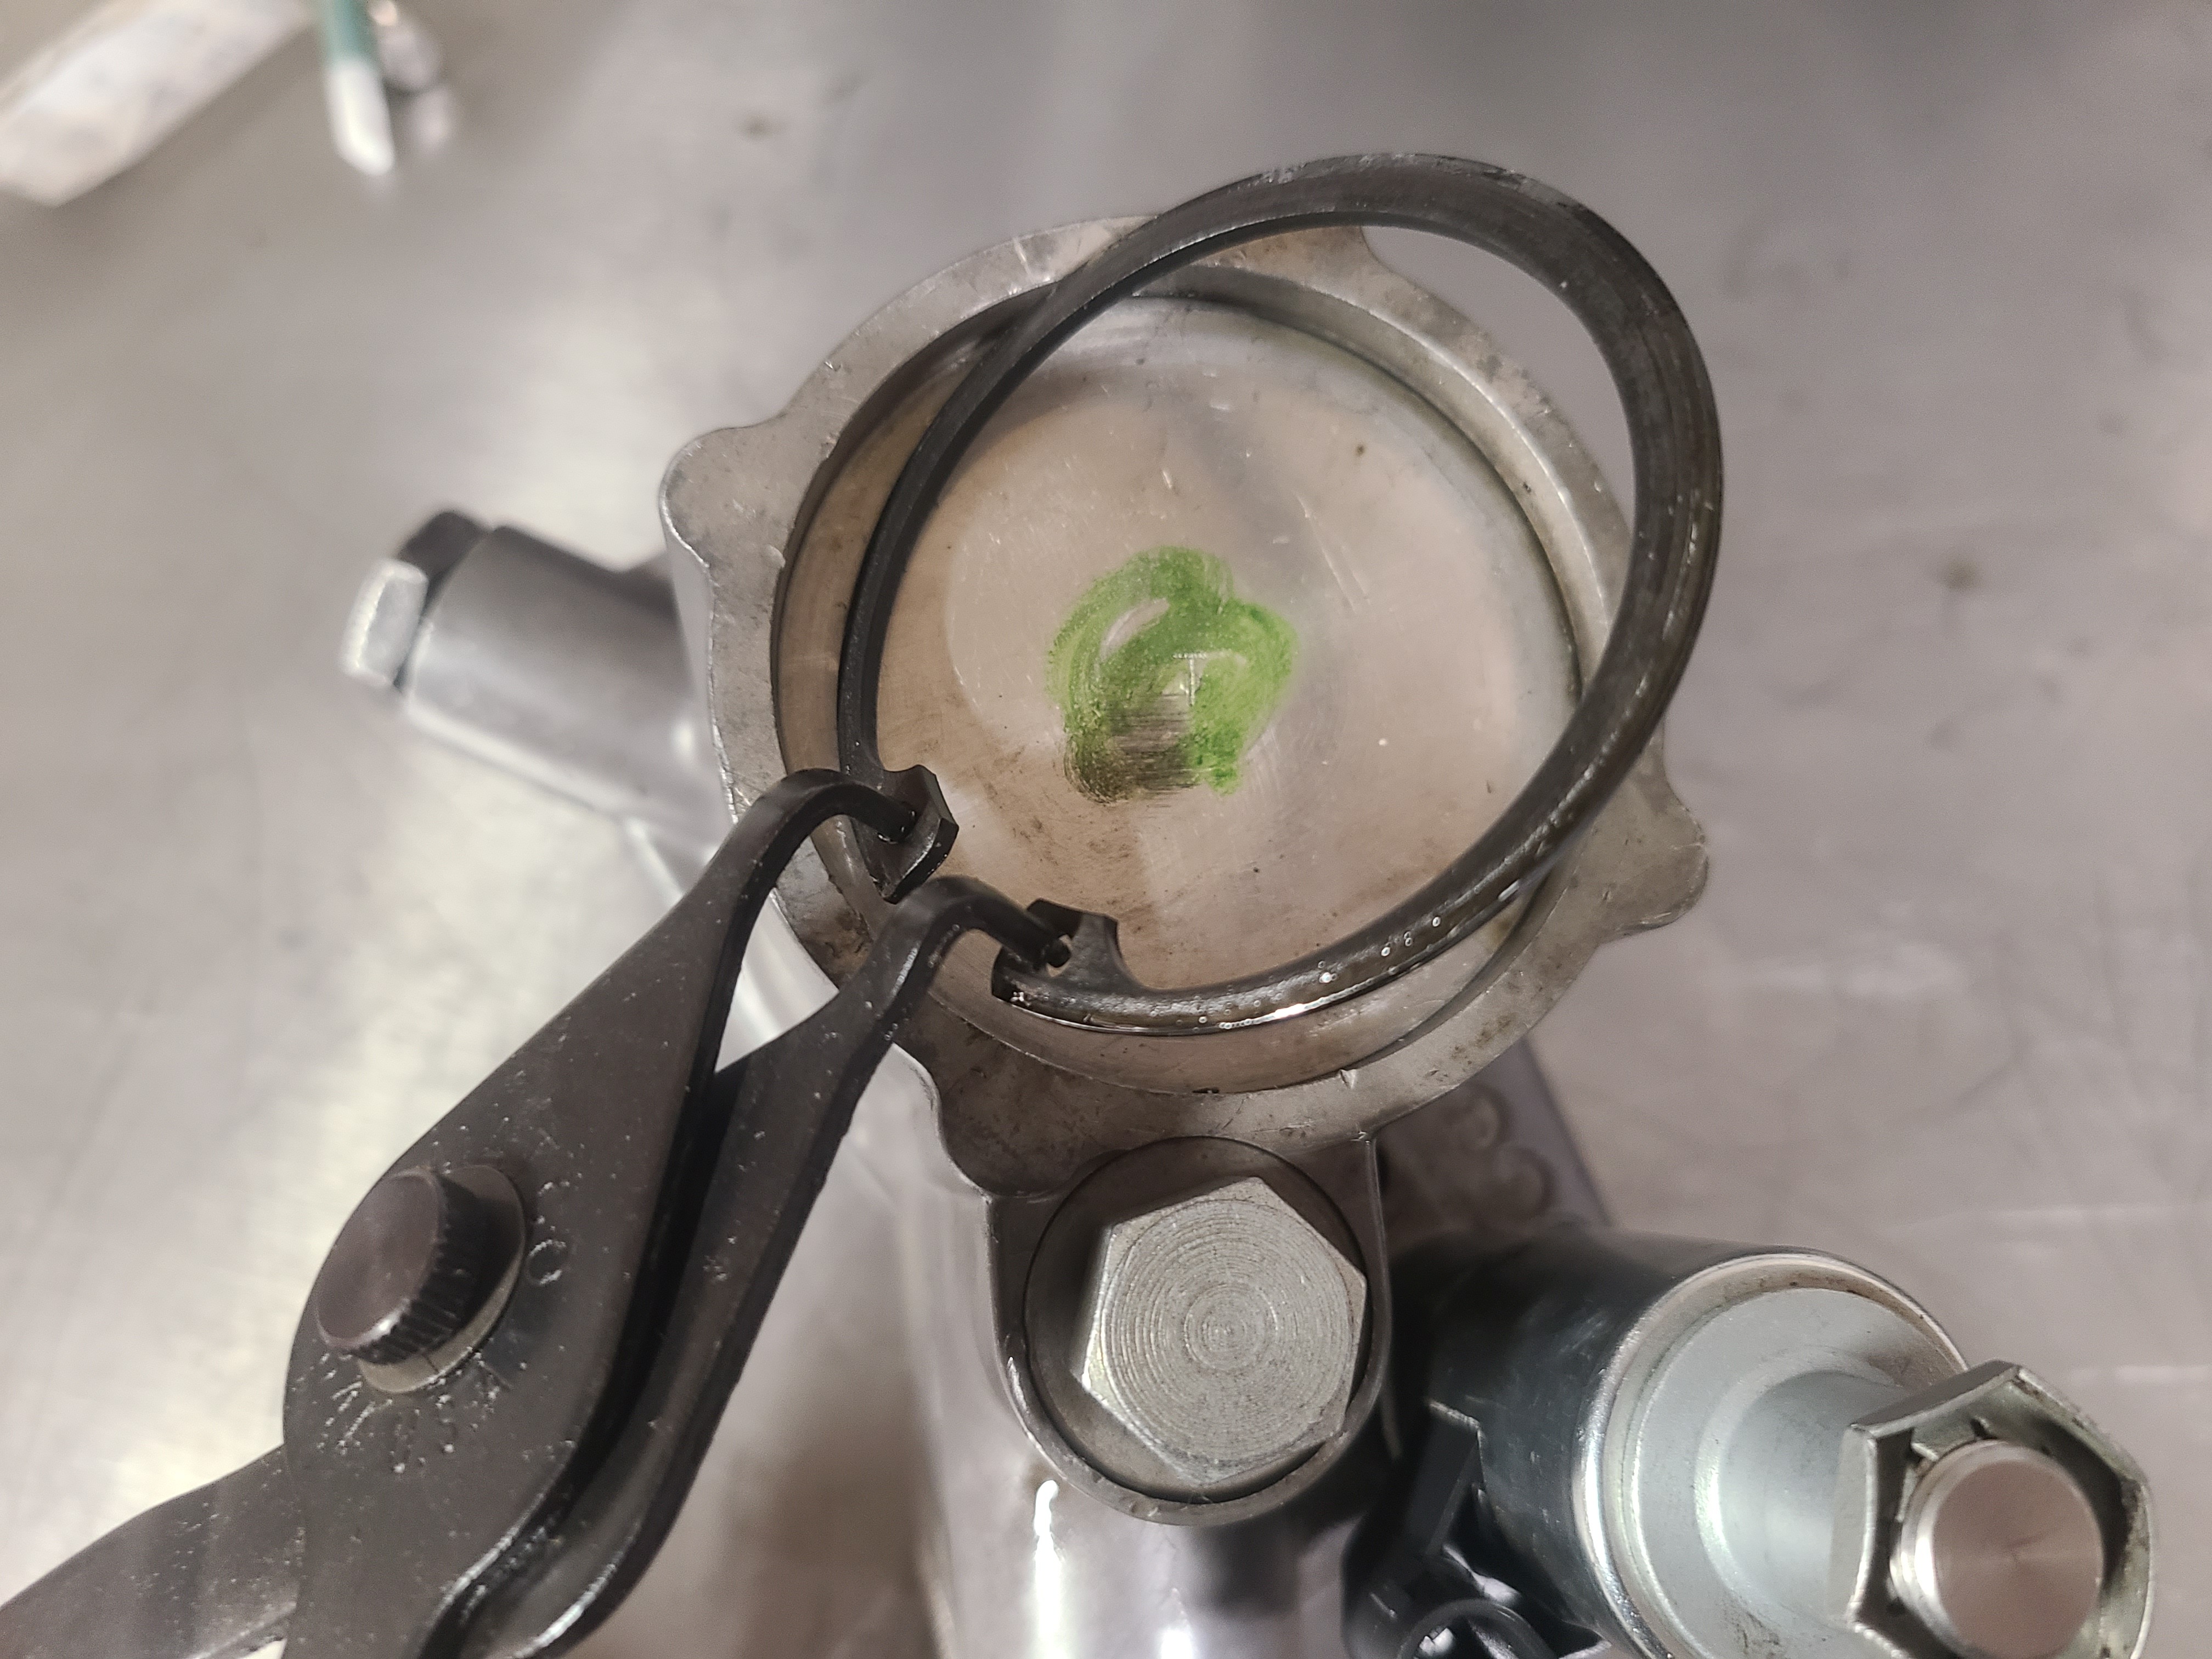
12 – Remove the snap ring with a set of snap ring pliers.
13 – Removing the plate takes some tricks. Once the ring is removed, you should be able to move/spin the plate with just your finger. If the plate is stuck, use a blunt object to lightly tap it to break it free. Then you’ll need to grab ahold of it to “walk” it out. This is the tricky part. Using a suction cup (a valve lapping tool works well) to grab the plate will usually work, you can also use a dab of super glue and a bolt or other object to grab onto the plate (like we did here). It’s best to grab the plate with either method off to one side.
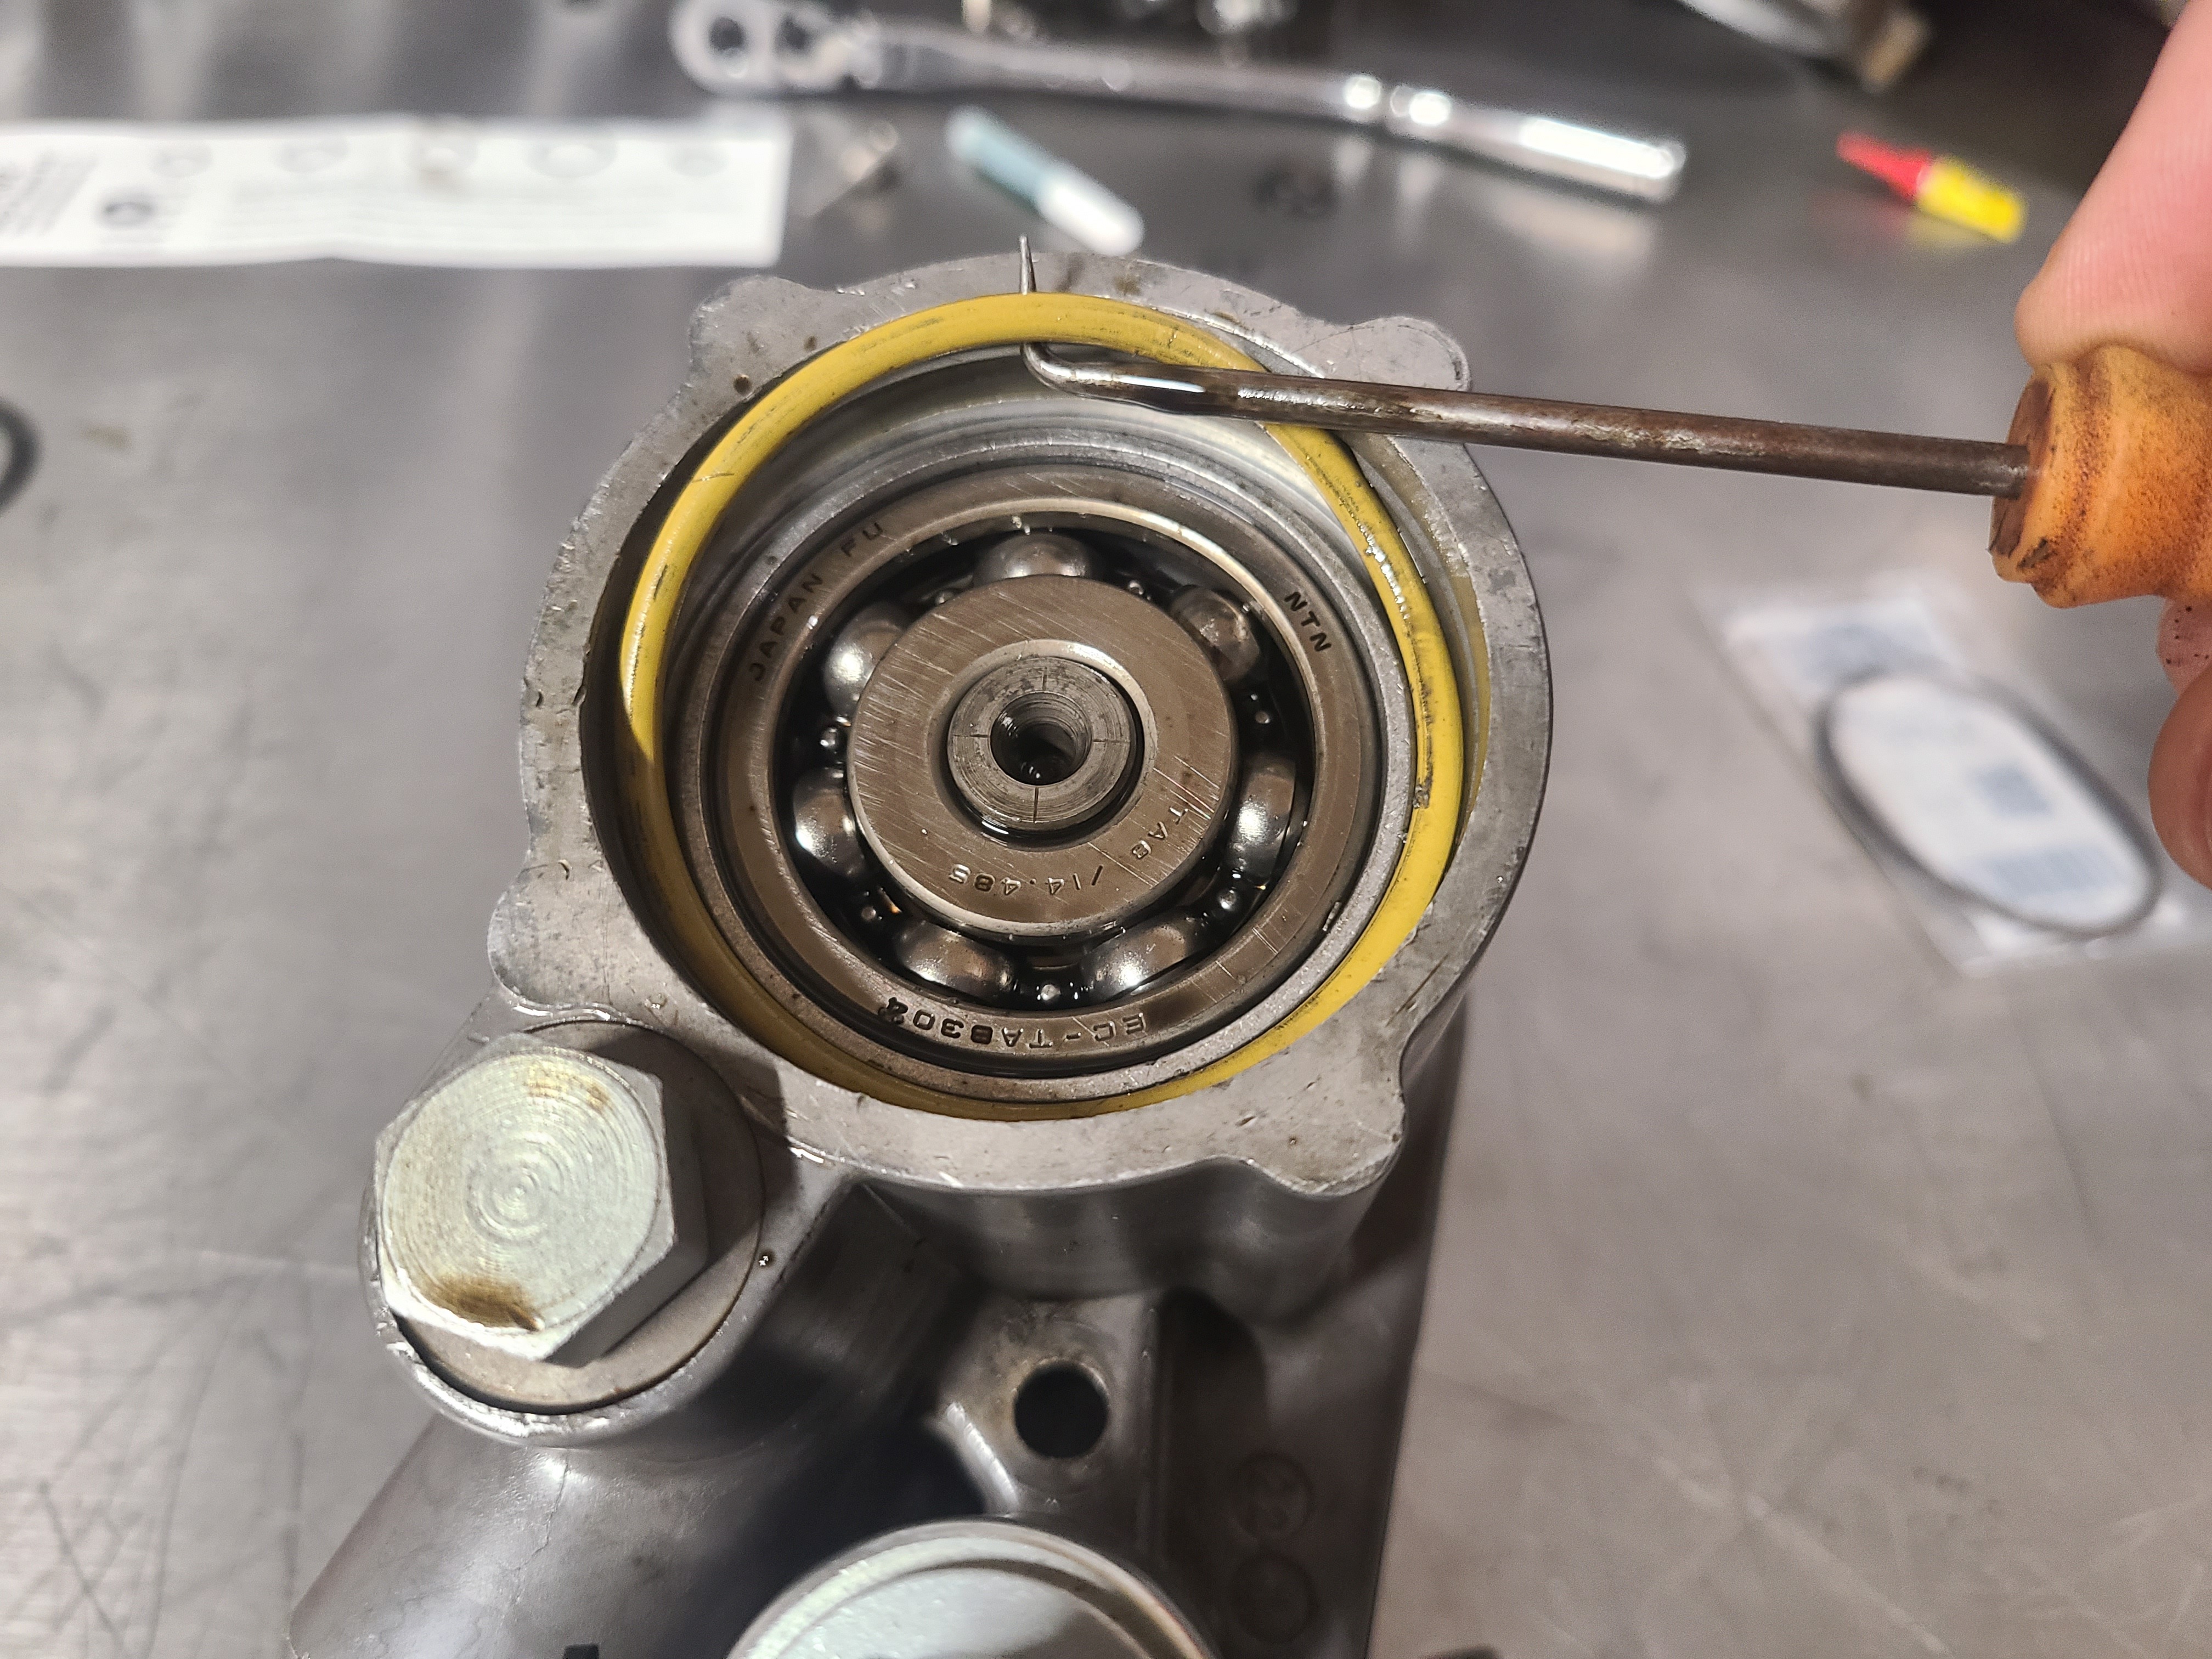
14 – With the plate removed, remove the old O-ring with a hook tool.
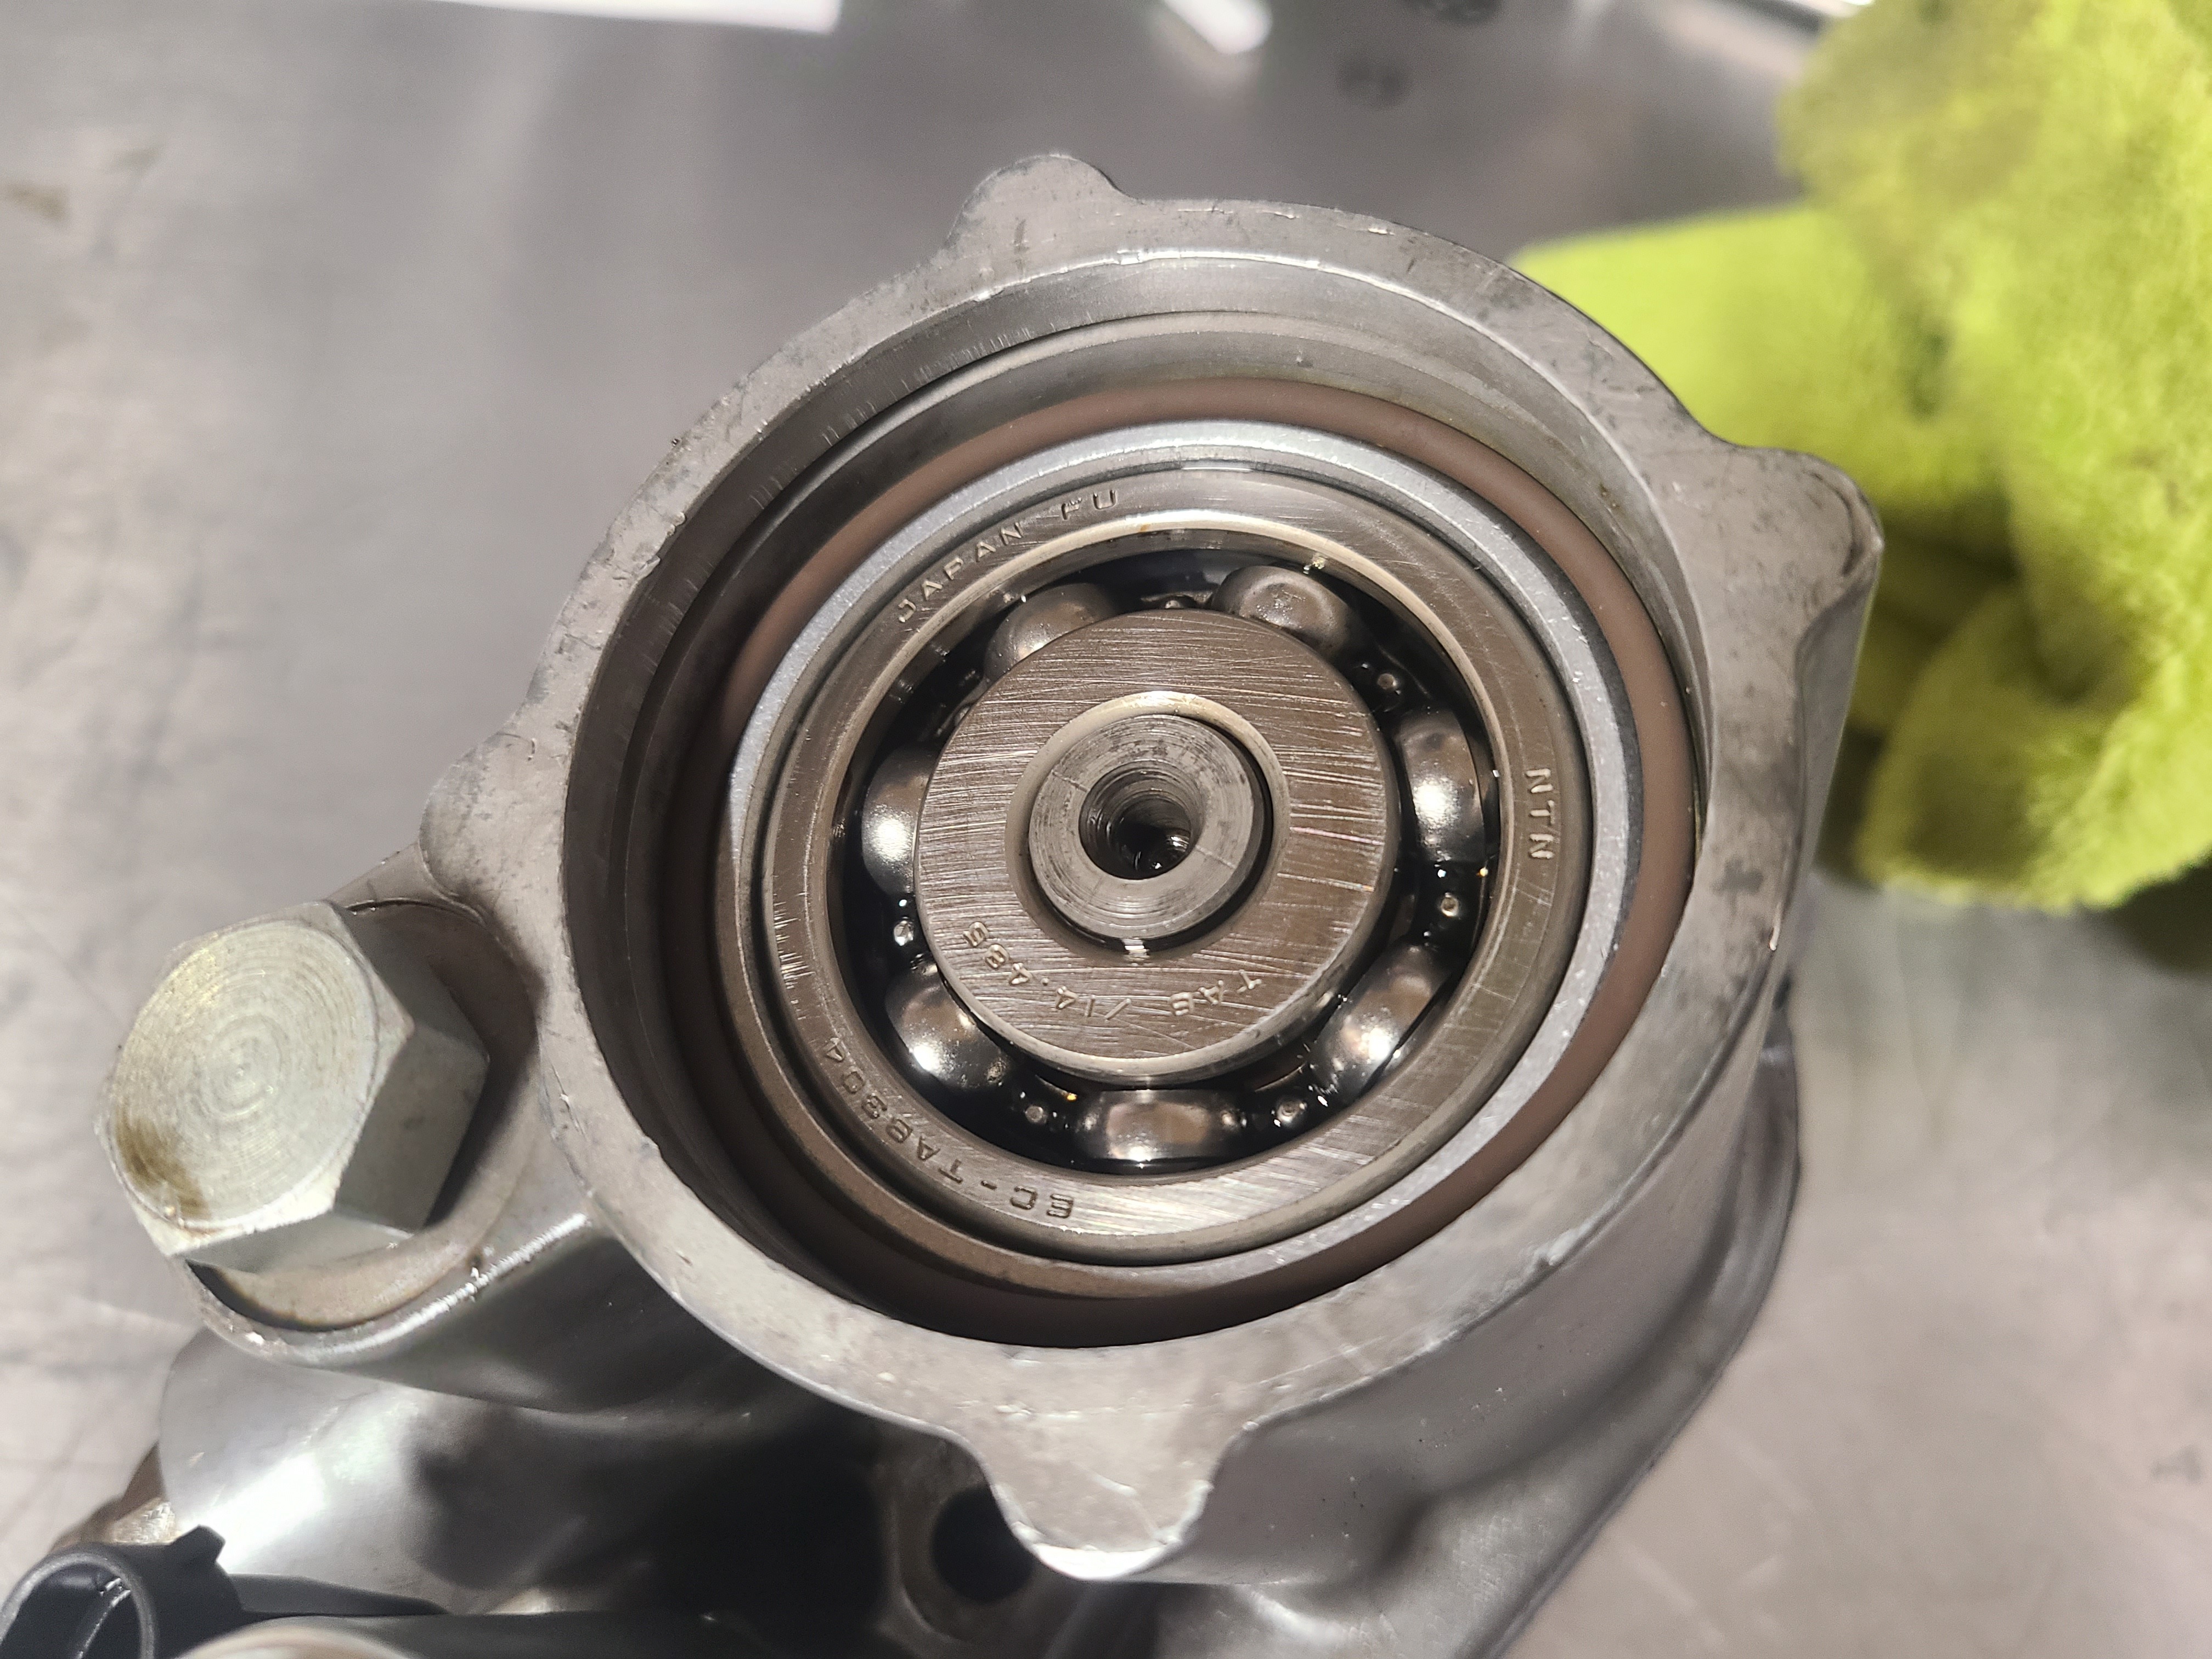
15 – And replace the O-ring making sure it is seated in the groove the old seal came out of and NOT the snap ring groove (the new O-ring is brown in color in this image). Cleanliness is extremely important here as any contamination will hinder reinstallation greatly. Reinstall the plate and snap ring, and you’re done.
Large Plug on Top Front Cover Side of HPOP
This can be done with the HPOP in the vehicle. READ CAPTION BEFORE PROCEEDING
16 - Leaks at this location are extremely uncommon, and if done incorrectly due to misalignment of the spring and check ball behind, it can cause no-start issues. DO NOT REMOVE THIS PLUG IF IT IS NOT LEAKING. If you must reseal this, be extremely careful not to move the spring when pulling the plug, if it does move, it is a very long and difficult process to realign everything. A process we cannot go into here. Making sure the HPOP is oriented with this plug bore facing up/vertically will help ensure alignment stays correct (don’t let anything fall out). The spring should sit flush to the surface when the check ball and the spring are aligned correctly. The only seal here is an O-ring on the plug, this seal is NOT included in the Riffraff 7 O-Ring Kit due to the installation complexity and rareness of leaks.
Disclaimer: The information provided on this blog is for informational purposes only. We share our knowledge and experience, but we are not liable for any damages, injuries, or losses that may occur as a result of using this information. Situations are rarely cut and dry in the automotive world. Your situation will likely be somewhat different than what we describe here. Use your best judgment and always consult a qualified professional for automotive repairs and modifications. Your safety is your responsibility.


