
Upgraded HPOP Lines: 1999-2003 7.3 JIC Hose Step By Step Installation
Oct 24th 2025
Full PDF Instructions can be downloaded here: https://www.riffraffdiesel.com/content/RESOURCES/Riffraff%20Diesel%20HPOP%20JIC%20Hoses%2099-03.pdf
Product Links:
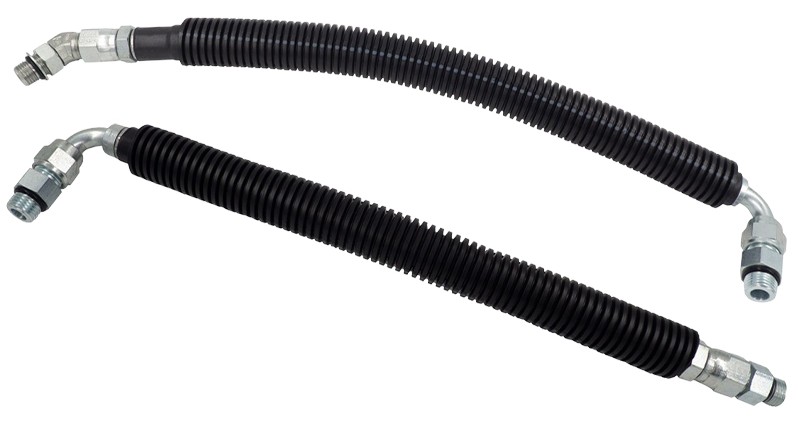
HPOP JIC Line - Passenger Side Head 99-03: https://www.riffraffdiesel.com/hpop-jic-line-passenger-side-head-99-03/
HPOP JIC Line - Driver Side Head 99-03: https://www.riffraffdiesel.com/hpop-jic-line-driver-side-head-99-03/
Parts Required:
- (1) Driver Side JIC Line: Part# RDP-HPOP-DRVR
- (1) Passenger Side JIC Line: Part# RDP-HPOP-PASS
Recommended Parts:
- (1) Riffraff Diesel HPOP Line Disconnect Tool: Part# 6595
1. The factory HPOP hoses are fastened to the heads and the HPOP using special Eaton STC® quick disconnect fittings. These fittings allow the hoses to easily be removed using a special tool.
2. The driver side hose goes to the forward fitting on the HPOP and the passenger side hose goes to the aft fitting. (Note: Fuel bowl is removed in the pictures for clarity. It is not required to remove the fuel bowl to replace the hoses).
3. Clean the hose fittings thoroughly before disconnecting. This will reduce the likelihood that you will introduce contaminates into the high pressure oil system.
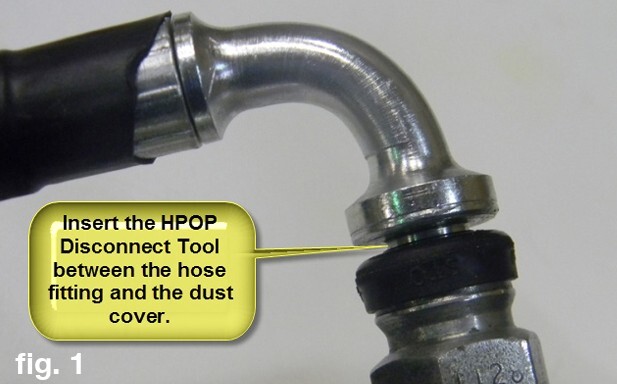
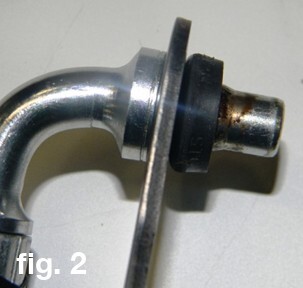
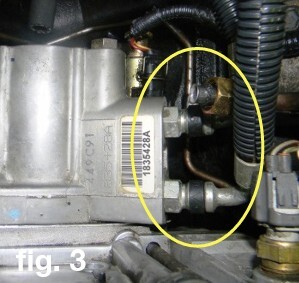
4. Insert the HPOP Line disconnect tool behind the release sleeve on the cylinder head fittings to disconnect the locking ring from the fittings. Pull the hoses free from the fittings. (fig. 1, fig. 2) Insert the HPOP Line Disconnect tool behind the release sleeve on the HPOP fittings and pull the hoses free from the fittings. Remove the hoses from the engine. (fig. 3)
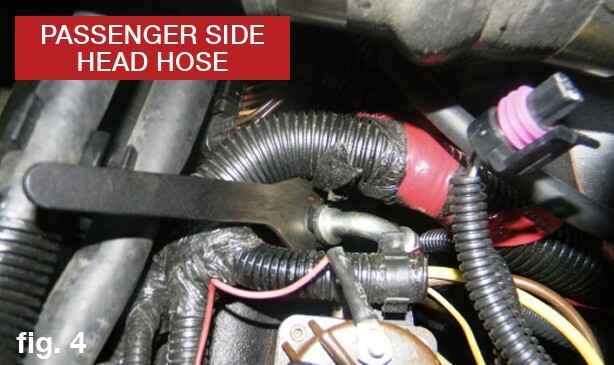
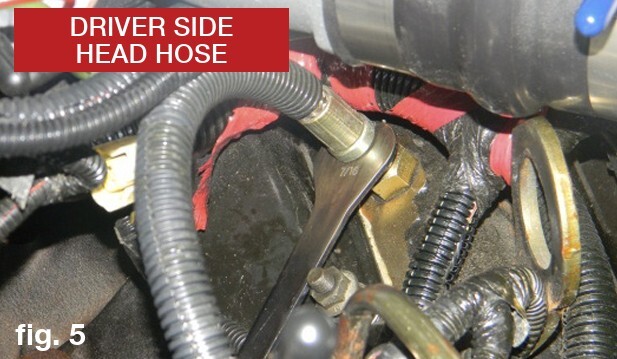
5. Remove the Quick Disconnect Fitting from the drivers and passenger heads. (fig. 4, fig. 5)
6. Evacuate some of the oil in the head to eliminate oil dripping out. This will allow you to clean the threaded area for the Loctite to engage better.
7. Remove the fittings from the High Pressure Oil Pump. Heat will help the Loctite release the fitting. (fig. 3, fig. 6)
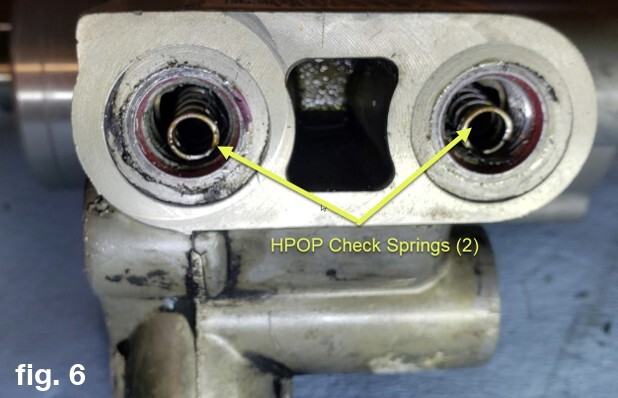
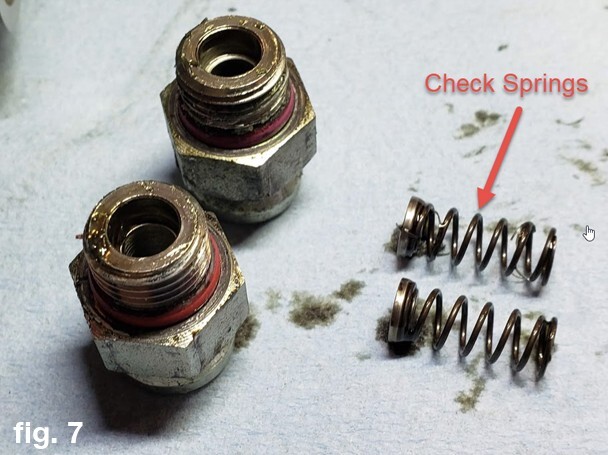
8. Remove the two check springs from the HPOP. These will not be utilized with the new installation. (fig. 6 ,fig. 7)
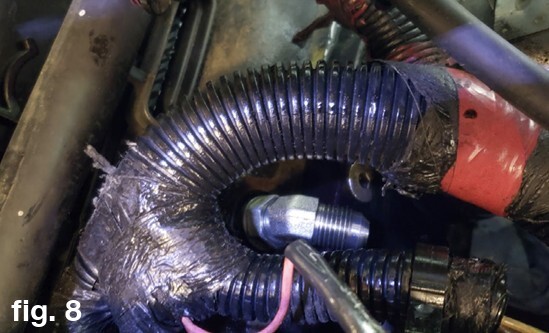
9. Install the fittings into each cylinder head and torque to 30 ftlbs or until full seated. The Passenger Side Head uses the 45º f itting and is pointed towards the Driver Side Head. Tighten the jam nut to hold it in place. (fig. 8)
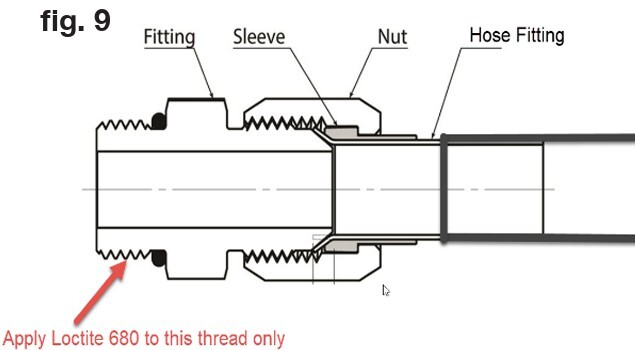
10. Apply Loctite 680 to the boss threads (o-ring side) (fig.9) of the new JIC fittings and install into the HPOP and torque to 25 ft-lbs or until fully seated. Do not apply Loctite to the flared end threads.
11. Route the new JIC Hoses from the HPOP to each cylinder head fitting using the same path as the original hoses. The 90º fittings are the HPOP end fittings and the 45º adapter is for the passenger side head.
12. Start each hose end nut onto the fitting before final tightening of the hose fitting. Torque the fittings to 20 ft-lbs.
13. After installing the new lines the truck may start hard/slowly and run rough. This will get better after roughly 75 miles as there is air in the high pressure oil system. It will purge out while driving.
14. Let the engine idle for 5-10 minutes, check for leaks. After idling, drive the truck and check for leaks.
Instructions and pictures provided by Ken (Woodnthings on FTE)
***Disclaimer: The information provided on this blog is for informational purposes only. We share our knowledge and experience, but we are not liable for any damages, injuries, or losses that may occur as a result of using this information. Situations are rarely cut and dry in the automotive world. Your situation will likely be somewhat different than what we describe here. Use your best judgment and always consult a qualified professional for automotive repairs and modifications. Your safety is your responsibility.


