
Step By Step How To: 2005-2007 Headlight Conversion For 1999-2004 Super Duty Fords
Jan 6th 2026
Recommended Parts:
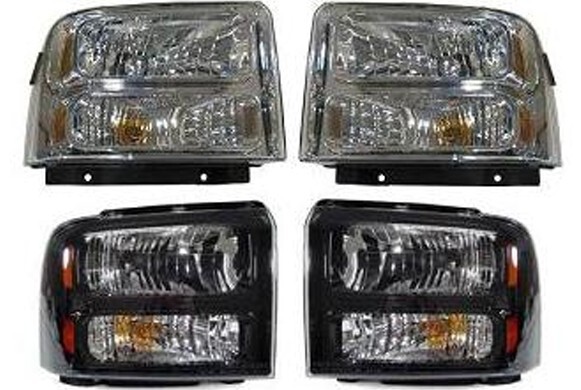
‘05 Superduty OEM Headlights
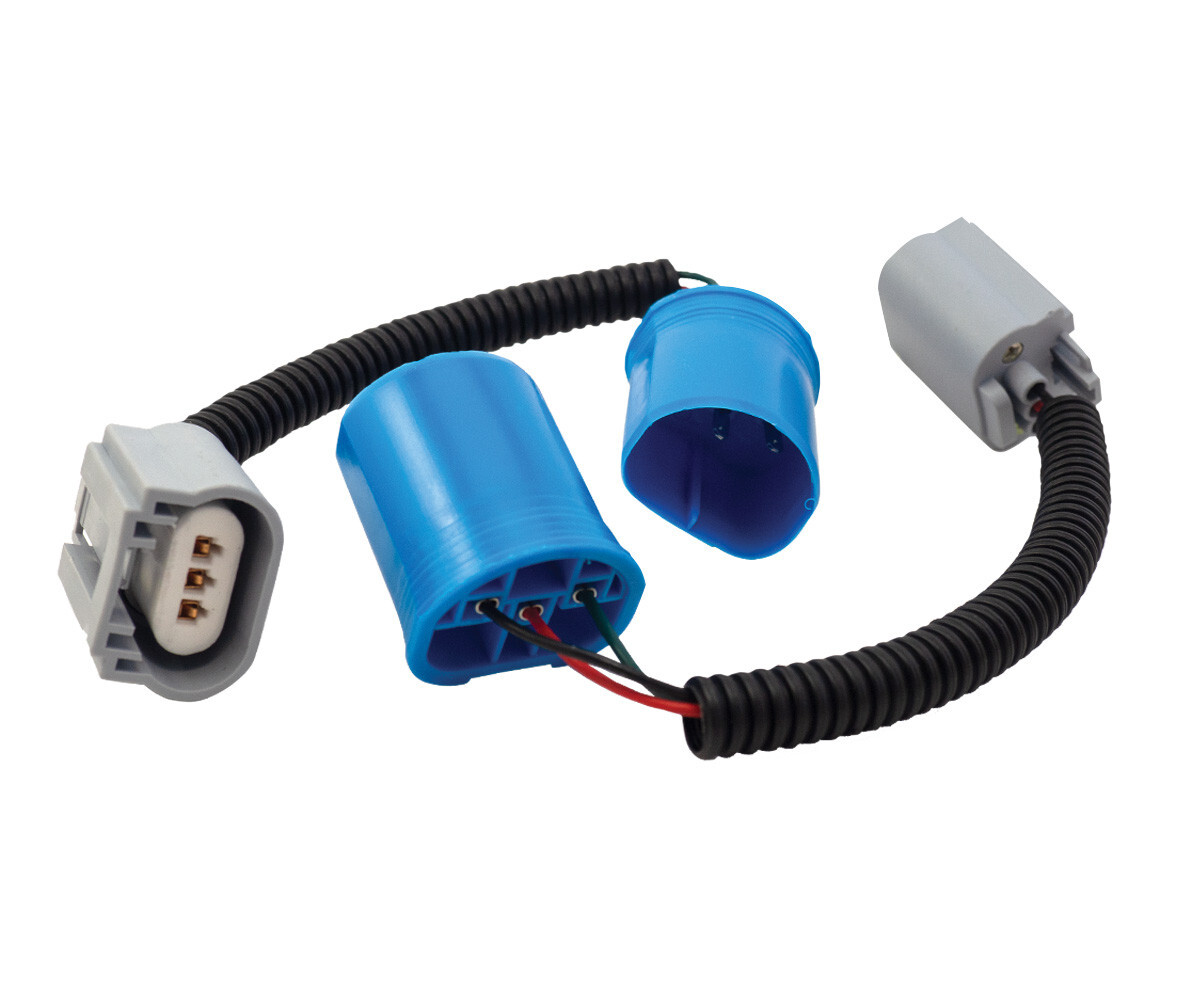
Riffraff Plug & Play 9007/9008/H13 Harness Adapter
(4) ¼”-20 x ¾” Button Head Cap Screw
(4) ¼”-20 U-nut clip
(4) ¼” Fender Washers
Recommended Tools:
- Phillips Screw Driver
- Common screwdriver or pry-bar
- Vice-Grip ® locking pliers
- Pick Set -Dremel ® or similar cutting device with cutting wheel.
- Torx ® driver
1. Remove the grille by removing the (4) Phillips screws along the top edge.
2. Unlock the (4) spring clips along the bottom of the grille that retain the bottom edge into the radiator support. The lower tabs are simply lifted with a upward pry with a flat screw driver or pry-bar. Work from one side to the other pulling the grille slightly out at each clip, This will ensure the clips remain unlocked. The grille will now be free and can be removed from the truck.
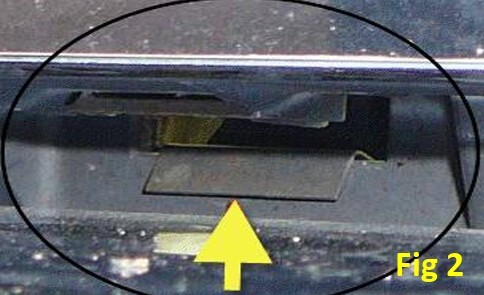
3. The headlights are held in at three locations. (2) locking clips at the top of the light assembly. There is also a lower attachment at the height adjuster.
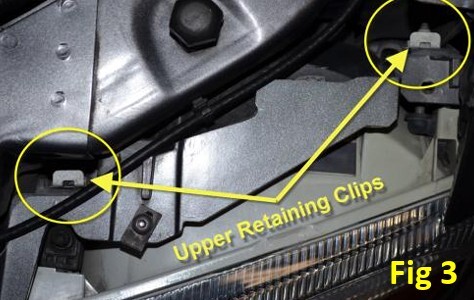
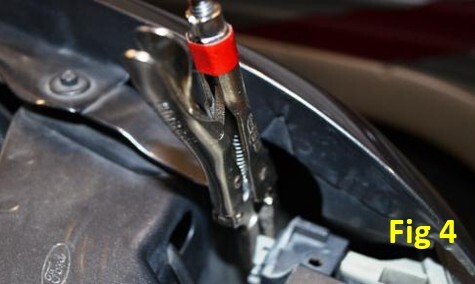
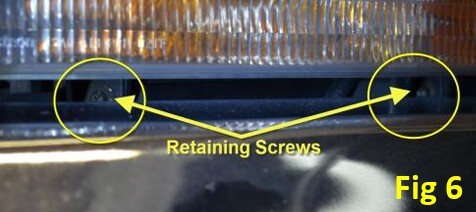
4. Remove the (2) locking clips at the aft side of the headlight. Using Vice-Grip ® pliers, grab onto the flange of the clip. It may also be needed to unlock the clip where it wraps around the plastic flange. Use a pick or scribe to disengage the retaining fingers. Pull the clip straight up and it will release from the flange. It does require a fair amount of force to pull if the retaining fingers are not partially disengaged prior to pulling up.
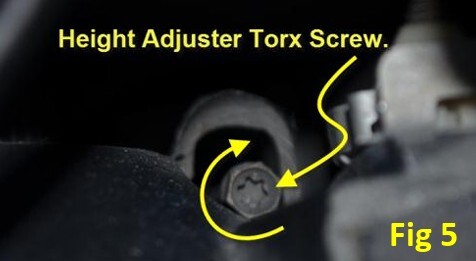
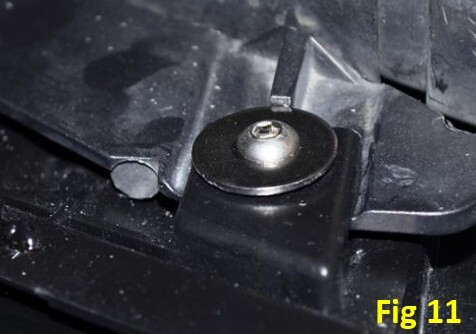
5. Using a Torx® bit, drive the height adjuster clockwise to thread the shaft out of the retaining nut. Use a drill/driver to make this quicker as it will be a lot of turns.
6. Disconnect the electrical connectors once the headlight is free.
7. Remove the (2) Phillips head screws between the bumper and the turn light assembly.
8. Remove the turn light assembly from the truck. Disconnect the connections once the turn light is free.
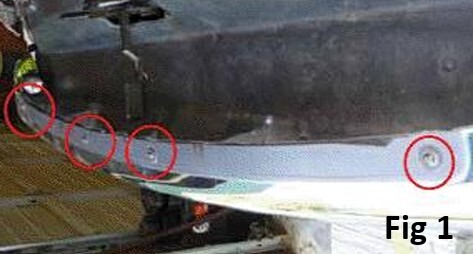
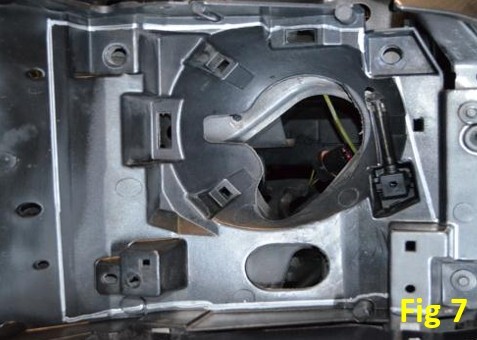
9. Clean off the header and mark the cut lines.
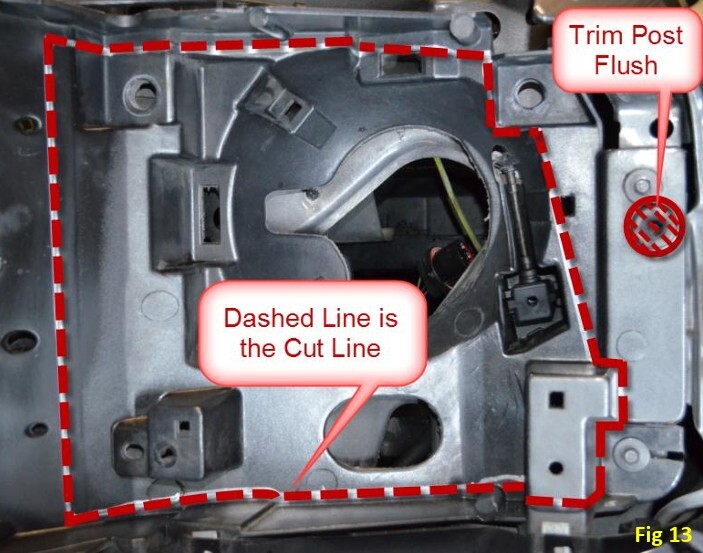
10. Using a cutting wheel, follow the lines you laid out. Drilling relief holes in the inside corners will aid in keeping the corners from being sharp.
Caution: The lower header cut line is close to the radiator support structure. Only cut in enough to sever the header and not into the metal.
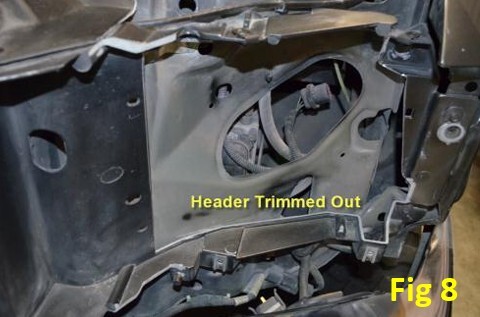
11. Once you cut the periphery, you can remove the section and discard.
12. Cut the outer post as flush as you can to the header panel. It only needs to be trimmed down to the height of the bolt just above it.
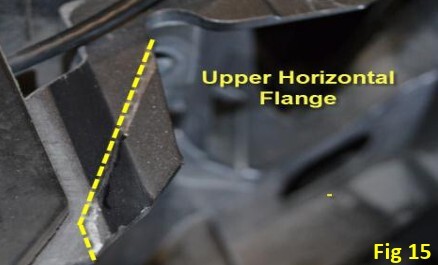
13. Mark and cut the upper horizontal flange.
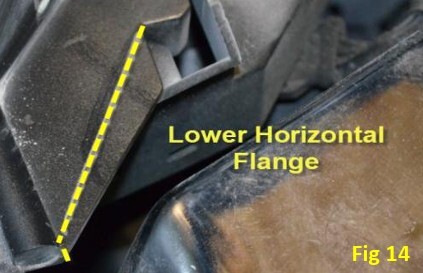
14. Mark and cut the lower horizontal flange.
15. Clean up all the cut edges.
16. Remove the splash guard that is located on the lower header panel (if installed). It is held in place by a couple of plastic push fasteners on the fender side and built-in pins along the front side. This will interfere with the new headlights if left in place. You may choose to trim it to clear the lights if you prefer to leave it in place.
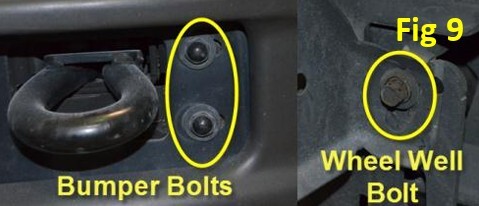
17. You will now need to loosen the bumper attach bolts. There are (4) bolts at the front of the truck and (1) in each wheel well. They only need to be loose enough to allow the bumper to be pushed down an inch or so.
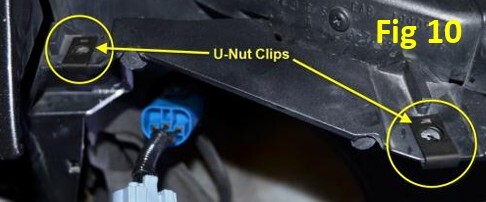
18. Install (2) U-Nut clips into the upper flange of the header. They will lock into the holes in the header panel.
19. Attach the harness adapter to the headlight. Connect the (3) connectors to the headlight assembly and place into the trimmed out header. The upper flanges on the headlights will be on top of the header panel. Install the (2) screws removed earlier to retain the lower flange.
20. Install (2) ¼”-20 x ¾” Button Head Cap Screws (or equivalent) fasteners with ¼” fender washers through the upper headlight flanges into the u-nut clips.
21. Repeat steps 4-20 on the other side.
22. Adjust the bumper back to the original position and tighten the bolts.
23. Reinstall the grille by snapping the lower clips into the header panel. Install the (4) screws and tighten.
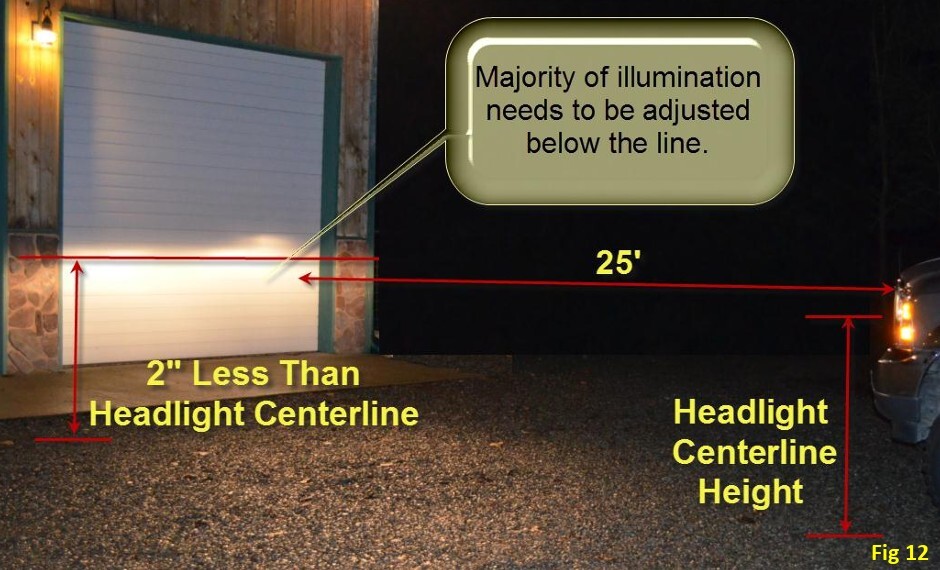
24. Adjust the headlights by performing the following adjustment procedures.
- Park on a level surface 25’ away from a vertical wall or door.
- Measure the height to the center of the headlight.
- On the wall or door, mark a horizontal line 2” lower than the headlight centerline height.
- Turn the headlights on and adjust the height of the beams to be just below the line on the wall.
- This will set your headlights to a position that will keep the beams out of oncoming traffic. You may find they need to adjust them differently to your liking.
Special Thanks to Ken (Woodnthings on FTE) for pictures and instructions.


