 - It’s easier than you’d think")
Rebuilding The 7.3L Injection Pressure Regulator (IPR) - It’s easier than you’d think
Oct 9th 2025
The HEUI system on the 7.3L Powerstroke uses high-pressure oil for the fuel injection event. We won’t fully go into the system’s specifics here, but good clean oil is very important to its operation. That being said, we’d like to address one of the most frequently replaced parts on the system: the Injection Pressure Regulator (IPR). The IPR controls how much oil is actually sent from the HPOP to the injectors. The thing is, even though it’s such a commonly replaced part, IPR’s don’t generally fail all that often. It has a bunch of small passageways, which can easily clog up with oil contaminants. So odds are the mass majority of those that were replaced due to an assumed failure were just contaminated. A good cleaning is all they really needed to work as intended again. Cleaning out the contamination is an easy process that anyone with even the slightest bit of mechanical ability can take care of. Here’s that easy process from step one to done. We hope it saves you from an unnecessary IPR purchase in the future!
IPR Reseal Kit can be found here: https://www.riffraffdiesel.com/ipr-complete-re-seal-kit/
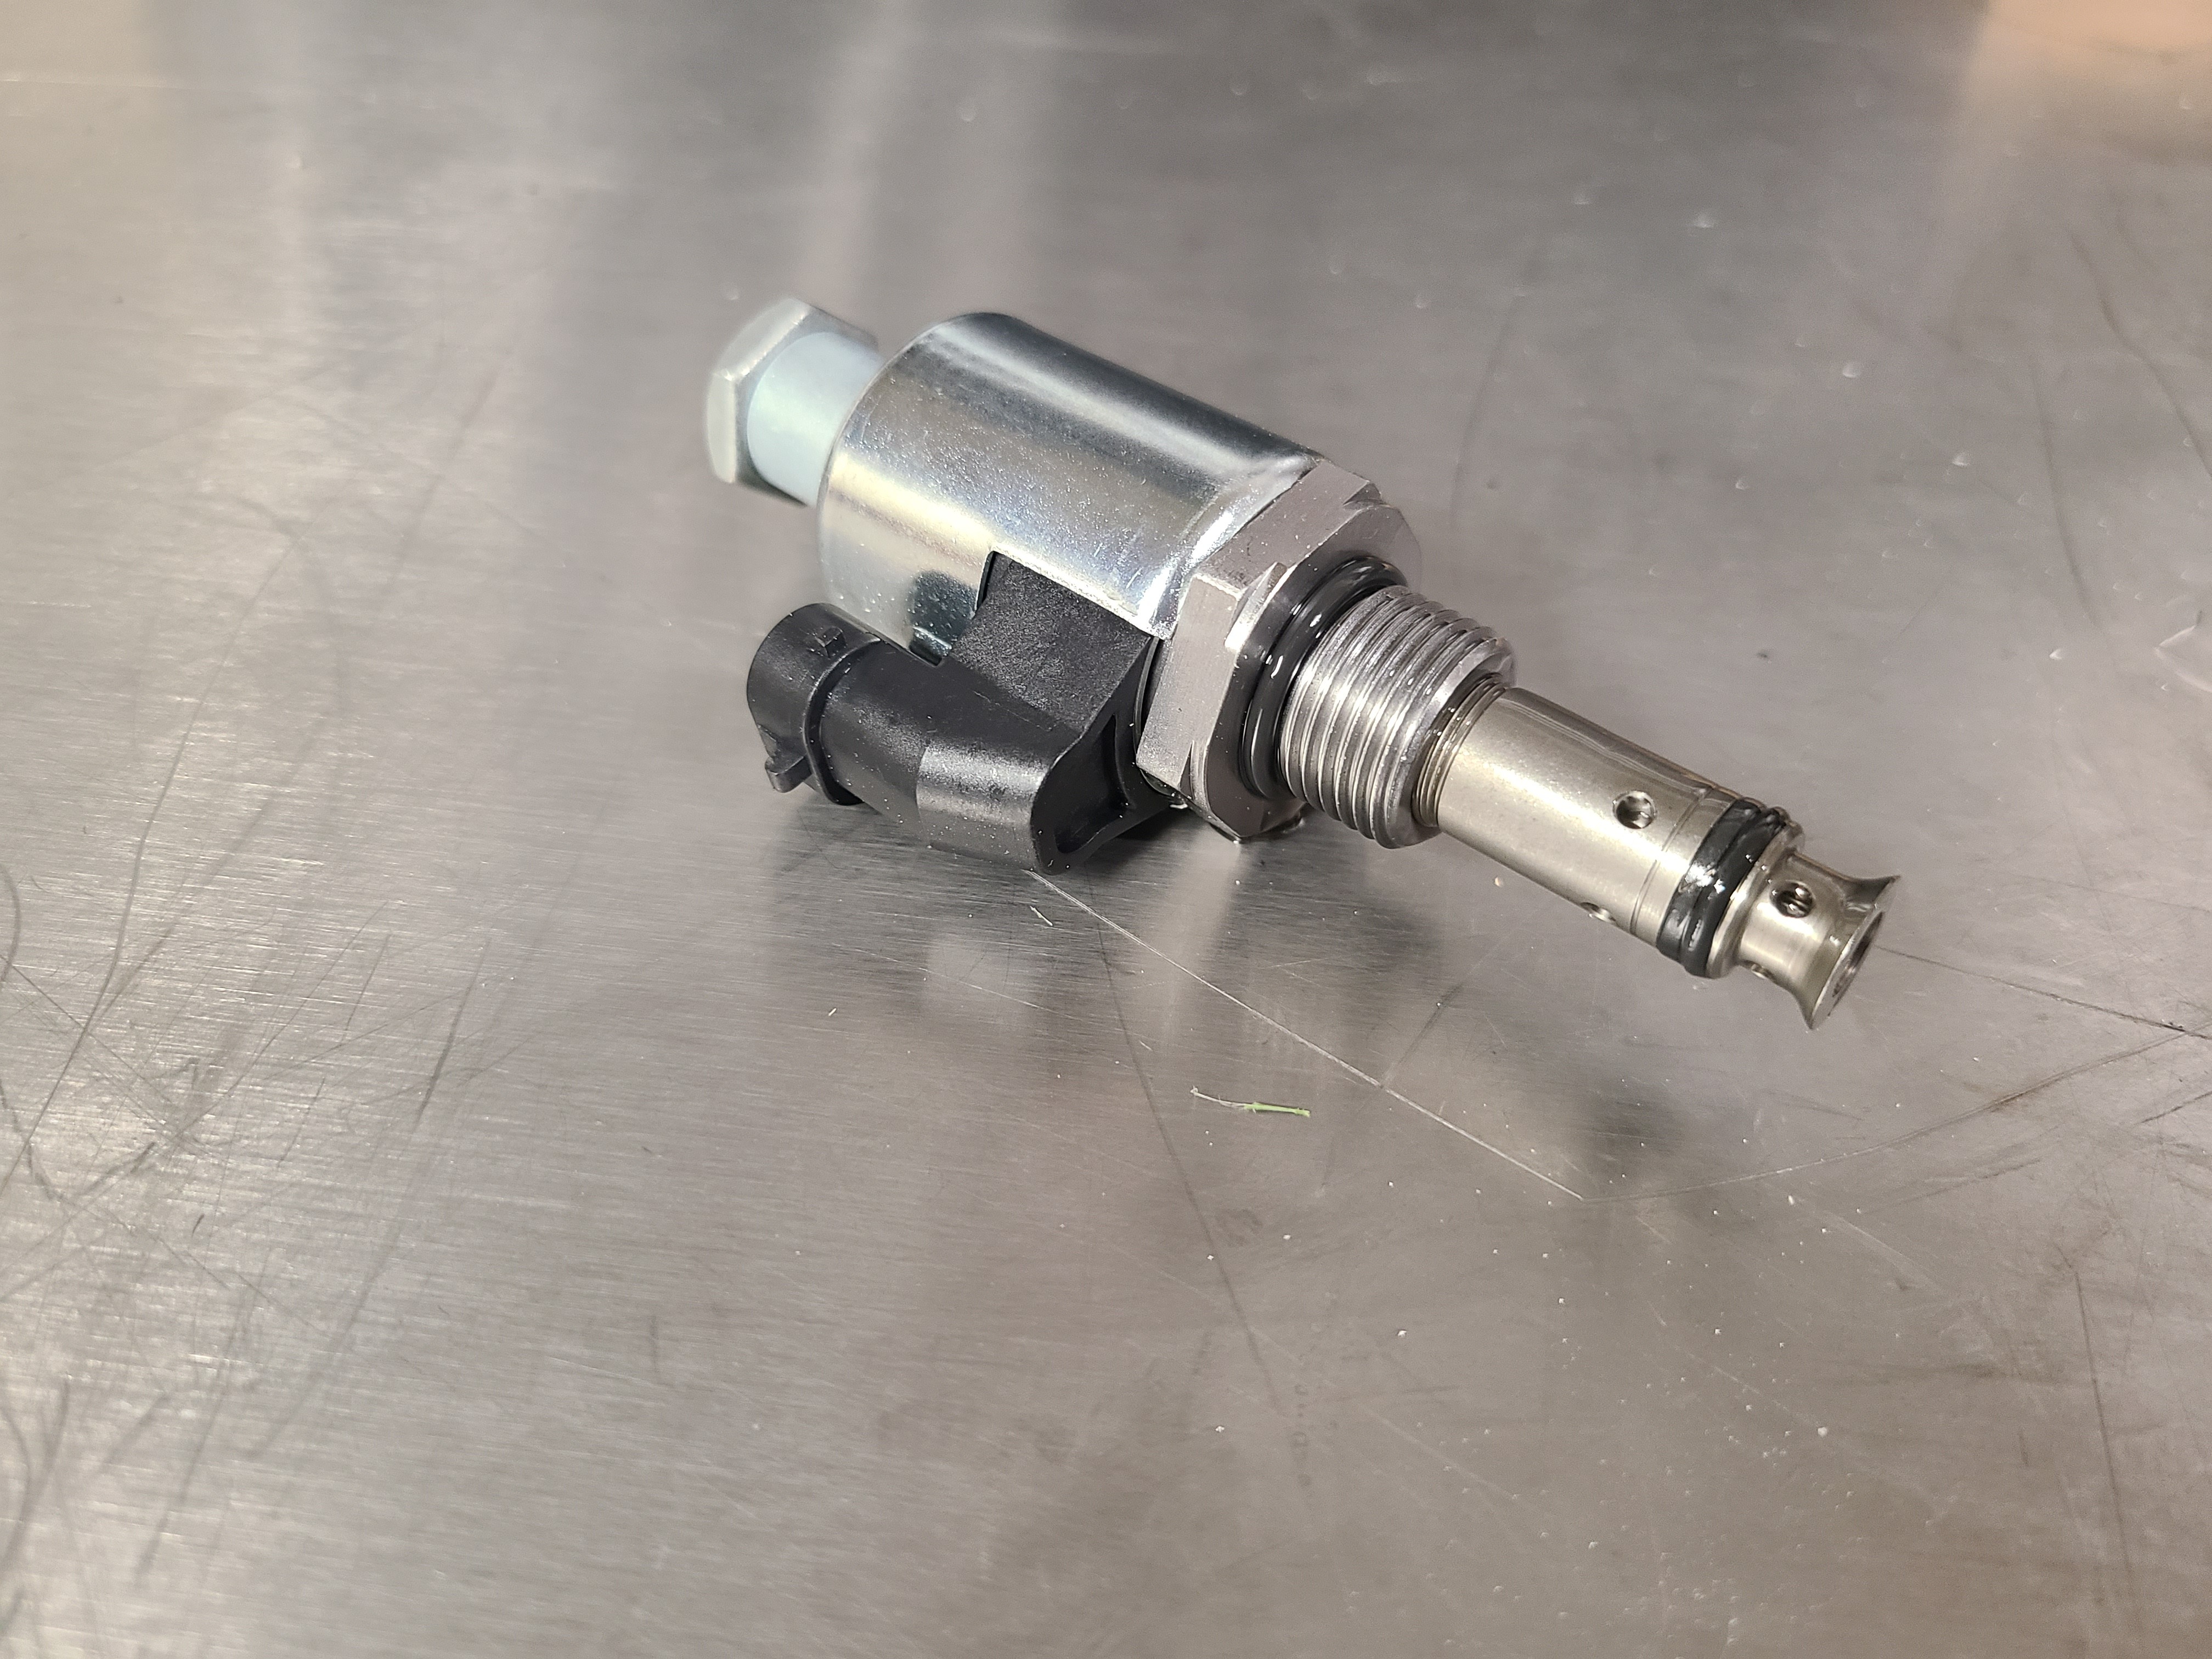
1. Once the IPR has been removed from the engine, give it a thorough external cleaning. Any caked-on oil/dirt/debris can add unwanted contamination during the rebuild/cleaning process. Find a good, clean surface to use during the rebuild process.
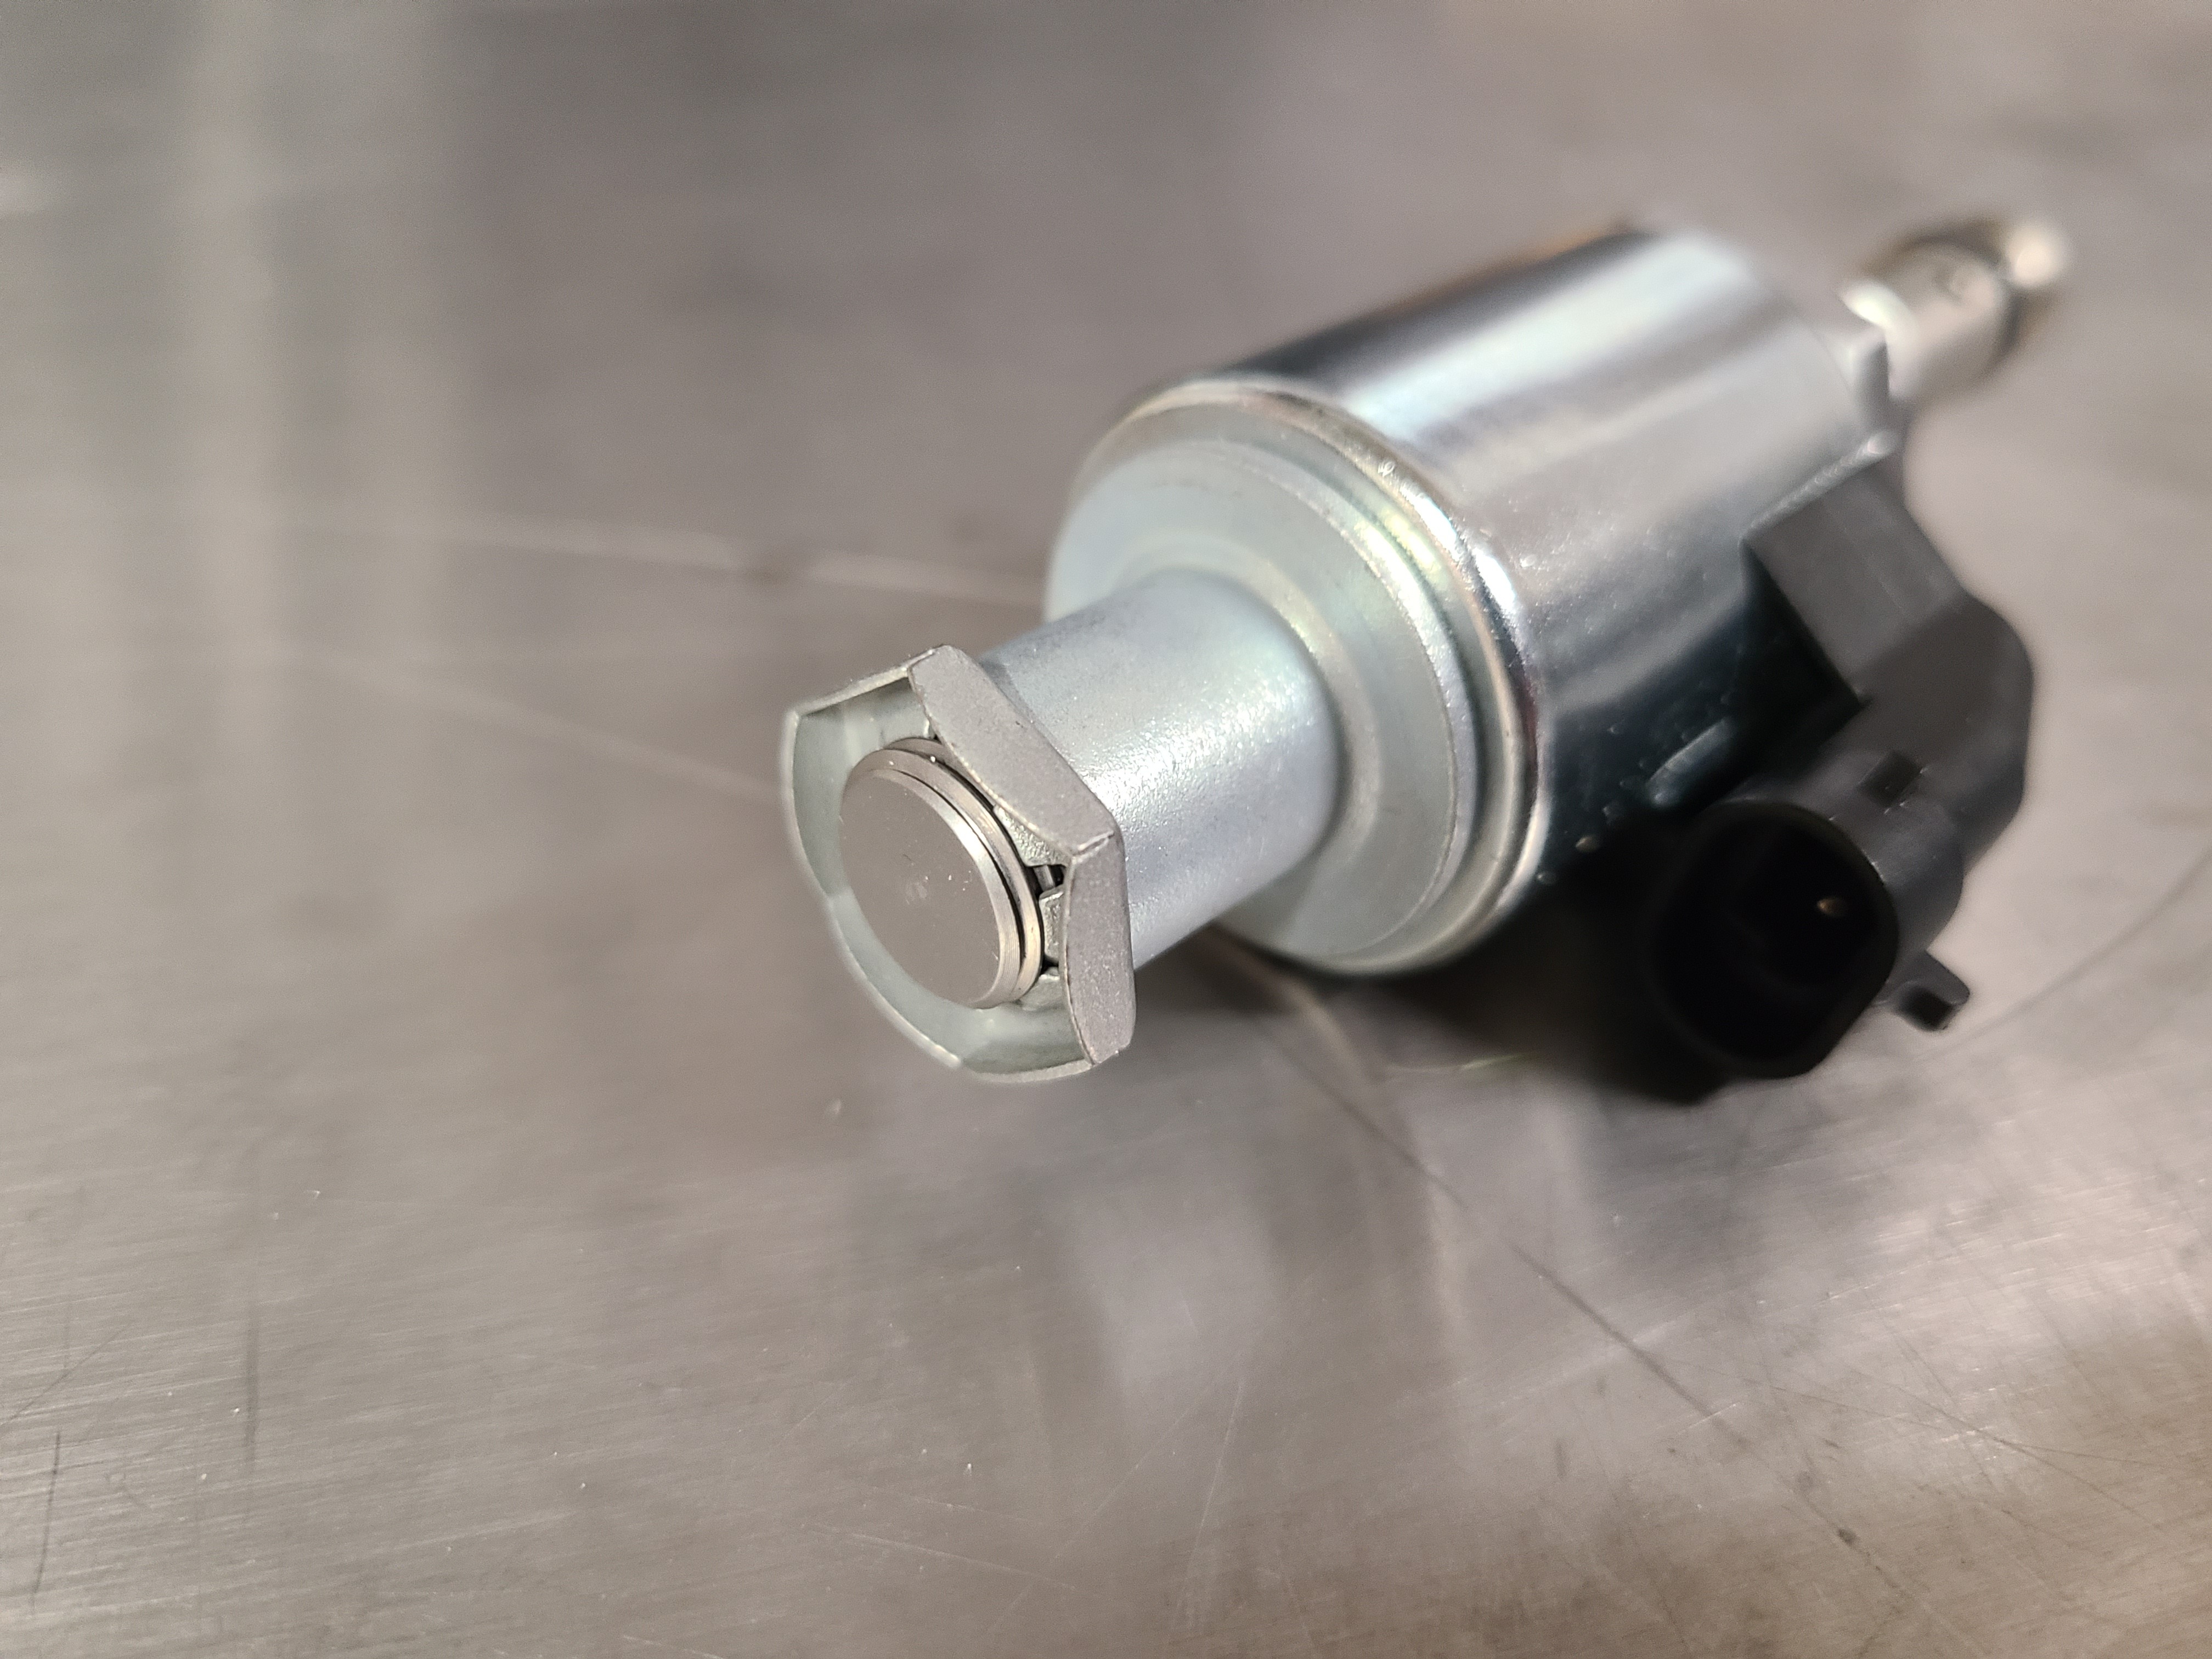
2. Start by removing this tin nut that holds the solenoid body onto the valve body assembly (aka armature post). It’s a ¾” nut. Note: These tin nuts are notorious for falling off on their own if not properly torqued. If you find this nut NOT installed when you went to remove the IPR from the engine, there’s a good chance it not being there contributed to or was the cause of any running issues.
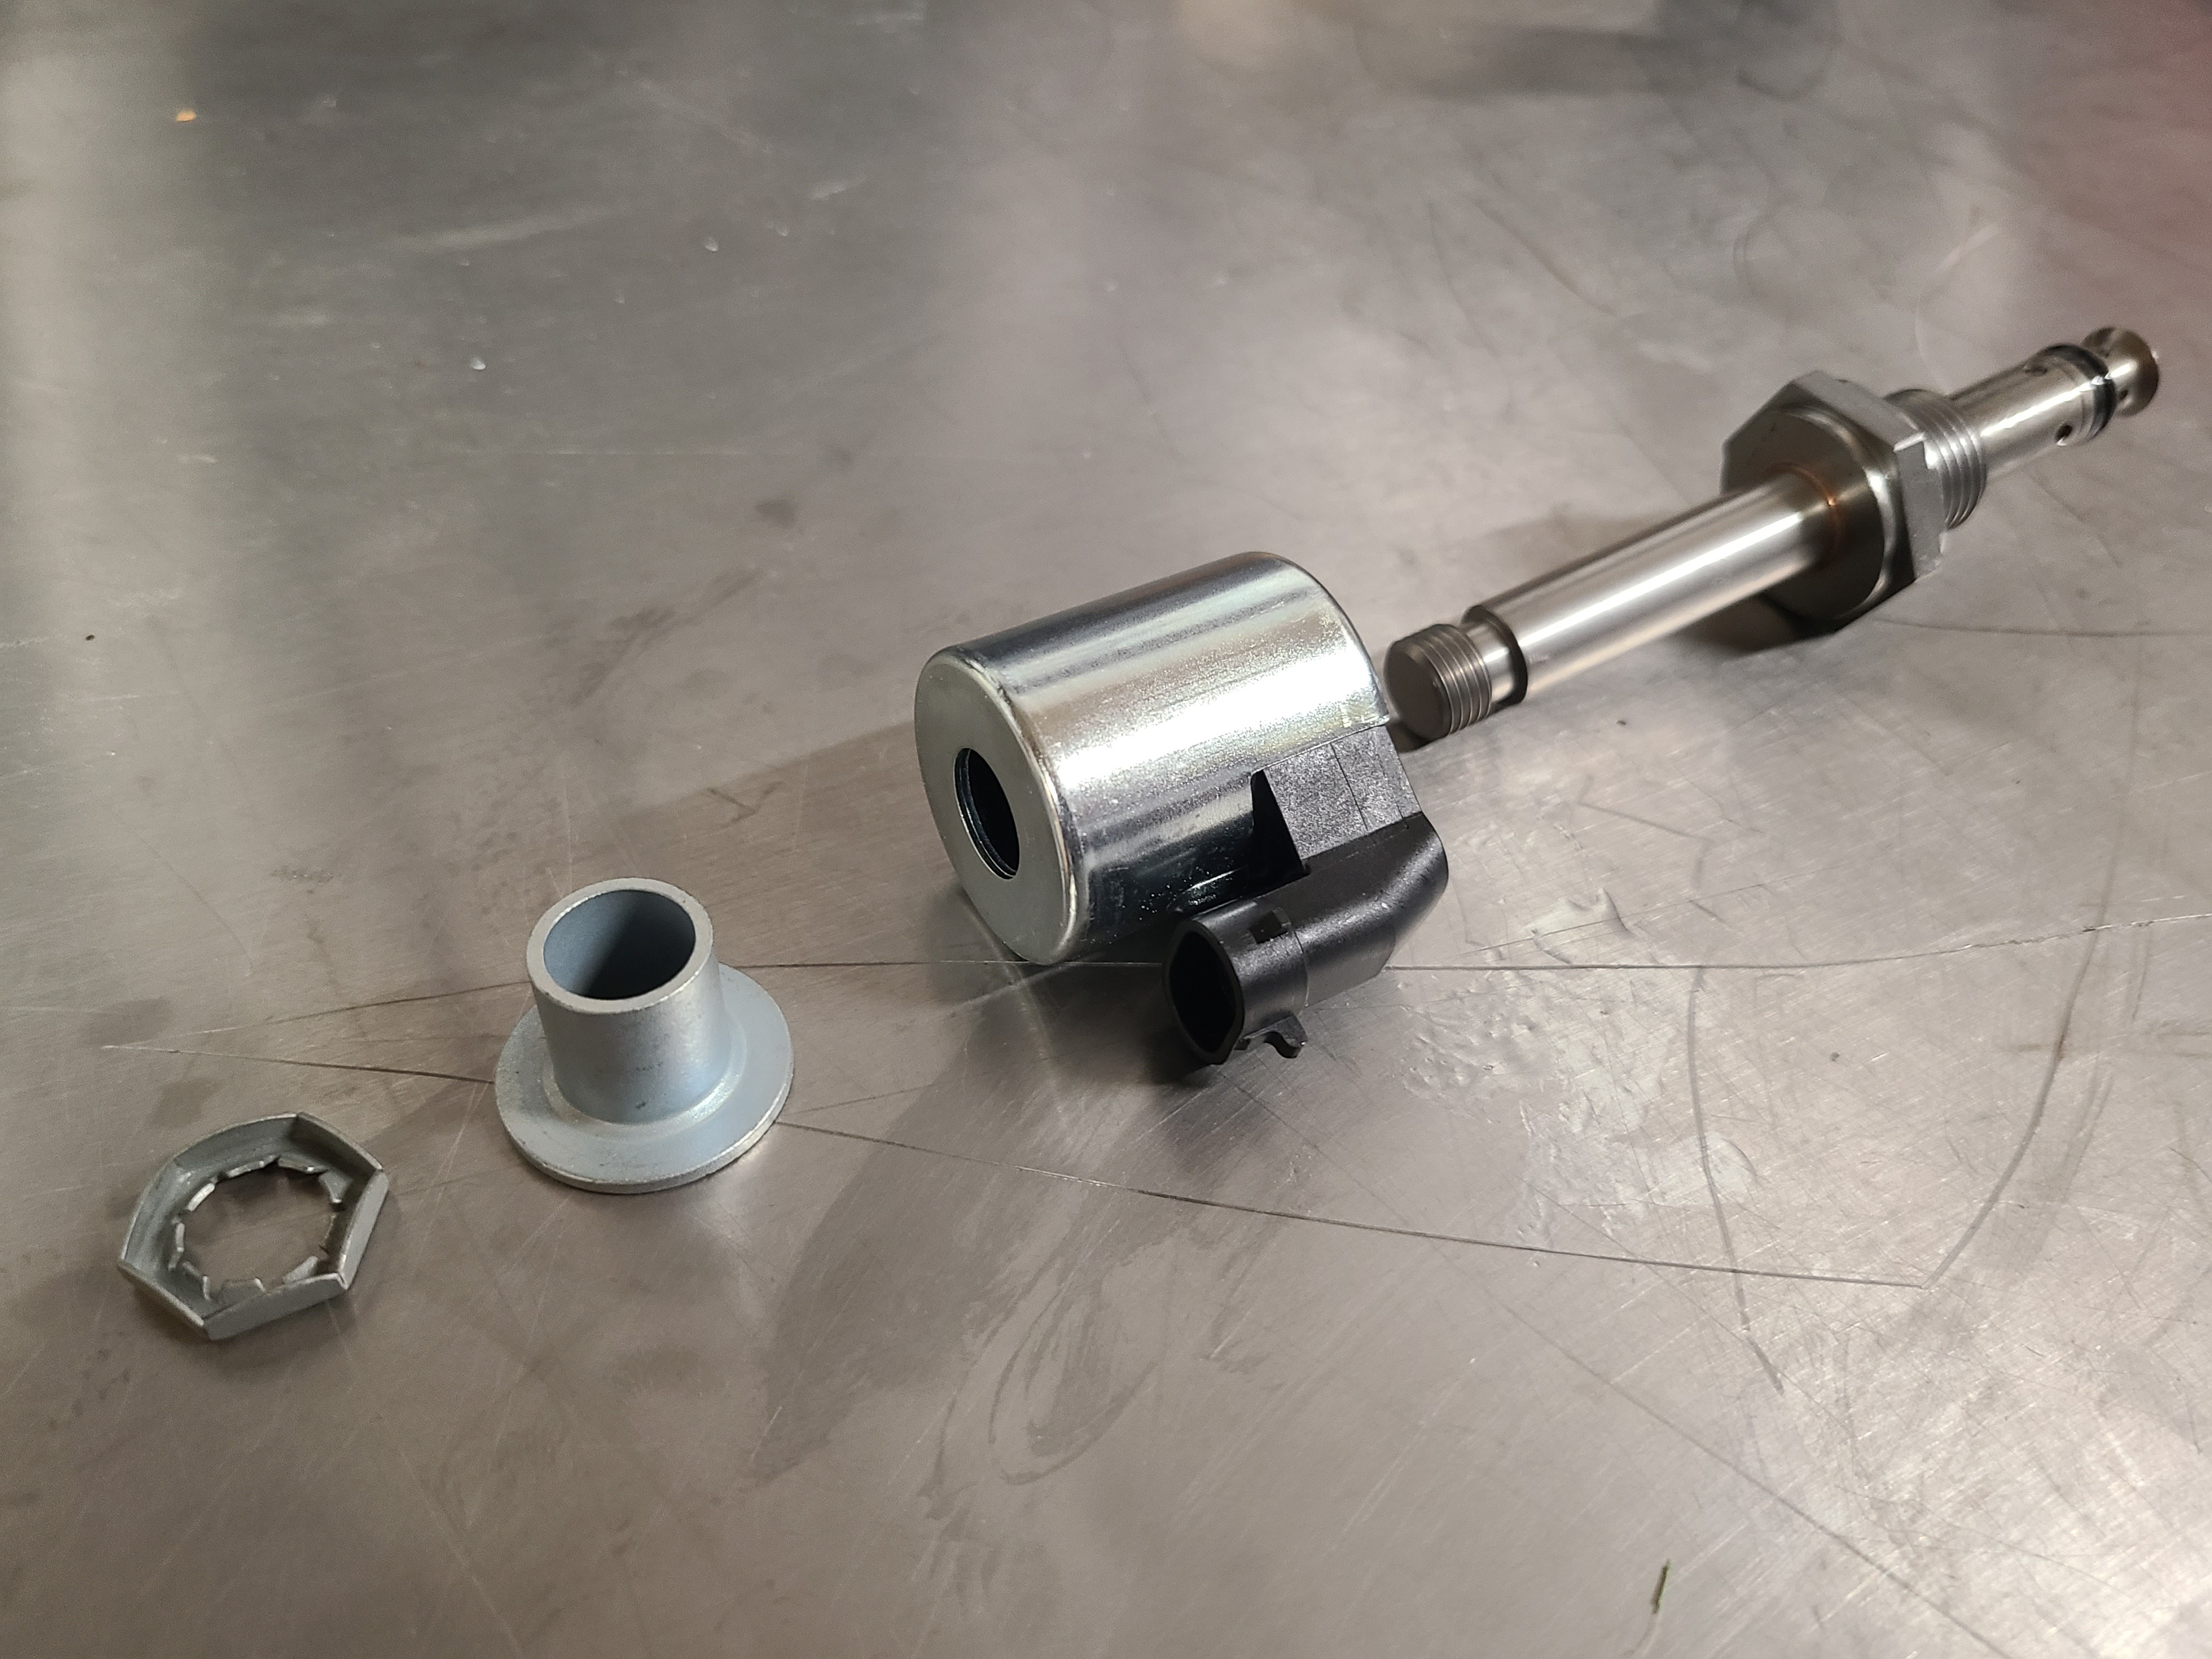
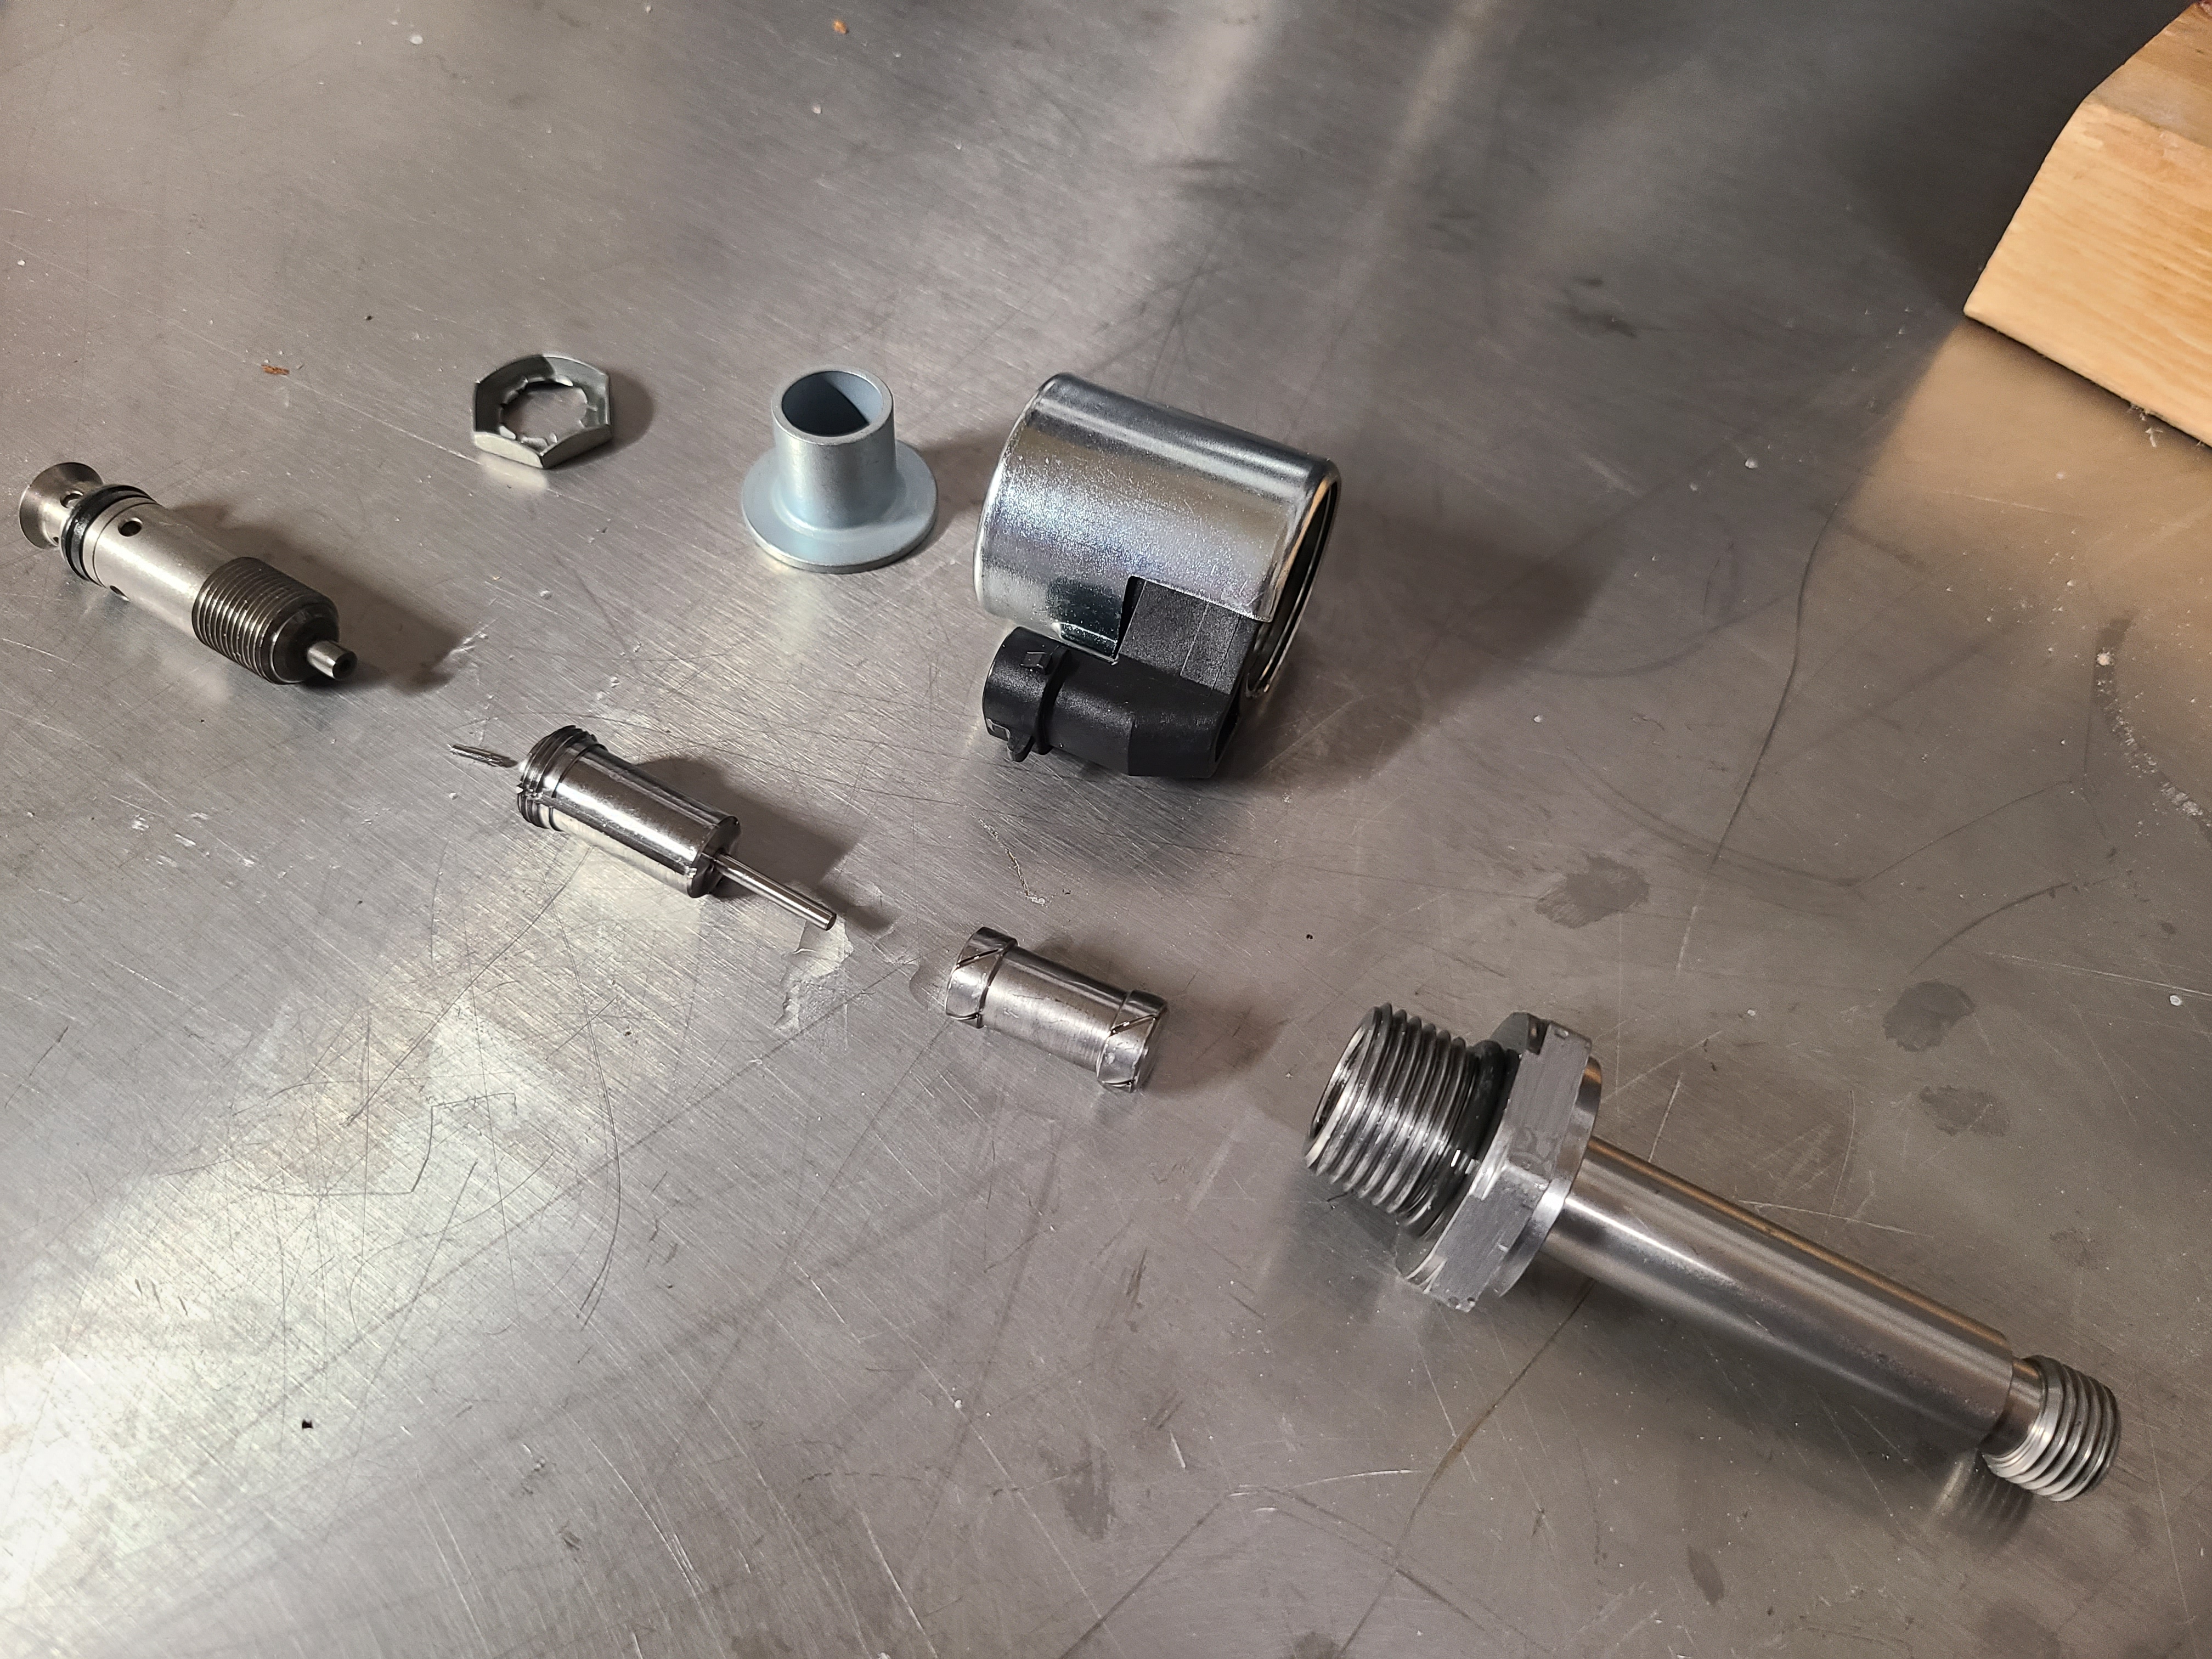
3. Remove the spacer and solenoid body from the armature post and set them aside. These will not be needed until reassembly.
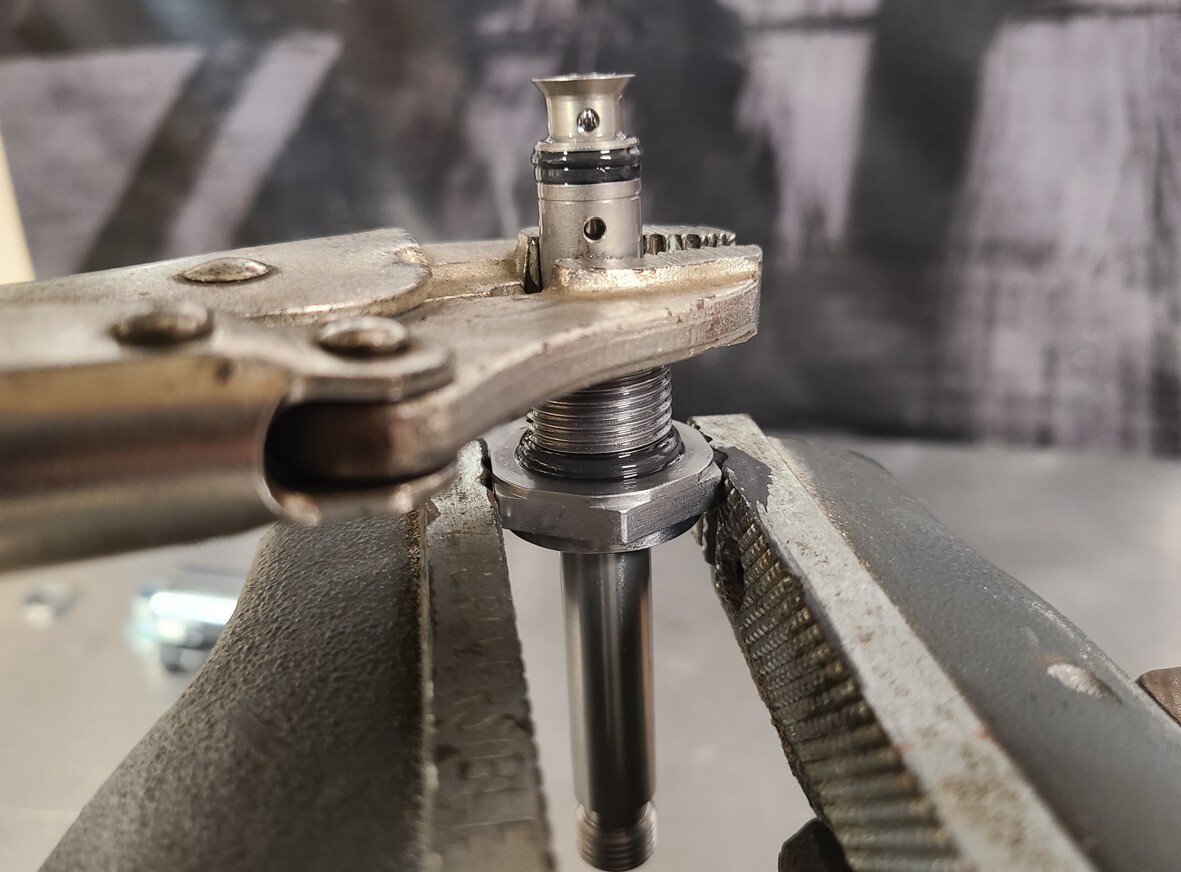
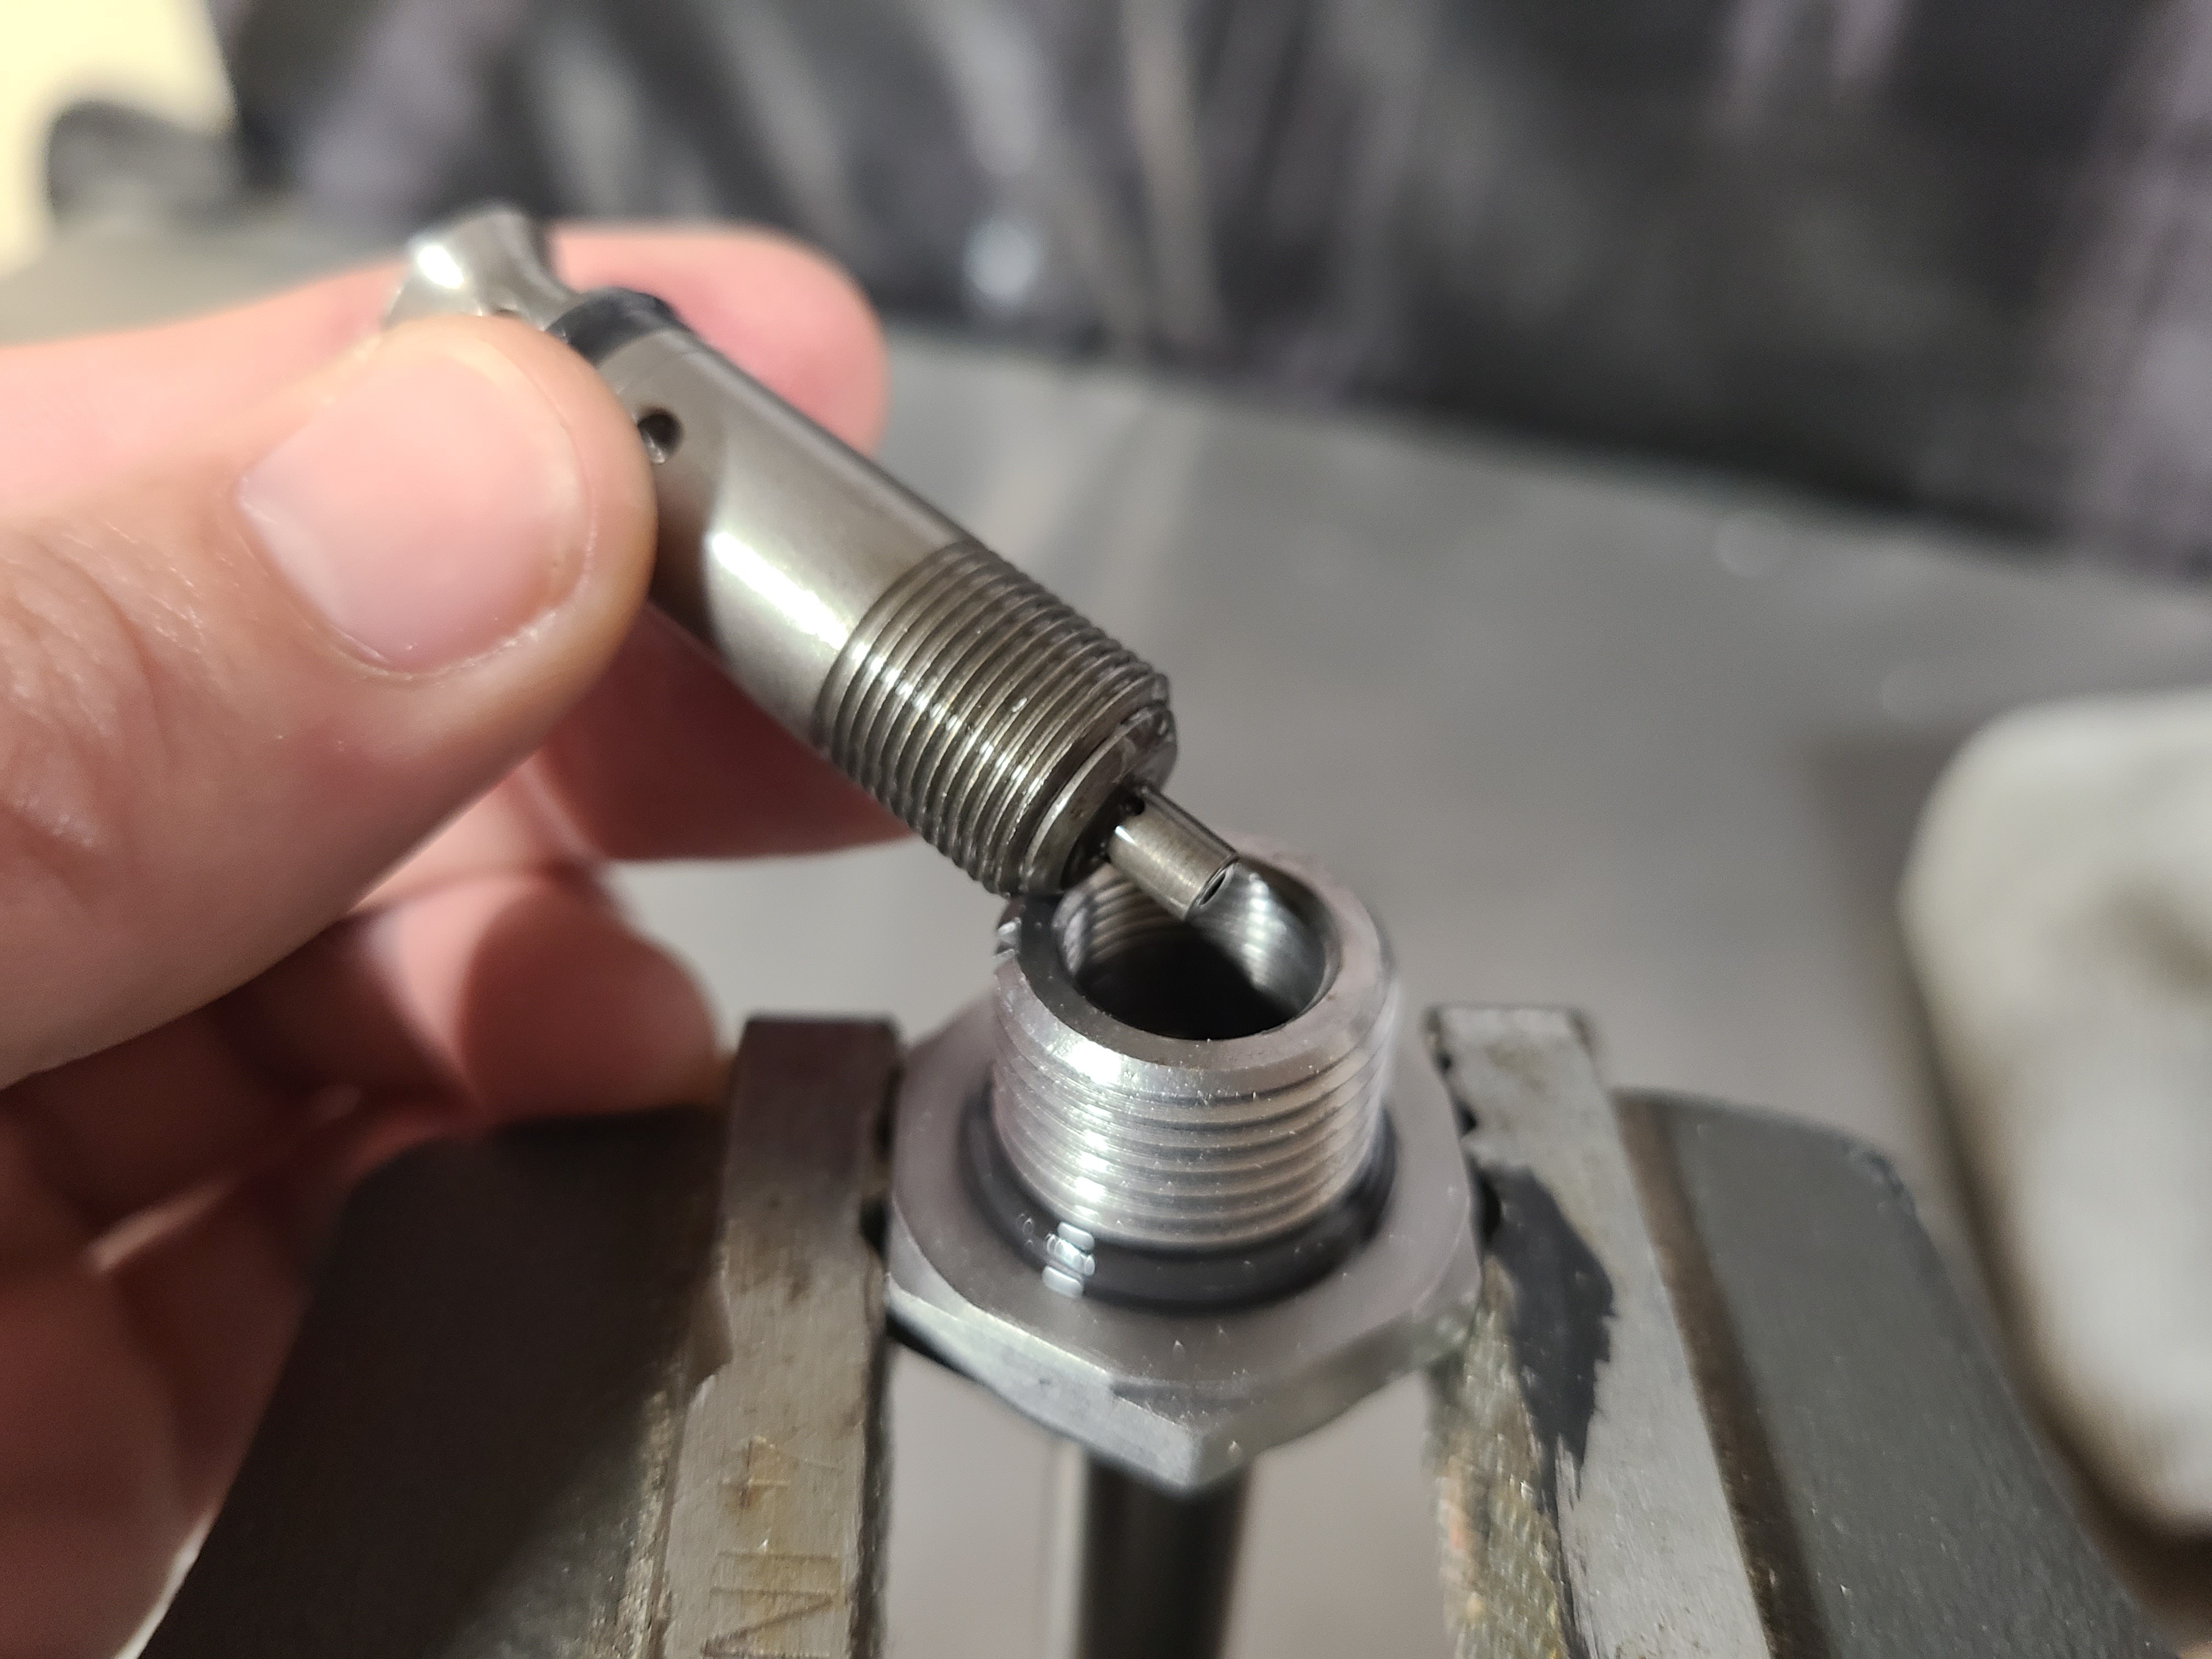
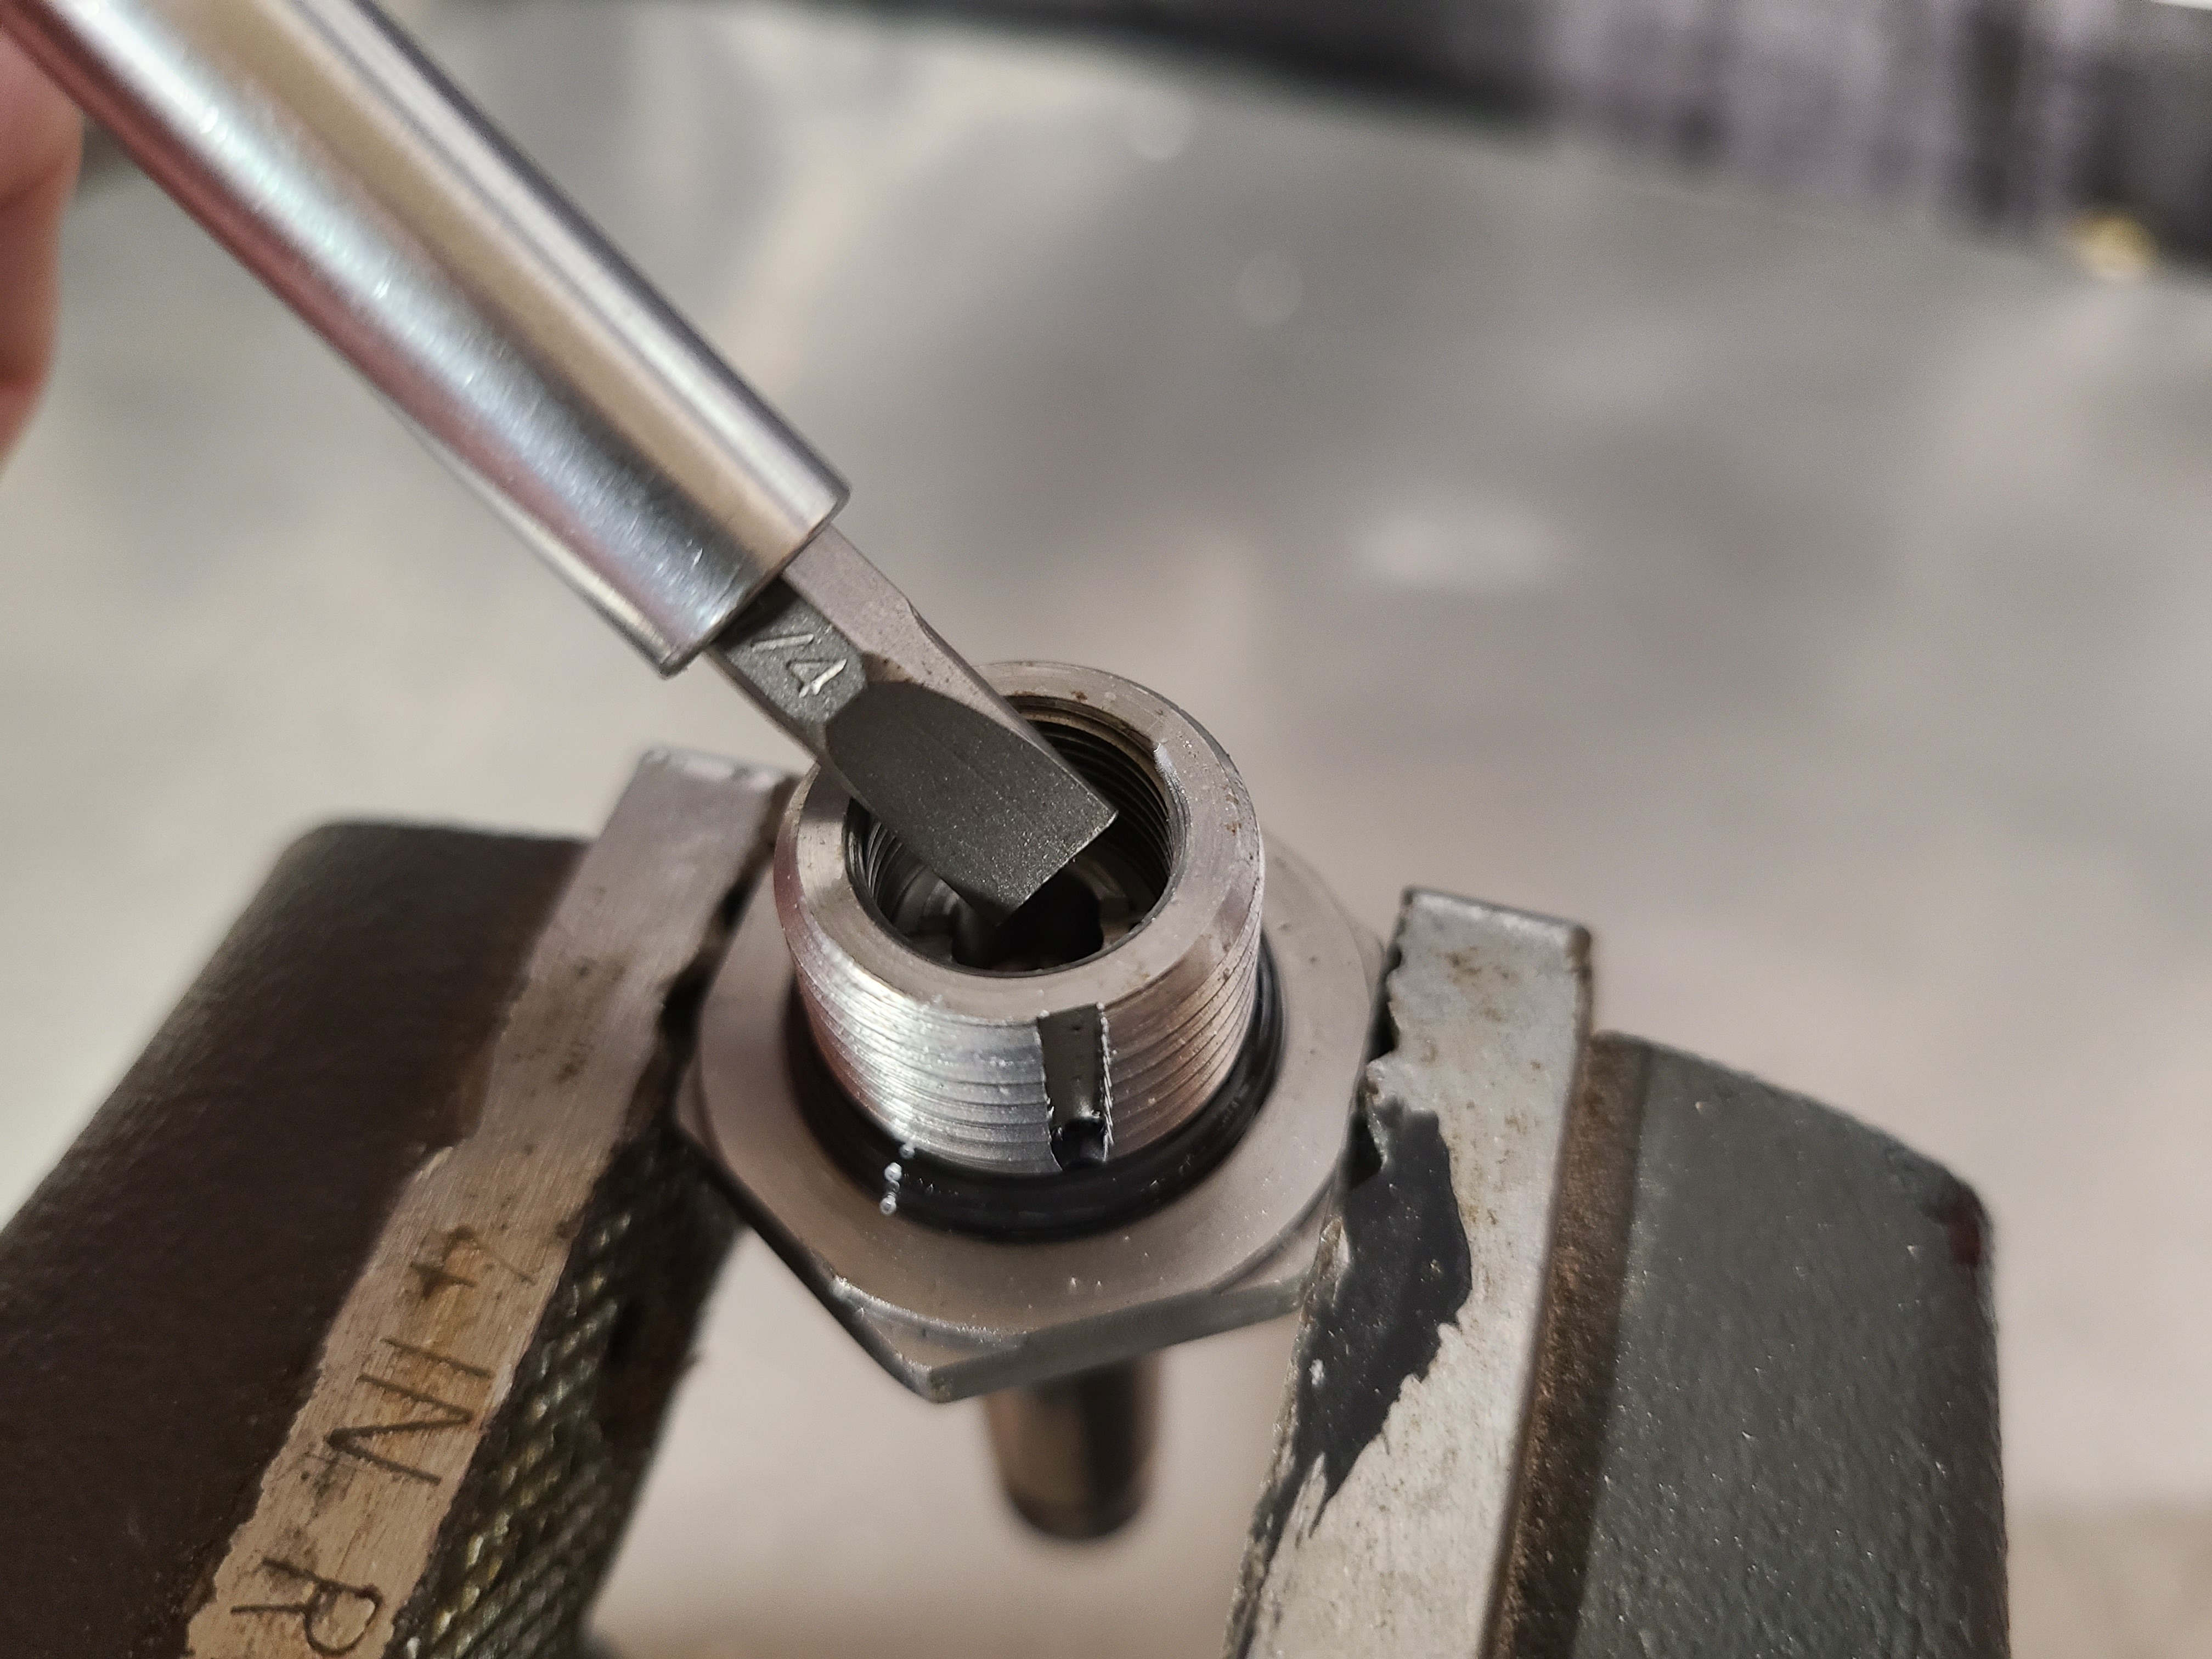
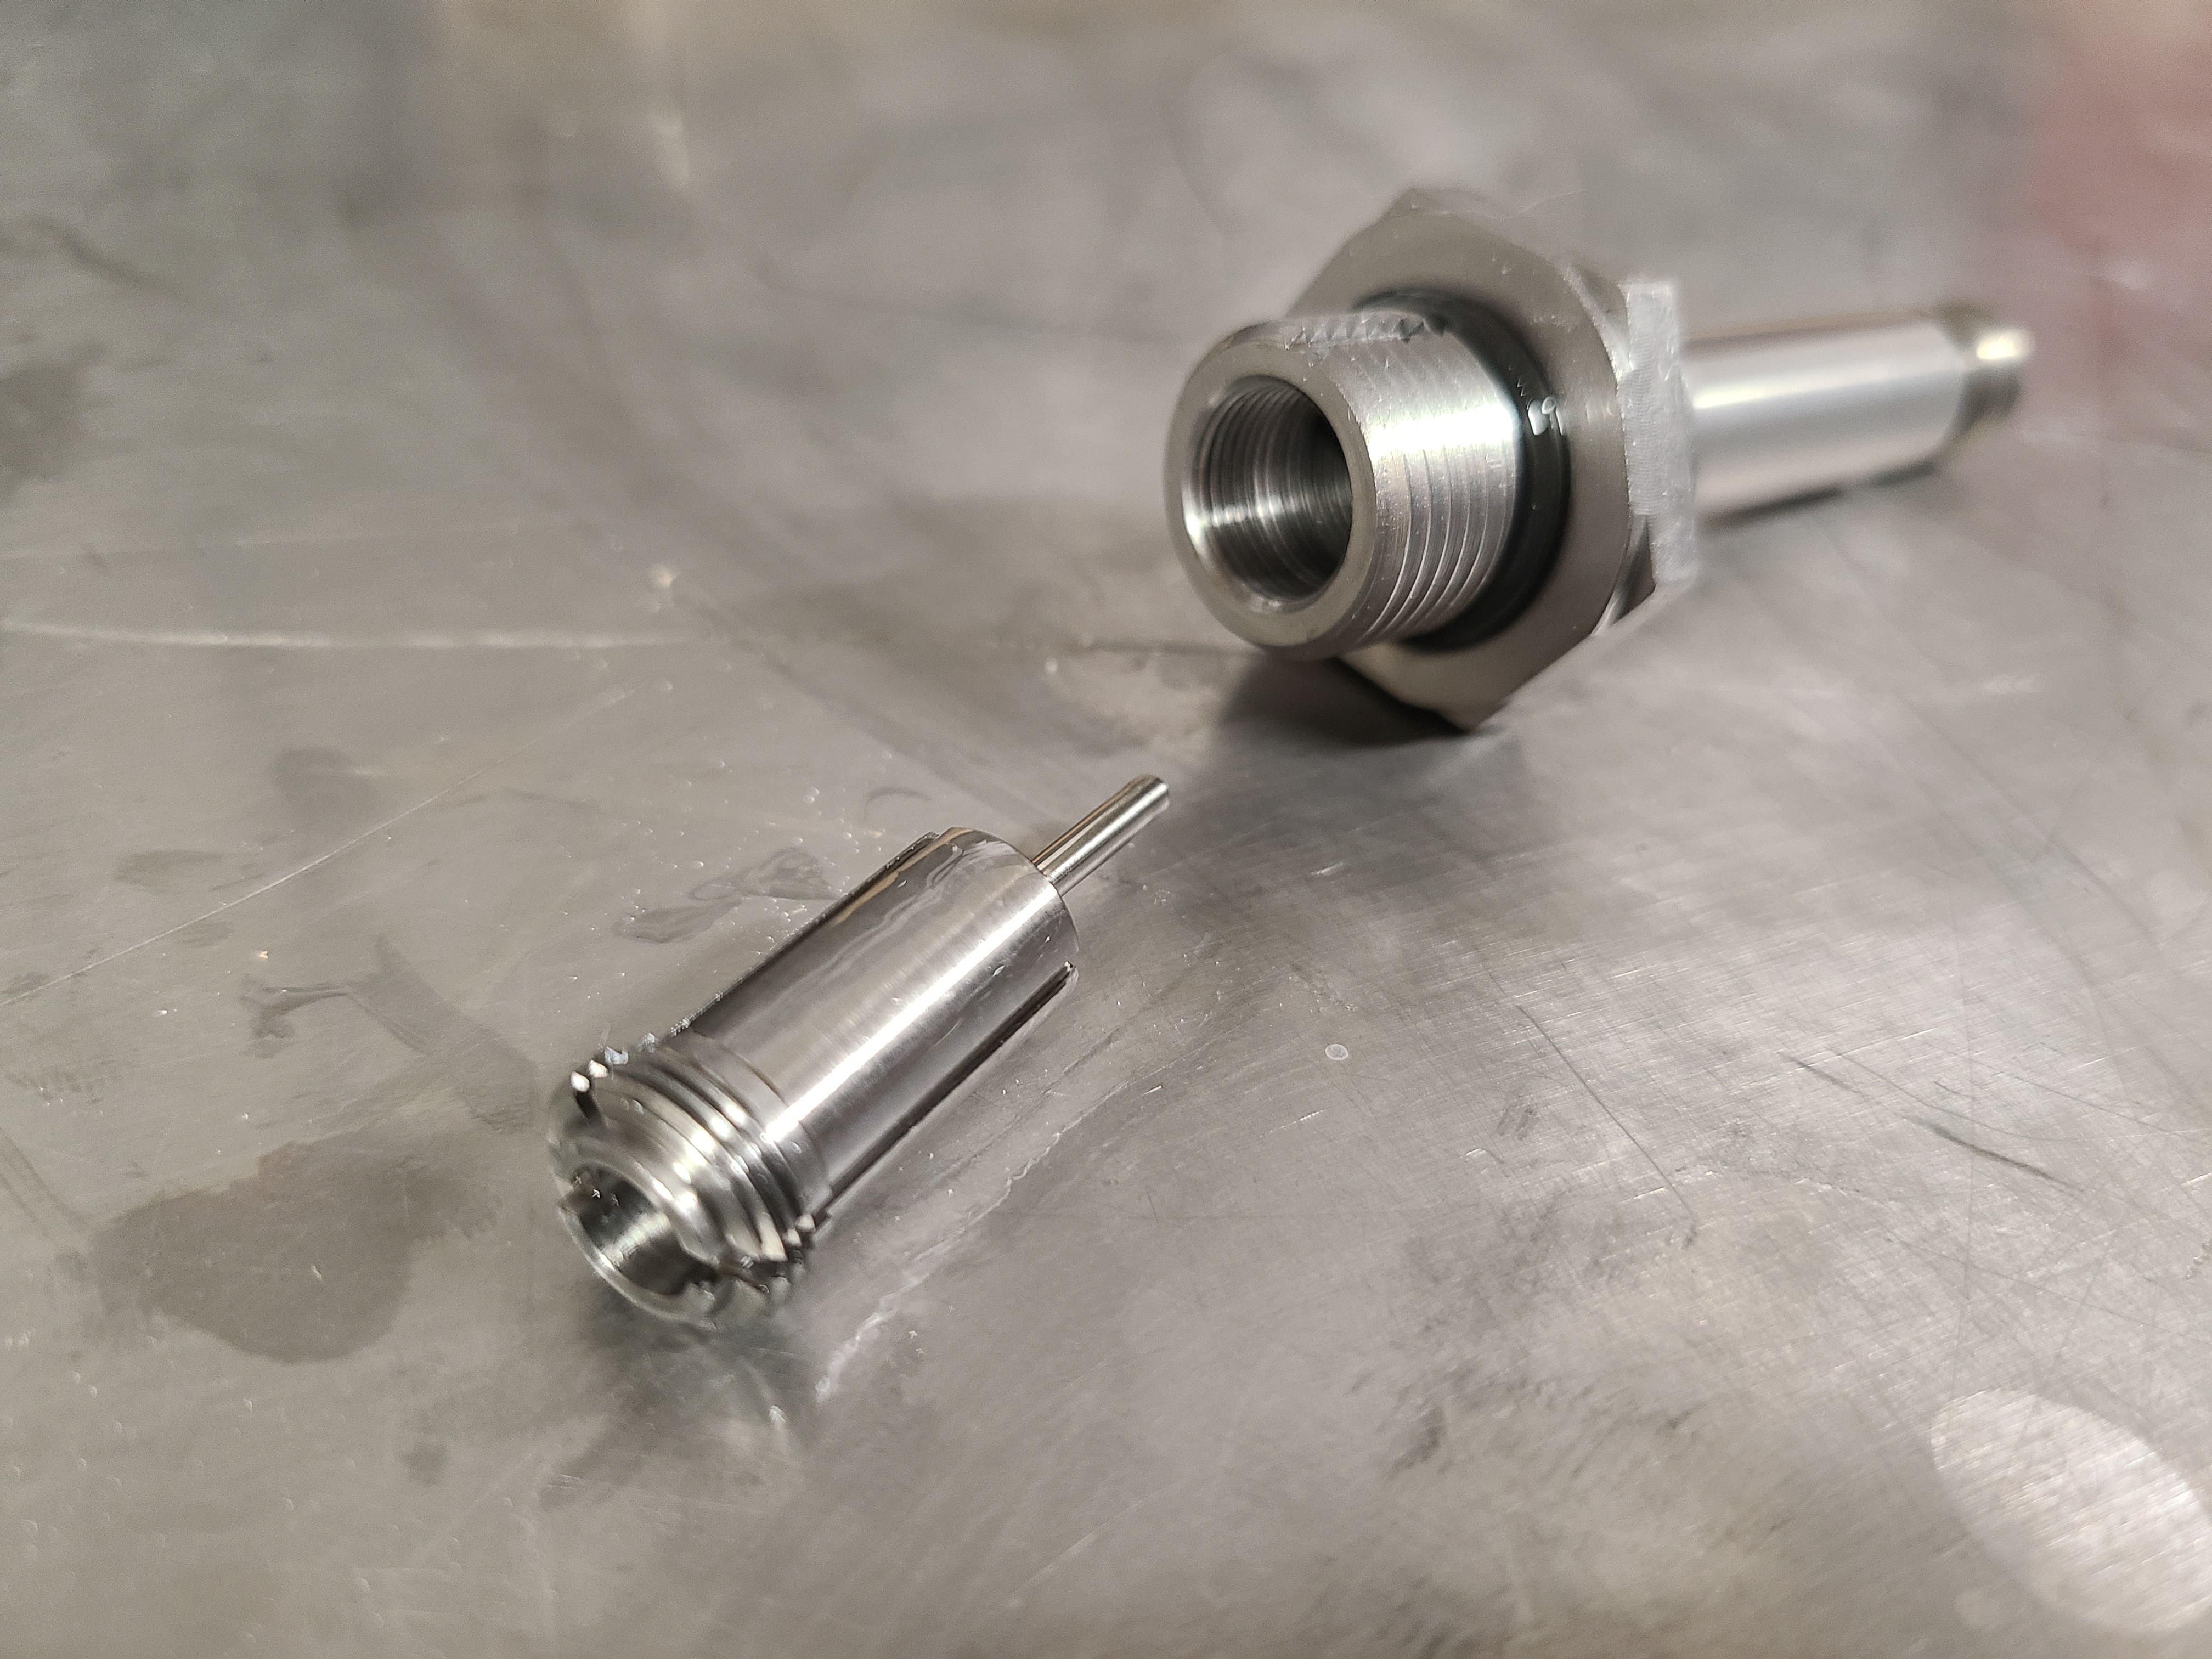
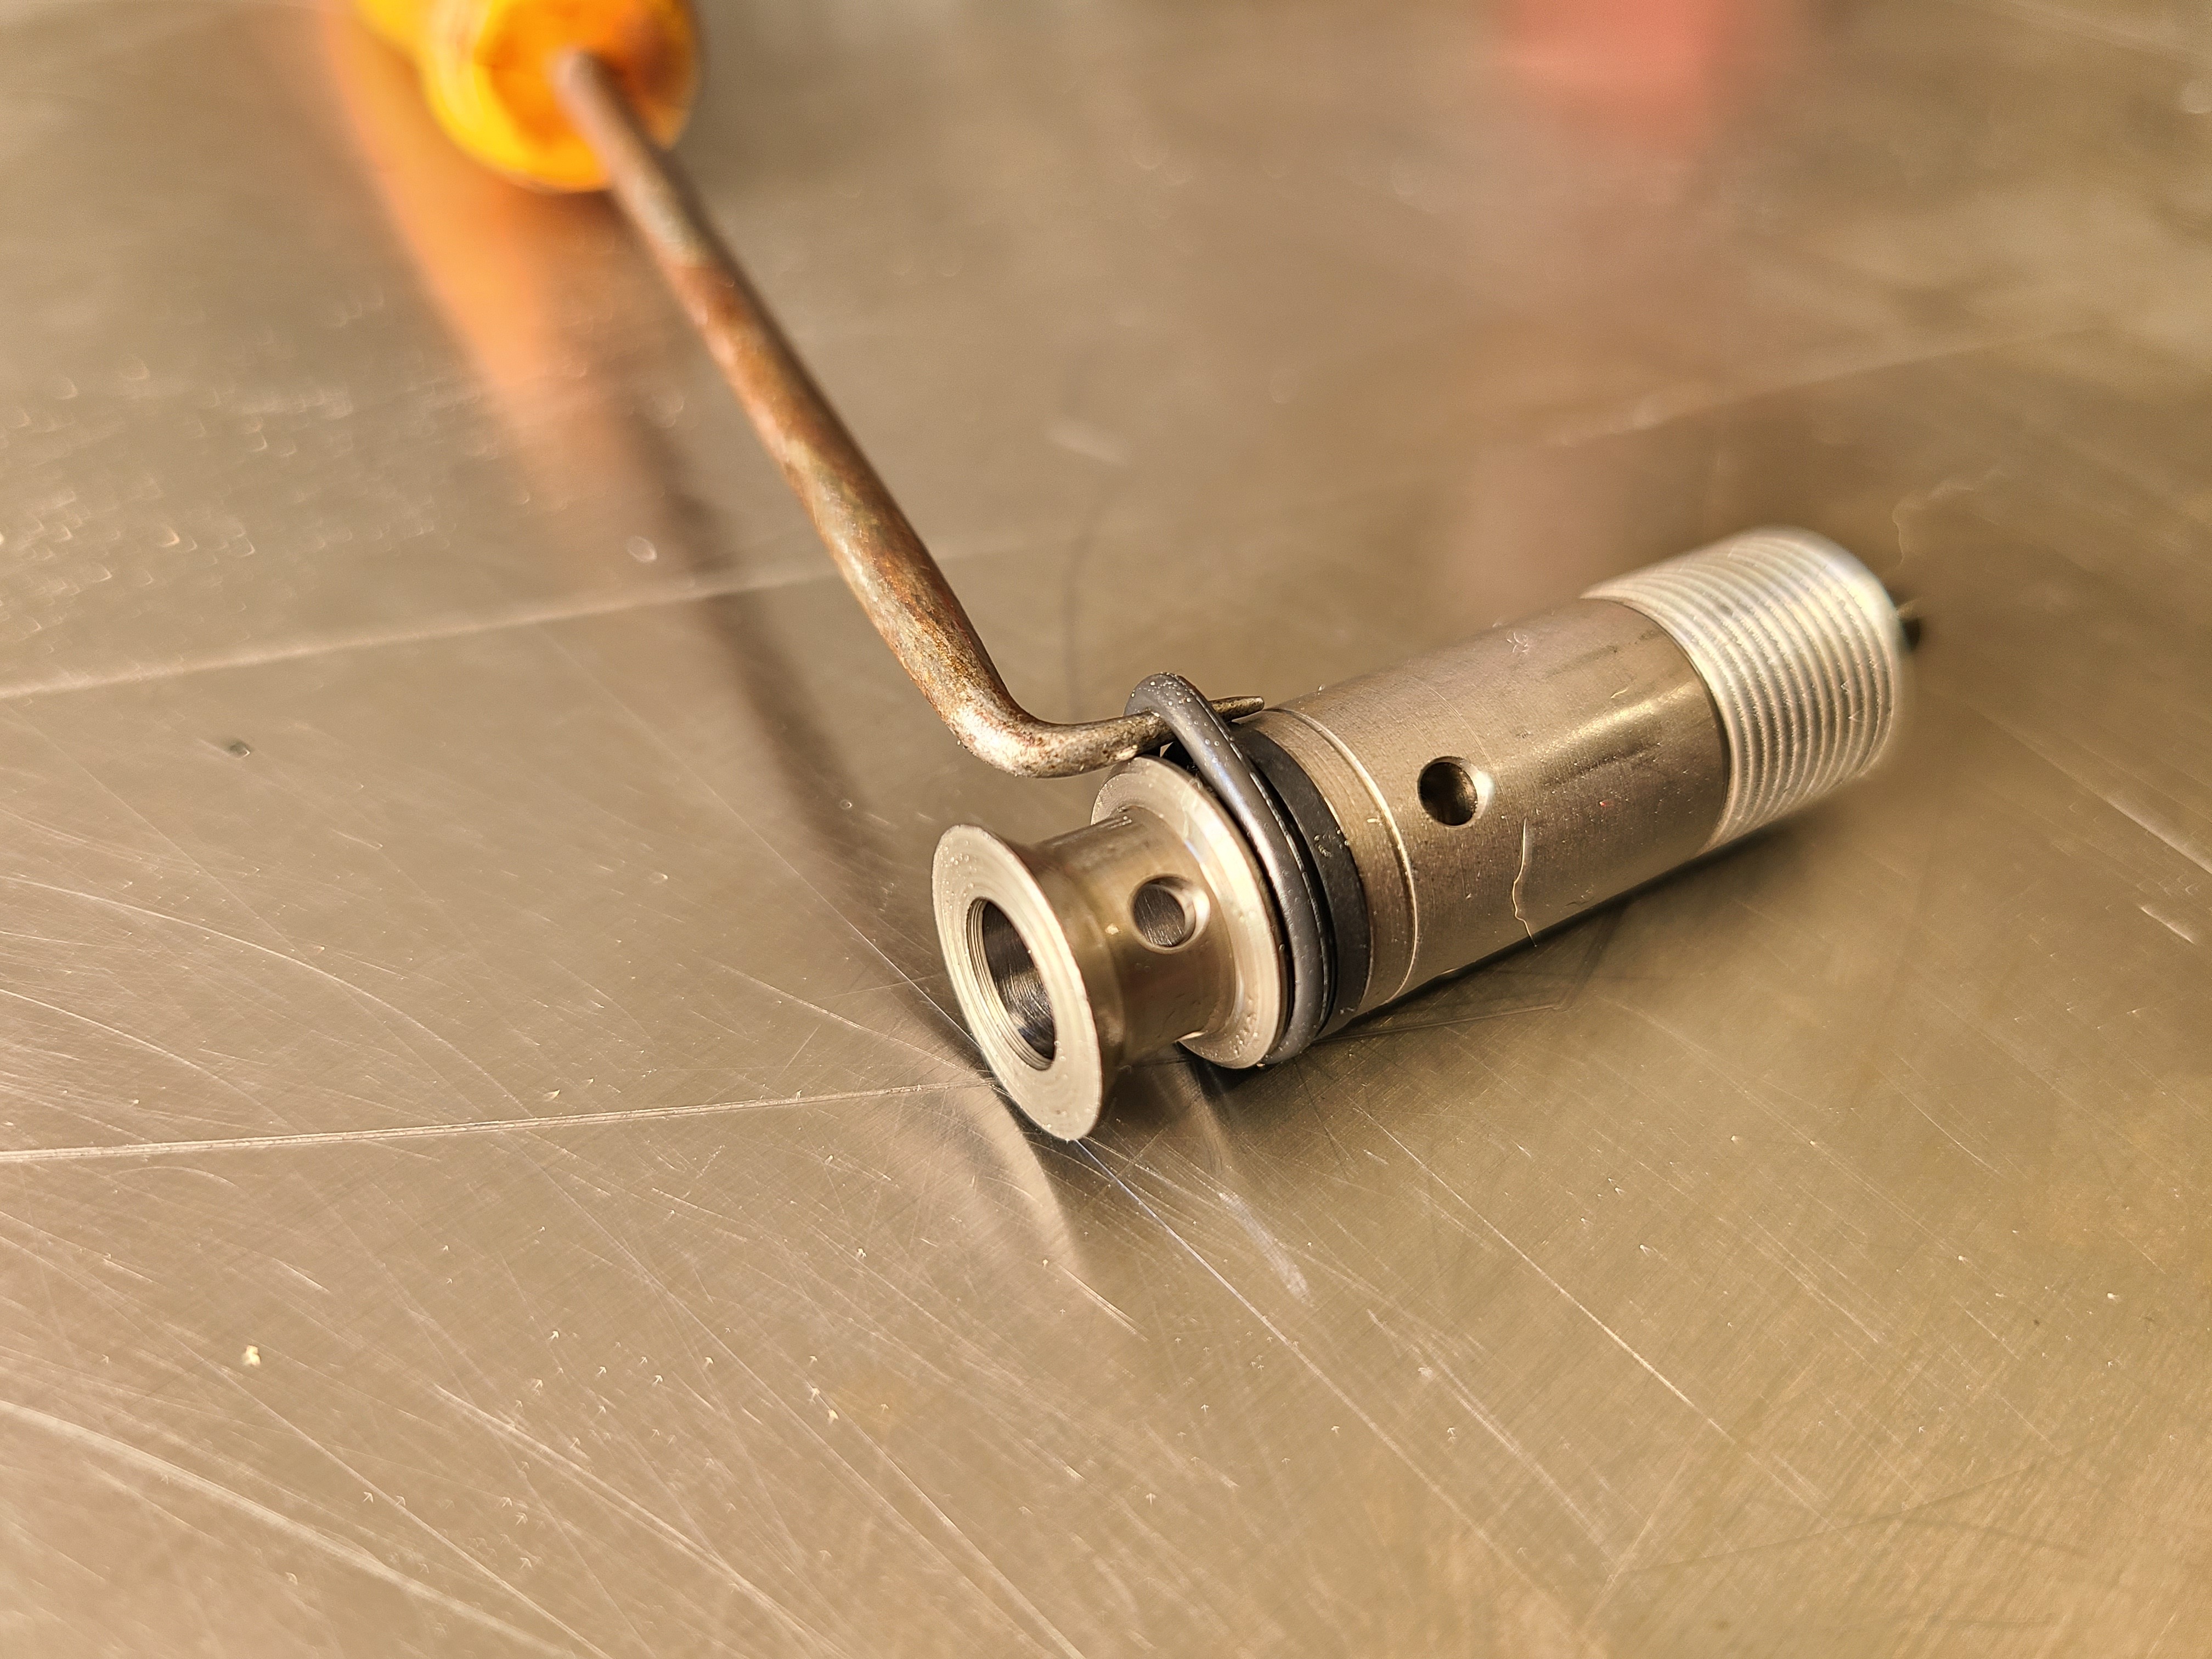
4. Next place the armature post in a vice with the hex head secured by the vice. Using a pair of vice-grip pliers, lightly grip the pilot valve assembly as shown and unthread it. Do not crush or deform this assembly as it will damage the internals. It uses standard right hand threads, the old "lefty-loosey" applies here.
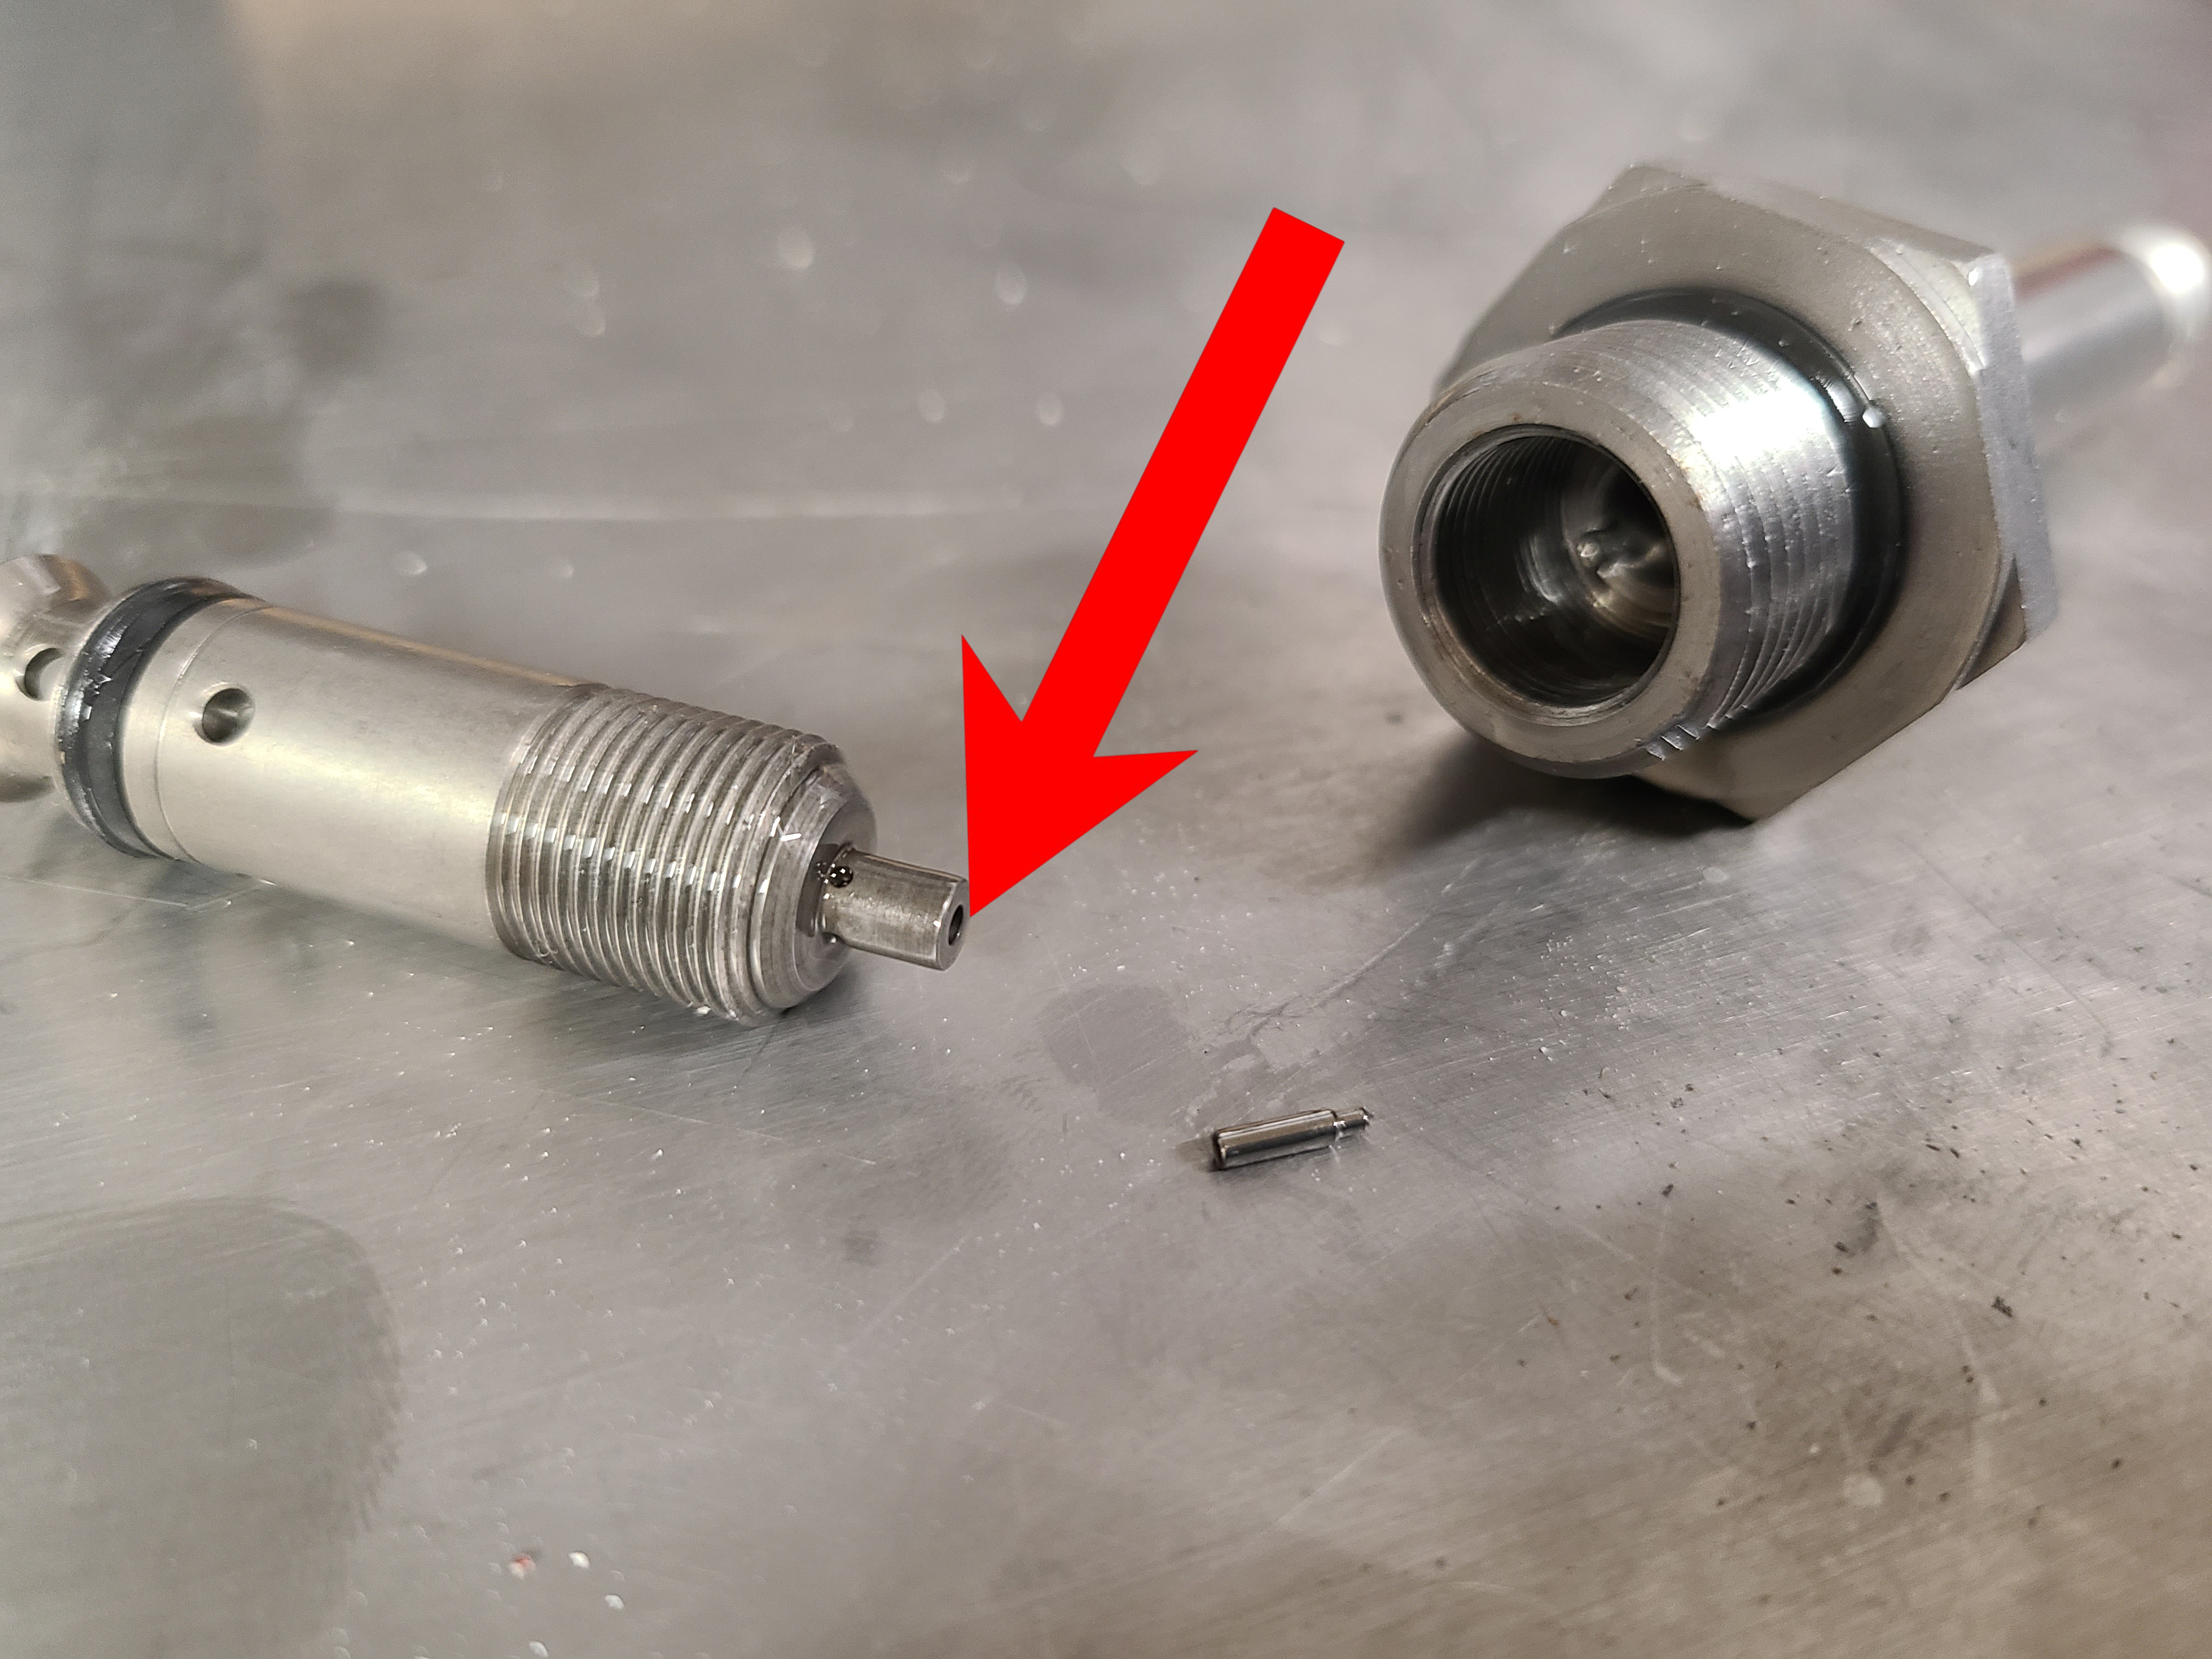
5. With the pilot valve removed, make sure to save this pin (the needle valve). It should be located in the area marked with an arrow. However, oftentimes the needle valve will still be in the armature post. Removing the armature post from the vice and tapping it on the bench may be necessary to remove it. Do not lose the needle valve.
6. If removed from the vice, place the armature post back in the vice. Using a flat-head screwdriver, unthread the plug inside the armature post. It should not be very tight. Set it and the actuator pin inside it, aside.
7. Remove the armature post from the vice and tap it on the bench to remove the piston inside it. This will take several taps as the part has a snug fit.
8. Now for the cleaning. The solenoid, spacer and tin nut are the only things not getting thoroughly cleaned here (it’s ok to clean them, but the commonly contaminated problematic parts are the others). Use whatever you need to, to get these parts clean inside and out. Small pipe cleaners, solvents like carburetor cleaner, or even a sonic cleaning machine. Just make sure not to use anything that could damage any surfaces.
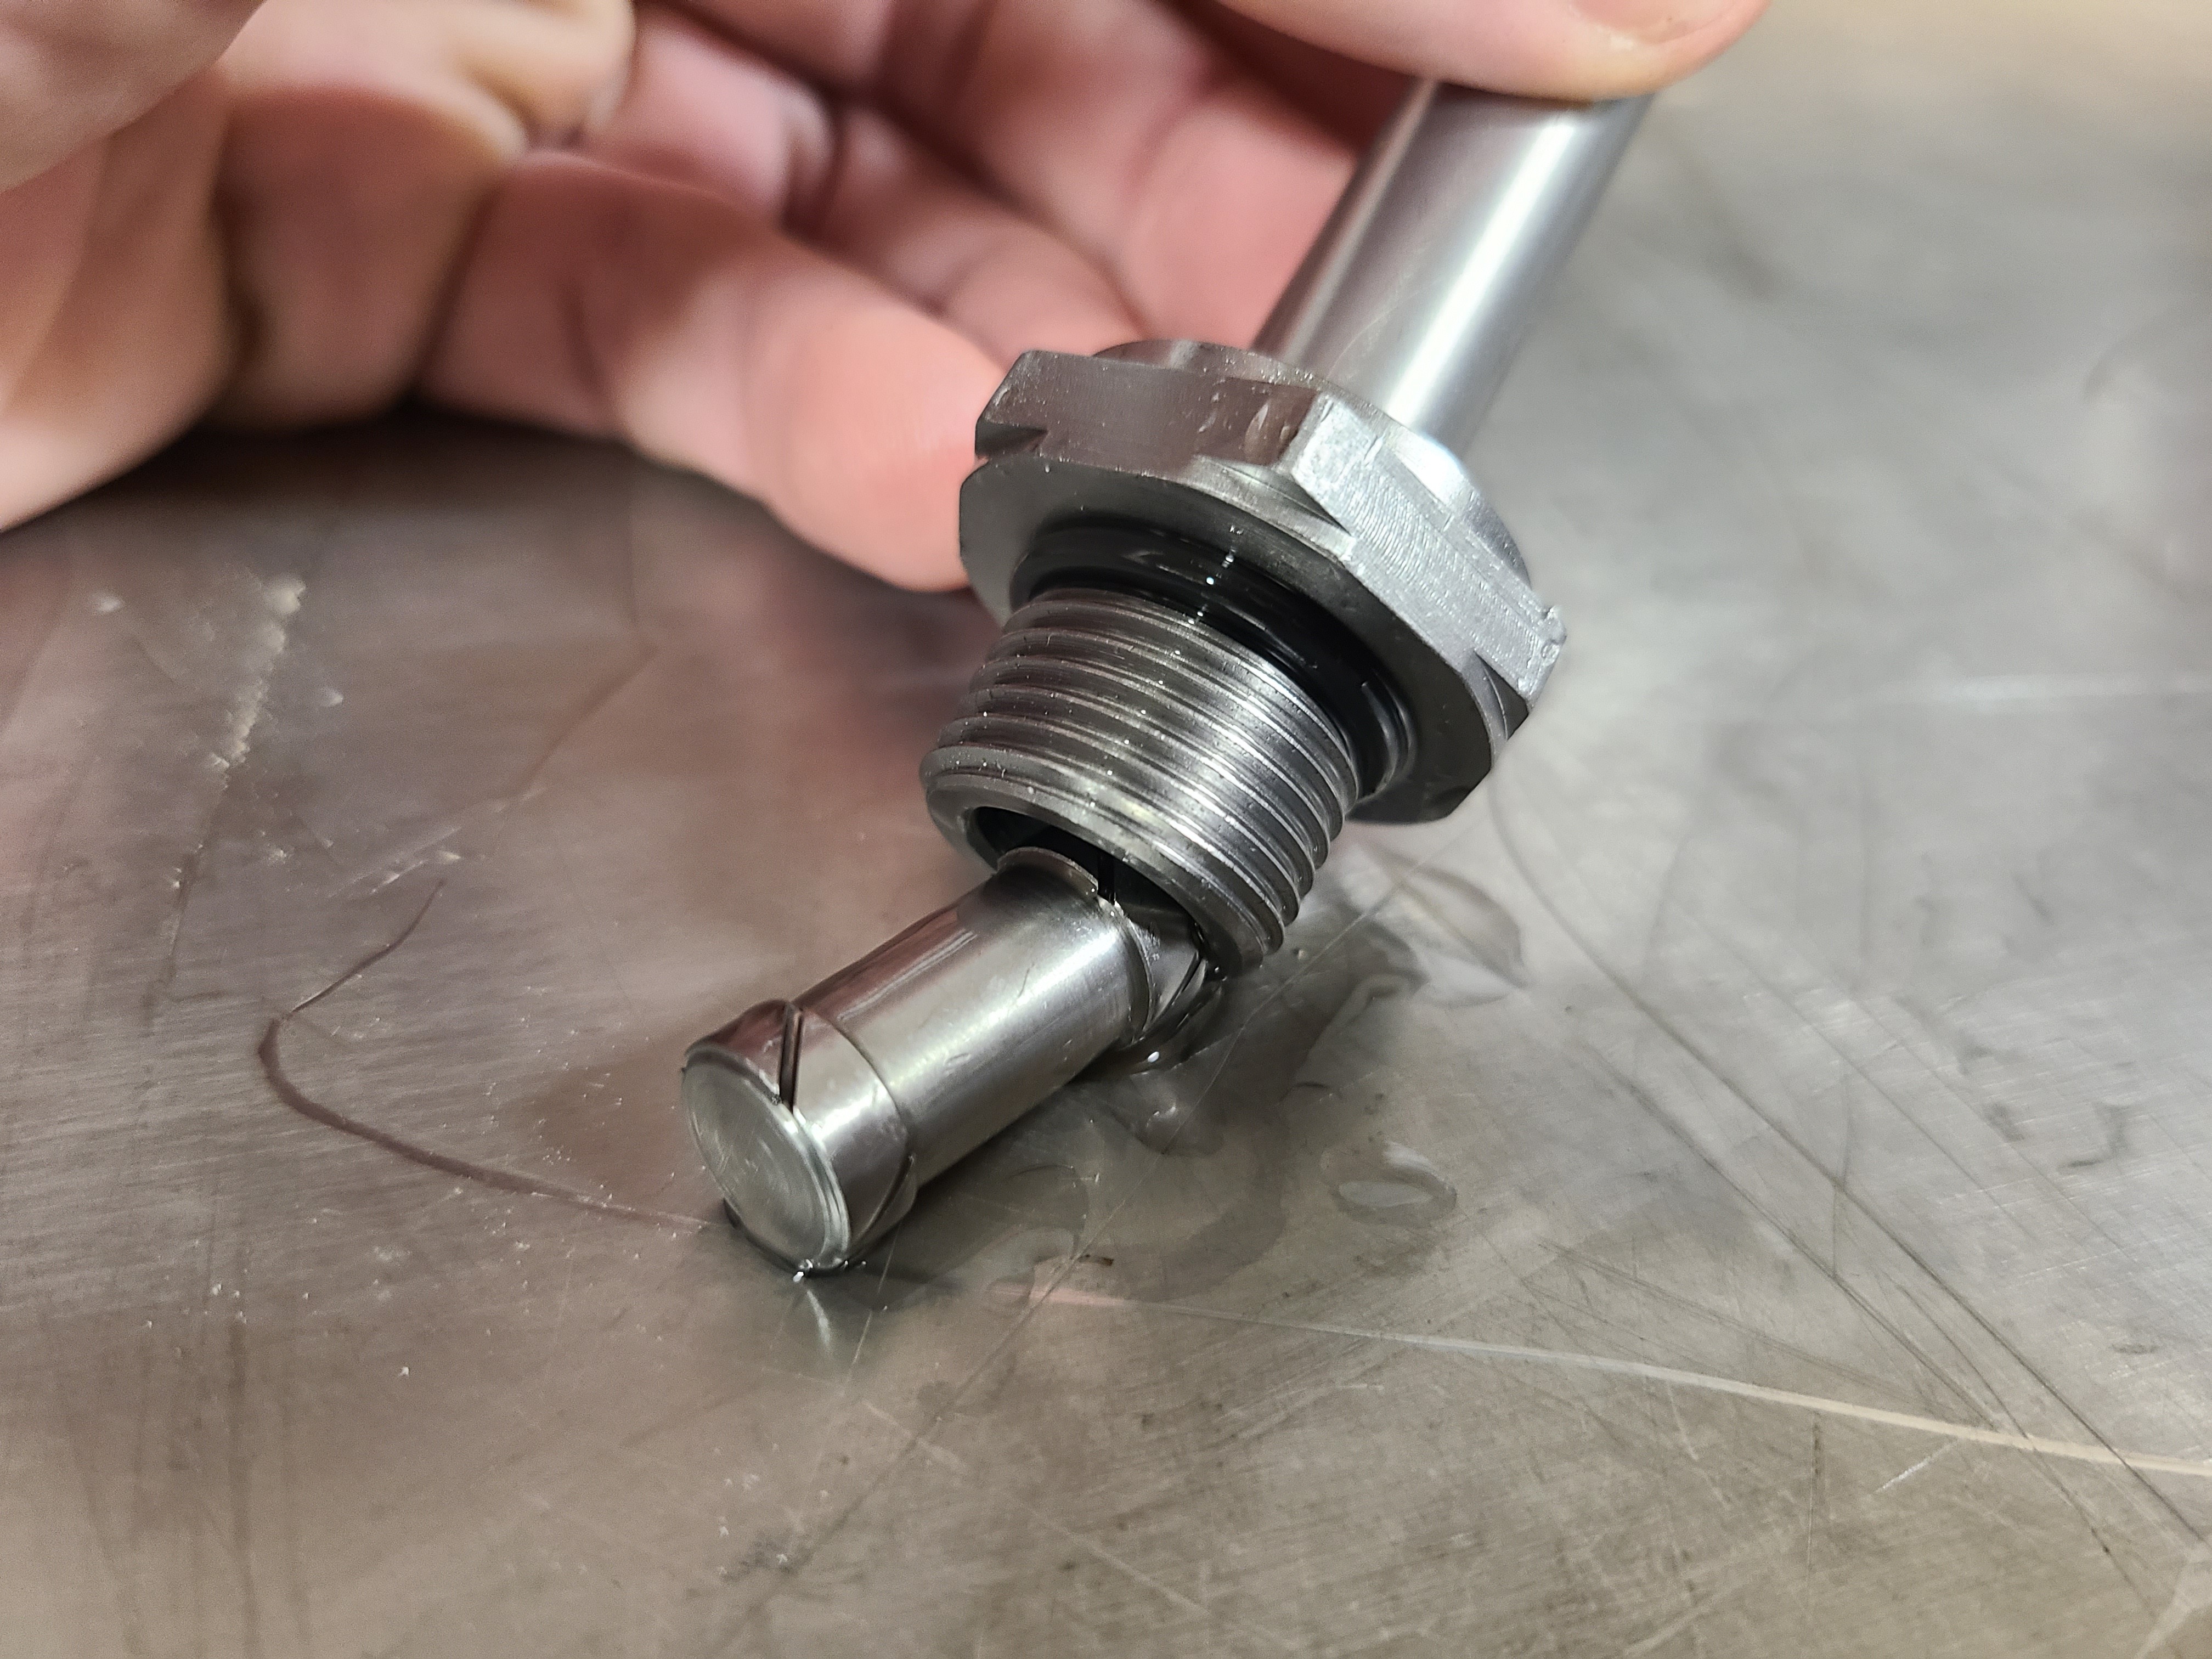
9. Once all parts are clean, it’s time to replace the O-rings and seals. There are three.
10. There are two seals here. One is a standard O-ring, the other is a split backer oring. This cut is normal. A pick can be used to remove both.

11. A simple 90 degree pick makes removing the old O-rings simple.

12. After replacing the O-rings and seal, assembly is the opposite of disassembly.
Notes:
- No part needs to be tightened more than snug finger-tight other than the tin nut. There’s no need to crank down on these parts. The official torque spec for the tin nut is 35-40 in-lb.
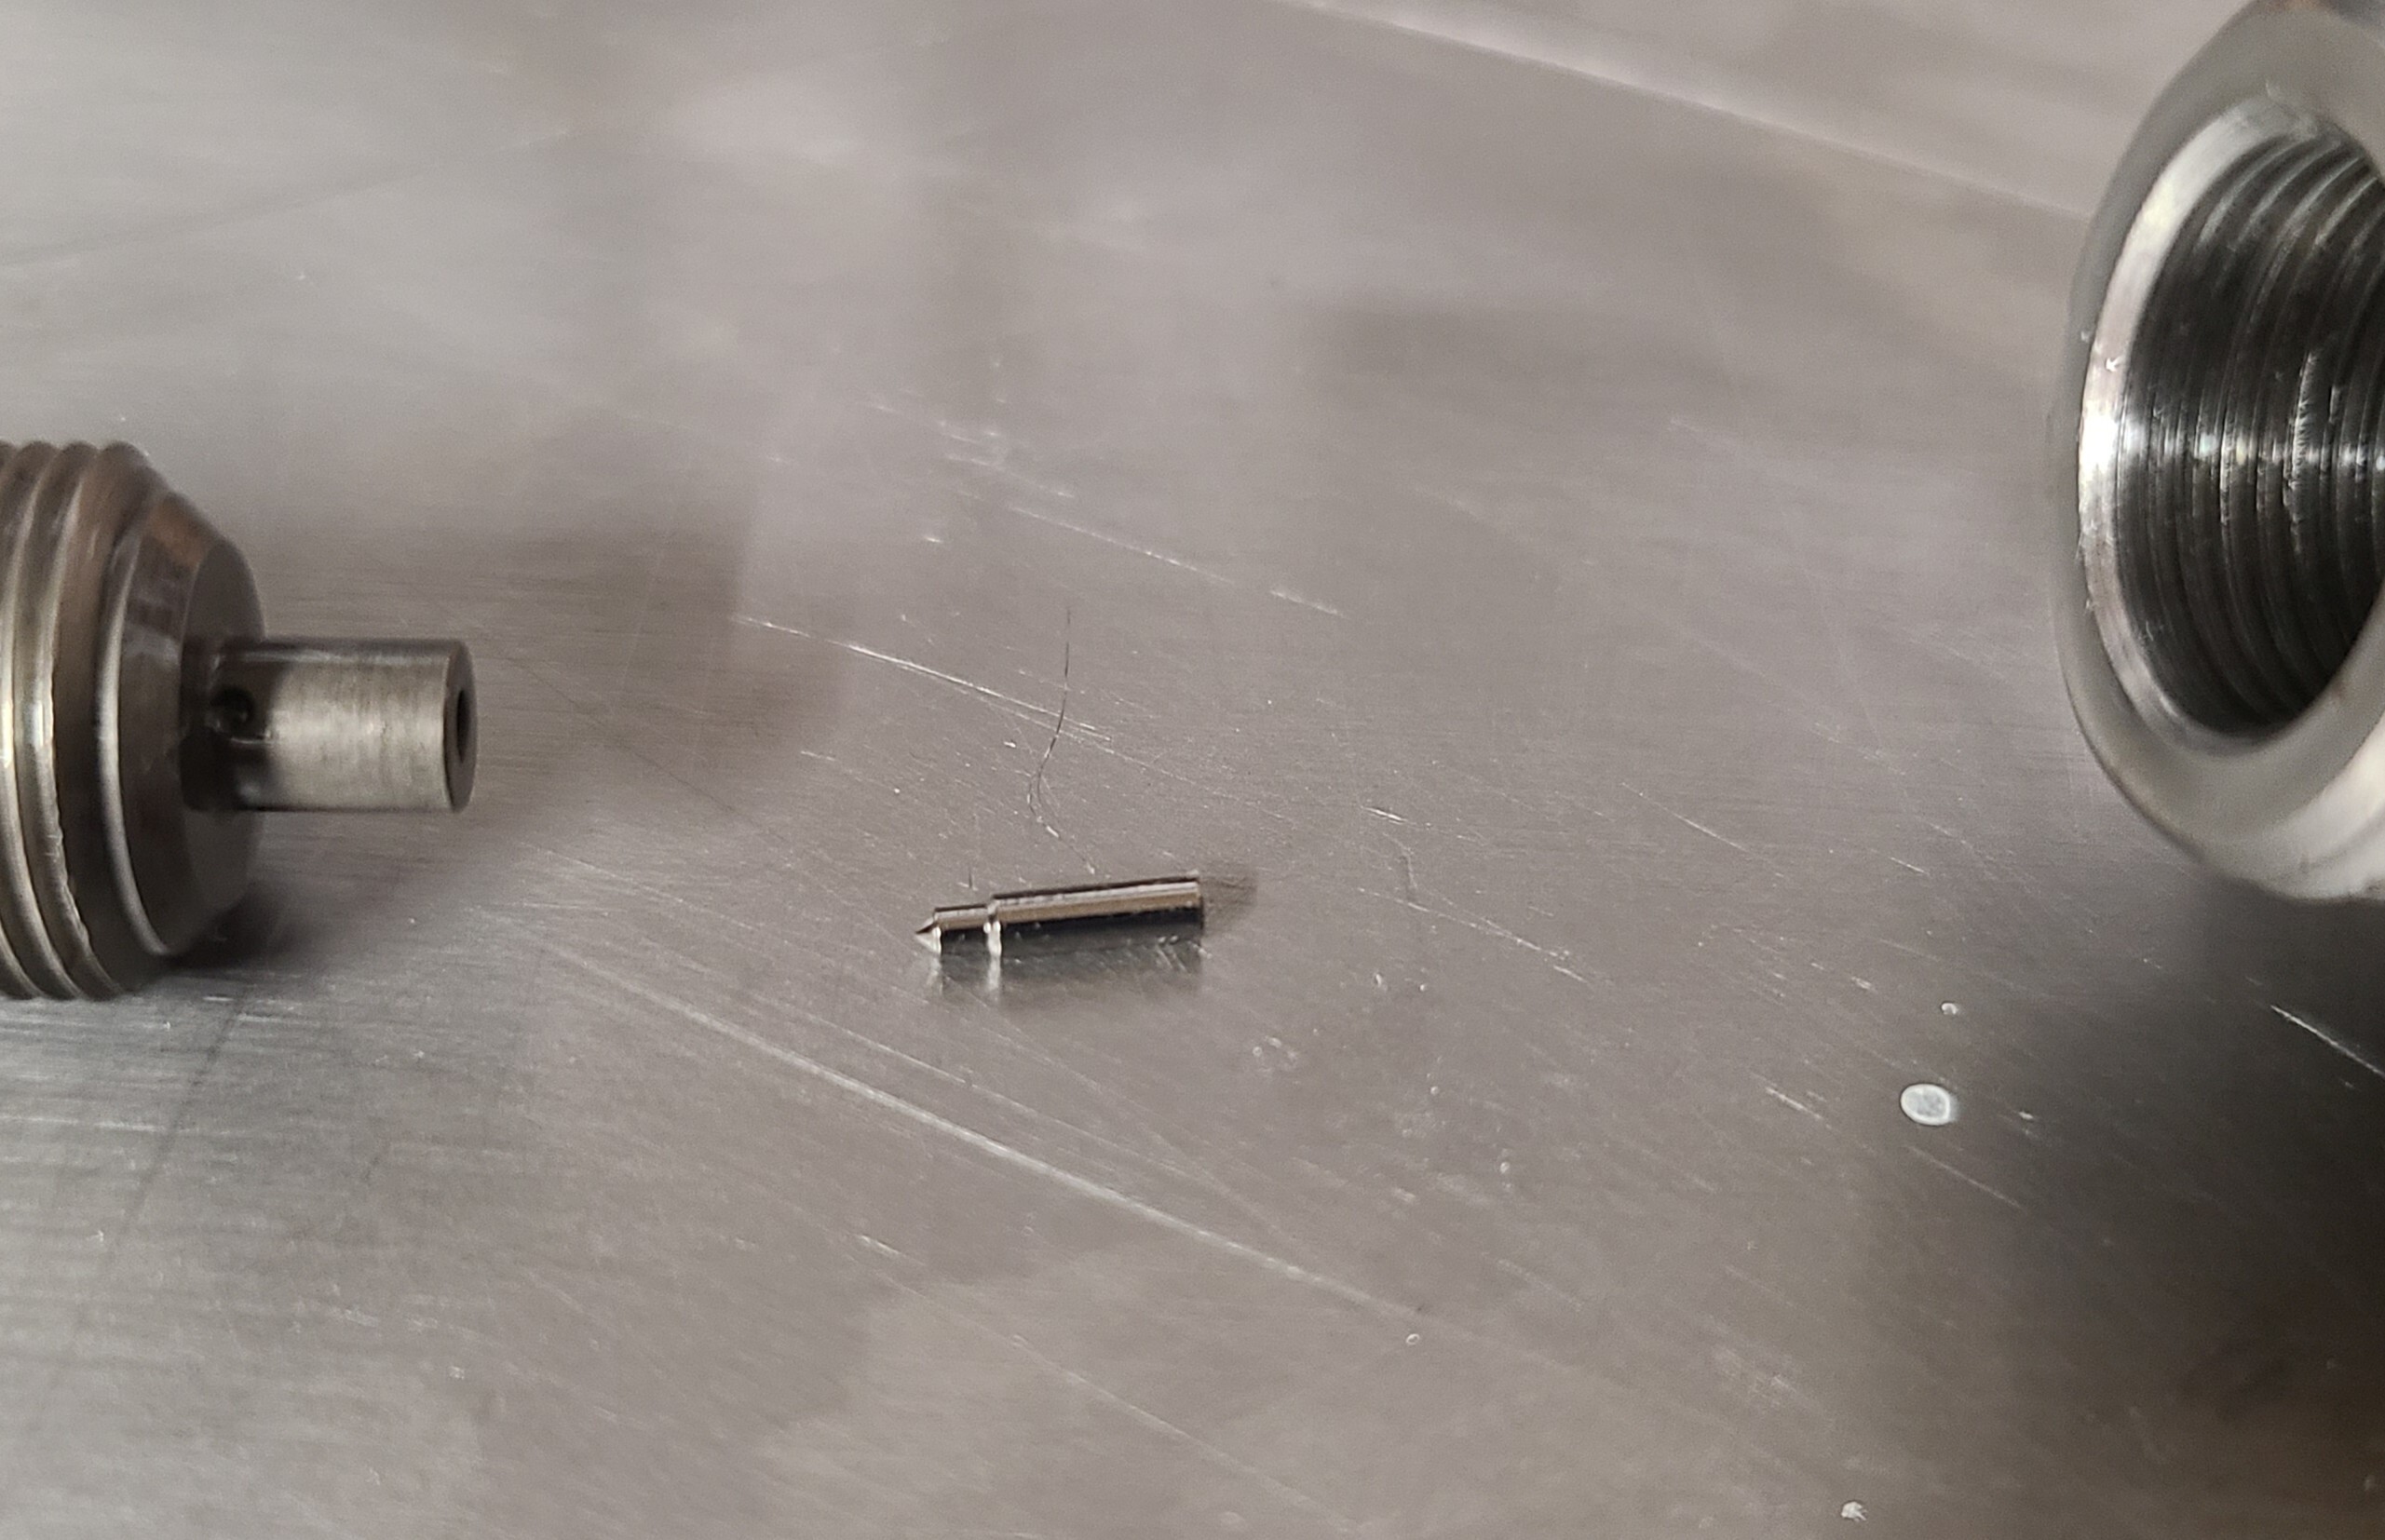
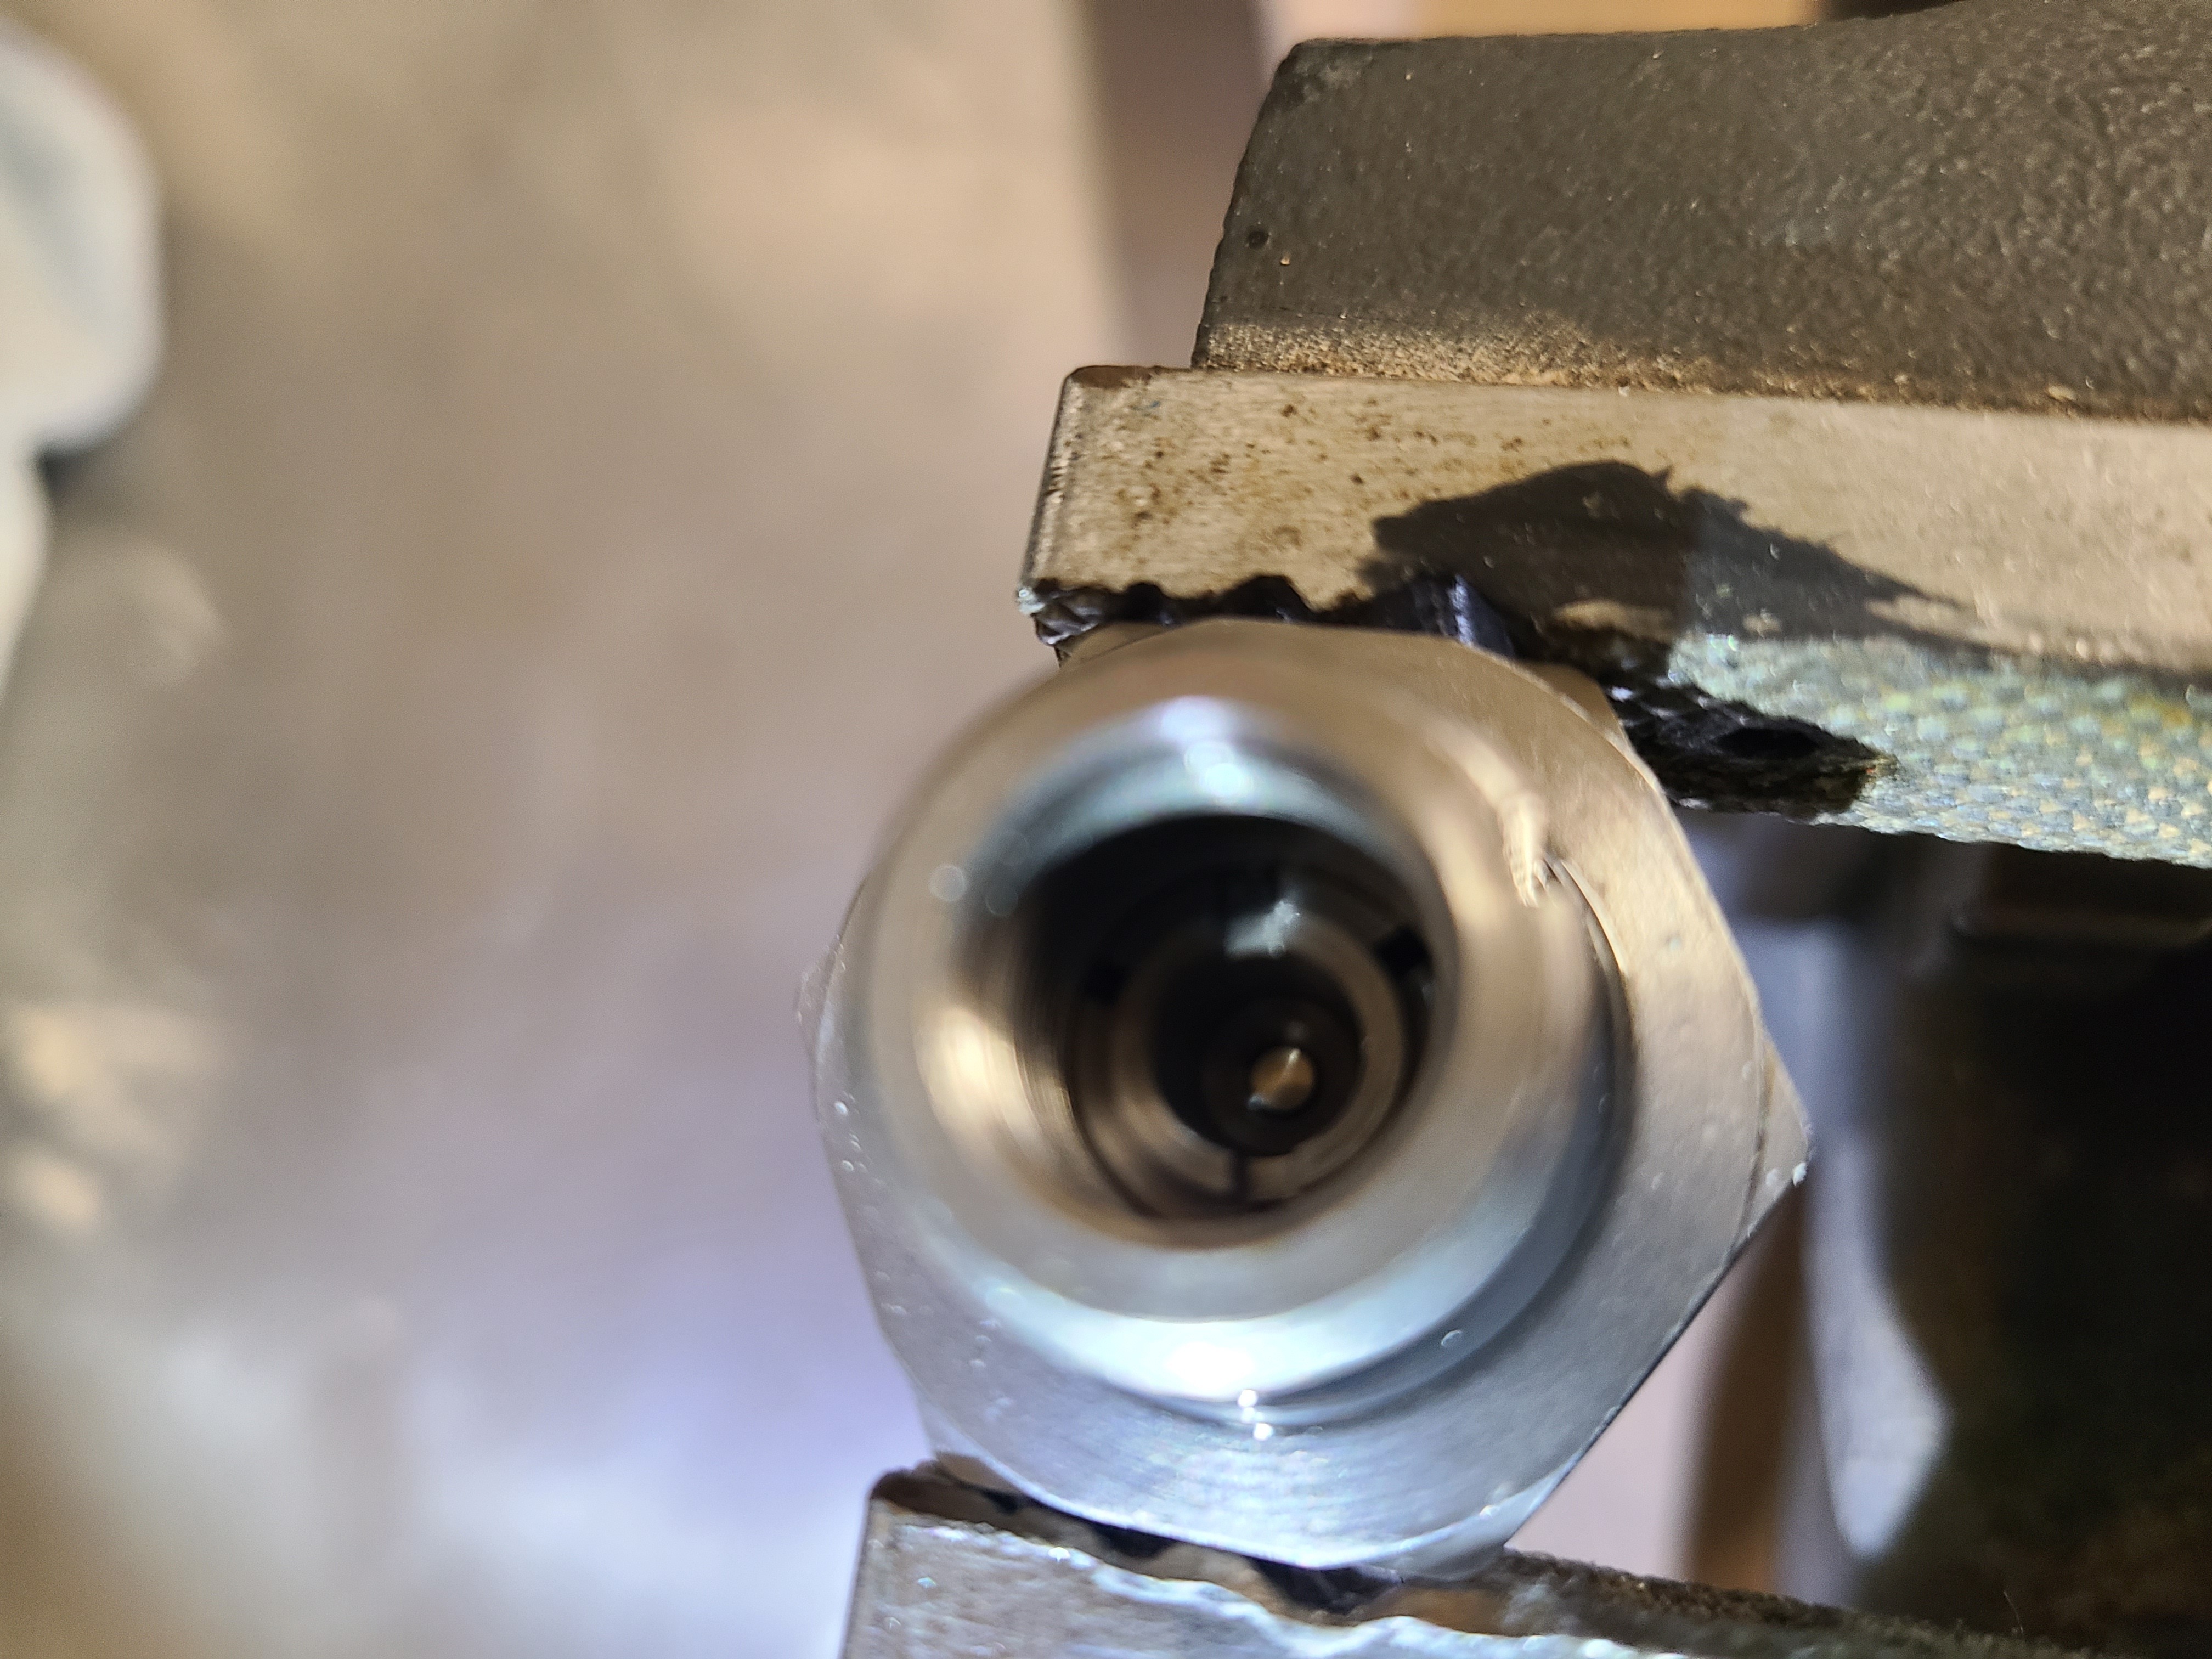
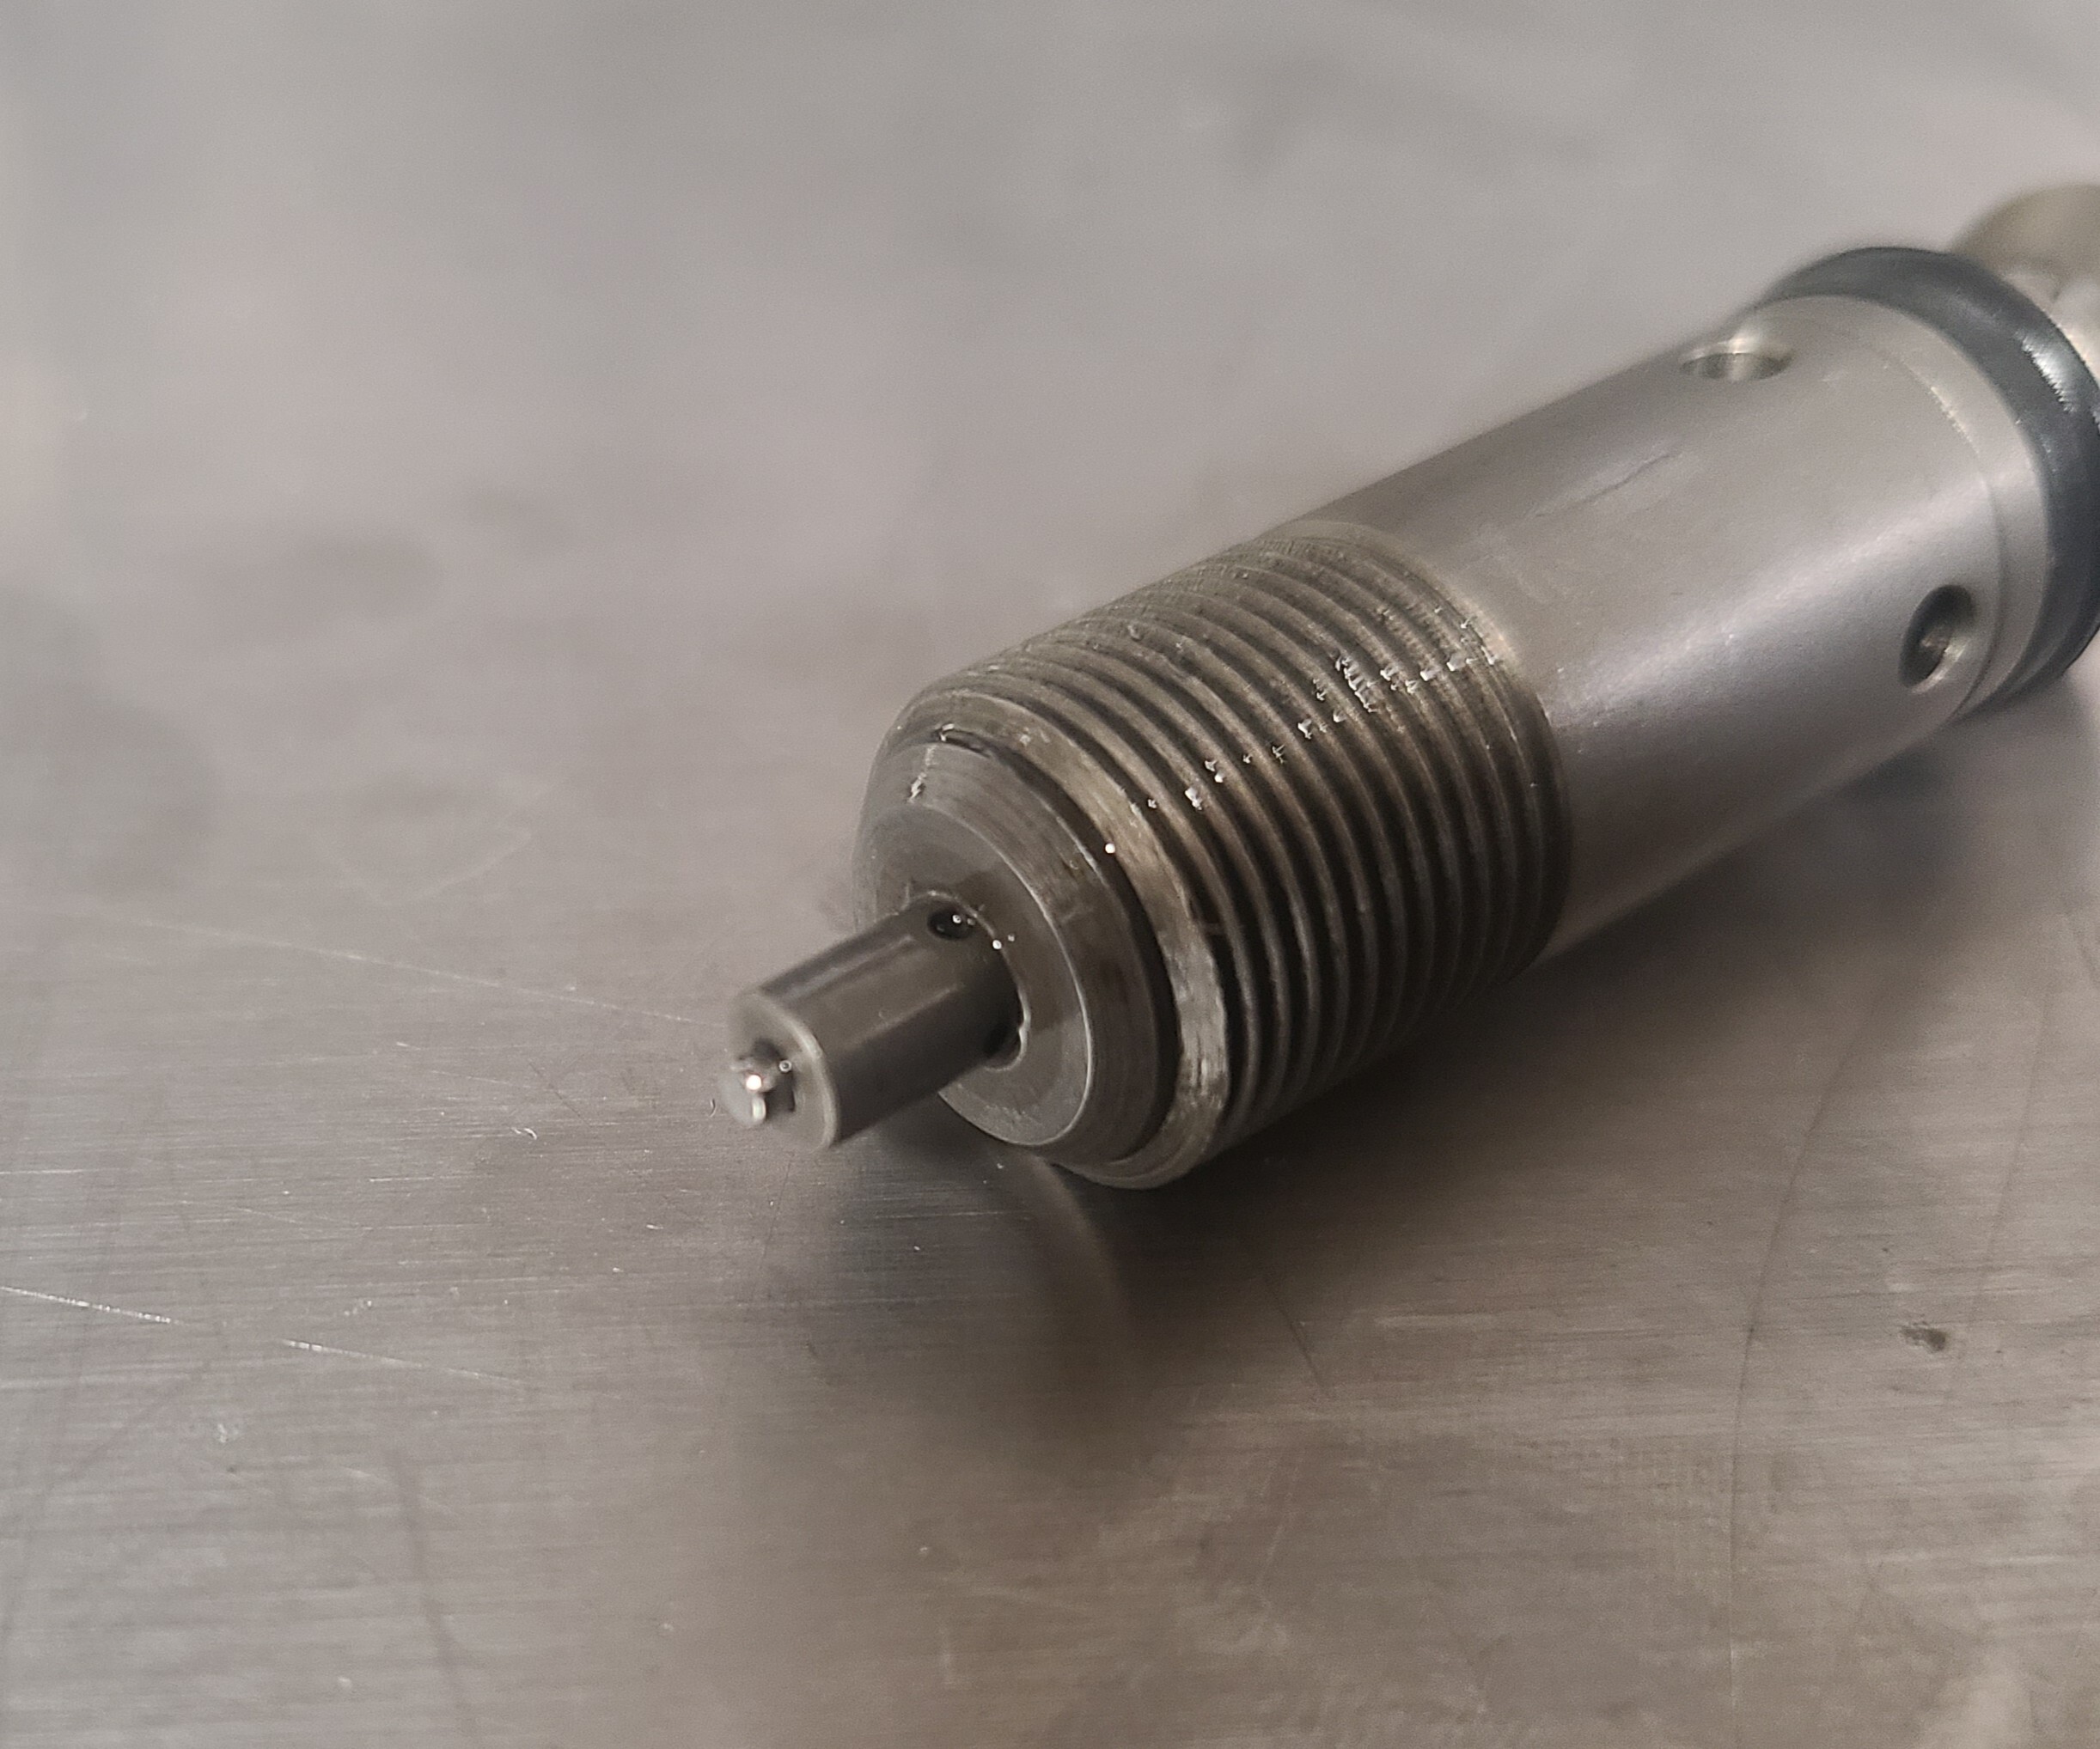
- Make sure the pin pictured below (the needle valve) is oriented in this way. The smaller side goes into the pilot valve assembly, on the left. It will look like the second image when installed correctly.
***Disclaimer: The information provided on this blog is for informational purposes only. We share our knowledge and experience, but we are not liable for any damages, injuries, or losses that may occur as a result of using this information. Situations are rarely cut and dry in the automotive world. Your situation will likely be somewhat different than what we describe here. Use your best judgment and always consult a qualified professional for automotive repairs and modifications. Your safety is your responsibility.


