
AutoEnginuity Scan Tool Installation - Step By Step How To
Apr 2nd 2026
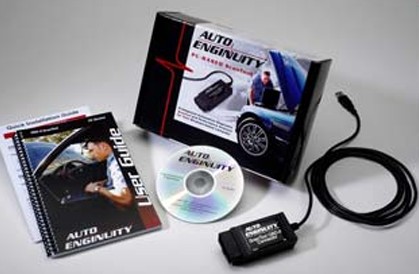
The ScanTool Package Consists of:
- AutoEnginuitySoftware
- AutoEnginuityOBD‐II Interface (ST06)
- USB 2.0 Interface and Cable
- User Guide •Quick Installation Guide
- Enhanced Activation Instructions (Blue Paper)
1. Insert the AutoEnginuity CD into your computers CD/DVD Drive.
2. The Set‐up program will begin the installation process automatically. If it does not start automatically just navigate to the CD/DVD drive and double click on the Install/Setup.exefile.
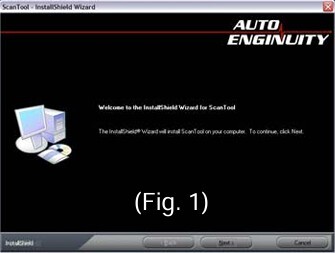
3. Select Next, (Fig. 1) then accept the terms and conditions.
4. Enter your information or your shop information into the next screen. (This can be edited later also) (Fig. 2)

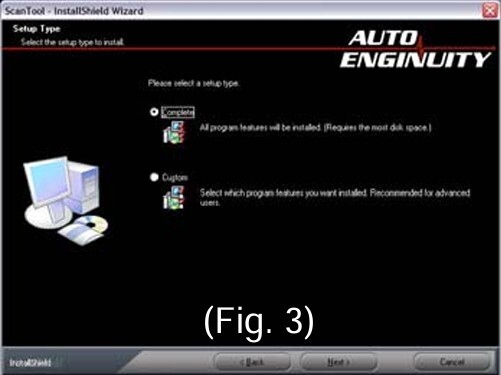
5. Select Complete for the installation. (Fig. 3)
6. Click Install.
7. Once complete, click Finish.
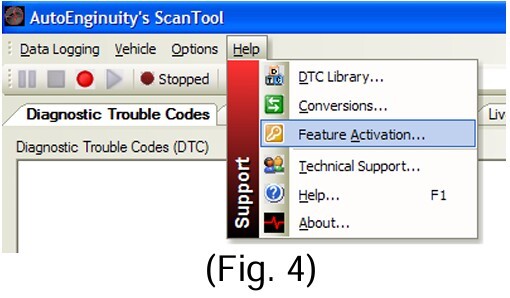
8. Feature Activation (Ford Enhanced) can be done by selecting Help from the tool bar, then choose Feature Activation. (Fig.4)
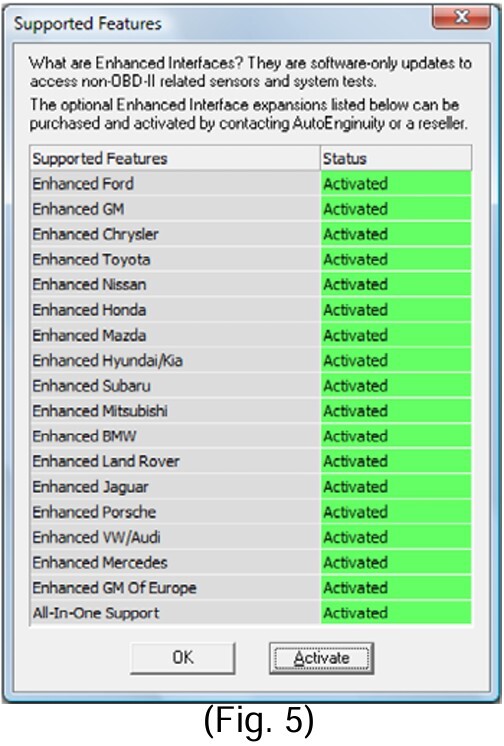
9. The Supported Features screen will show which enhanced packages you have purchased previously. It will show “Activated or Not Activated”(Fig. 5)
10. Click on the Activate button to input your Activation Numbers from the Enhanced Activation Instruction Sheet (Blue Paper) (Fig. 6)

11. Now input the information from the Enhanced Activation Instruction Sheet (Blue Paper) (Fig. 7)
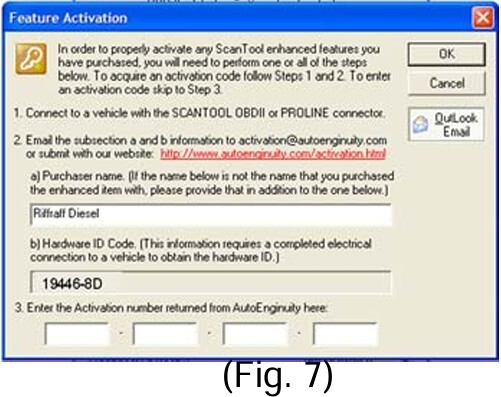
12. Input the Hardware ID Code (this is also located on the OBD‐II Connector) (Fig. 7)
13. Input the Activation Number into the space provided (Fig. 7)
14. Click the OK Button at the top. (Fig. 7)
15. Once complete, restart AutoEnginuitySoftware. Do not restart your computer until you restart AutoEnginuityand ensure the activation code is stored.
16. Verify the Enhanced feature is turned on, by clicking Help in the toolbar, then Feature Activation. You should see the version you purchased shows “Activated”.
Instructions provided by: Ken (Woodnthings on FTE)
Disclaimer: The information provided on this blog is for informational purposes only. We share our knowledge and experience, but we are not liable for any damages, injuries, or losses that may occur as a result of using this information. Situations are rarely cut and dry in the automotive world. Your situation will likely be somewhat different than what we describe here. Use your best judgment and always consult a qualified professional for automotive repairs and modifications. Your safety is your responsibility.


