
7.3 Powerstroke Fuel Bowl Rebuild - Full Step By Step How To
Feb 27th 2026
Fuel leaks on the 7.3 Powerstroke are one of those problems almost every owner will deal with sooner or later. While these trucks can seep fuel from a few different places, the fuel filter housing (fuel bowl) is usually the main culprit. That makes sense when you look at how much the 7.3 fuel bowl does—and how many seals, fittings, and moving parts it packs into one assembly. More parts means more potential leak points. The good news is that a 7.3 Powerstroke fuel bowl rebuild is inexpensive, straightforward, and can save a lot of frustration later. In a perfect world, you’d remove the fuel bowl, completely disassemble it, clean everything thoroughly, rebuild it, and reinstall it. Realistically, most owners fix each leak as it shows up, so we’ll walk through the common leak points one at a time. All parts used for this rebuild are either OEM components or parts made by the same suppliers Ford/International originally used, with a few Riffraff Diesel upgrades where they make sense. This write-up uses a Super Duty 7.3 fuel bowl, but the OBS 7.3 Powerstroke fuel bowl process is very similar.
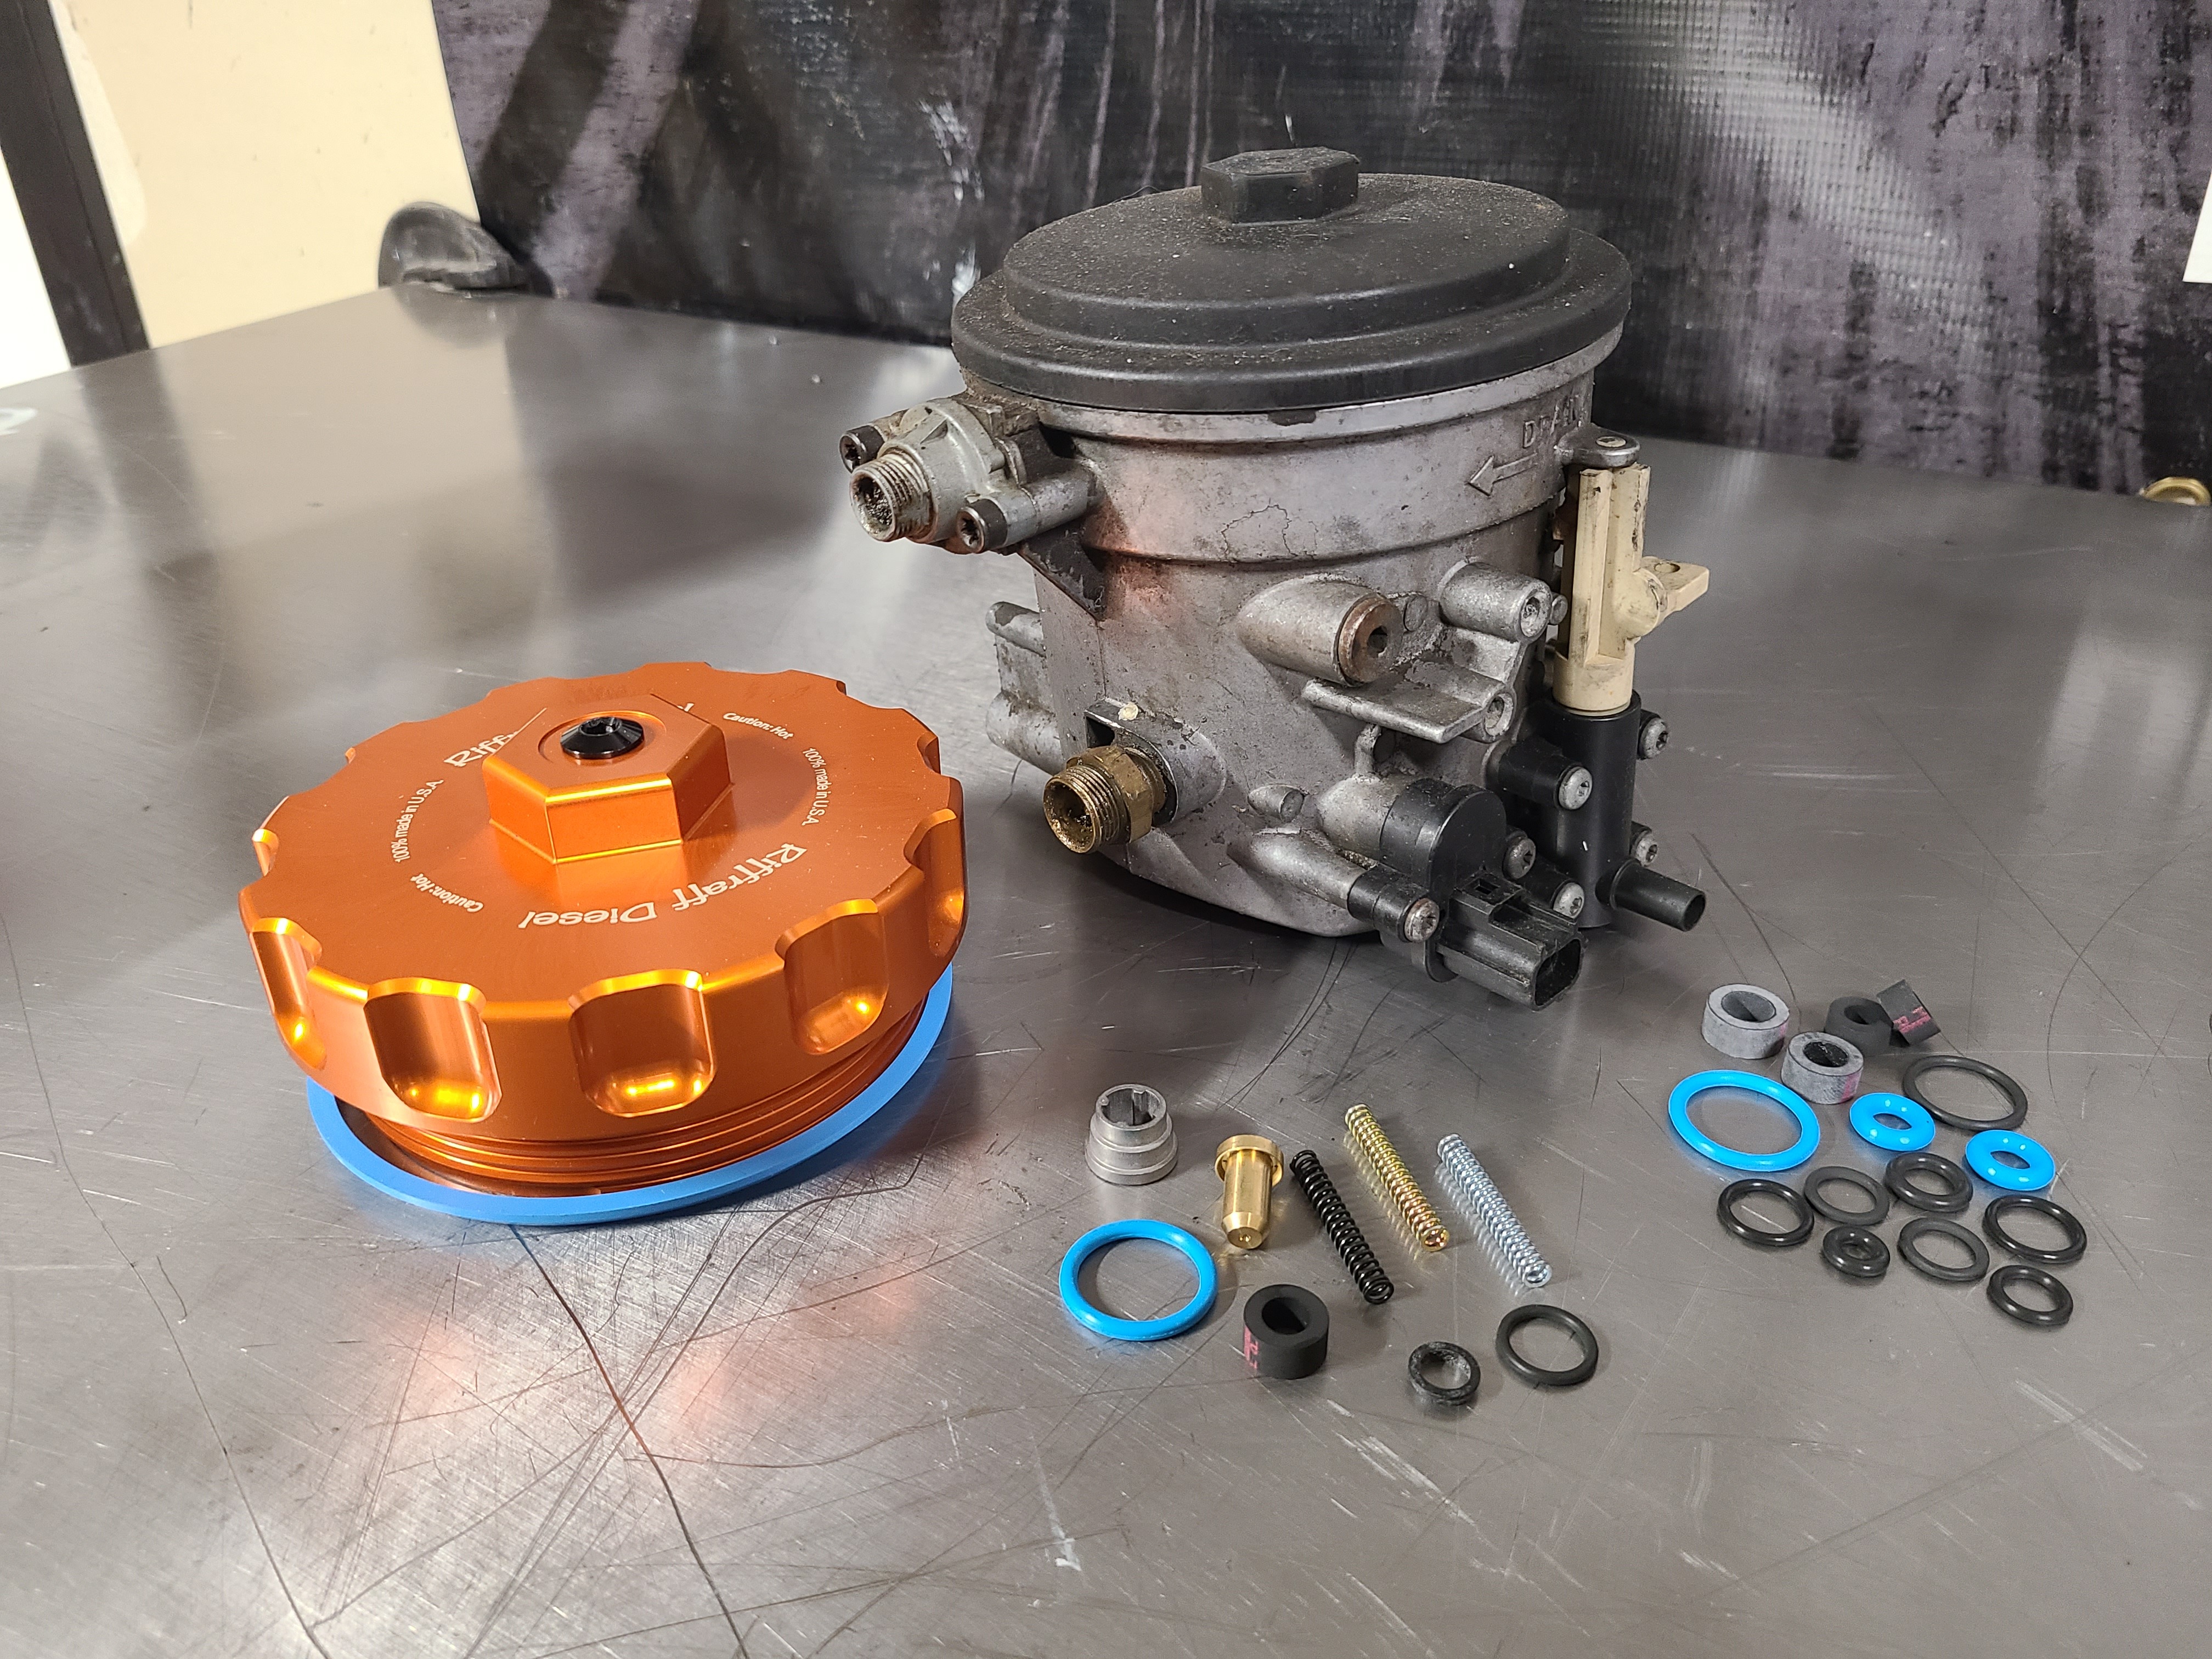
Parts Used:
Fuel Bowl Heater Element 99-03 - https://www.riffraffdiesel.com/fuel-bowl-heater-element-99-03/
Complete Fuel Bowl Seal Kit w/ Fluorosilicone Drain O-rings 99-03 - https://www.riffraffdiesel.com/complete-fuel-bowl-seal-kit-w-fluorosilicone-drain-orings-99-03/
Fuel Bowl FPR Complete Rebuild Kit 99-03 7.3L - https://www.riffraffdiesel.com/fuel-bowl-fpr-complete-rebuild-kit-99-03-7-3l/
Riffraff Diesel Billet 7.3L Fuel Bowl Cap 99-03 - https://www.riffraffdiesel.com/riffraff-diesel-billet-7-3l-fuel-bowl-cap-99-03/
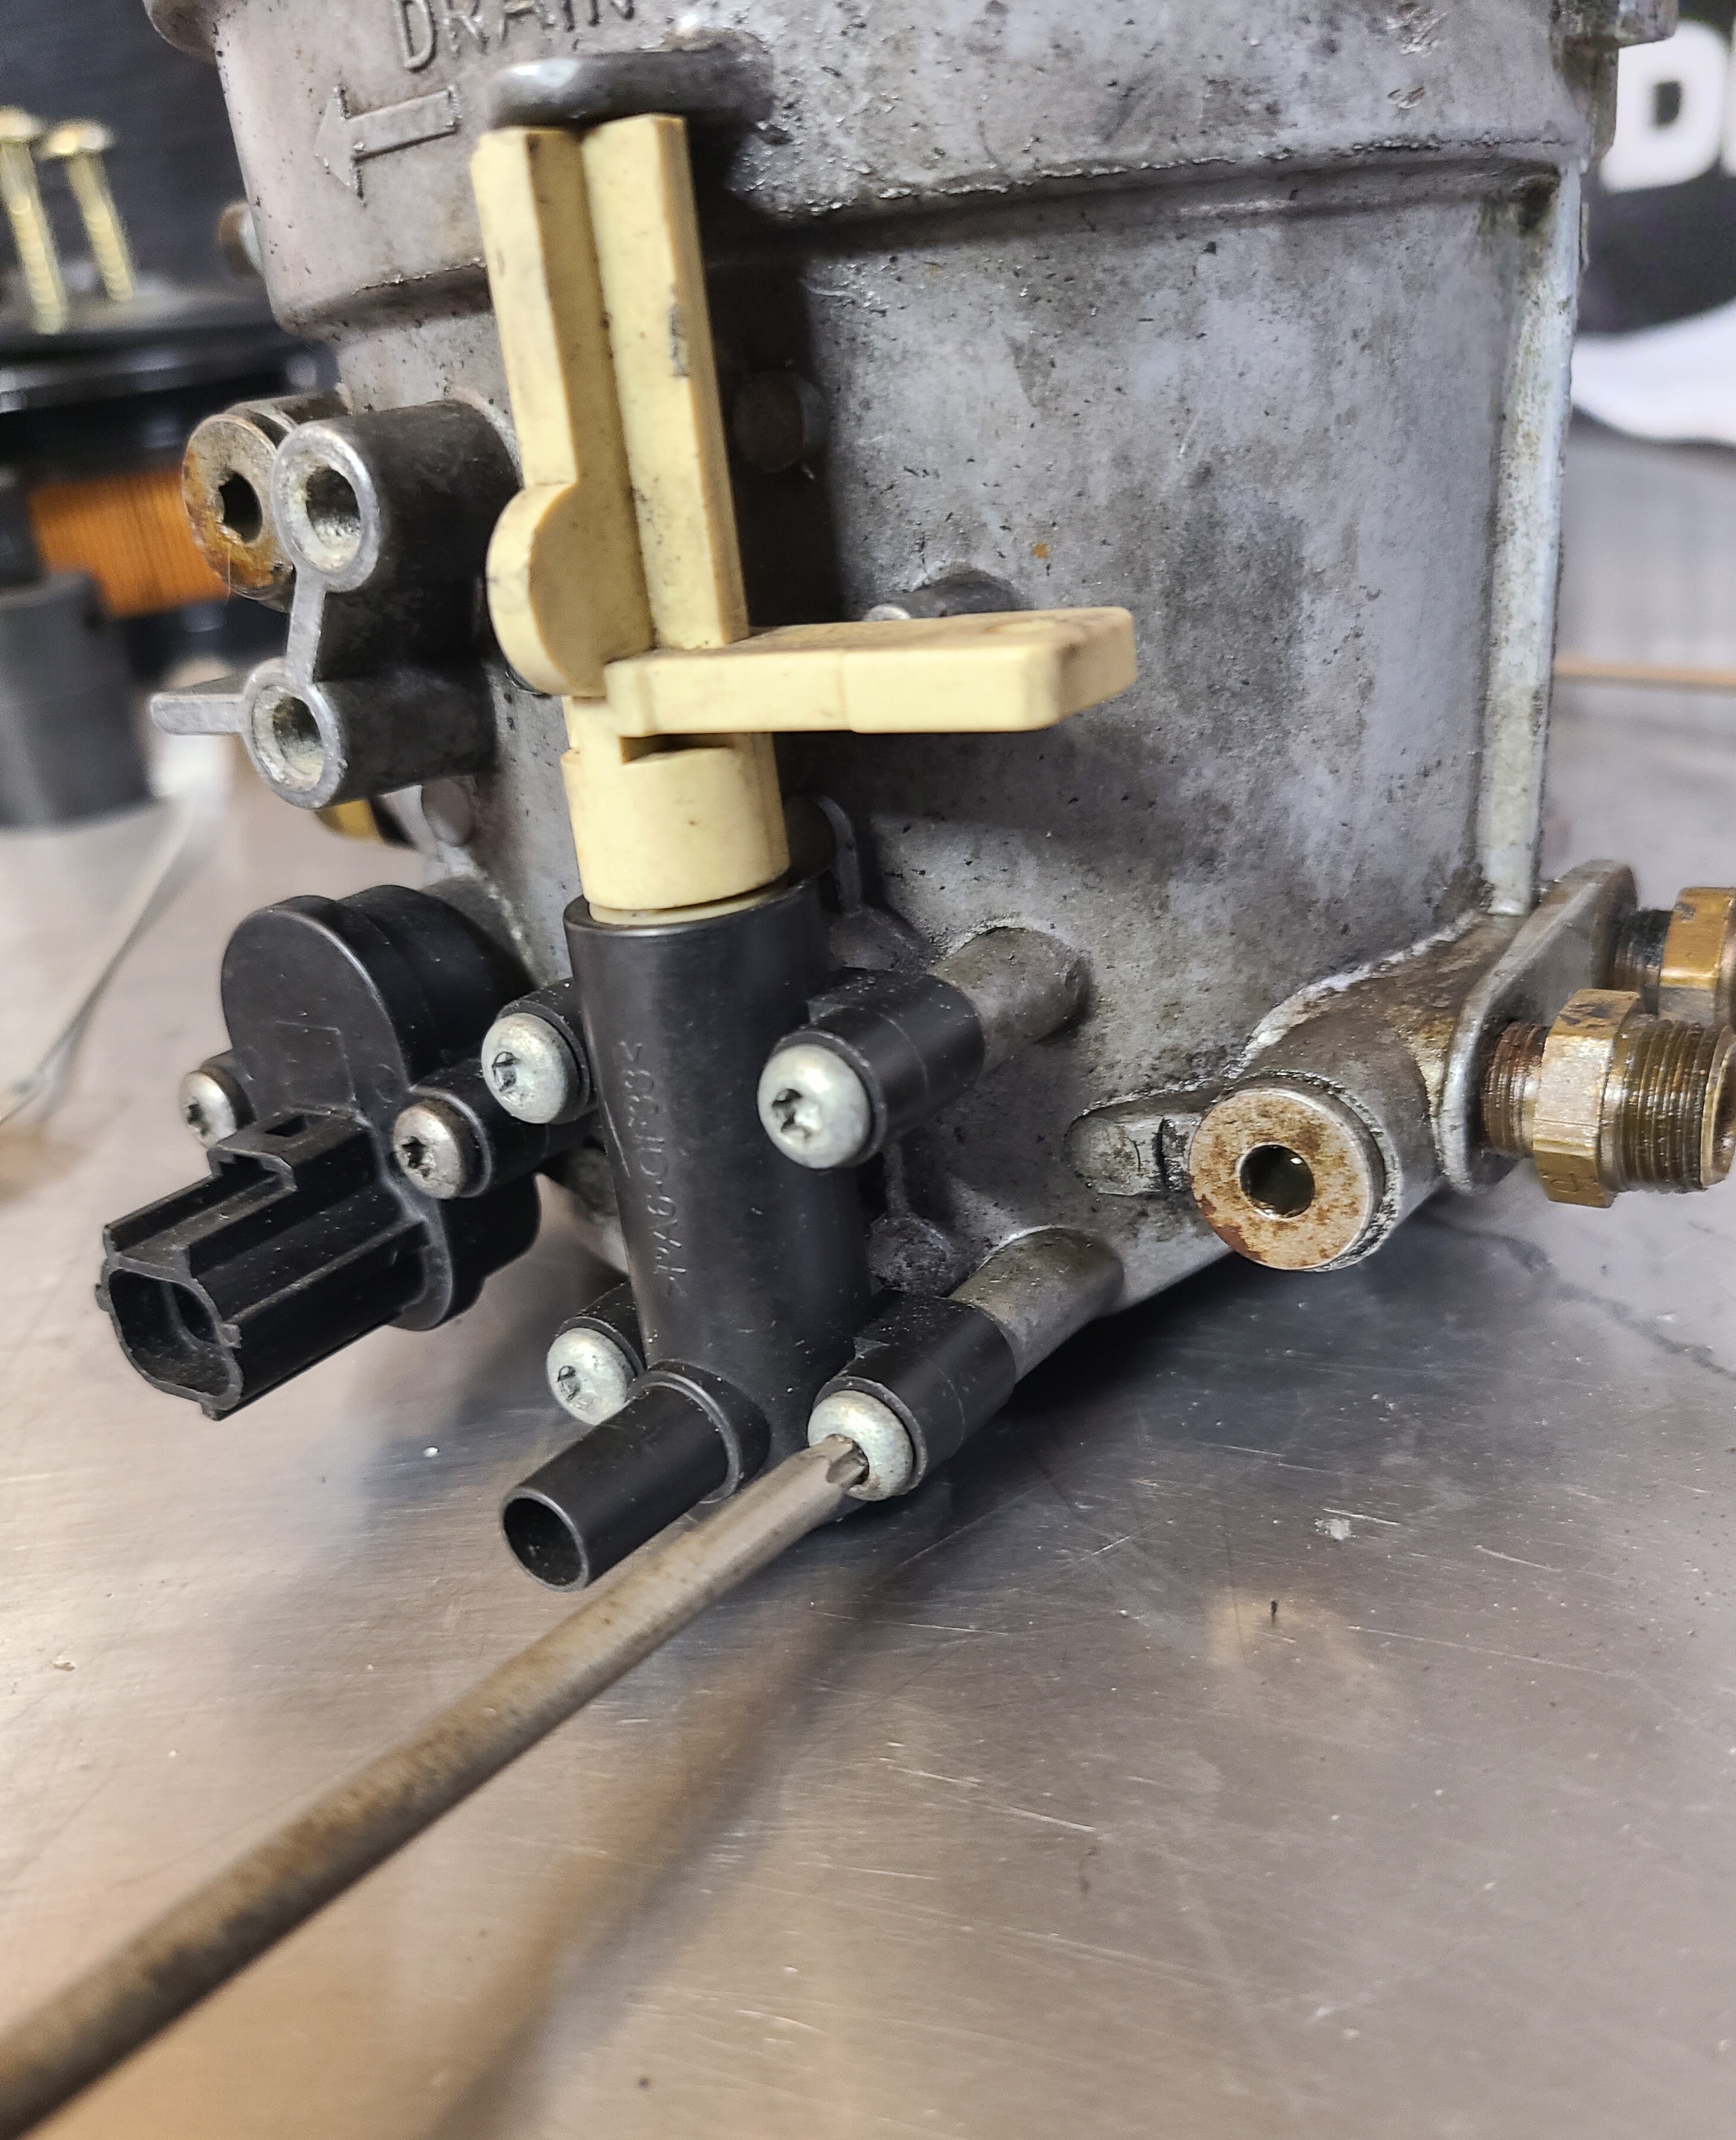
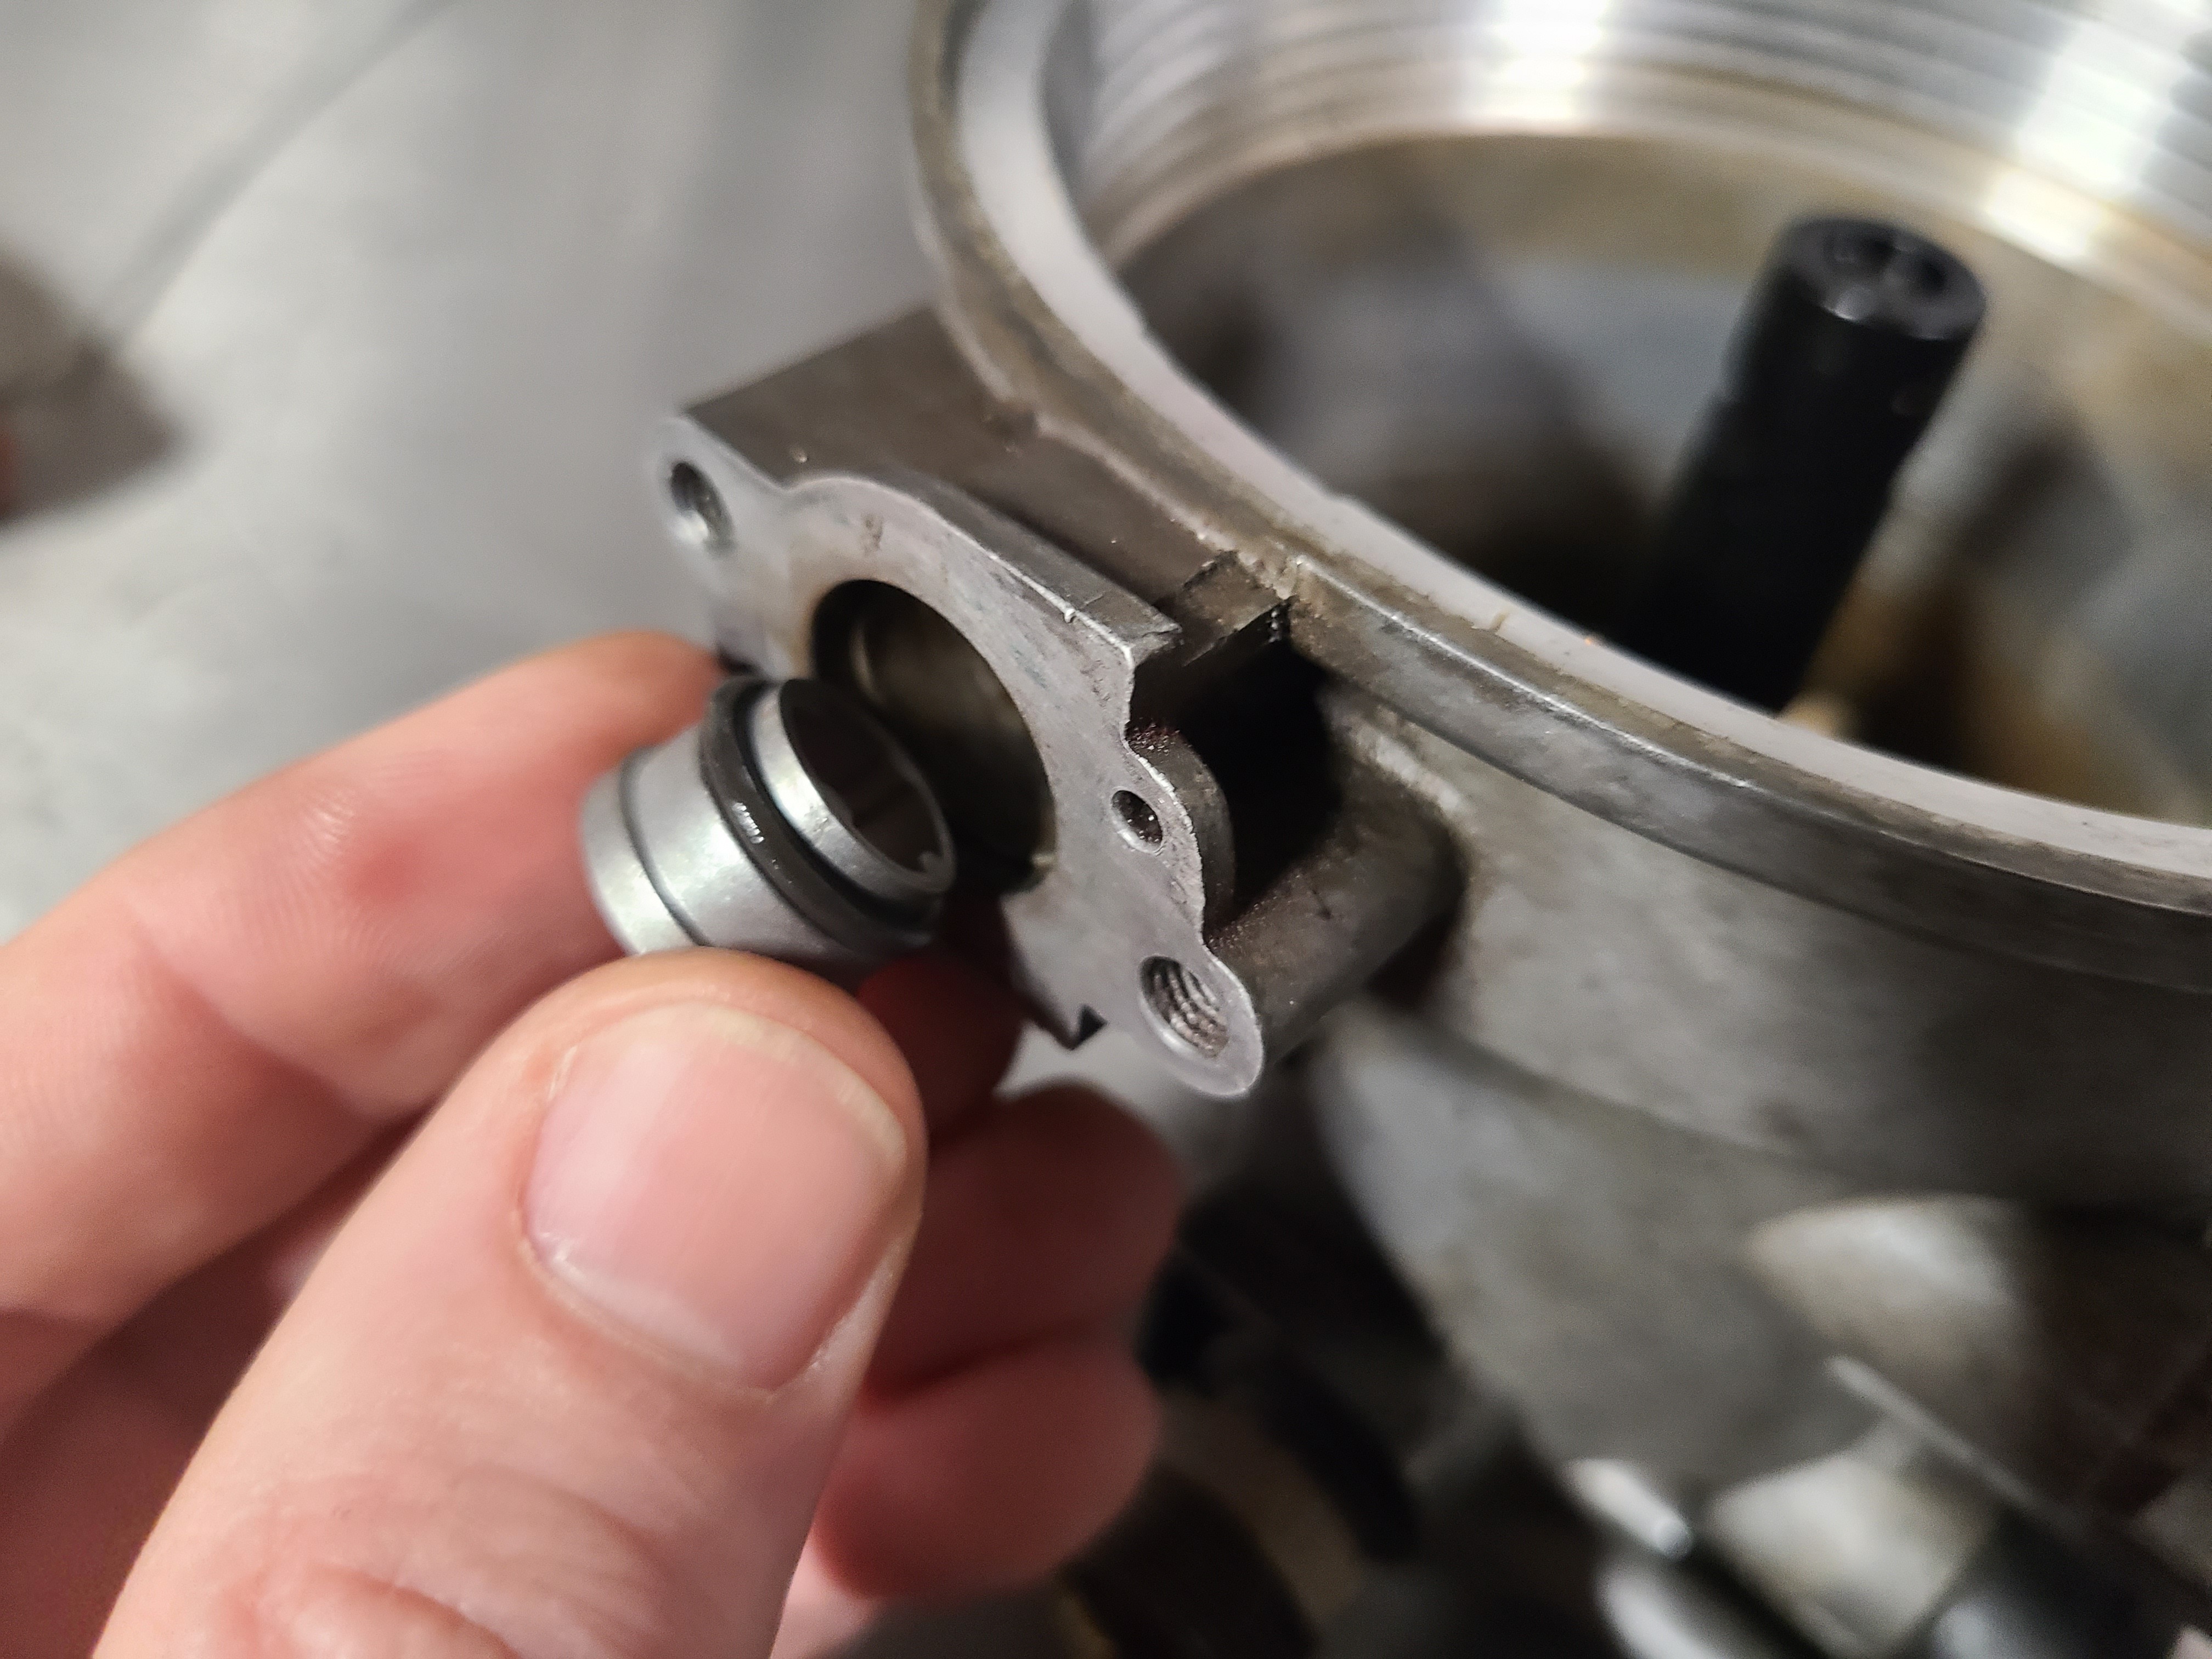
01. With the fuel bowl on a bench, the first thing to address is the fuel bowl drain valve. The valve is held on with four T20 Torx bolts.
02. Once the valve is removed, we need to disassemble it.
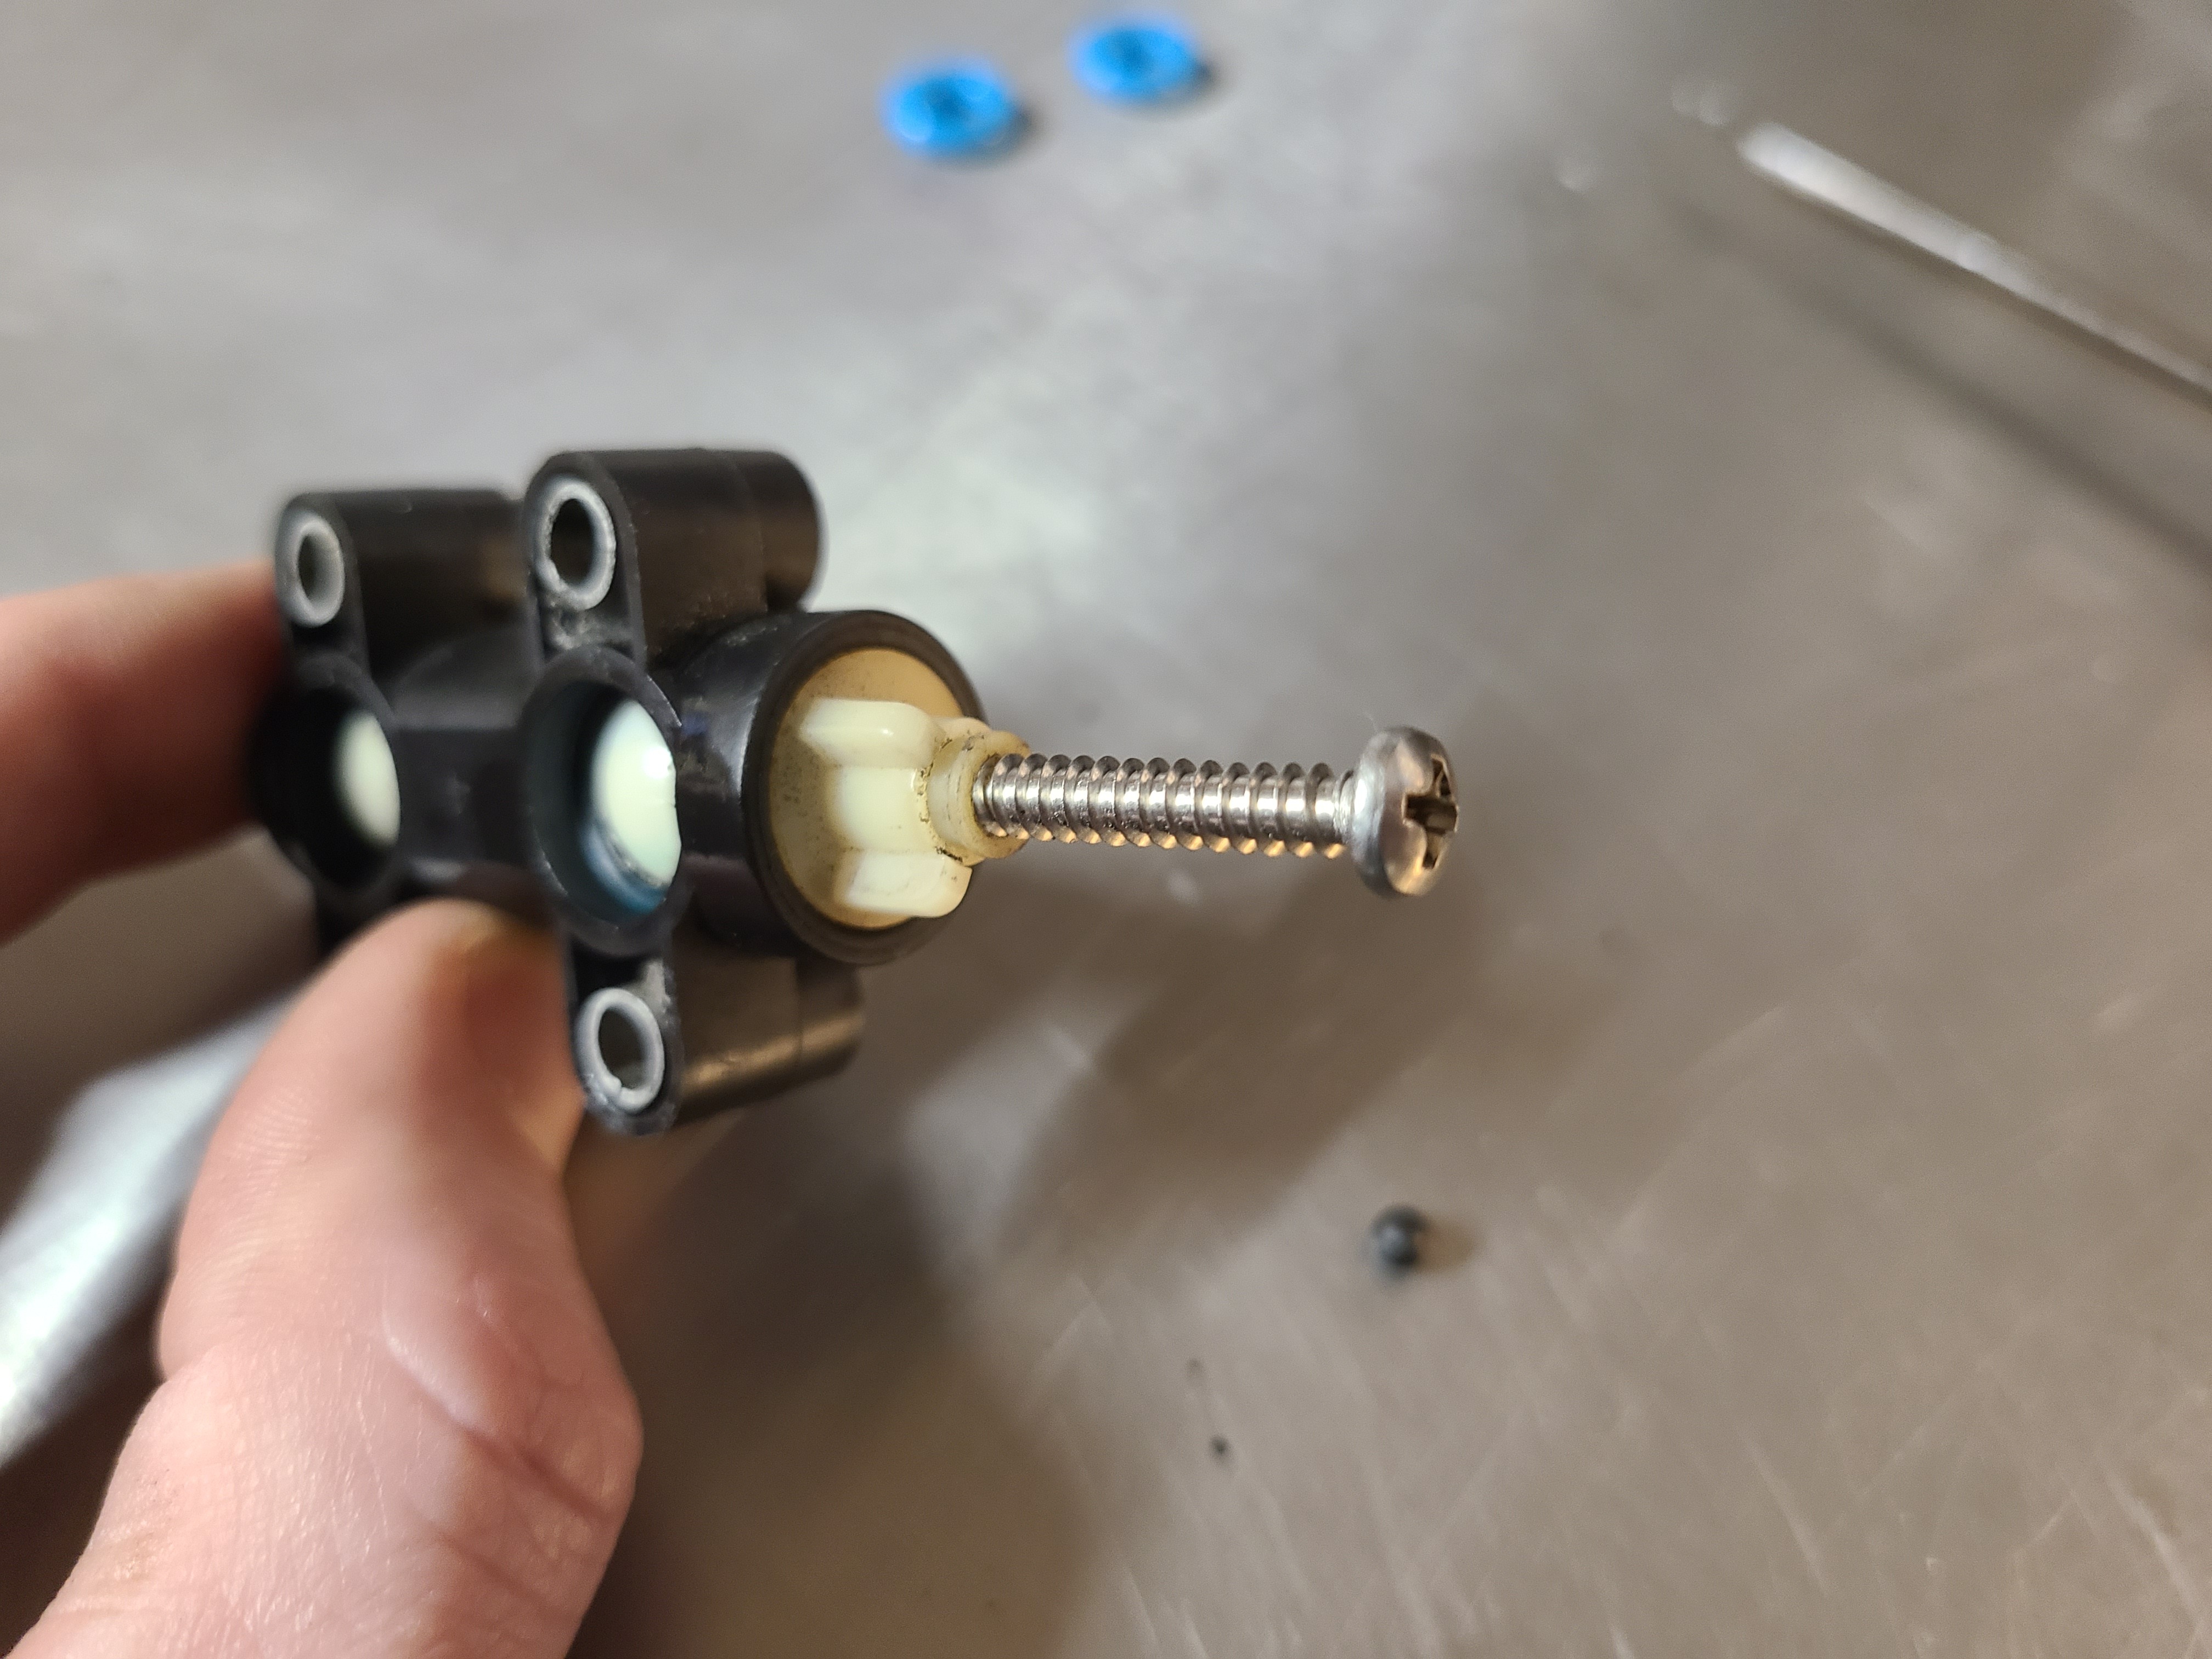
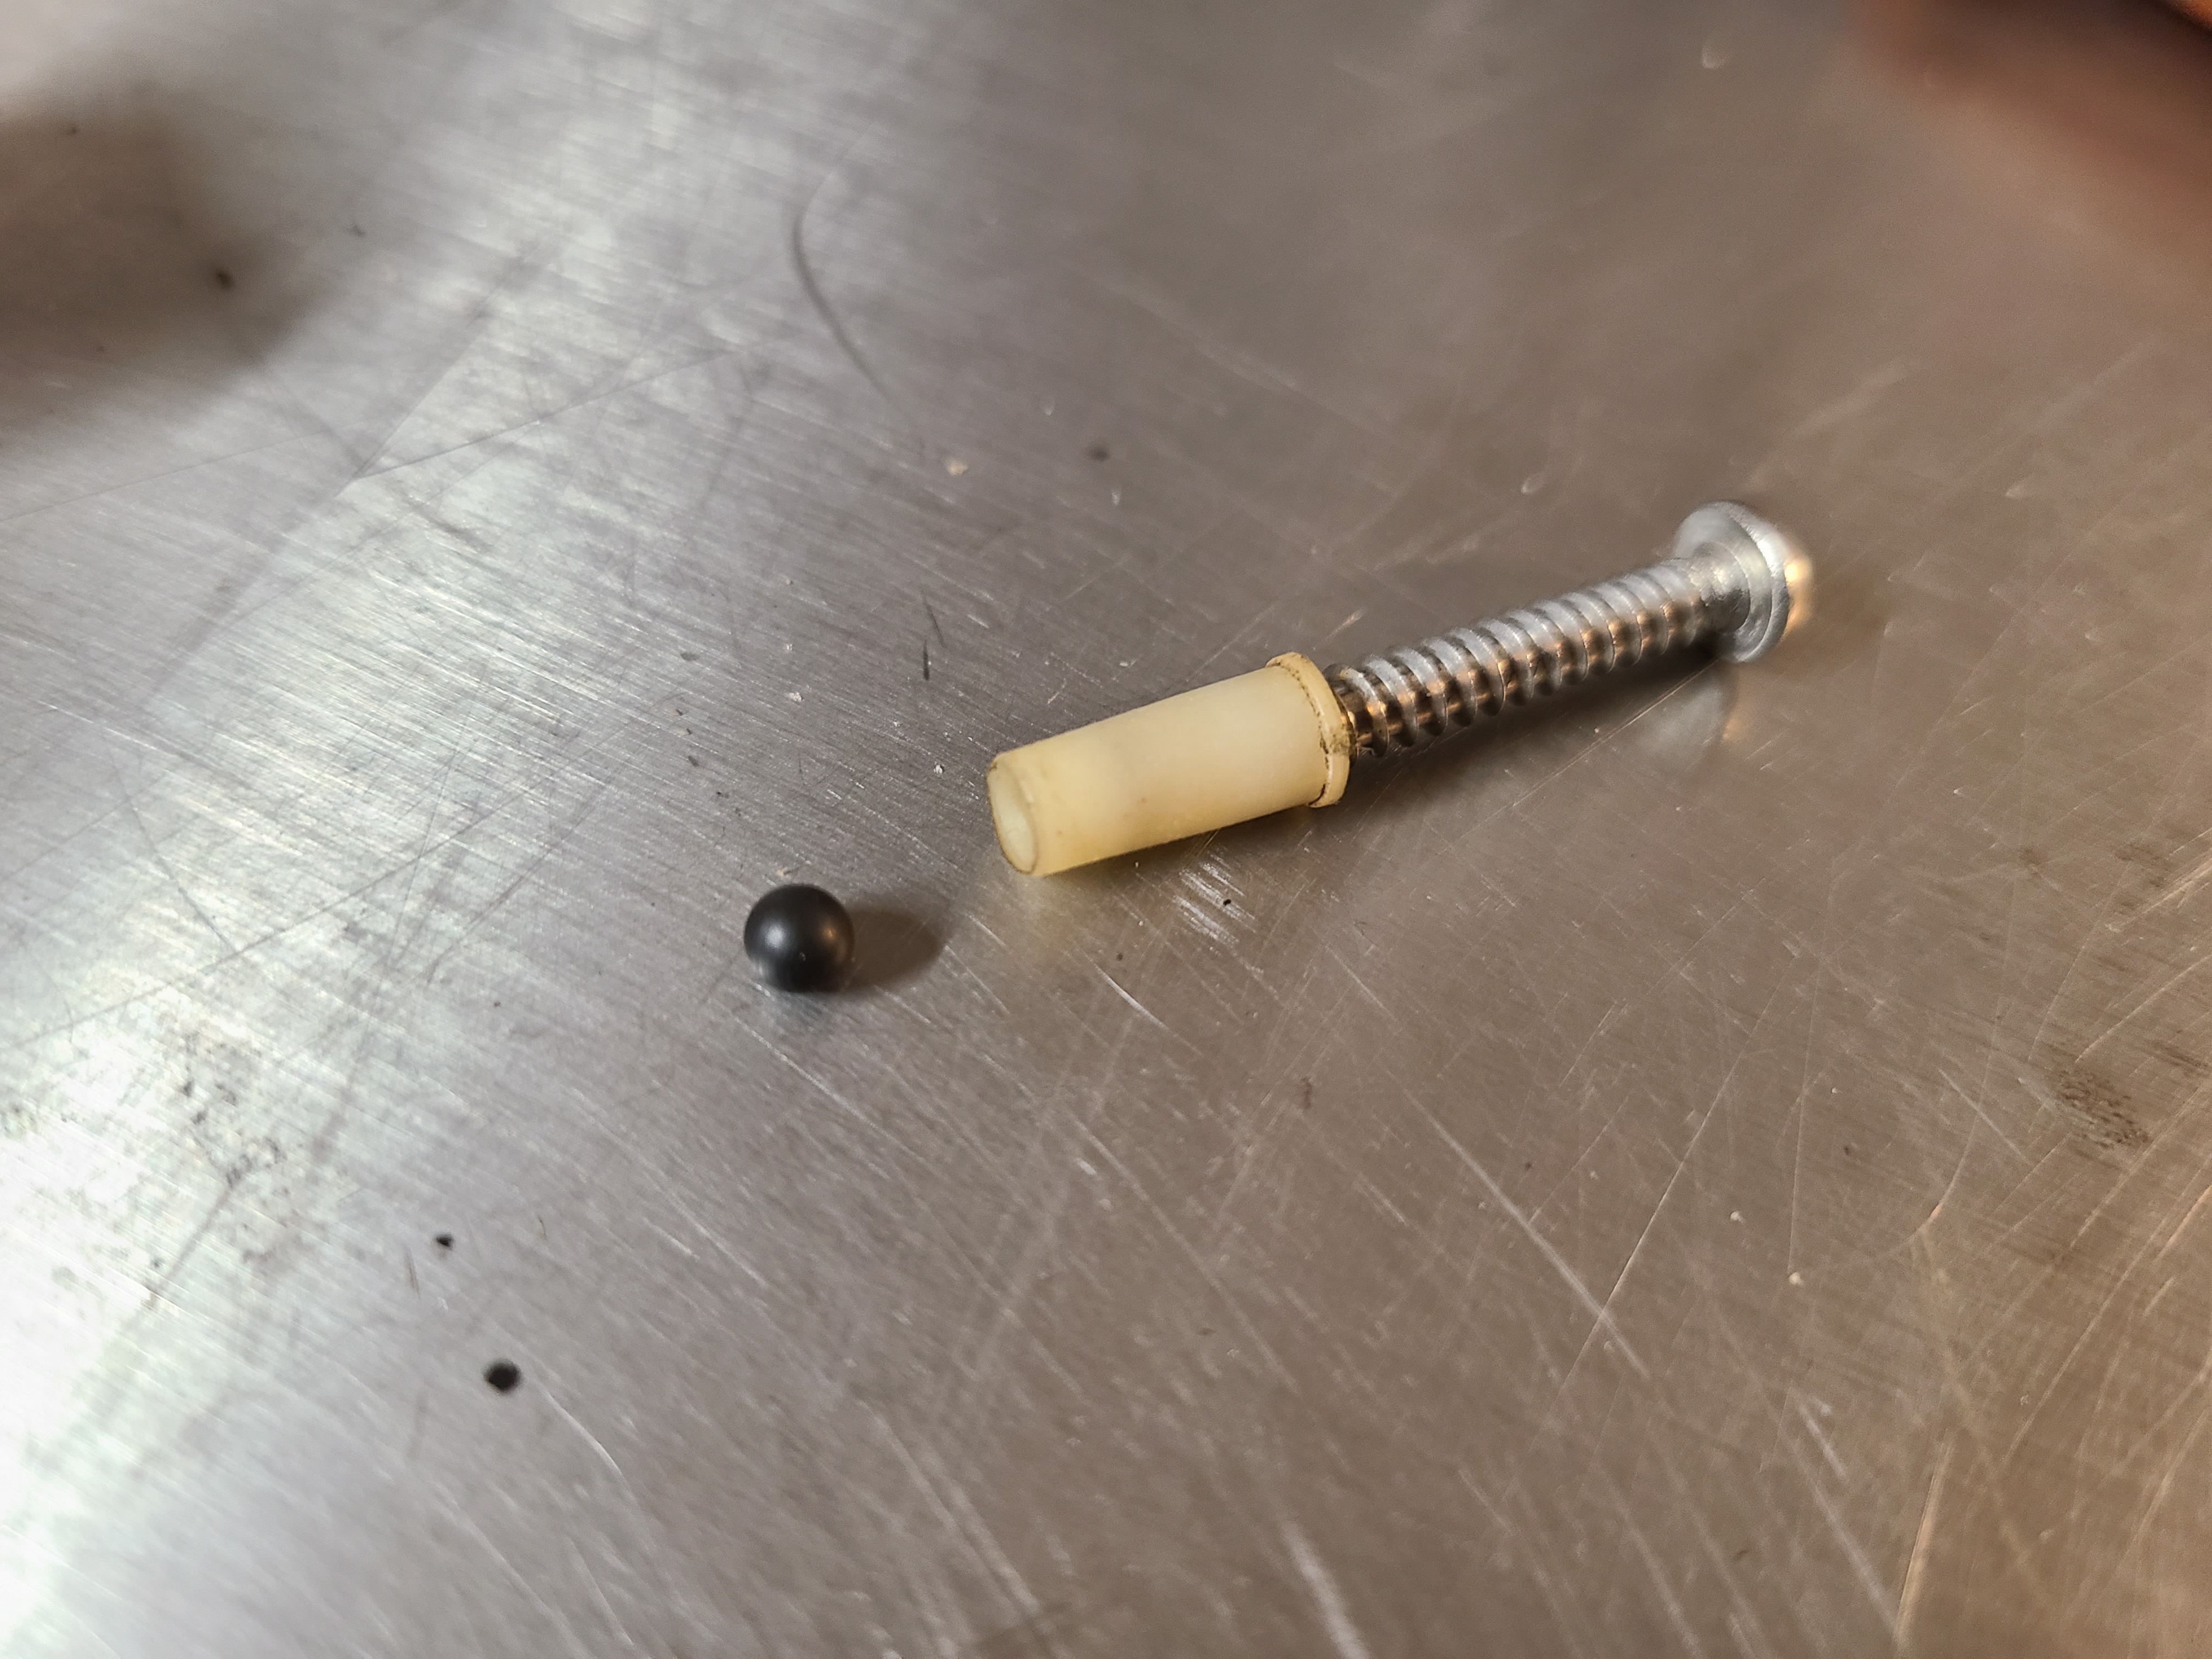
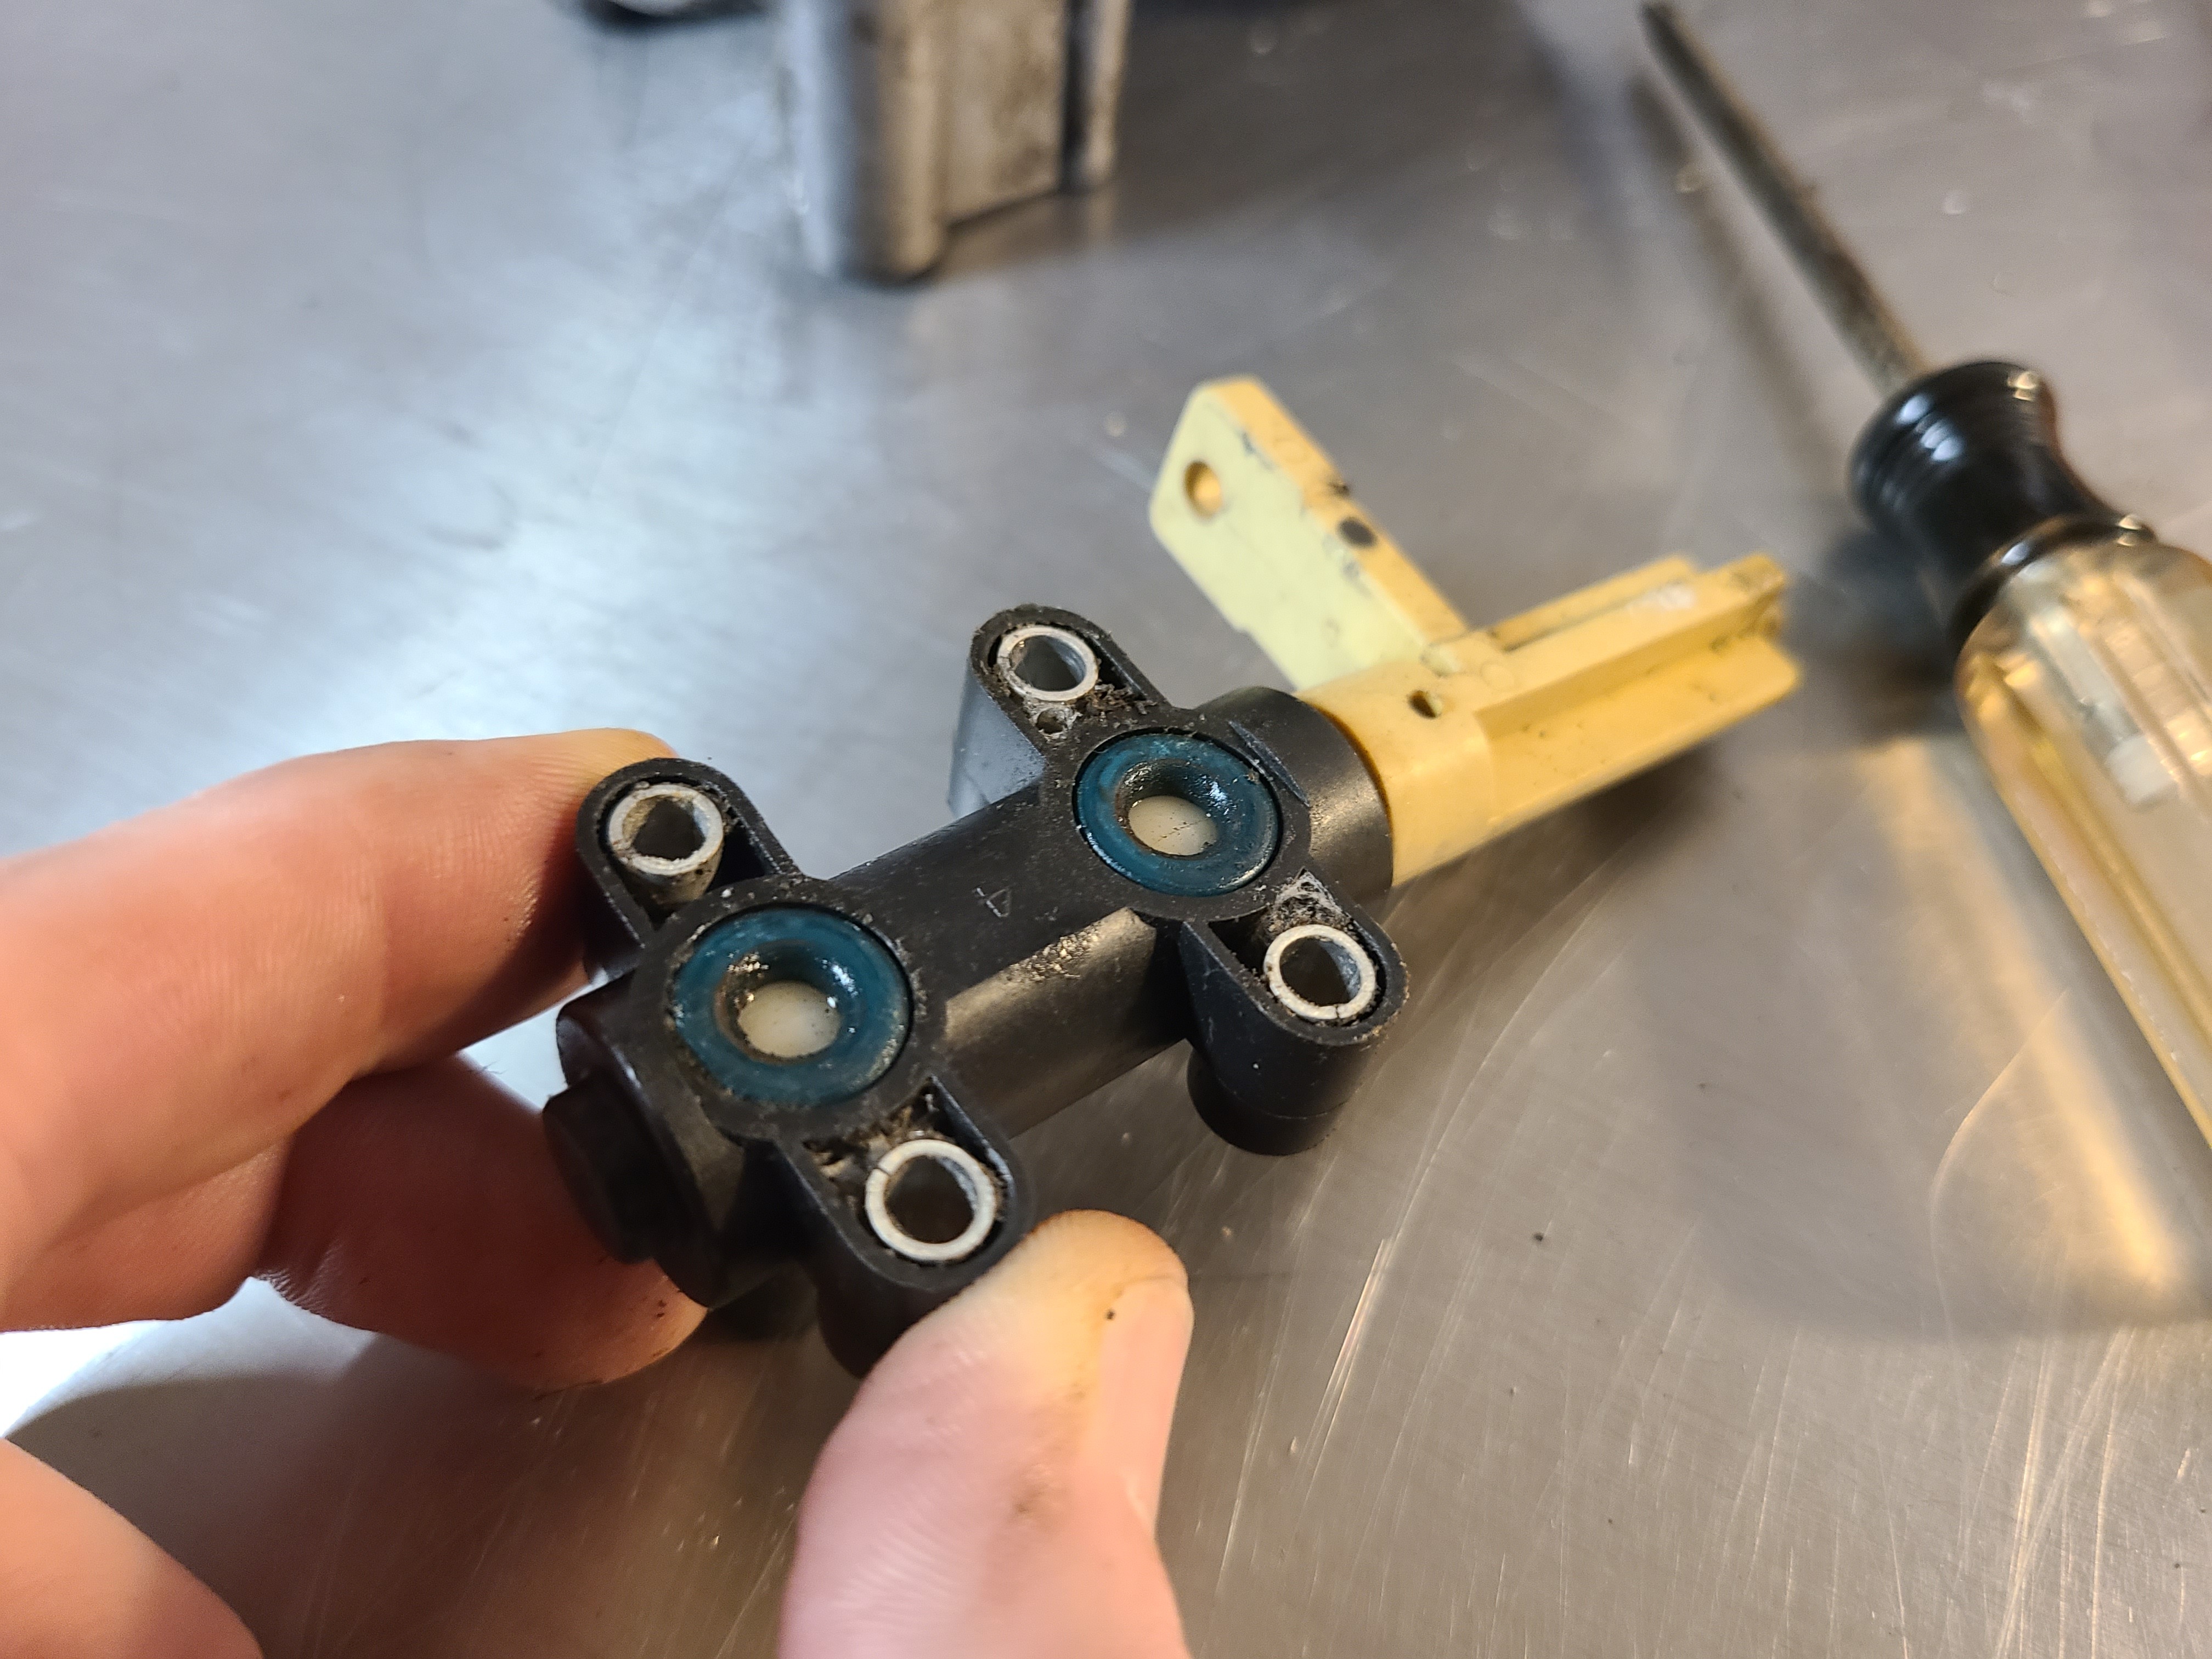
03. After pulling off the valve lever (no tools required), this plastic tube must be removed as well as the check ball it’s holding in. A small course thread screw can help with removal. The screw only needs to be lightly installed and the sleeve can be easily pulled out by pulling on the screw. Be careful not to lose the check ball behind the sleeve.
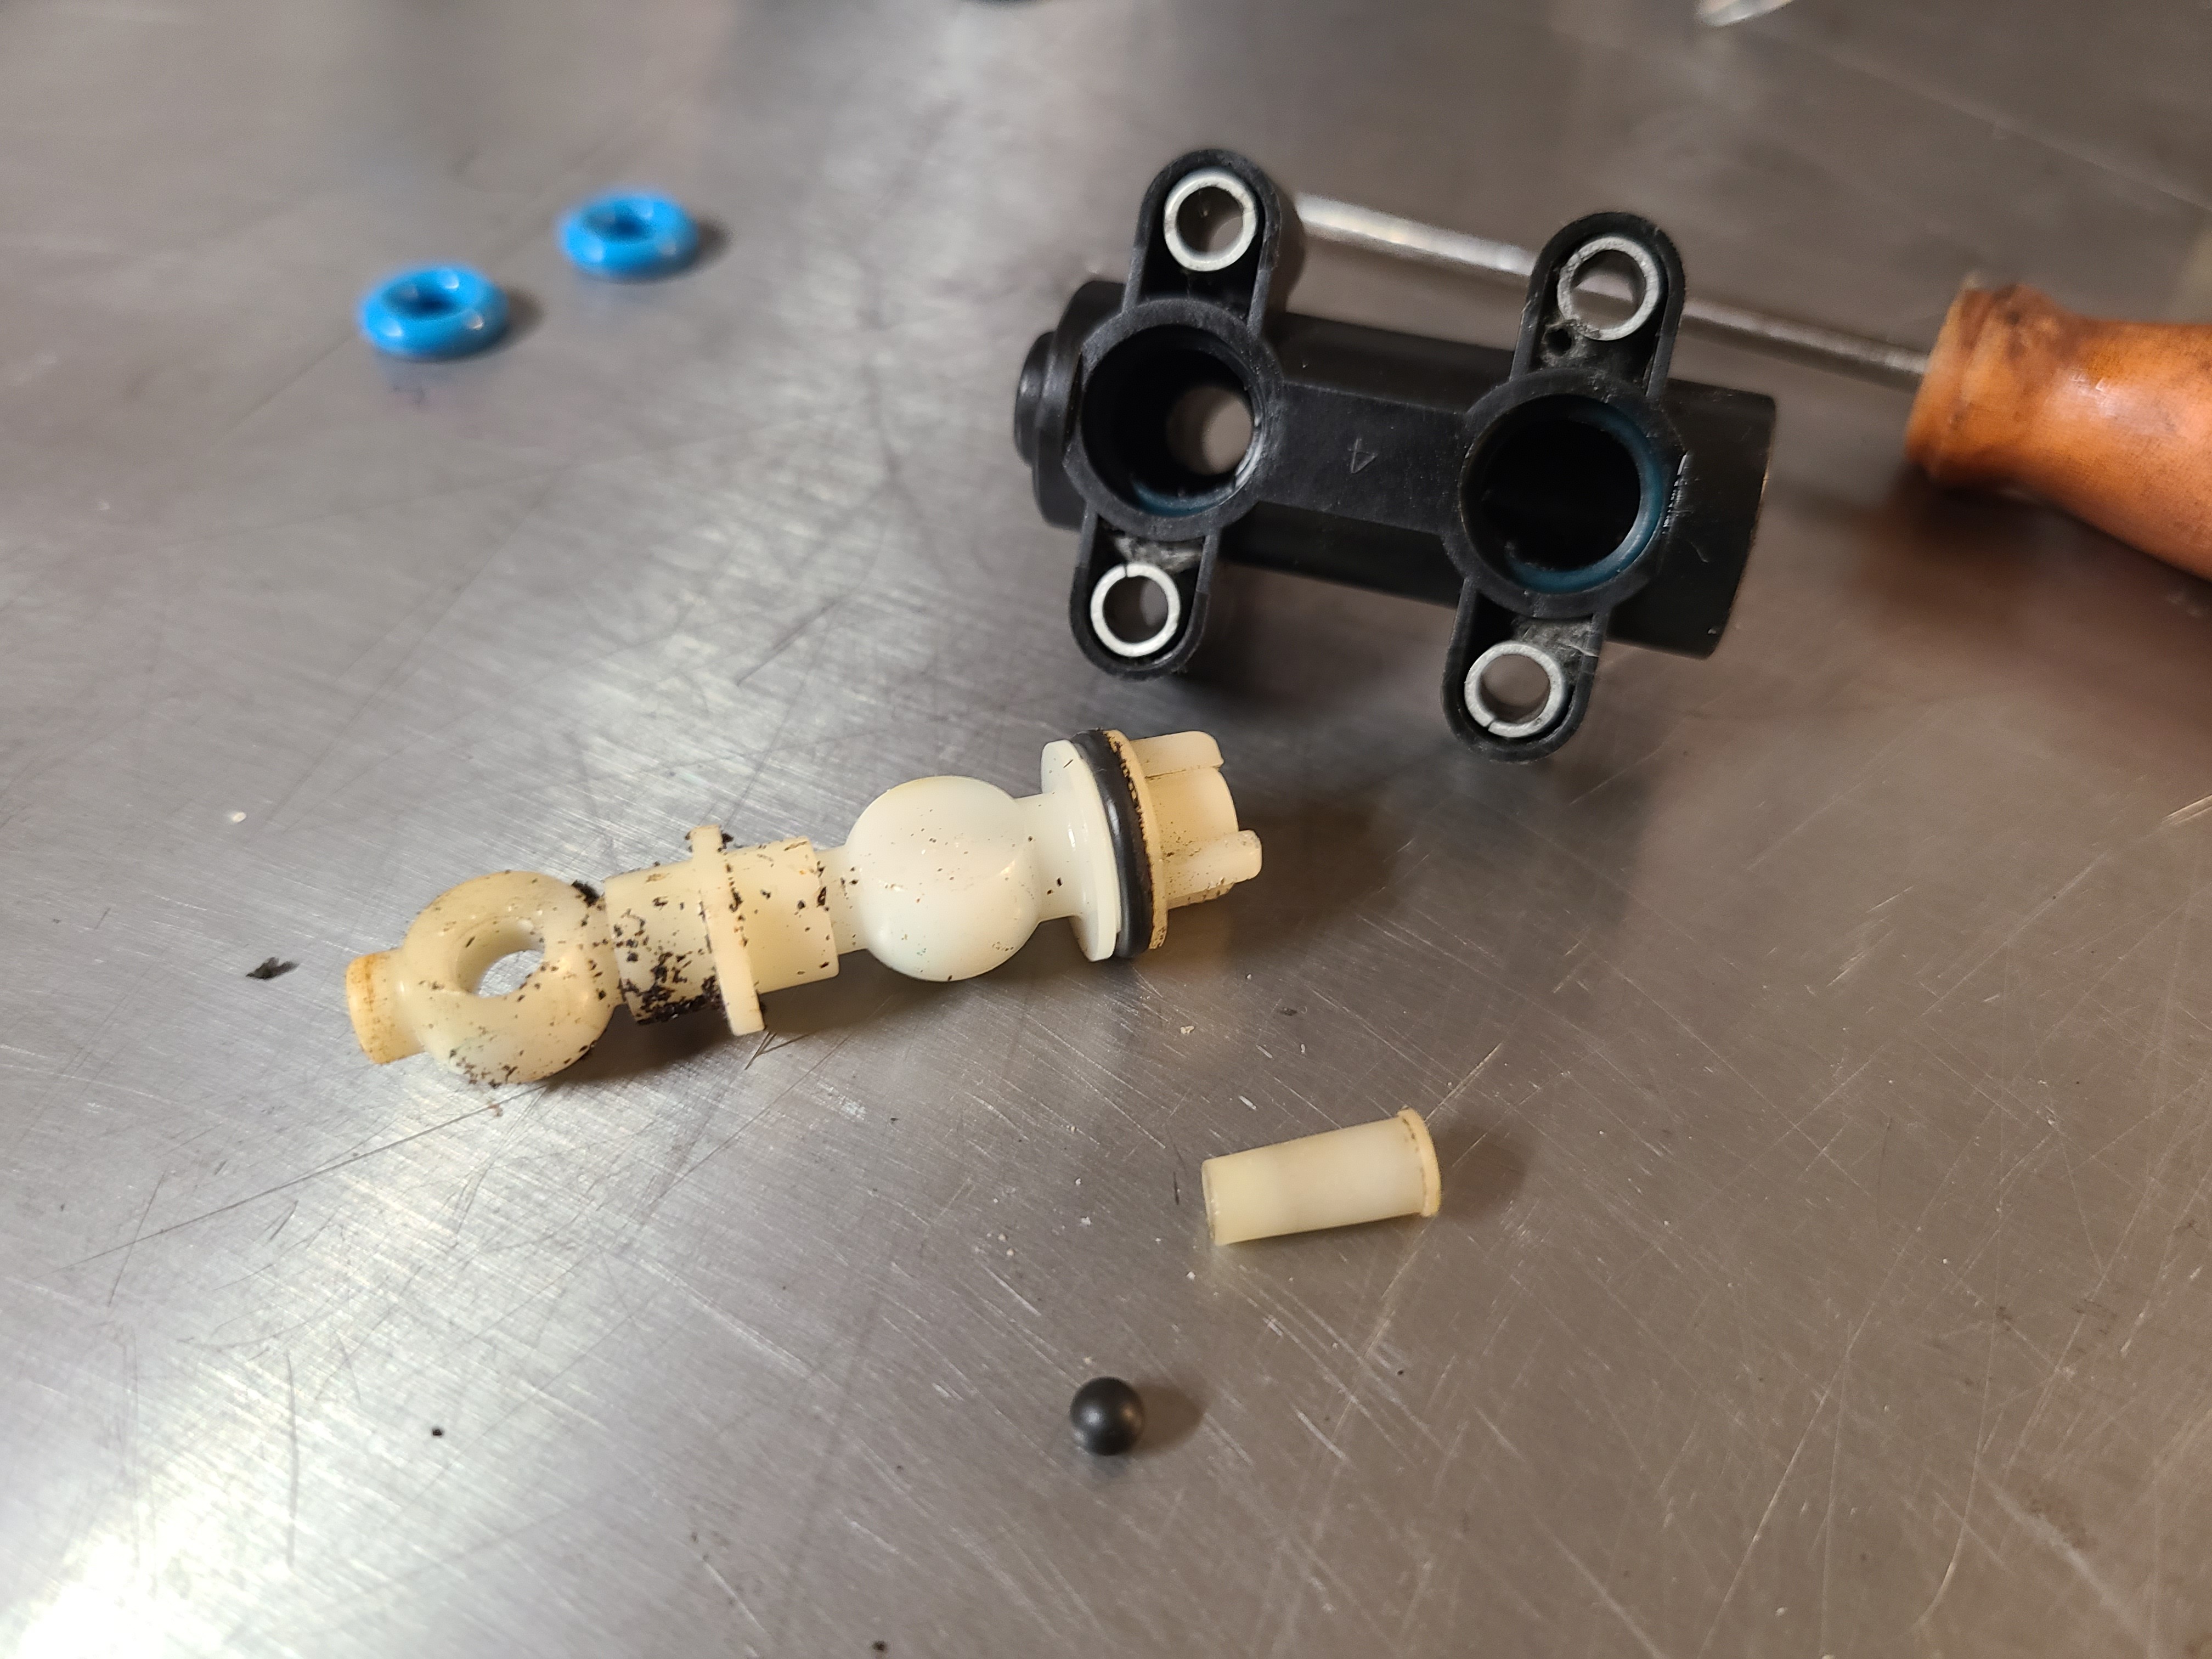
04. Next the valve shaft needs to be removed by pulling it straight out of the assembly. This shaft does need to be clocked correctly to be removed. Rotate the shaft until you see a flat spot, then the shaft can be pulled out.
Replace the shaft O-ring with the new O-ring supplied in the Riffraff kit. The shaft can then be reinstalled into the assembly keeping in mind that the flat spots must line up correctly with the assembly. The check ball and sleeve can be reinstalled at this time as well.
Note: Use a bit of clean diesel fuel as lubricant on the O-ring to ease in reinstallation. This tip should be used for all seals from here on.
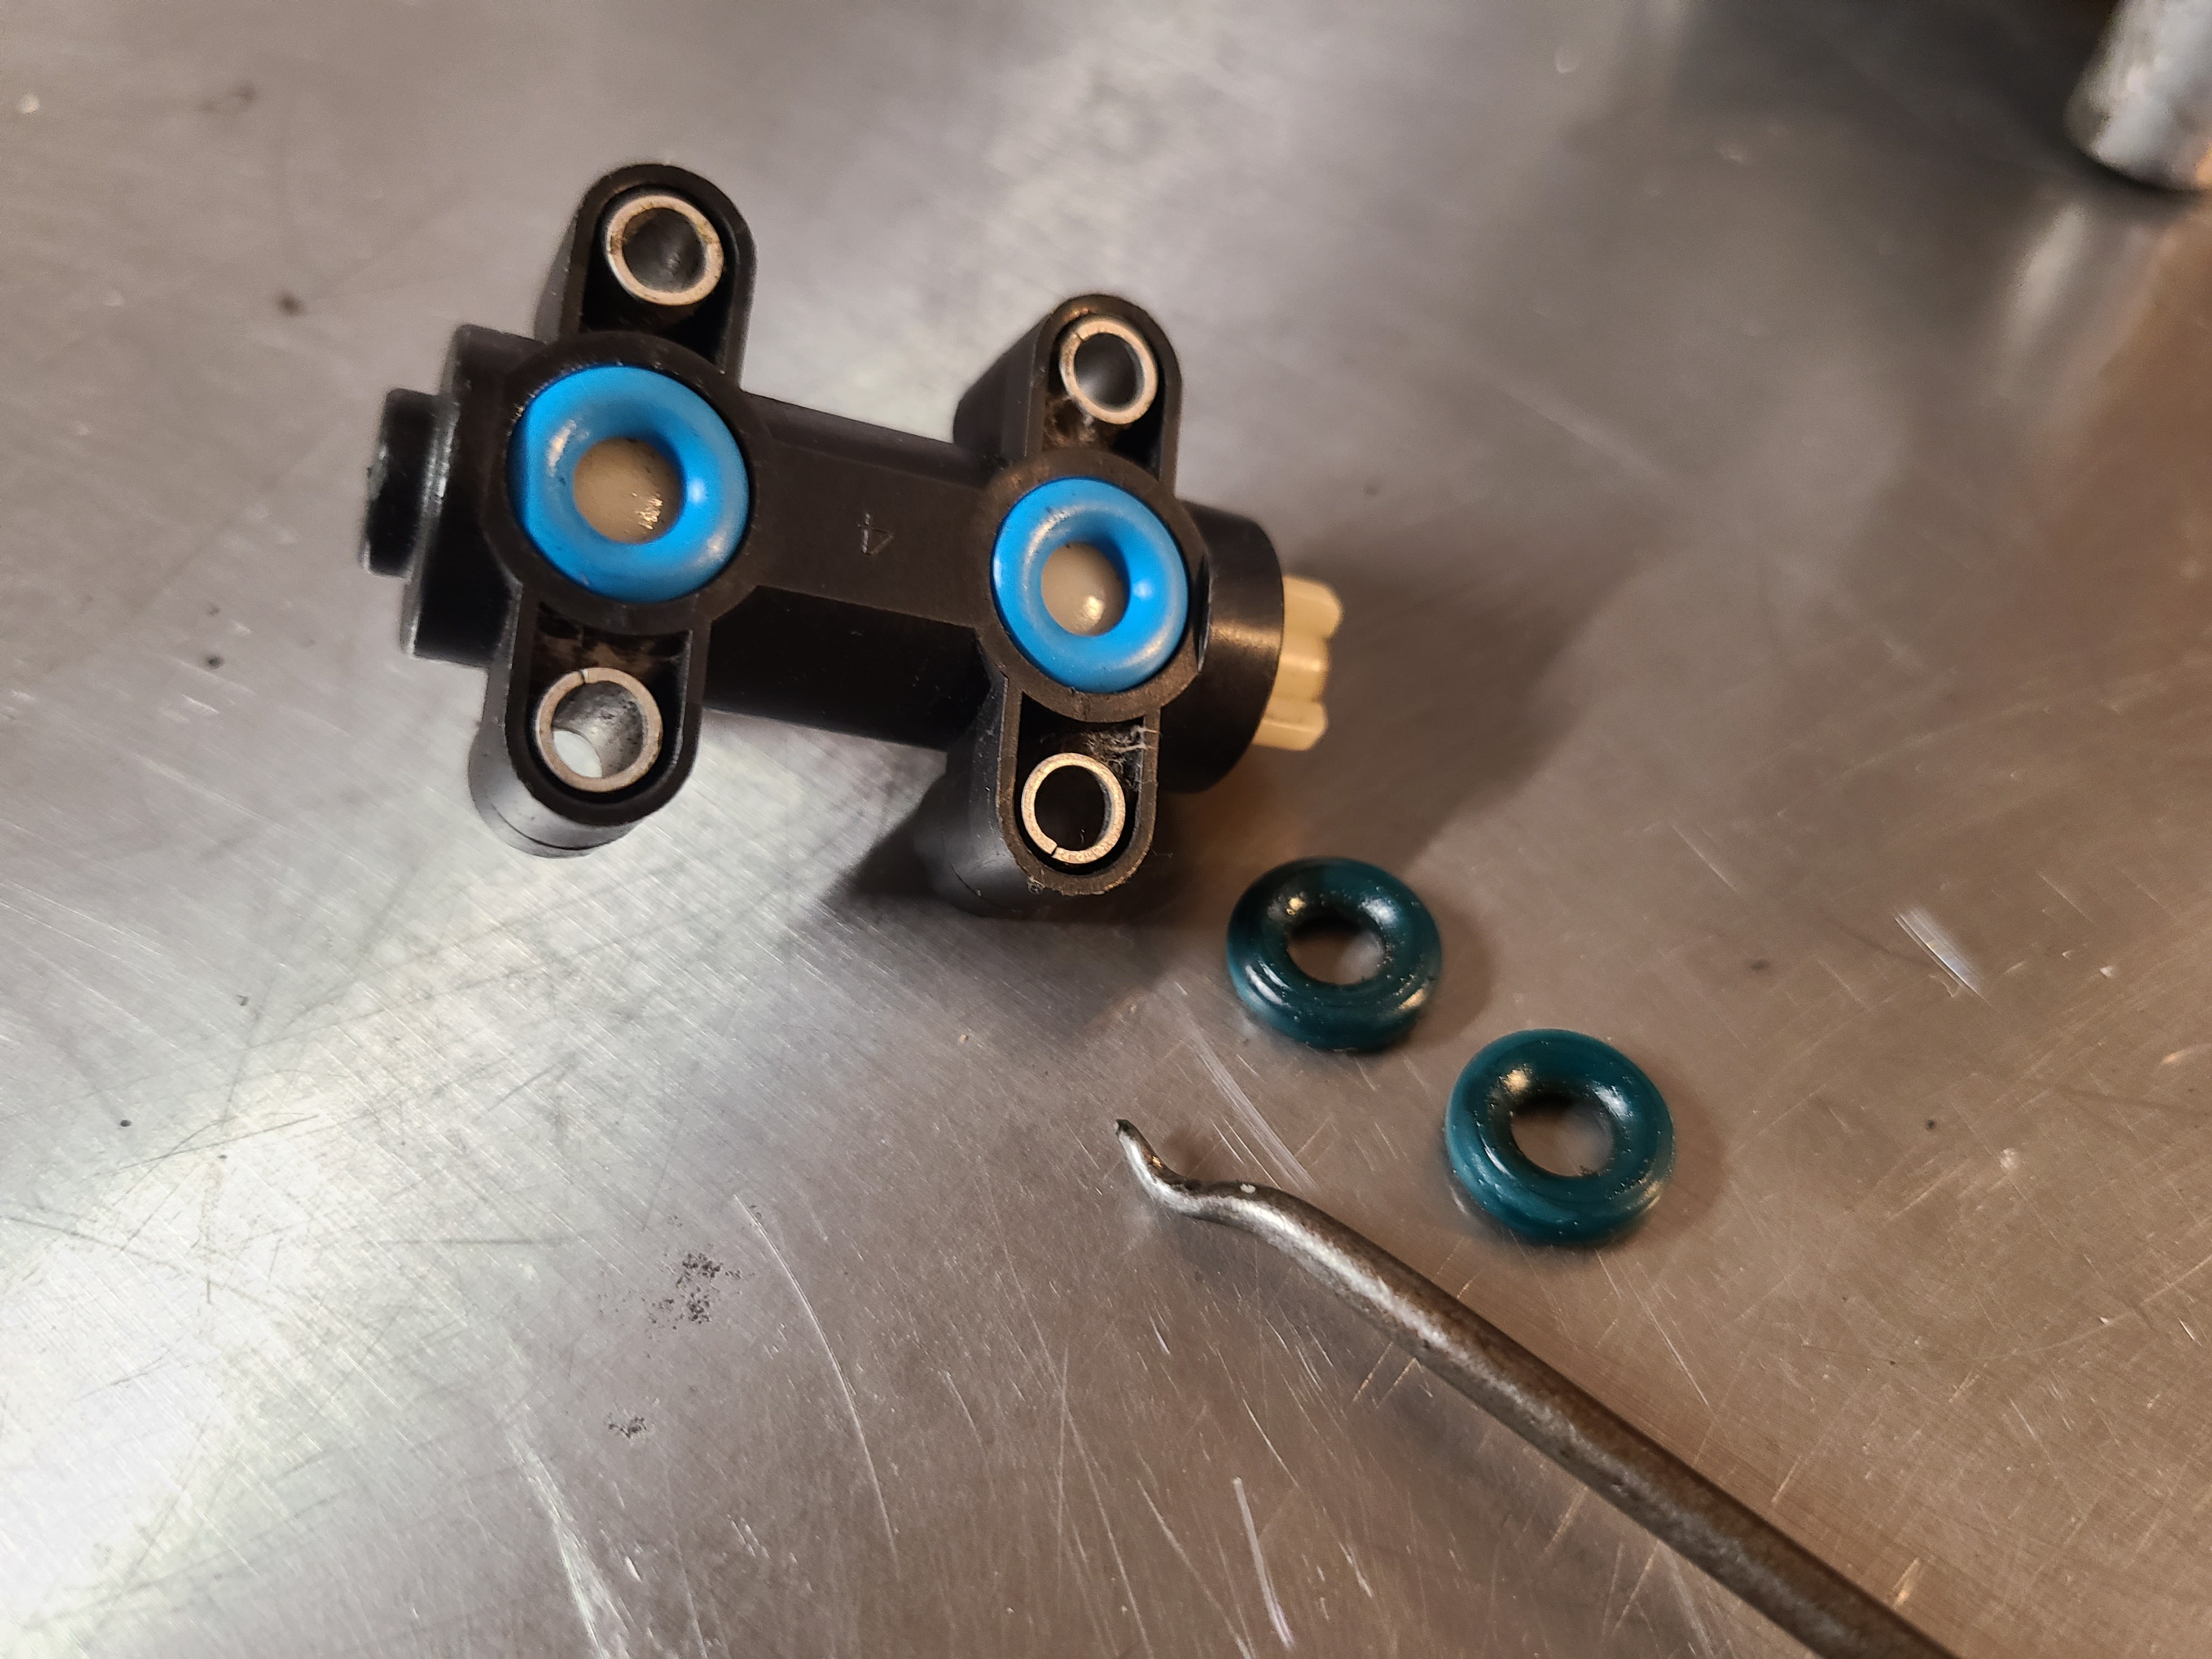
05. With the shaft reinstalled, new O-rings can be installed on the ports, and the entire assembly can be reinstalled onto the fuel bowl. Torque the four Torx bolts to 22 in-lbs.
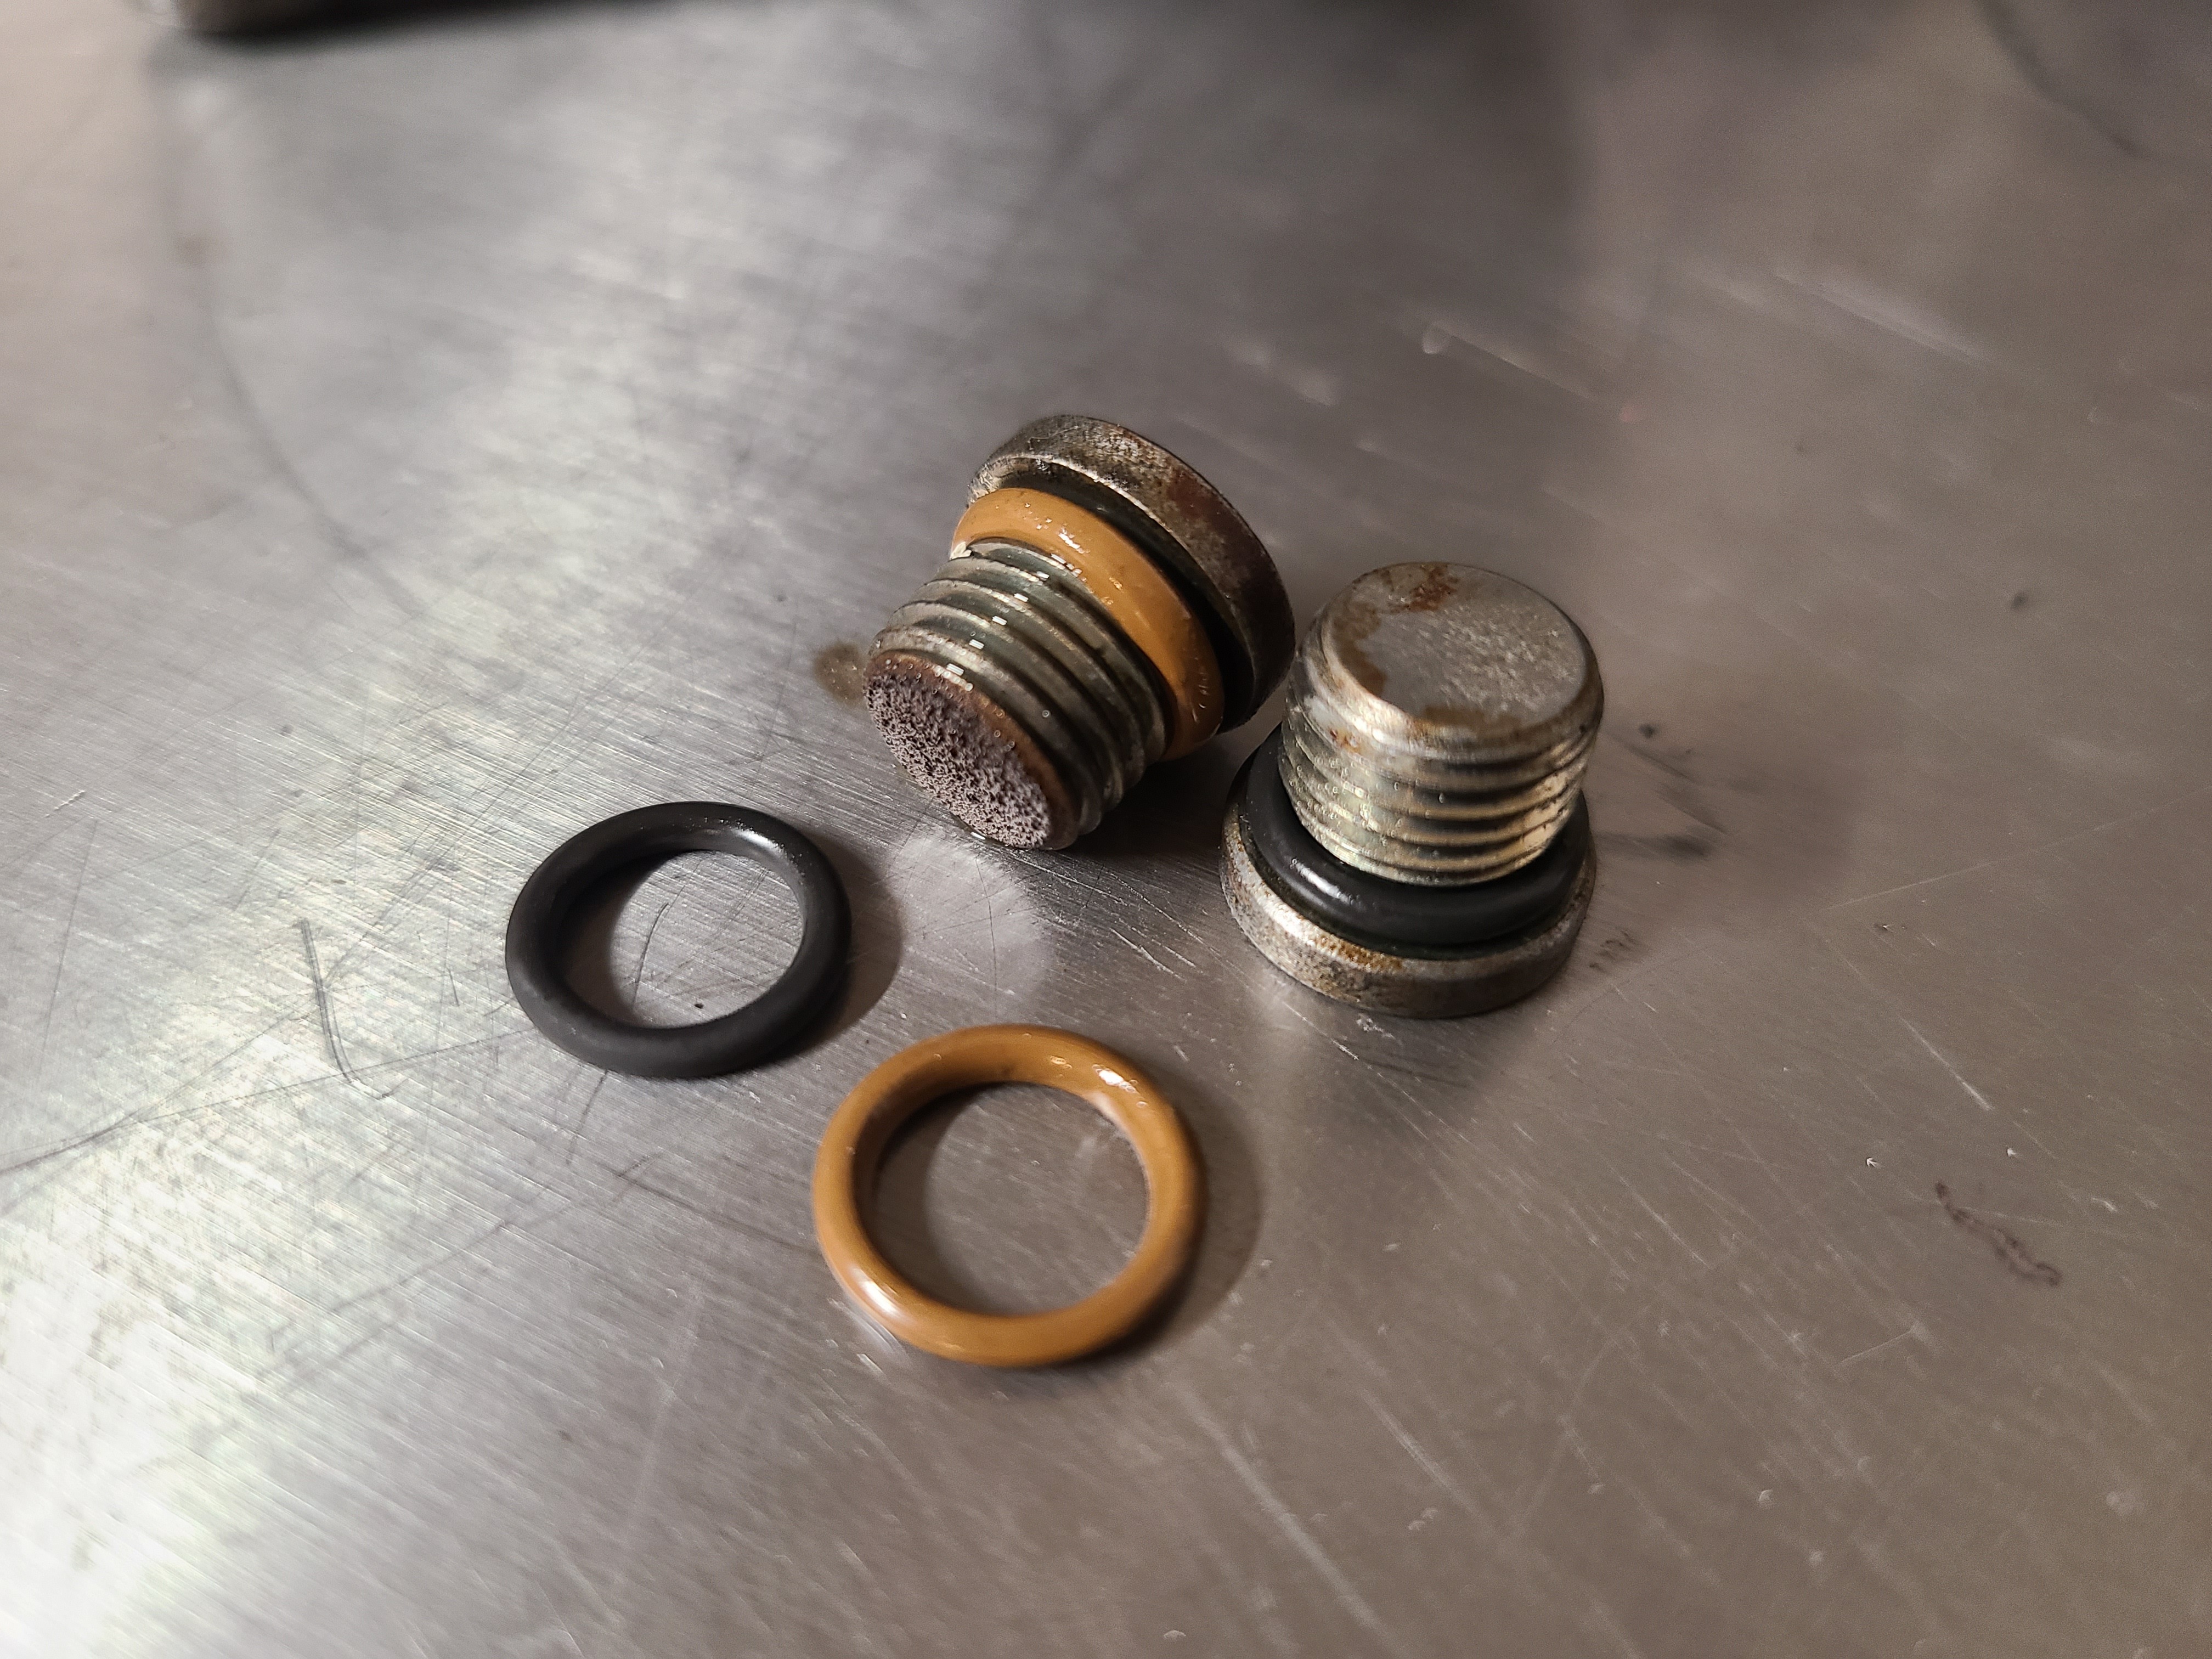
06. Next replace the O-rings on each of the two port/gallery plugs. Removal is done with a 3/16” Allen key. Once the O-rings are replaced, lube them with diesel and reinstall.
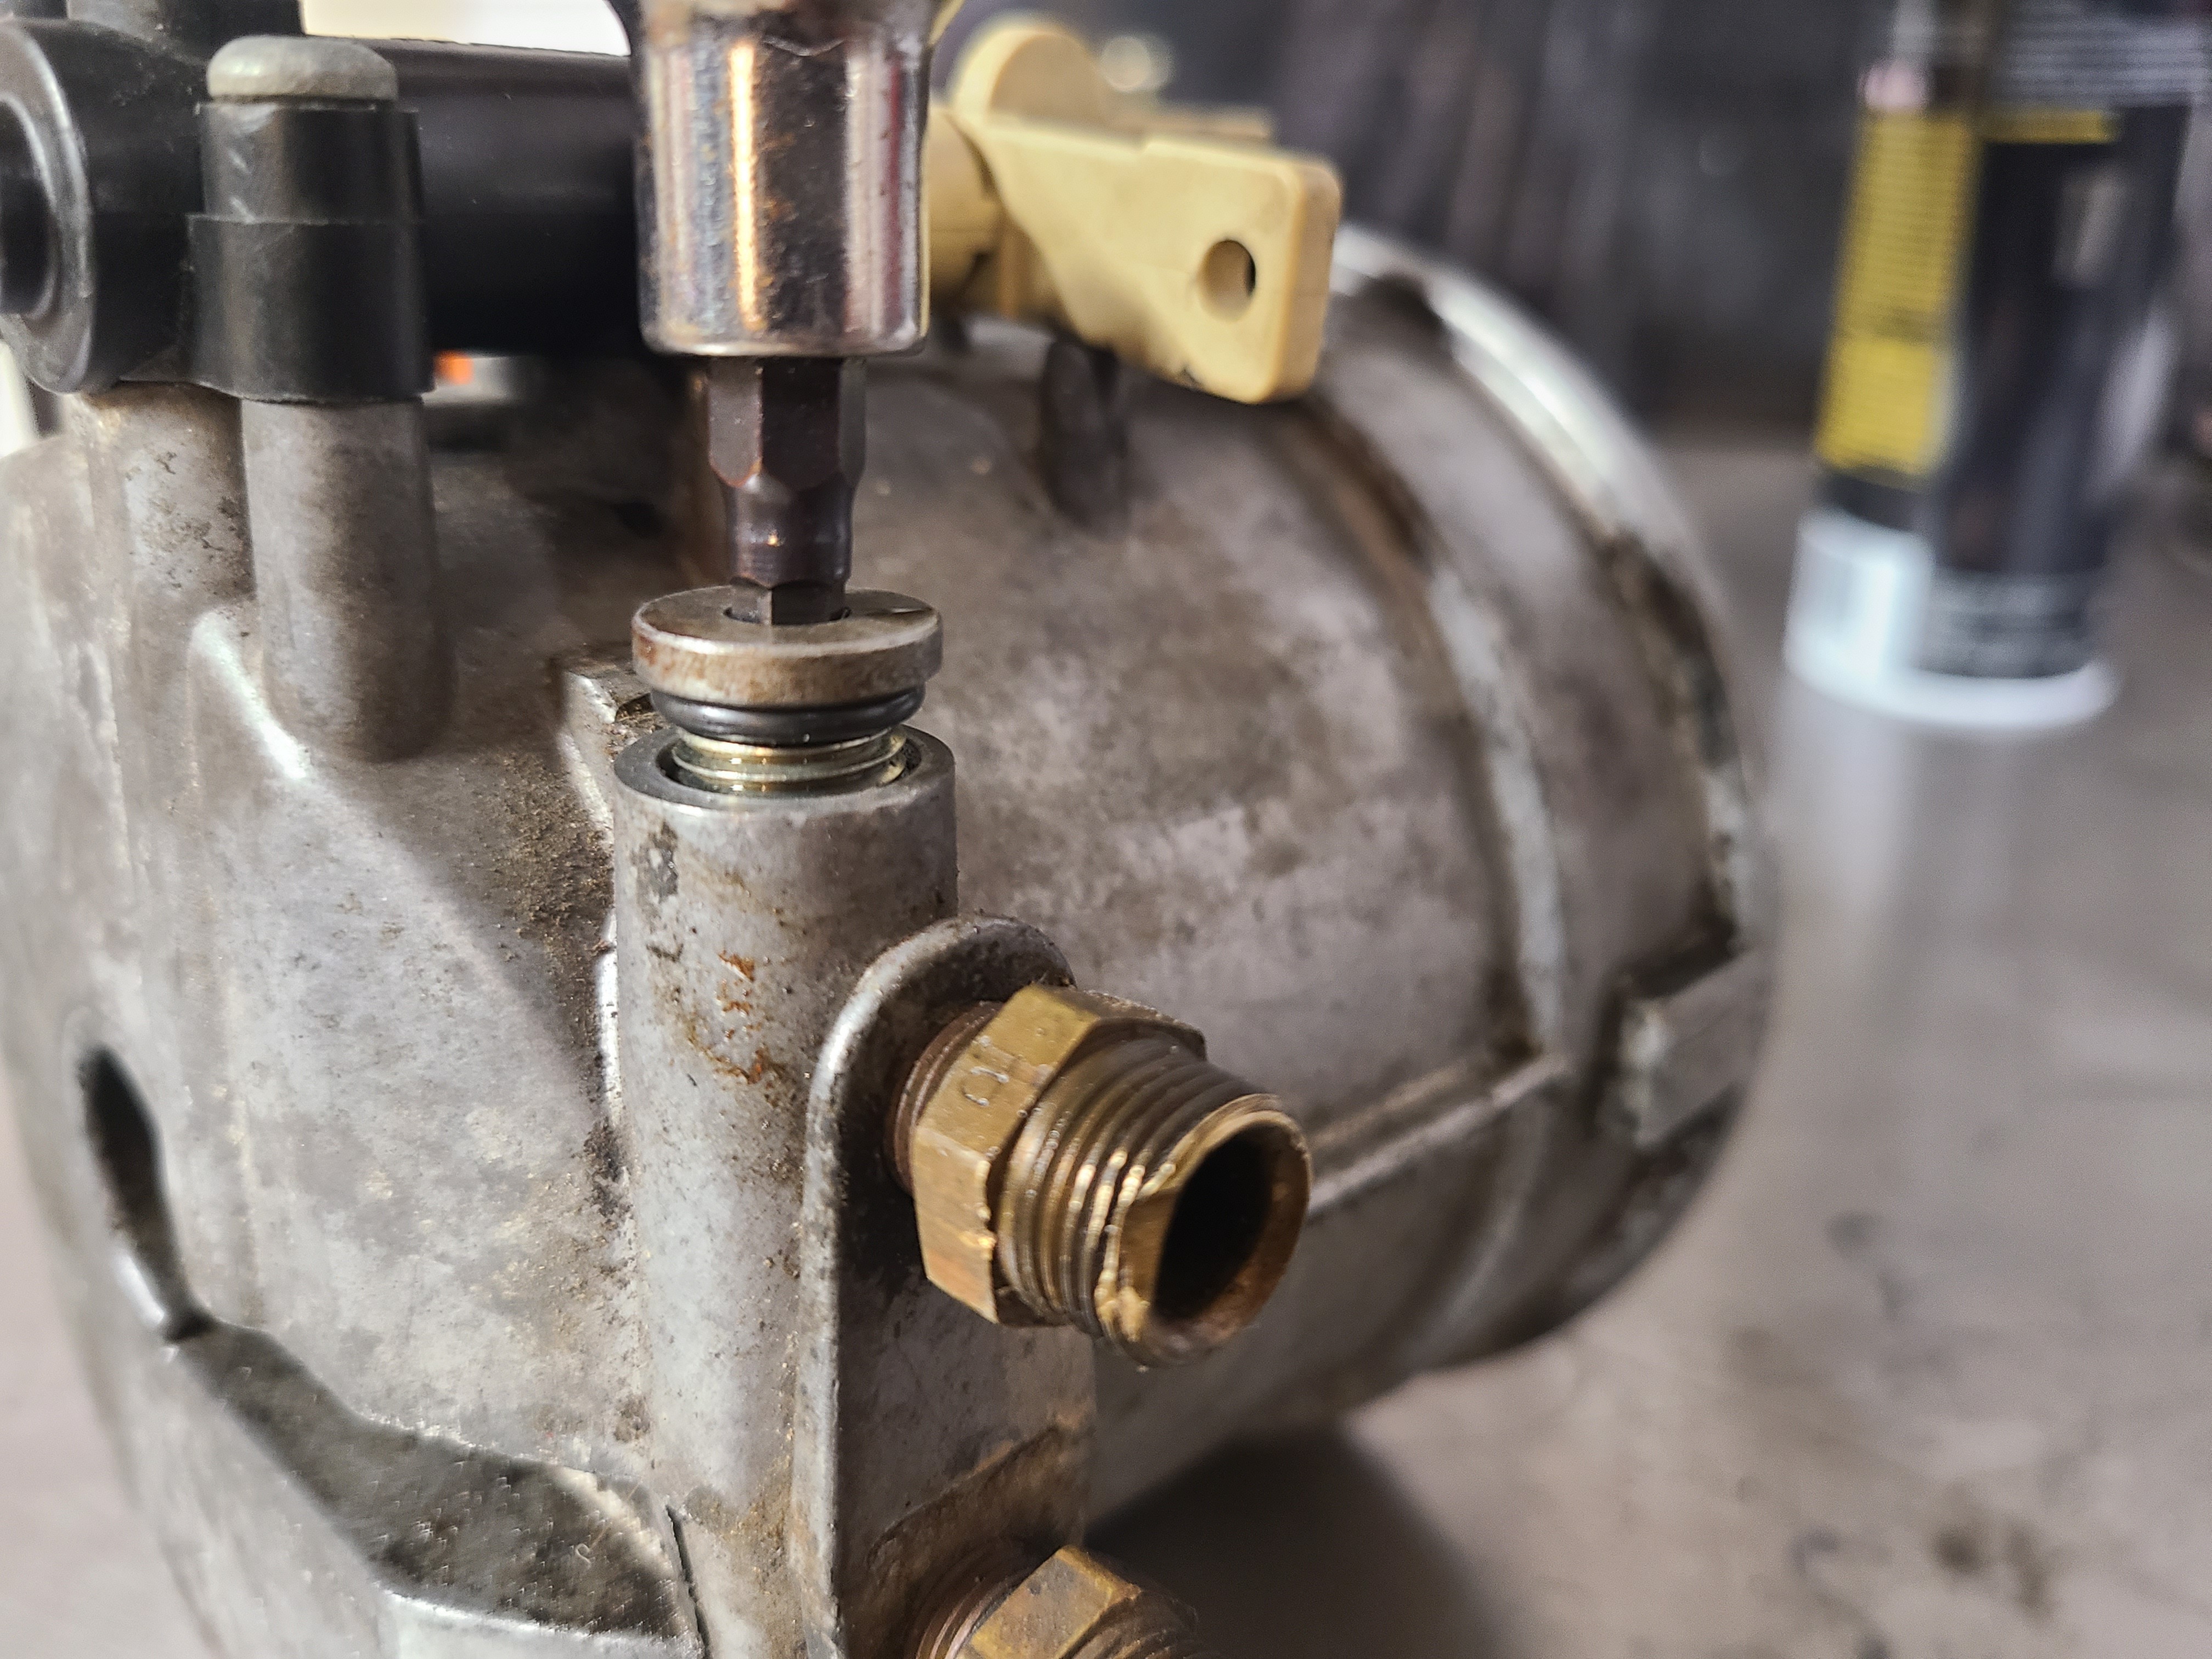
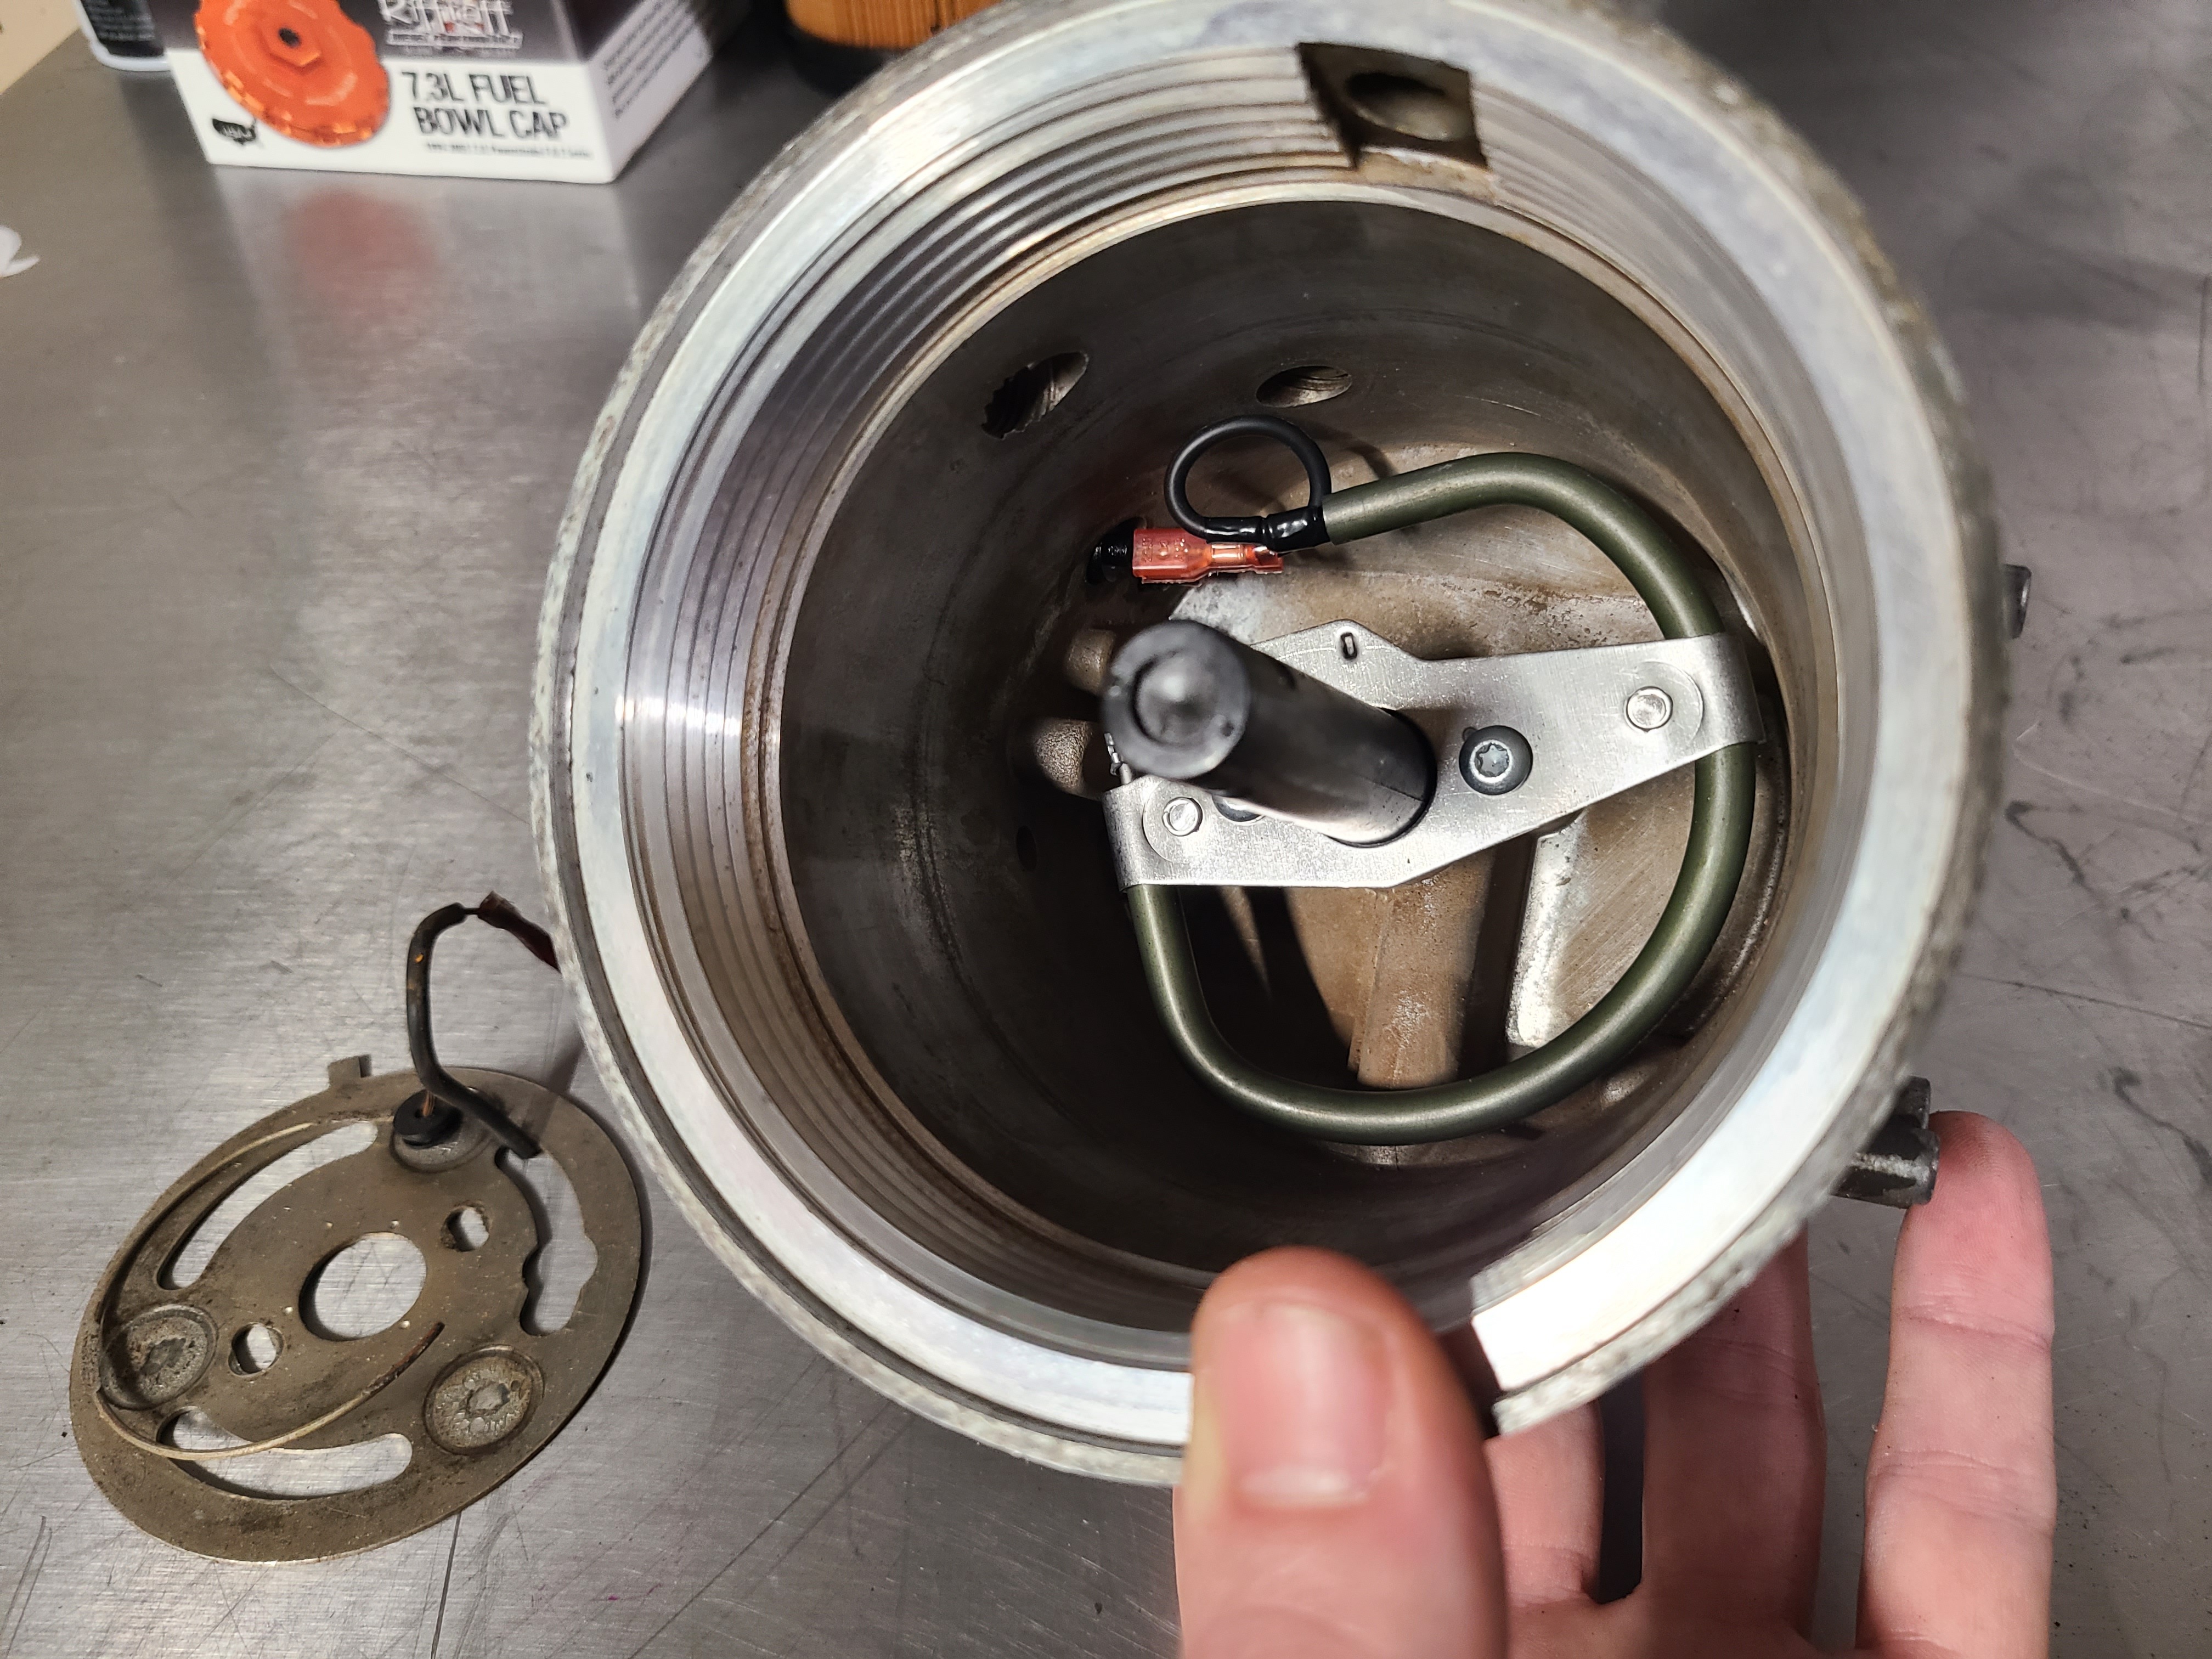
07. The Water In Fuel sensor is the next to tackle. Remove the two T20 Torx screws followed by the sensor itself.
08. Replace the two O-rings, lubricate them, and the sensor can be reinstalled.
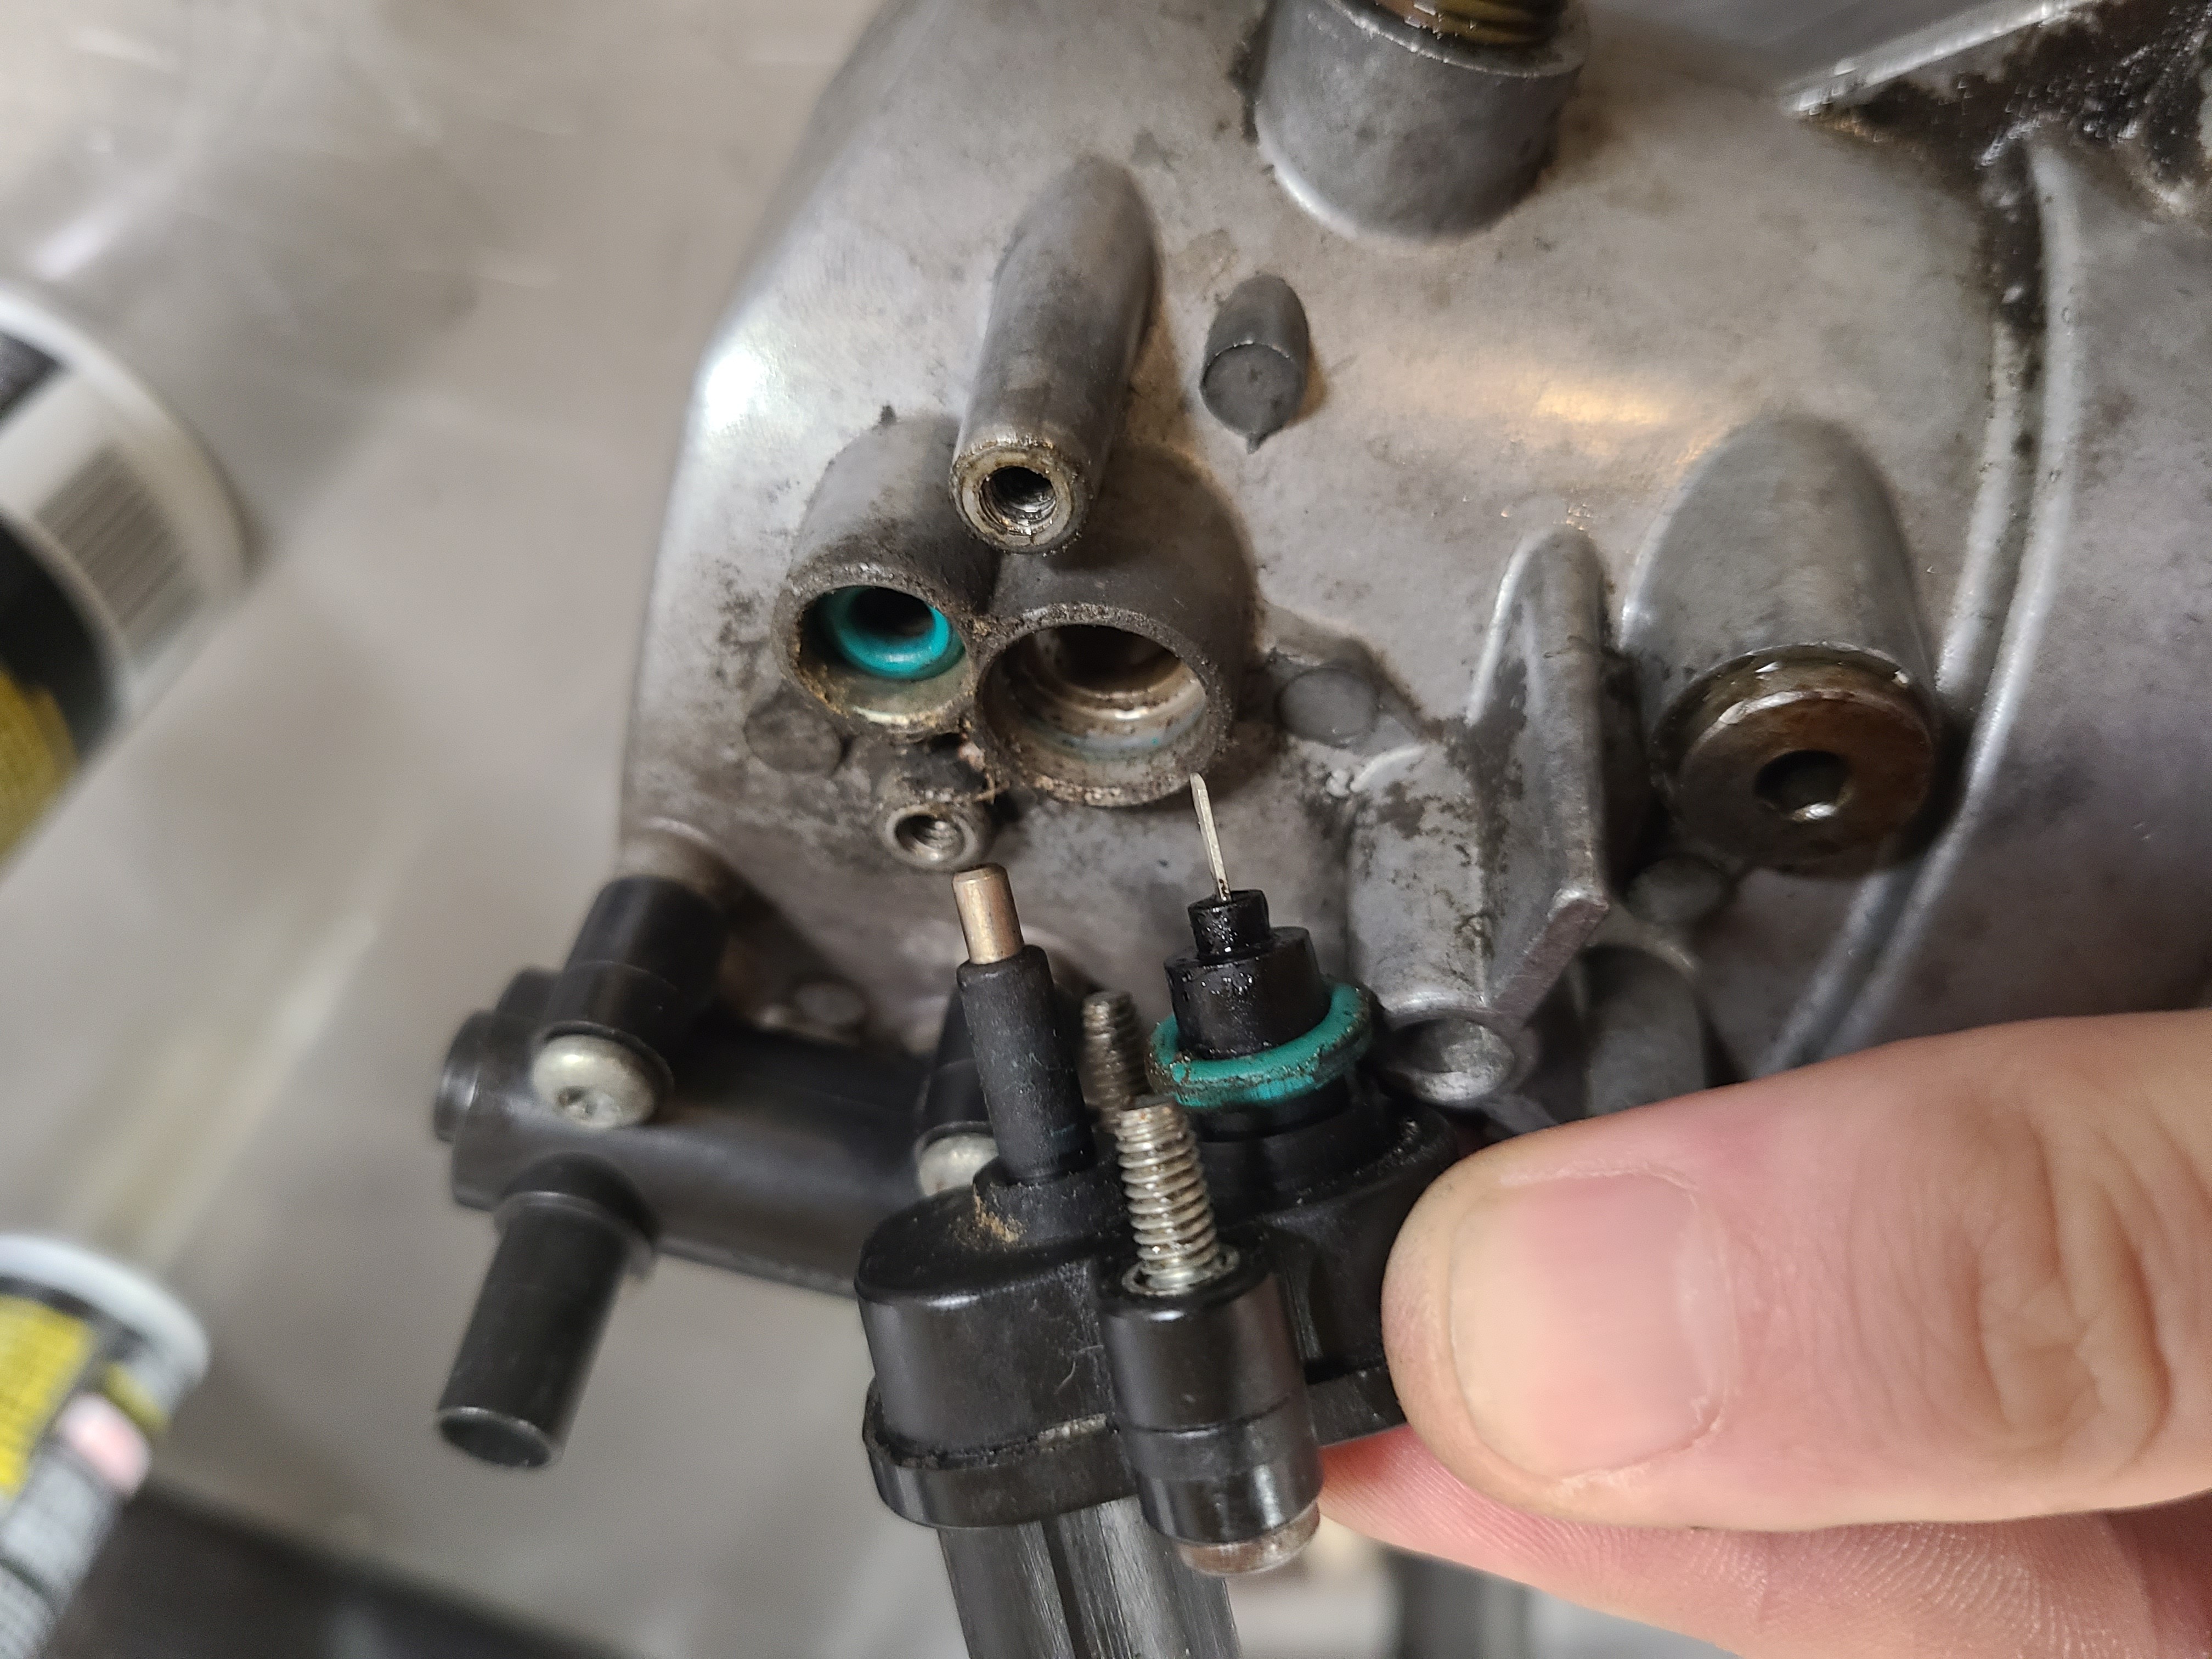
09. The check valve assembly and fuel heater are next. Within the bowl, remove the two T20 Torx screws and both the heater and check valve assembly can be moved aside for the next step. Do not fully remove these parts yet.
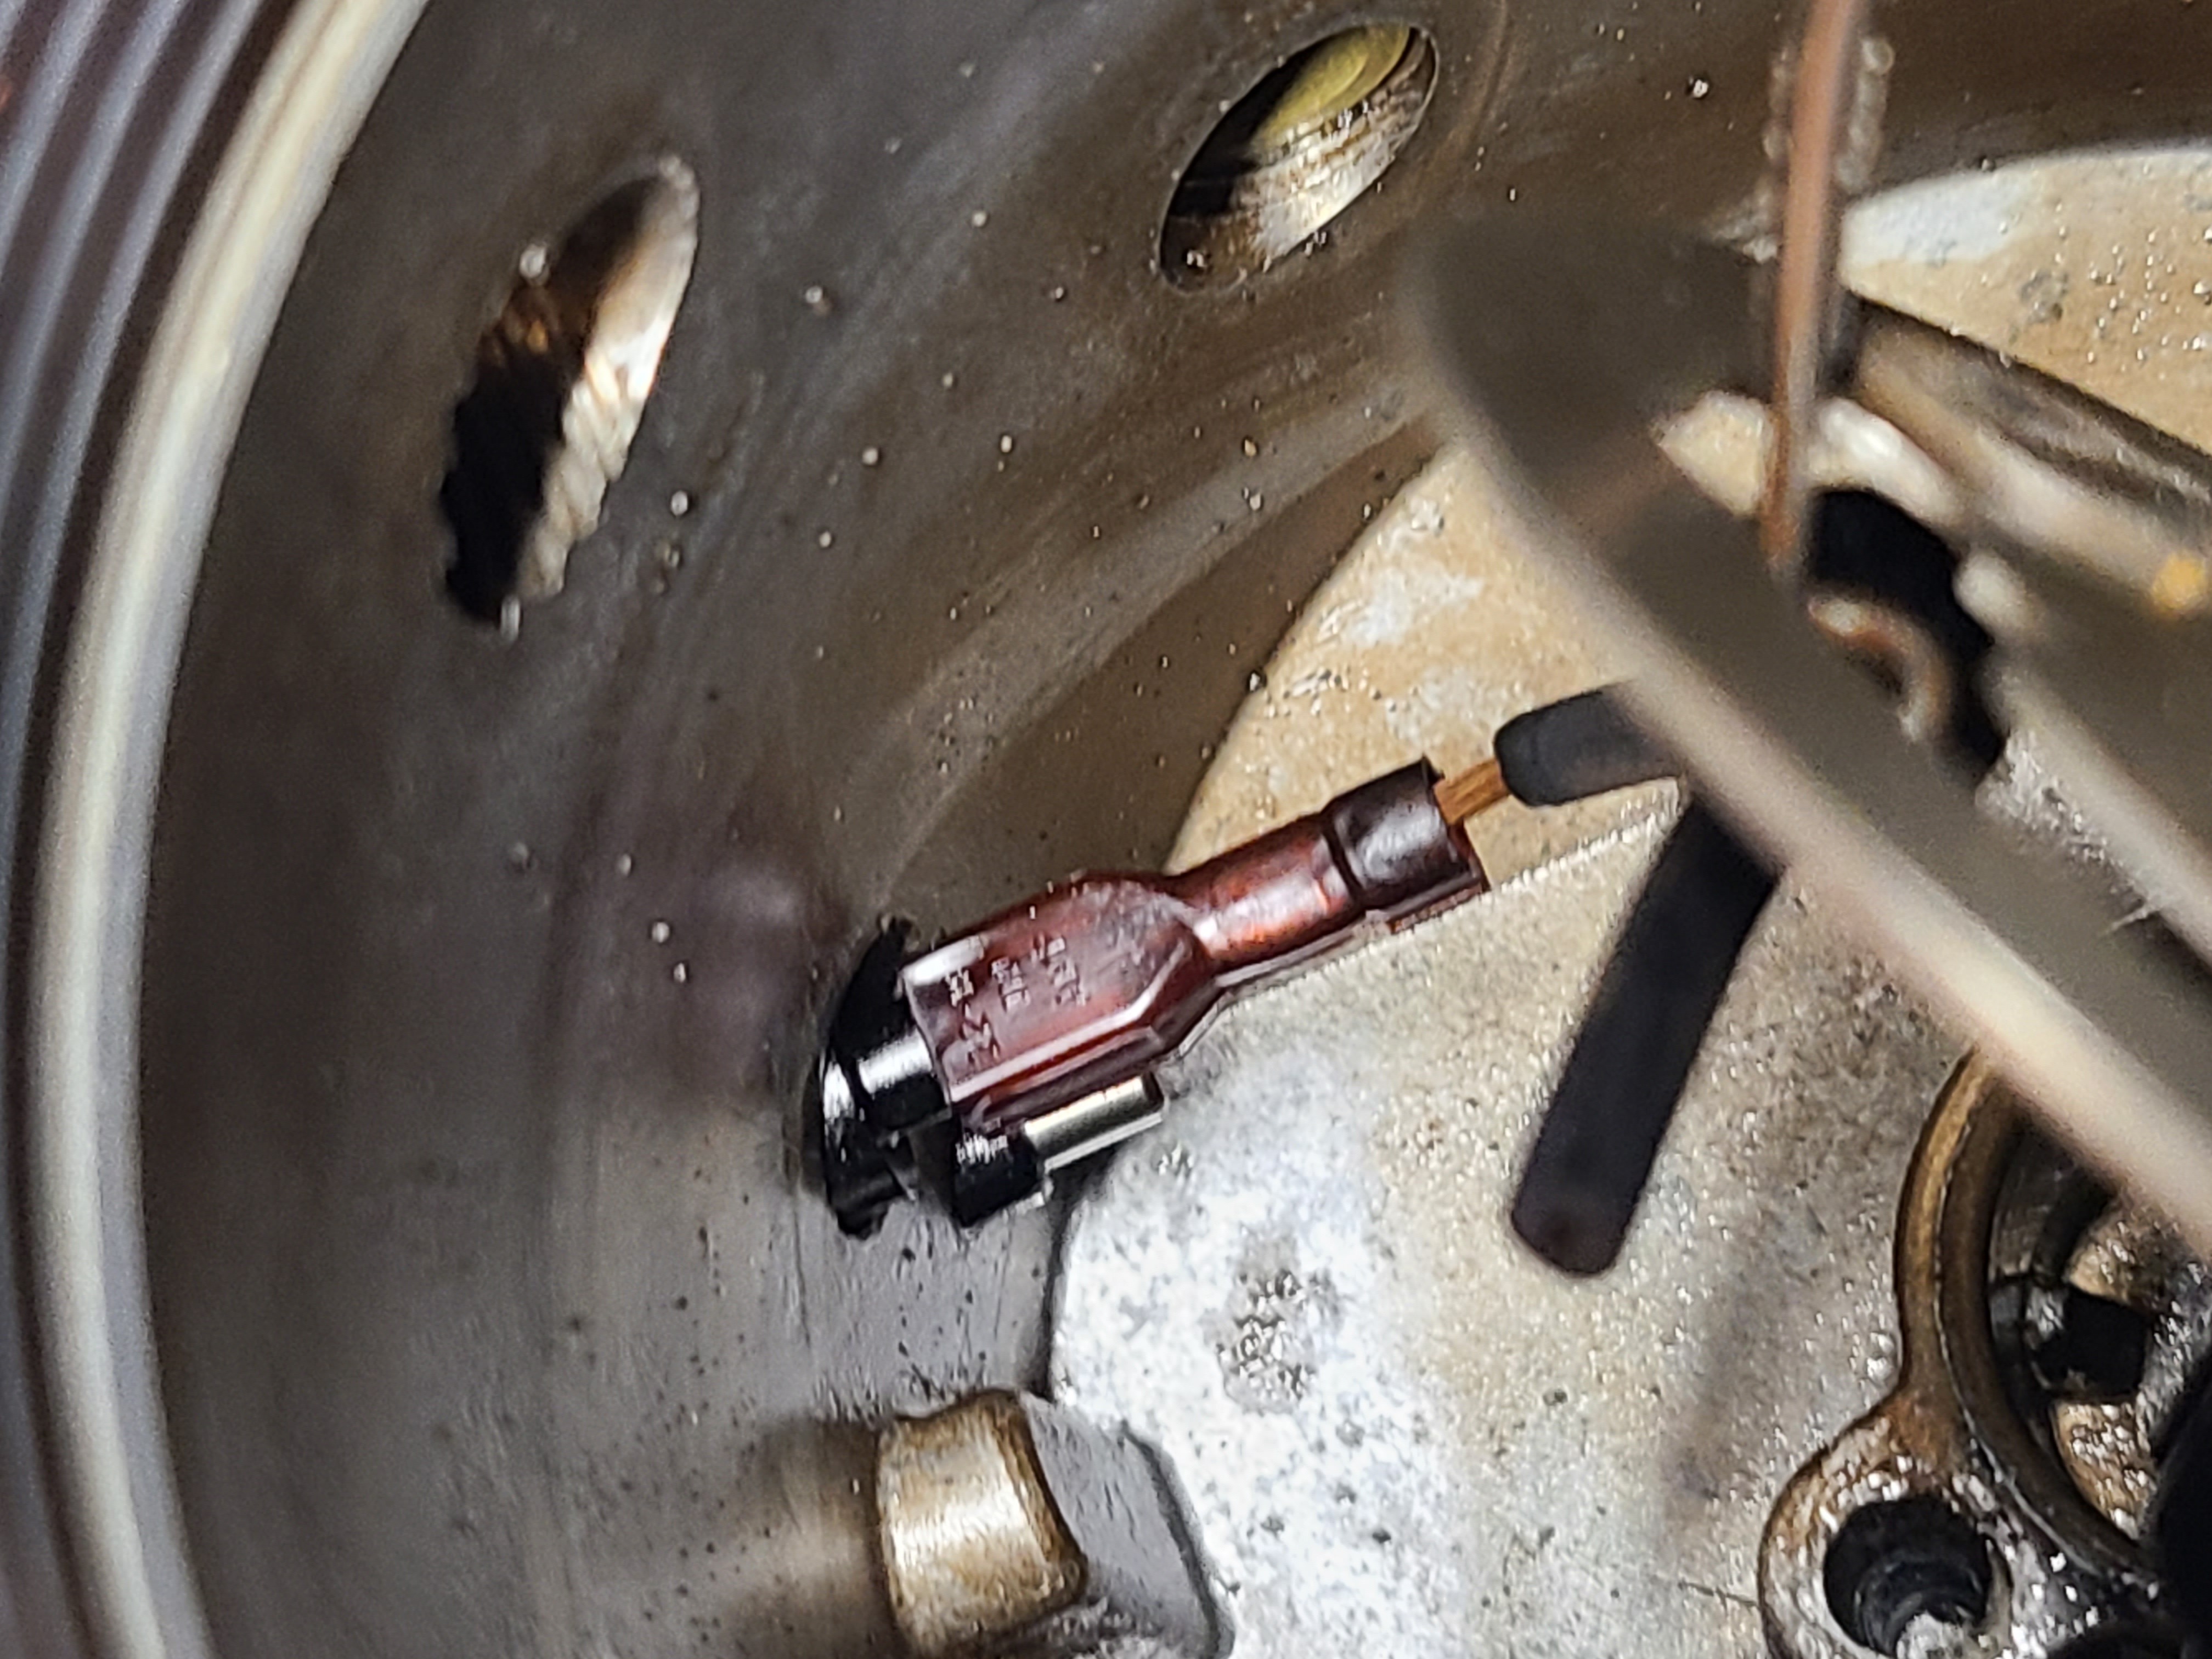
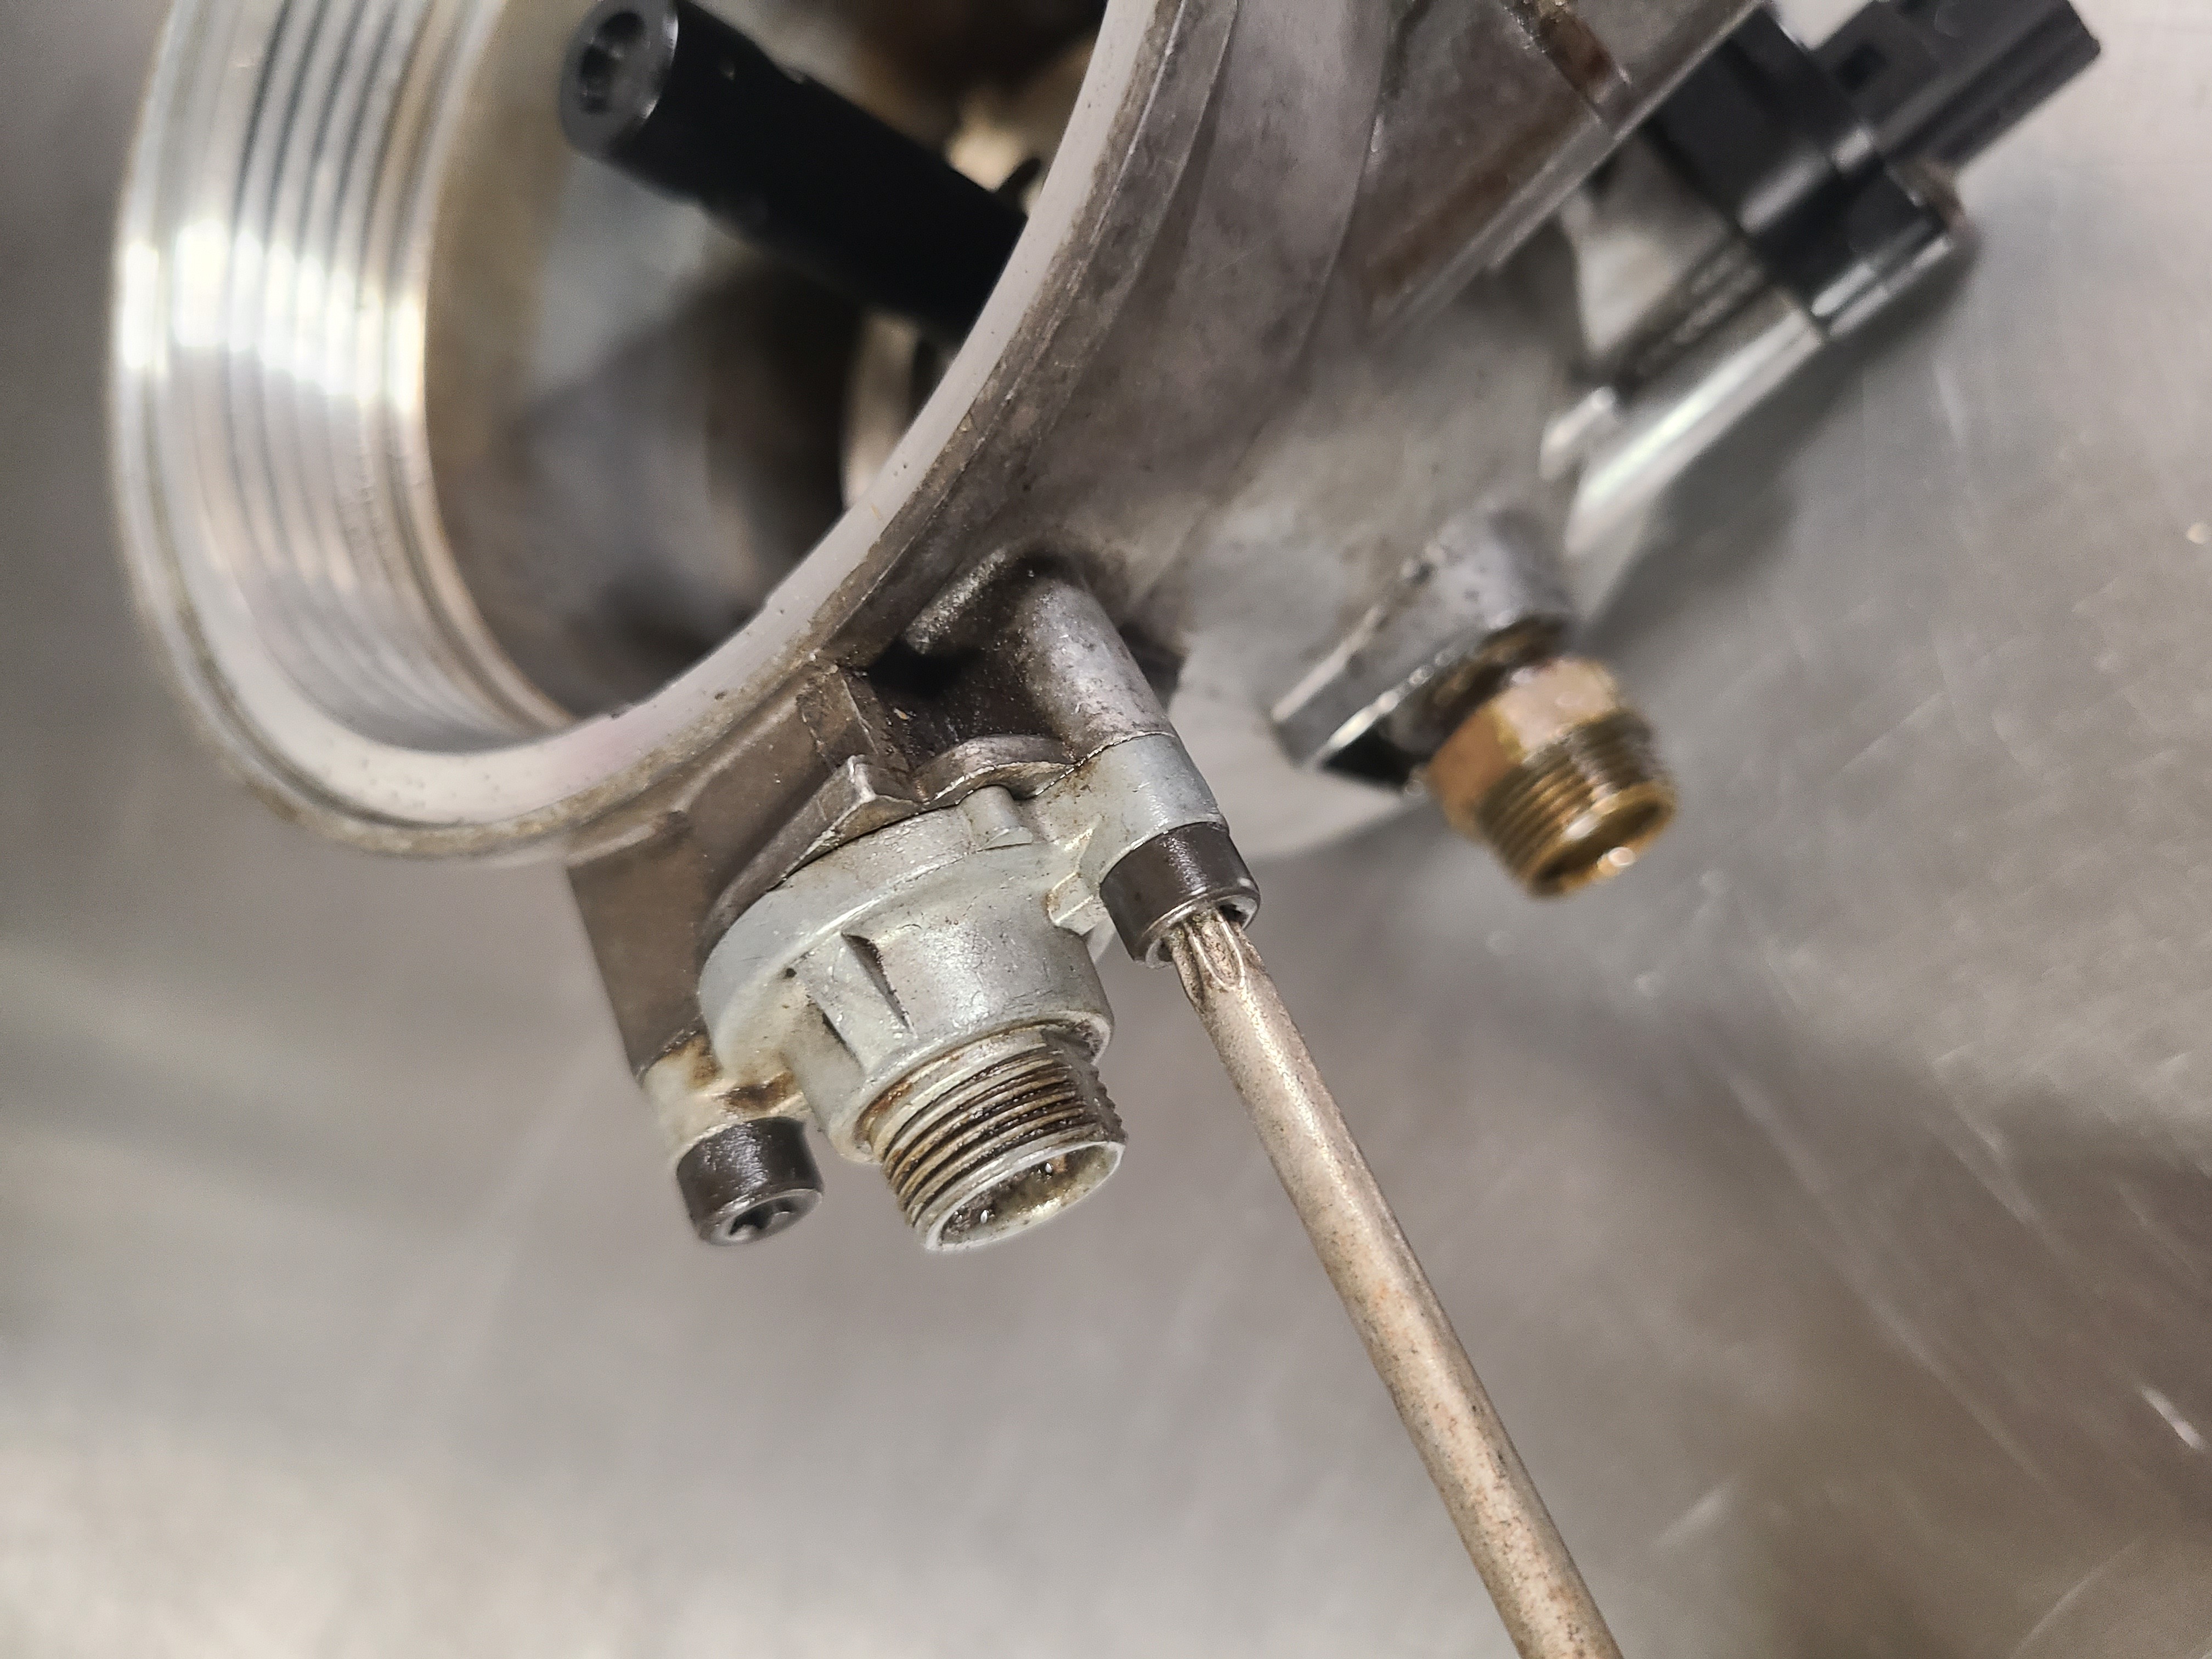
10. Before the heater and check valve assembly can be removed, this electrical connection for the heater must be disconnected. Using a small screwdriver or needle nose pliers makes this job easy.
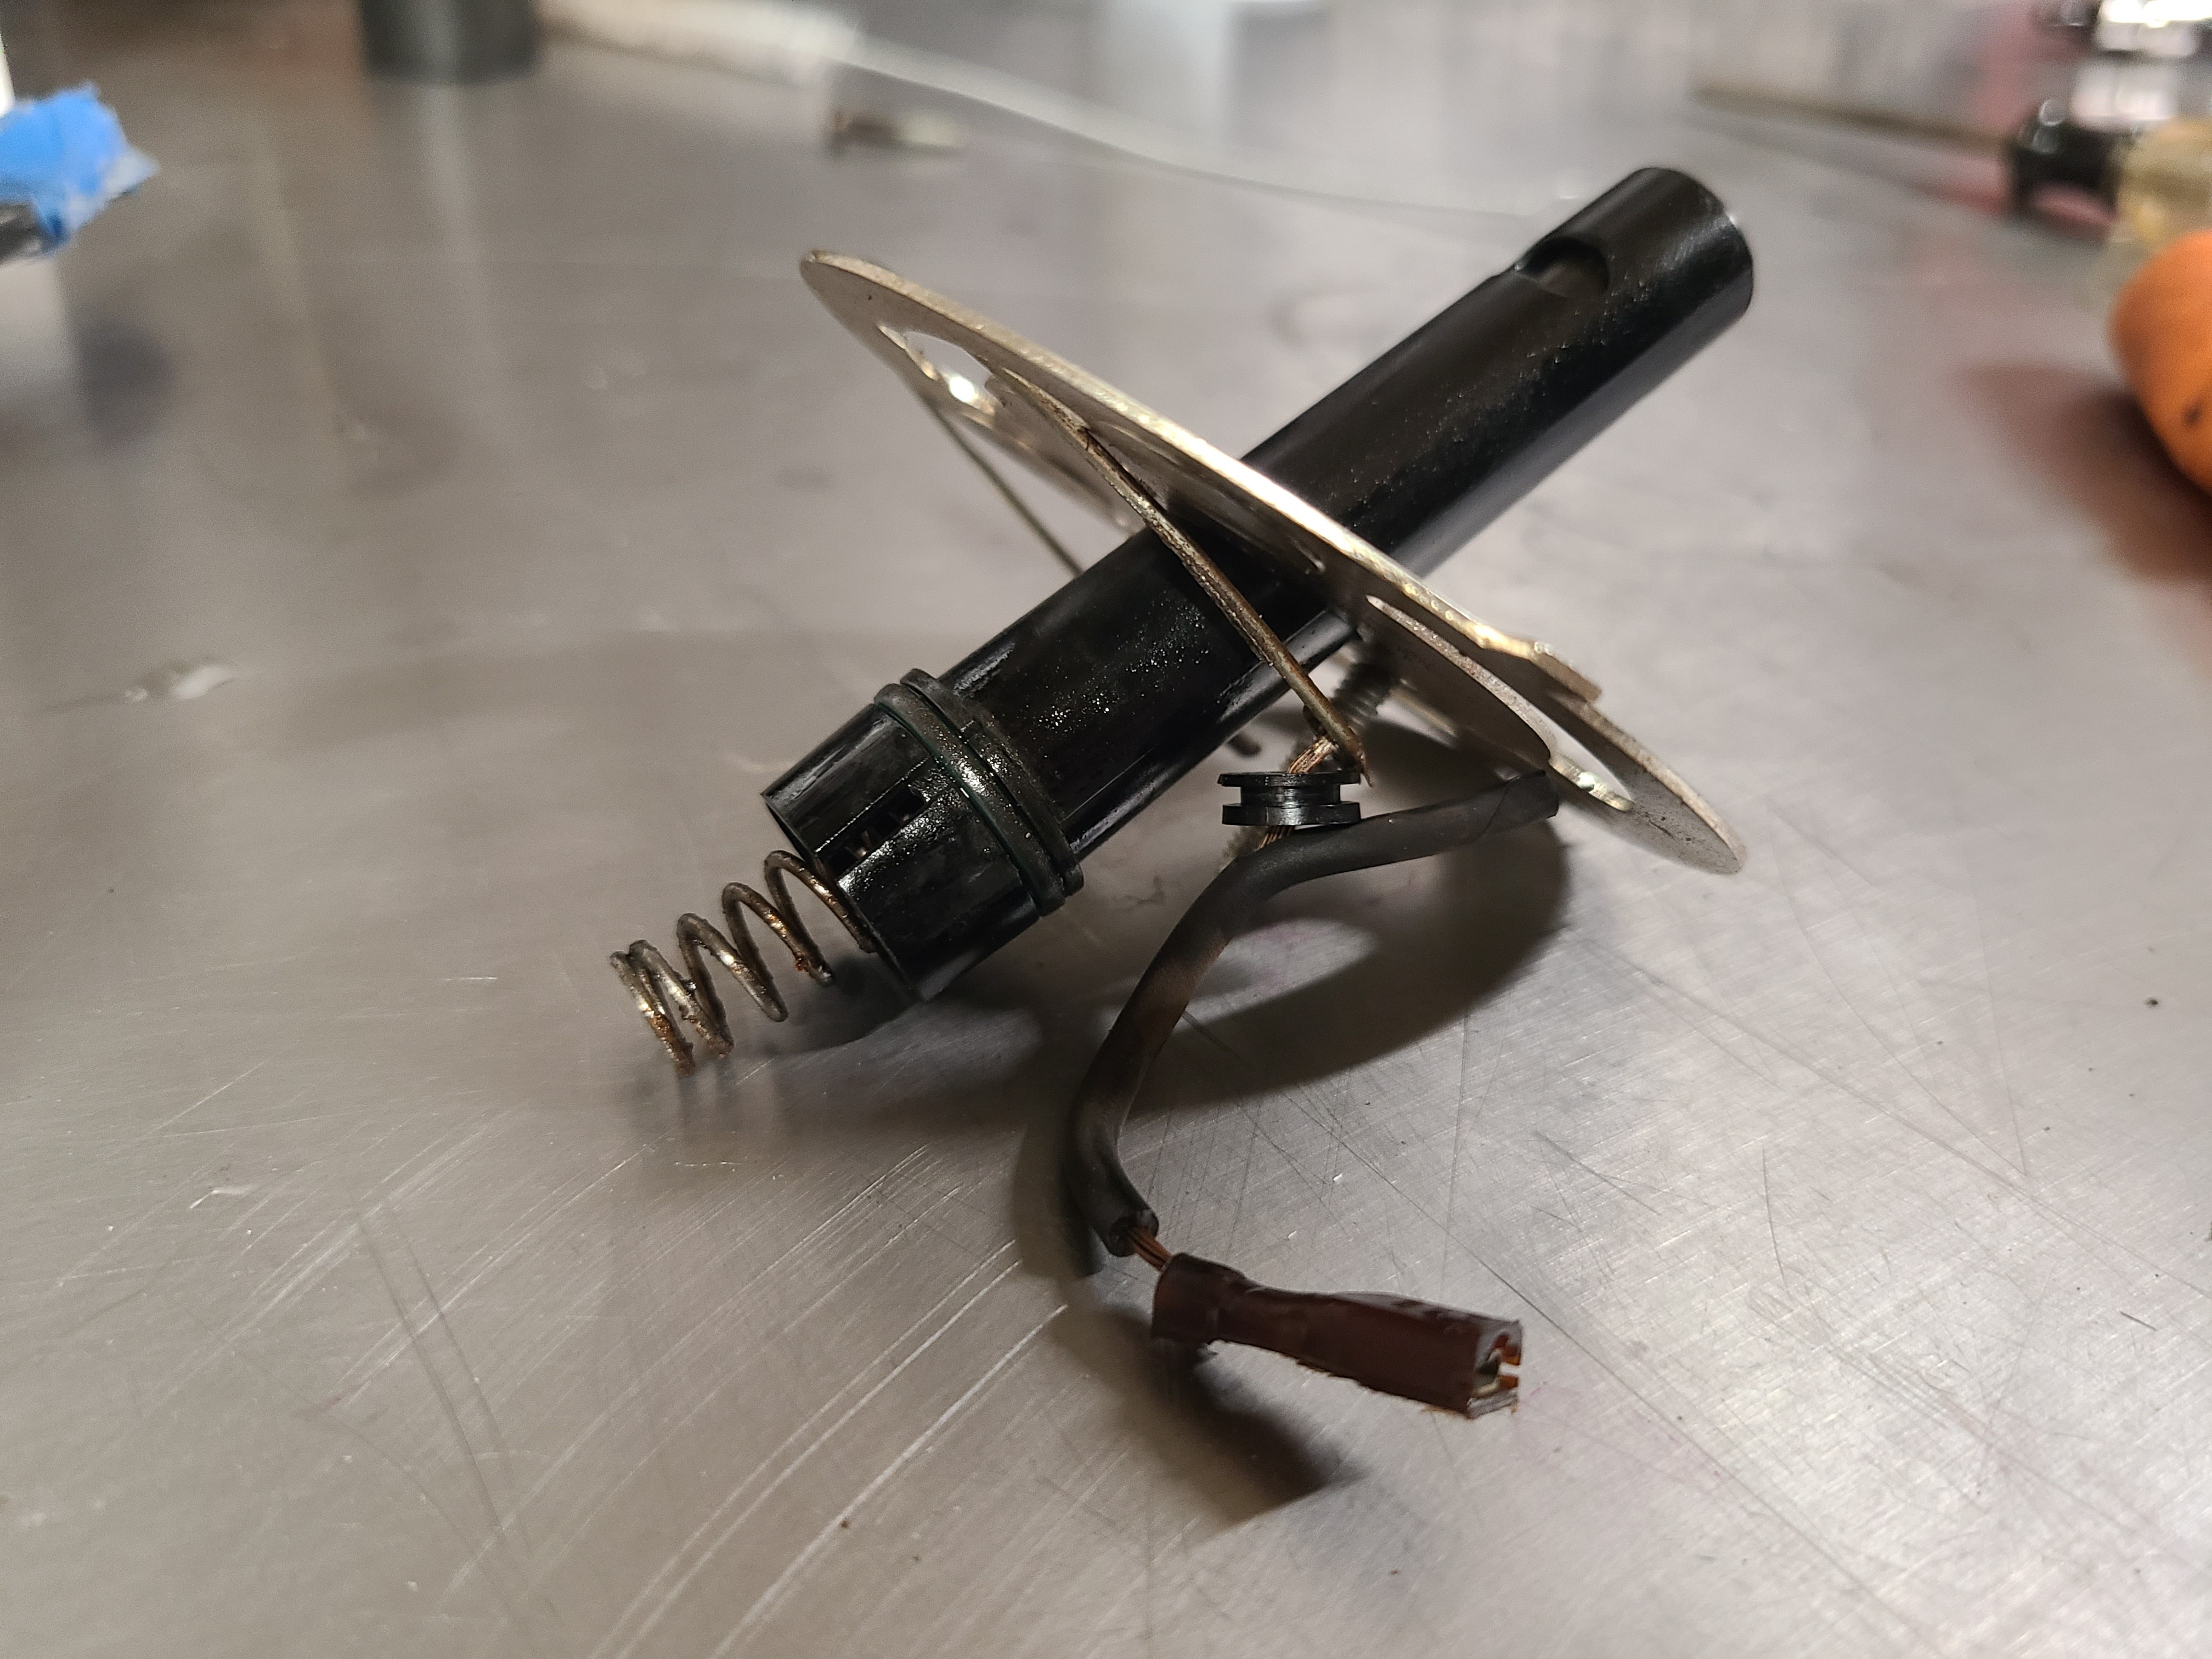
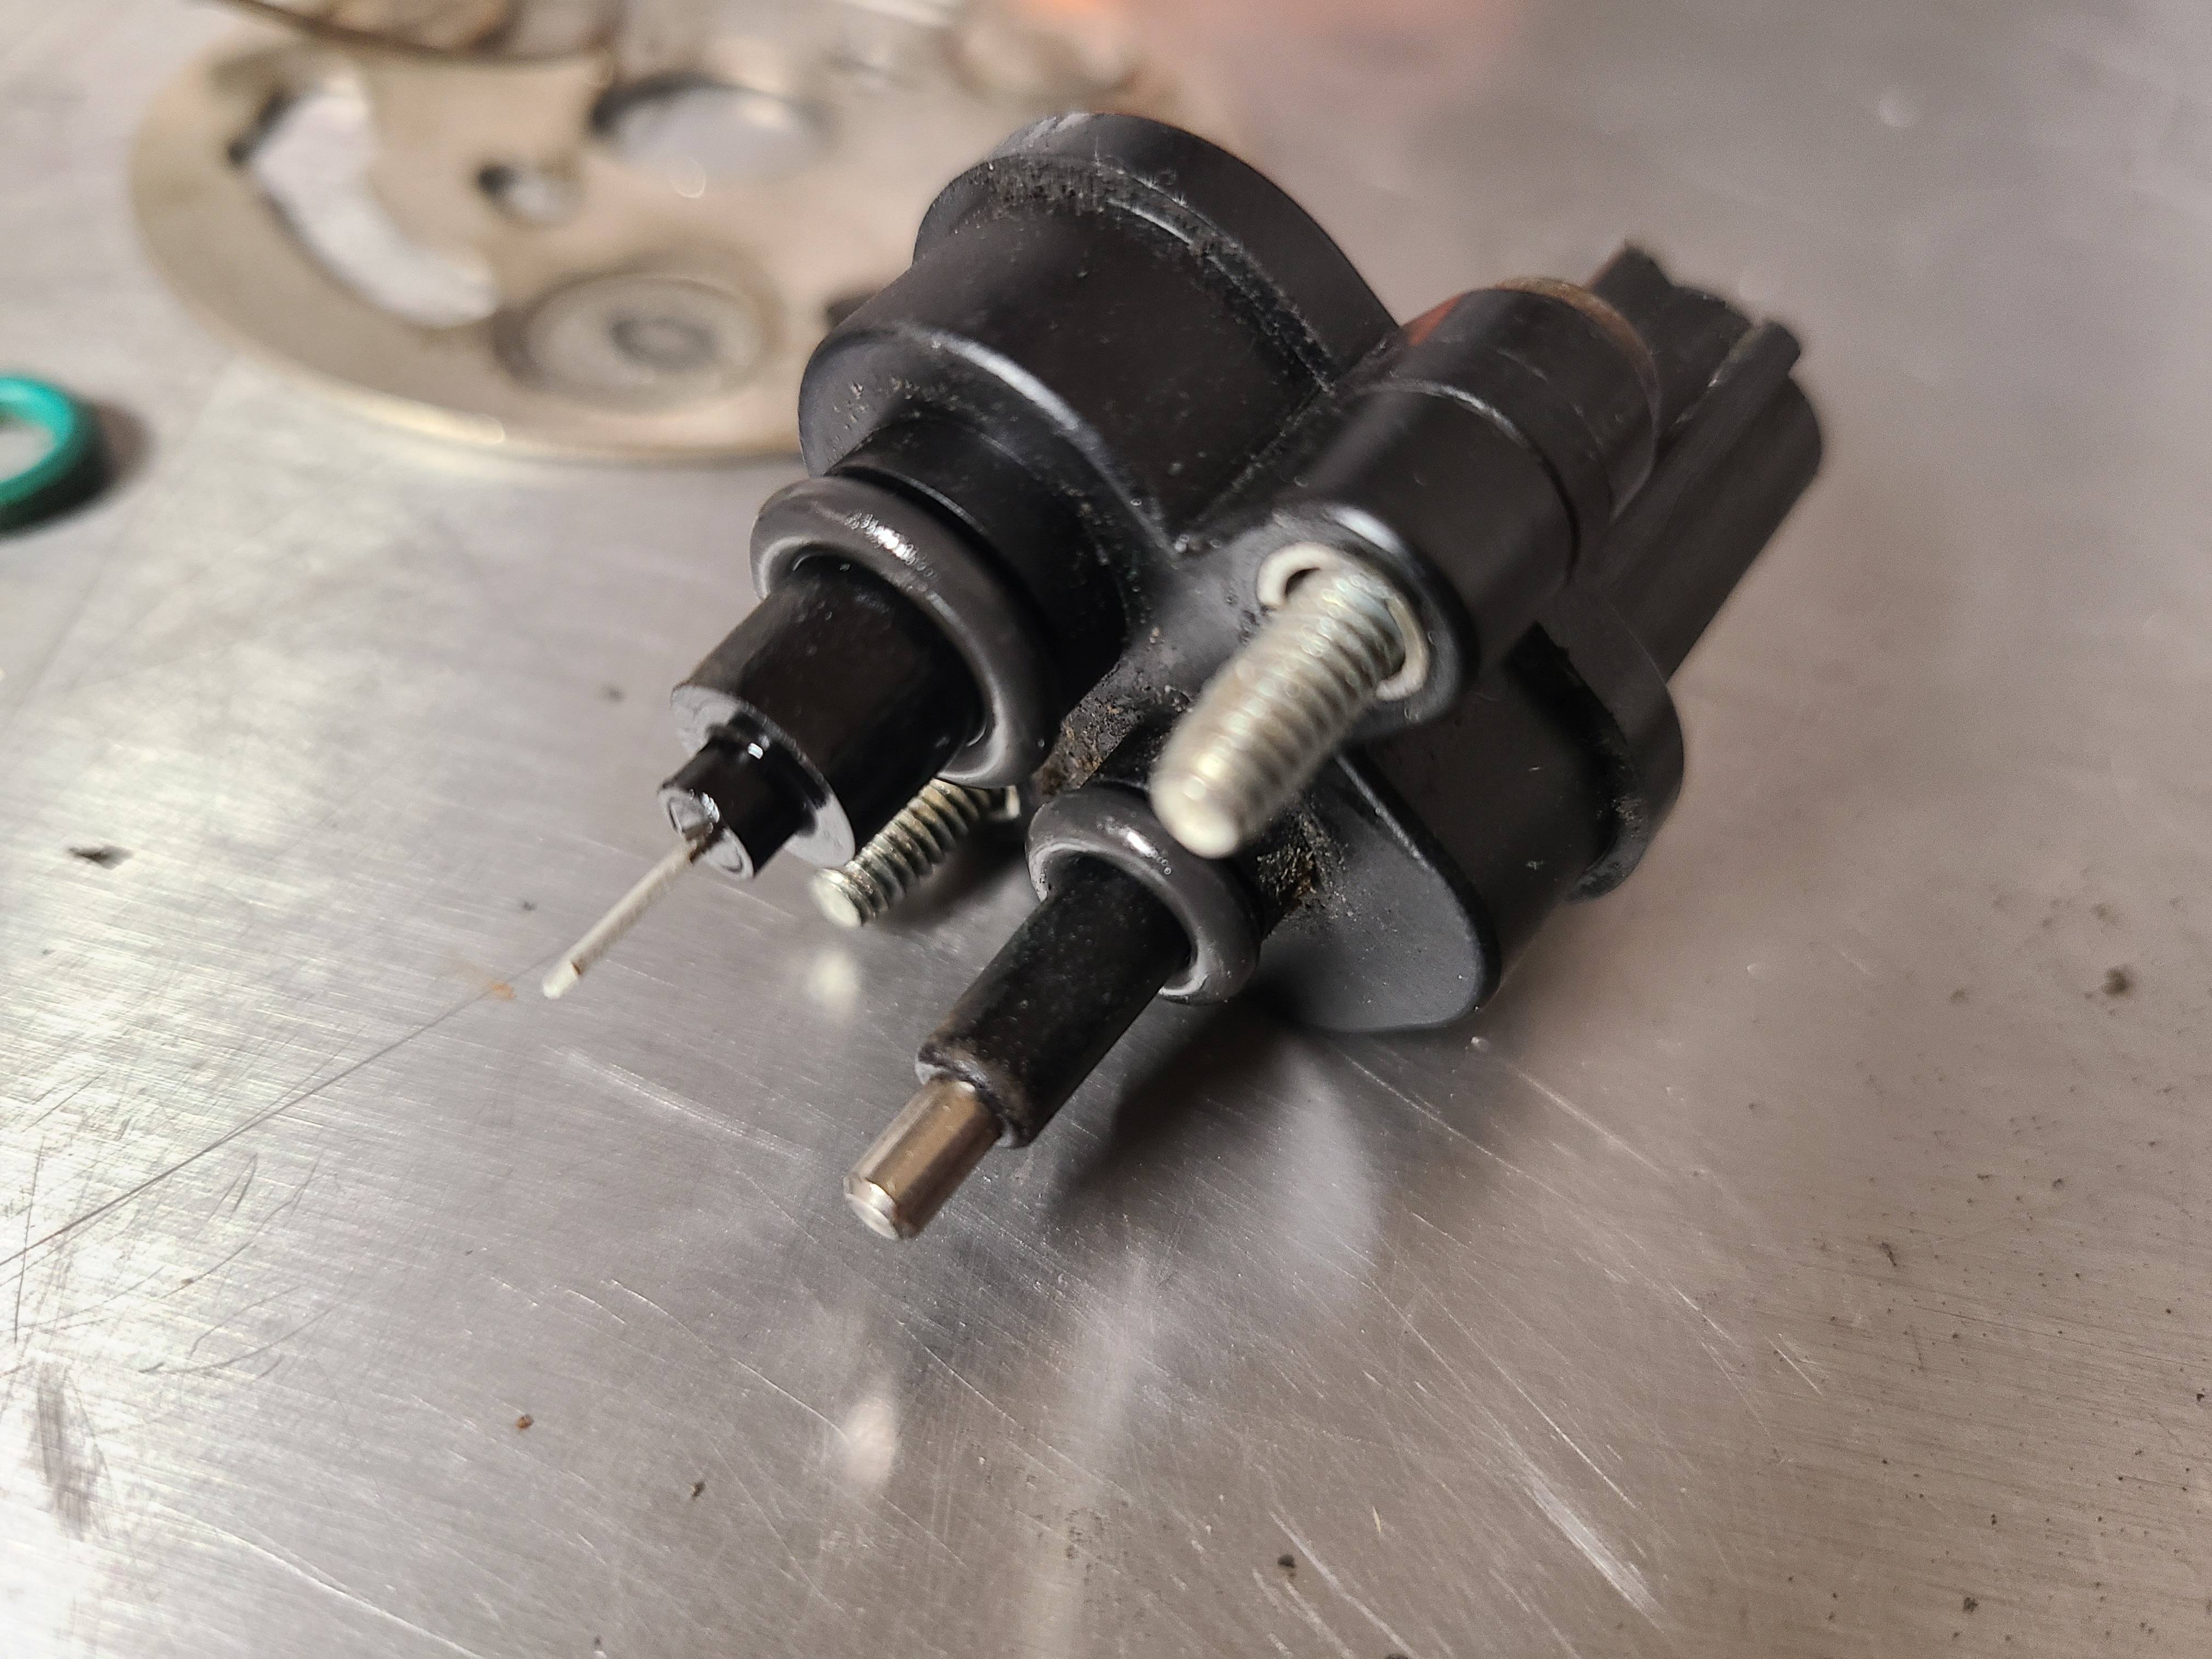
11. The check valve assembly and fuel heater, removed.
12. As is extremely common, this fuel bowl’s heater has failed. We’ll be installing an upgraded part in its place.
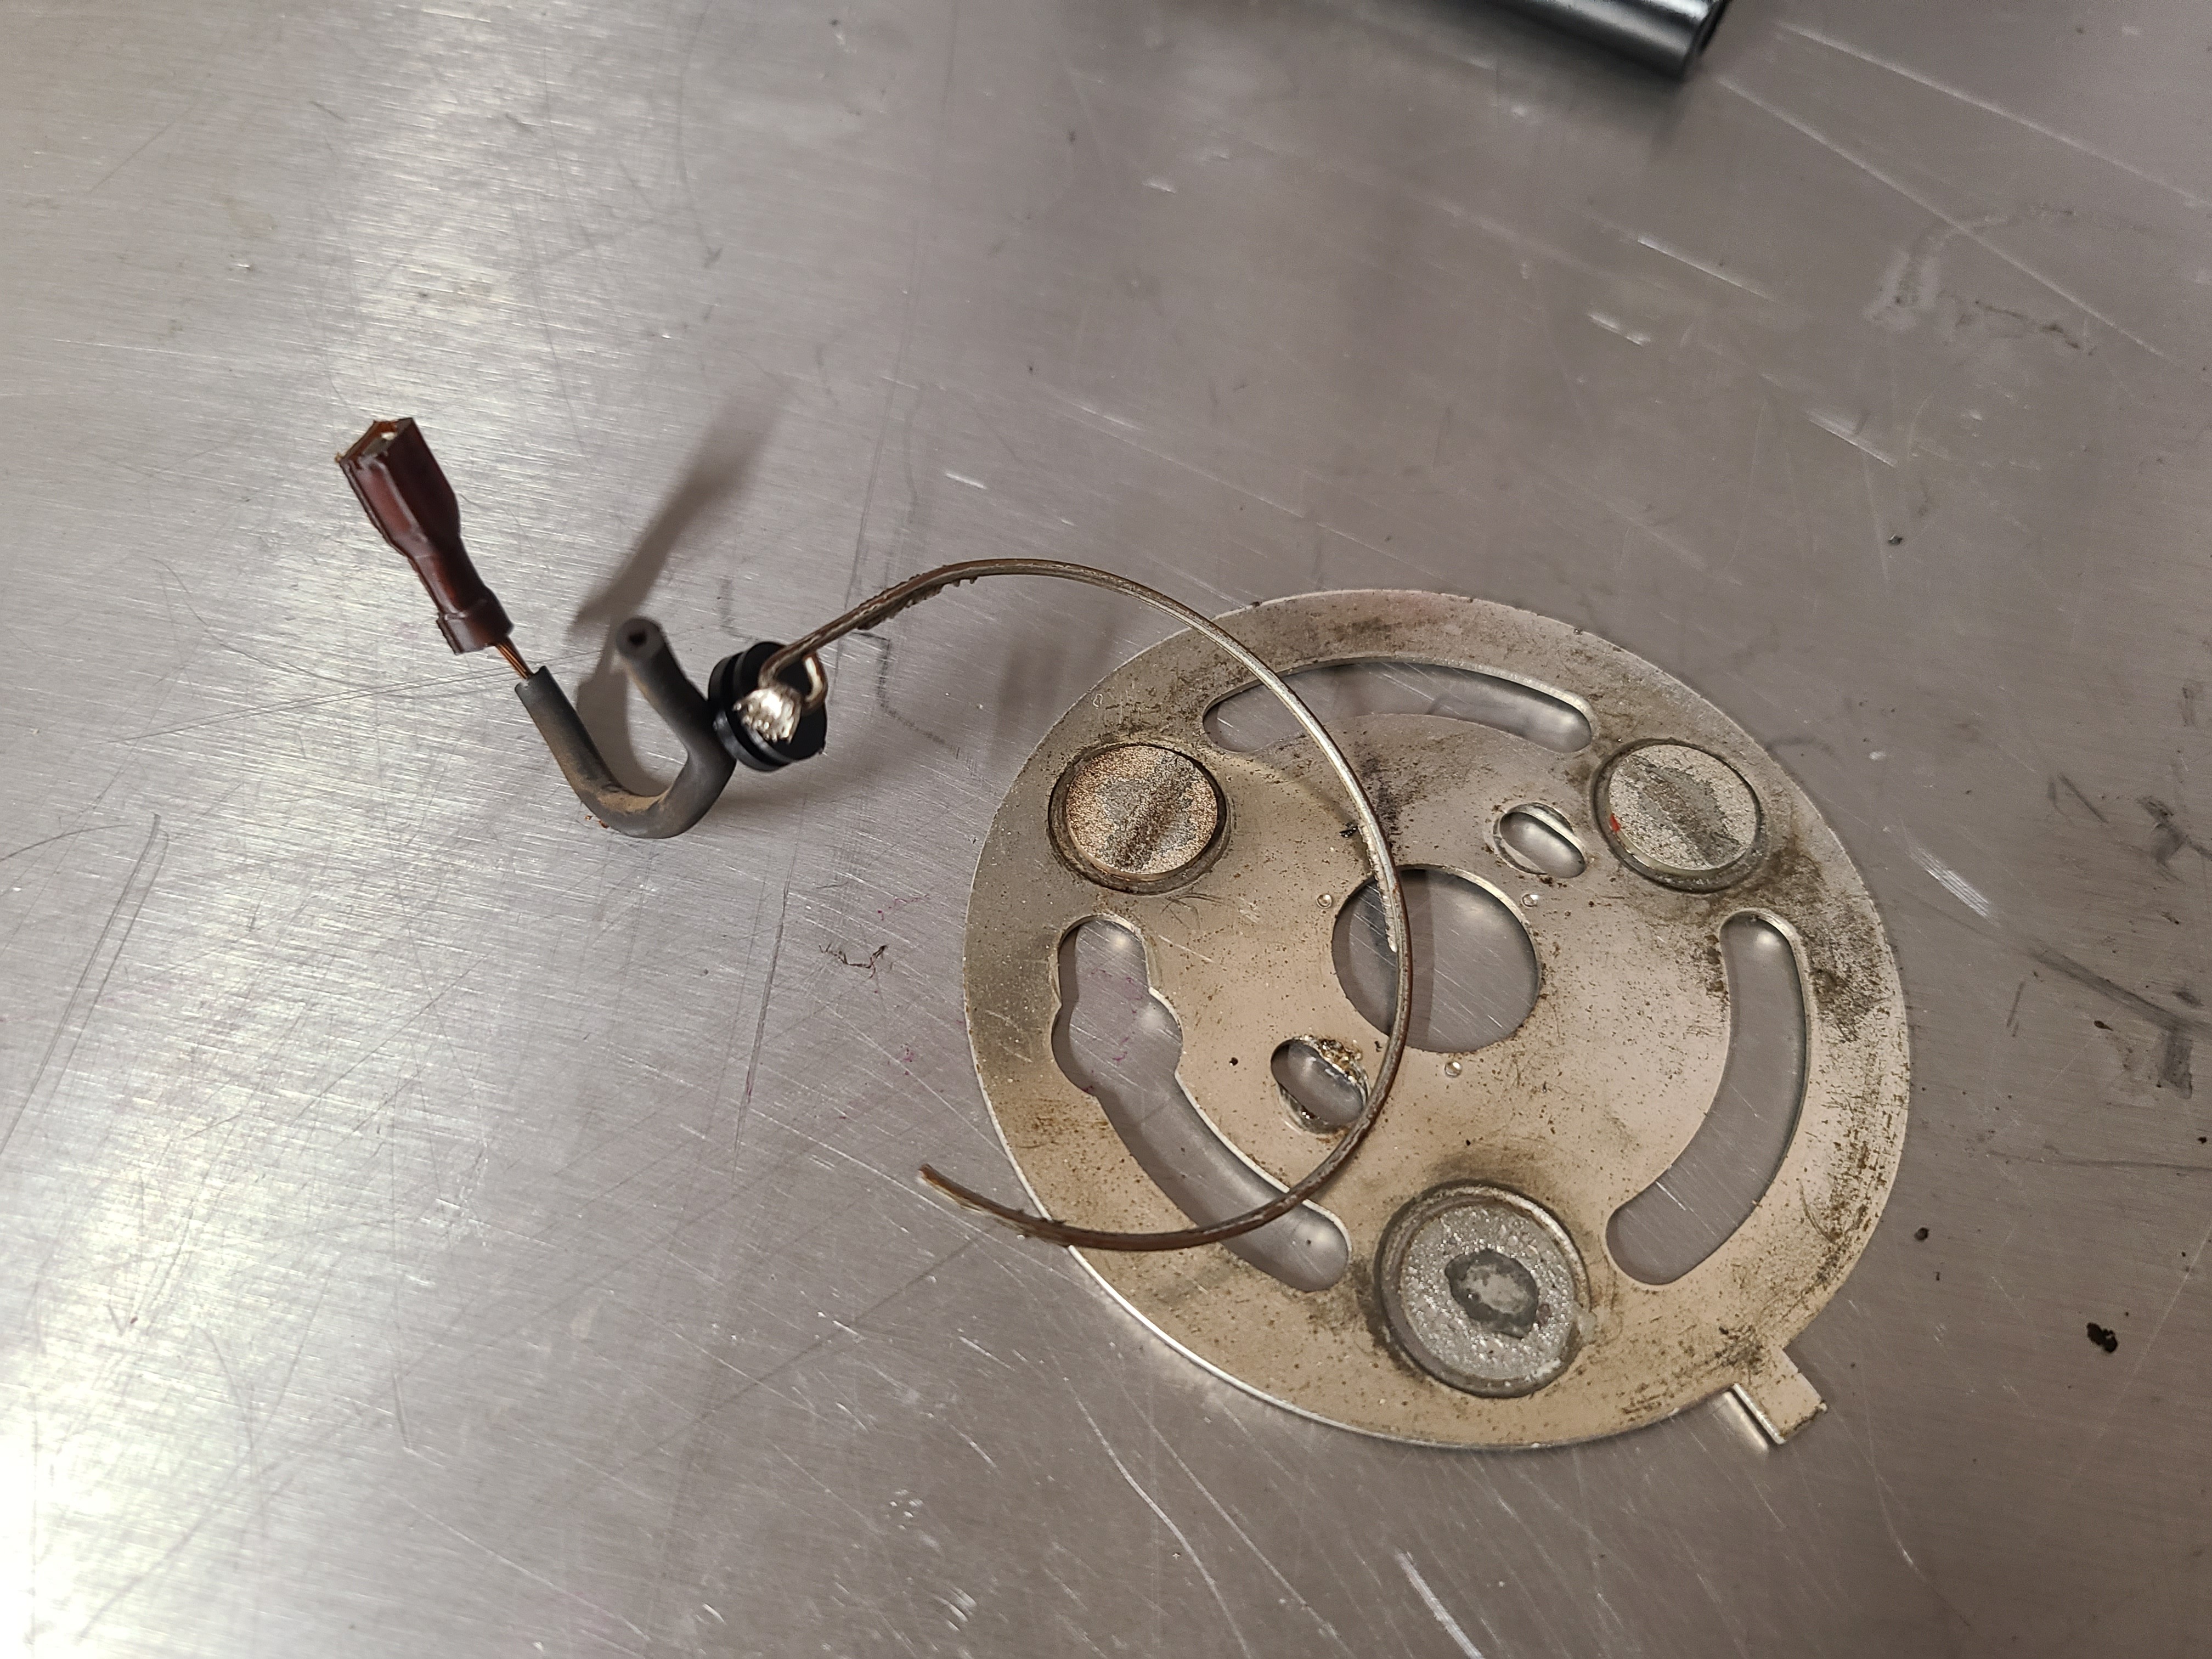
13. The check valve assembly must be disassembled so that the internal O-ring can be replaced. Make sure it goes back together as shown. Also be sure to replace the O-ring on the outside of the assembly with the supplied O-ring from Riffraff Diesel.
14. Replacing the heater element is best done with a newer style unit like this one. It’s an International part supplied by Riffraff that is known for its reliability and long service life. It installs just as the old unit did with no modifications needed.
The freshly rebuilt check valve assembly and new heater will then be installed as shown. The heater will serve as a retainer for the check valve assembly so it must go on last. Don’t forget to plug in the new heater’s electrical connector.
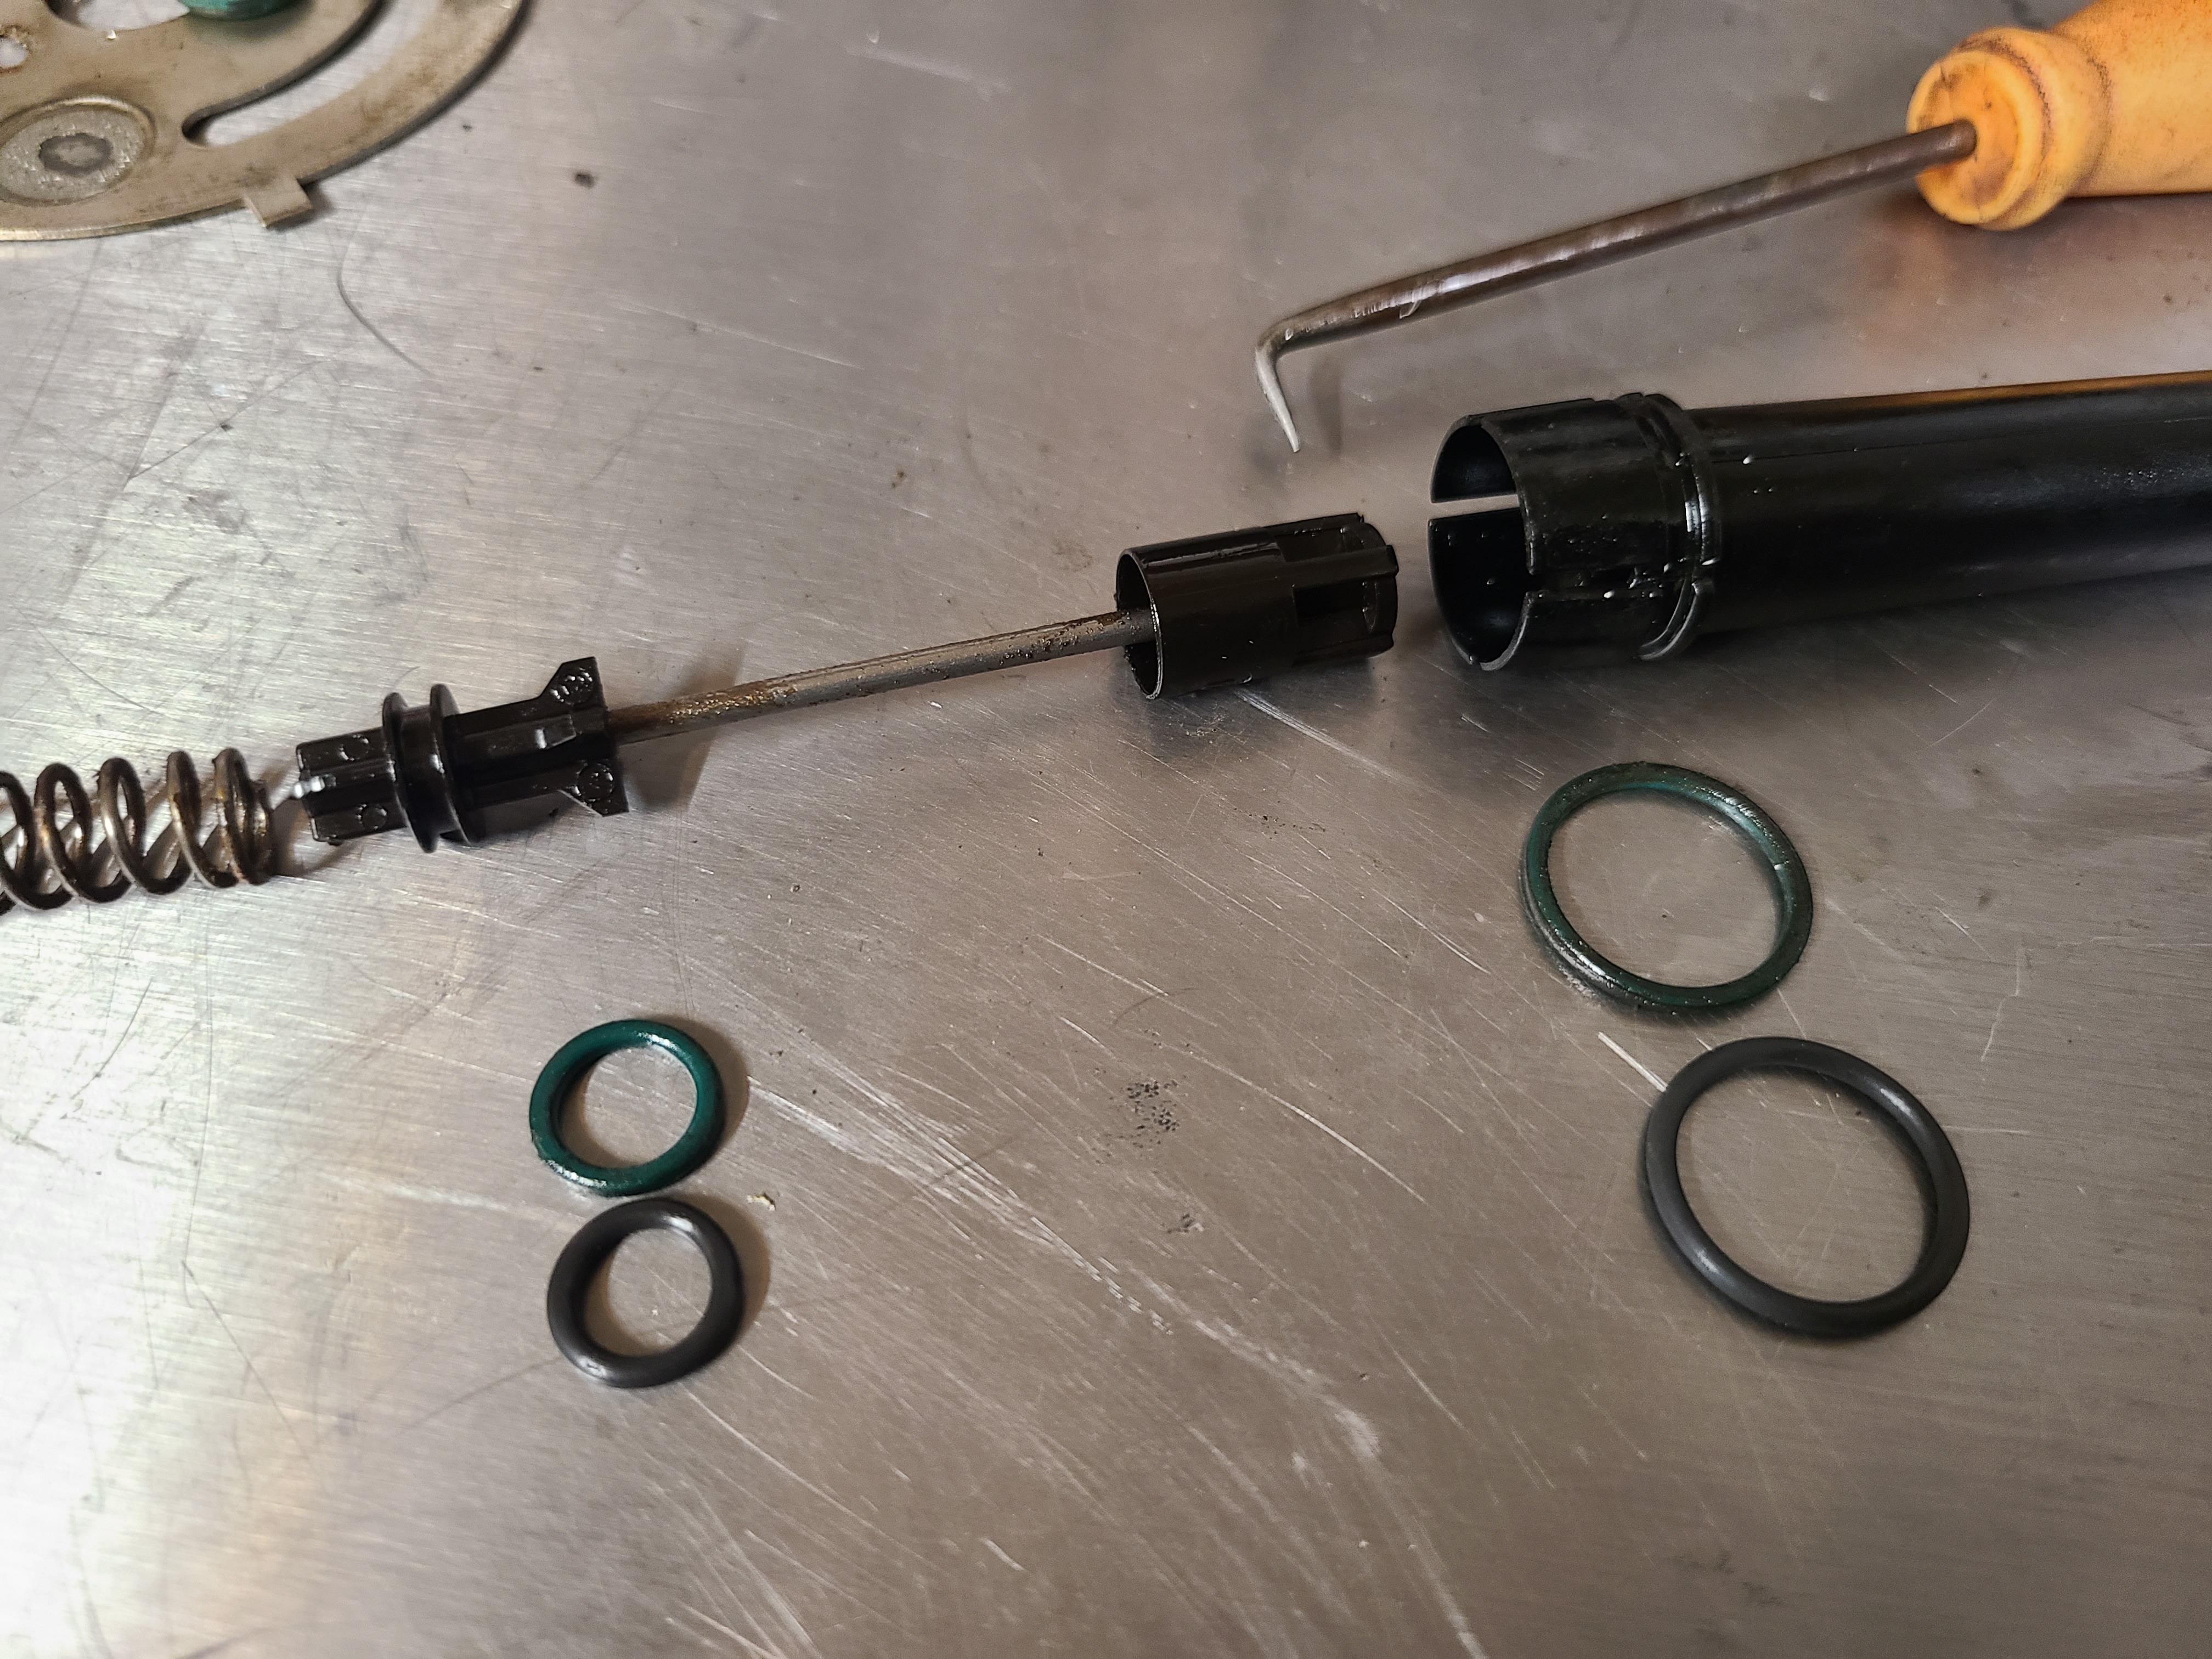
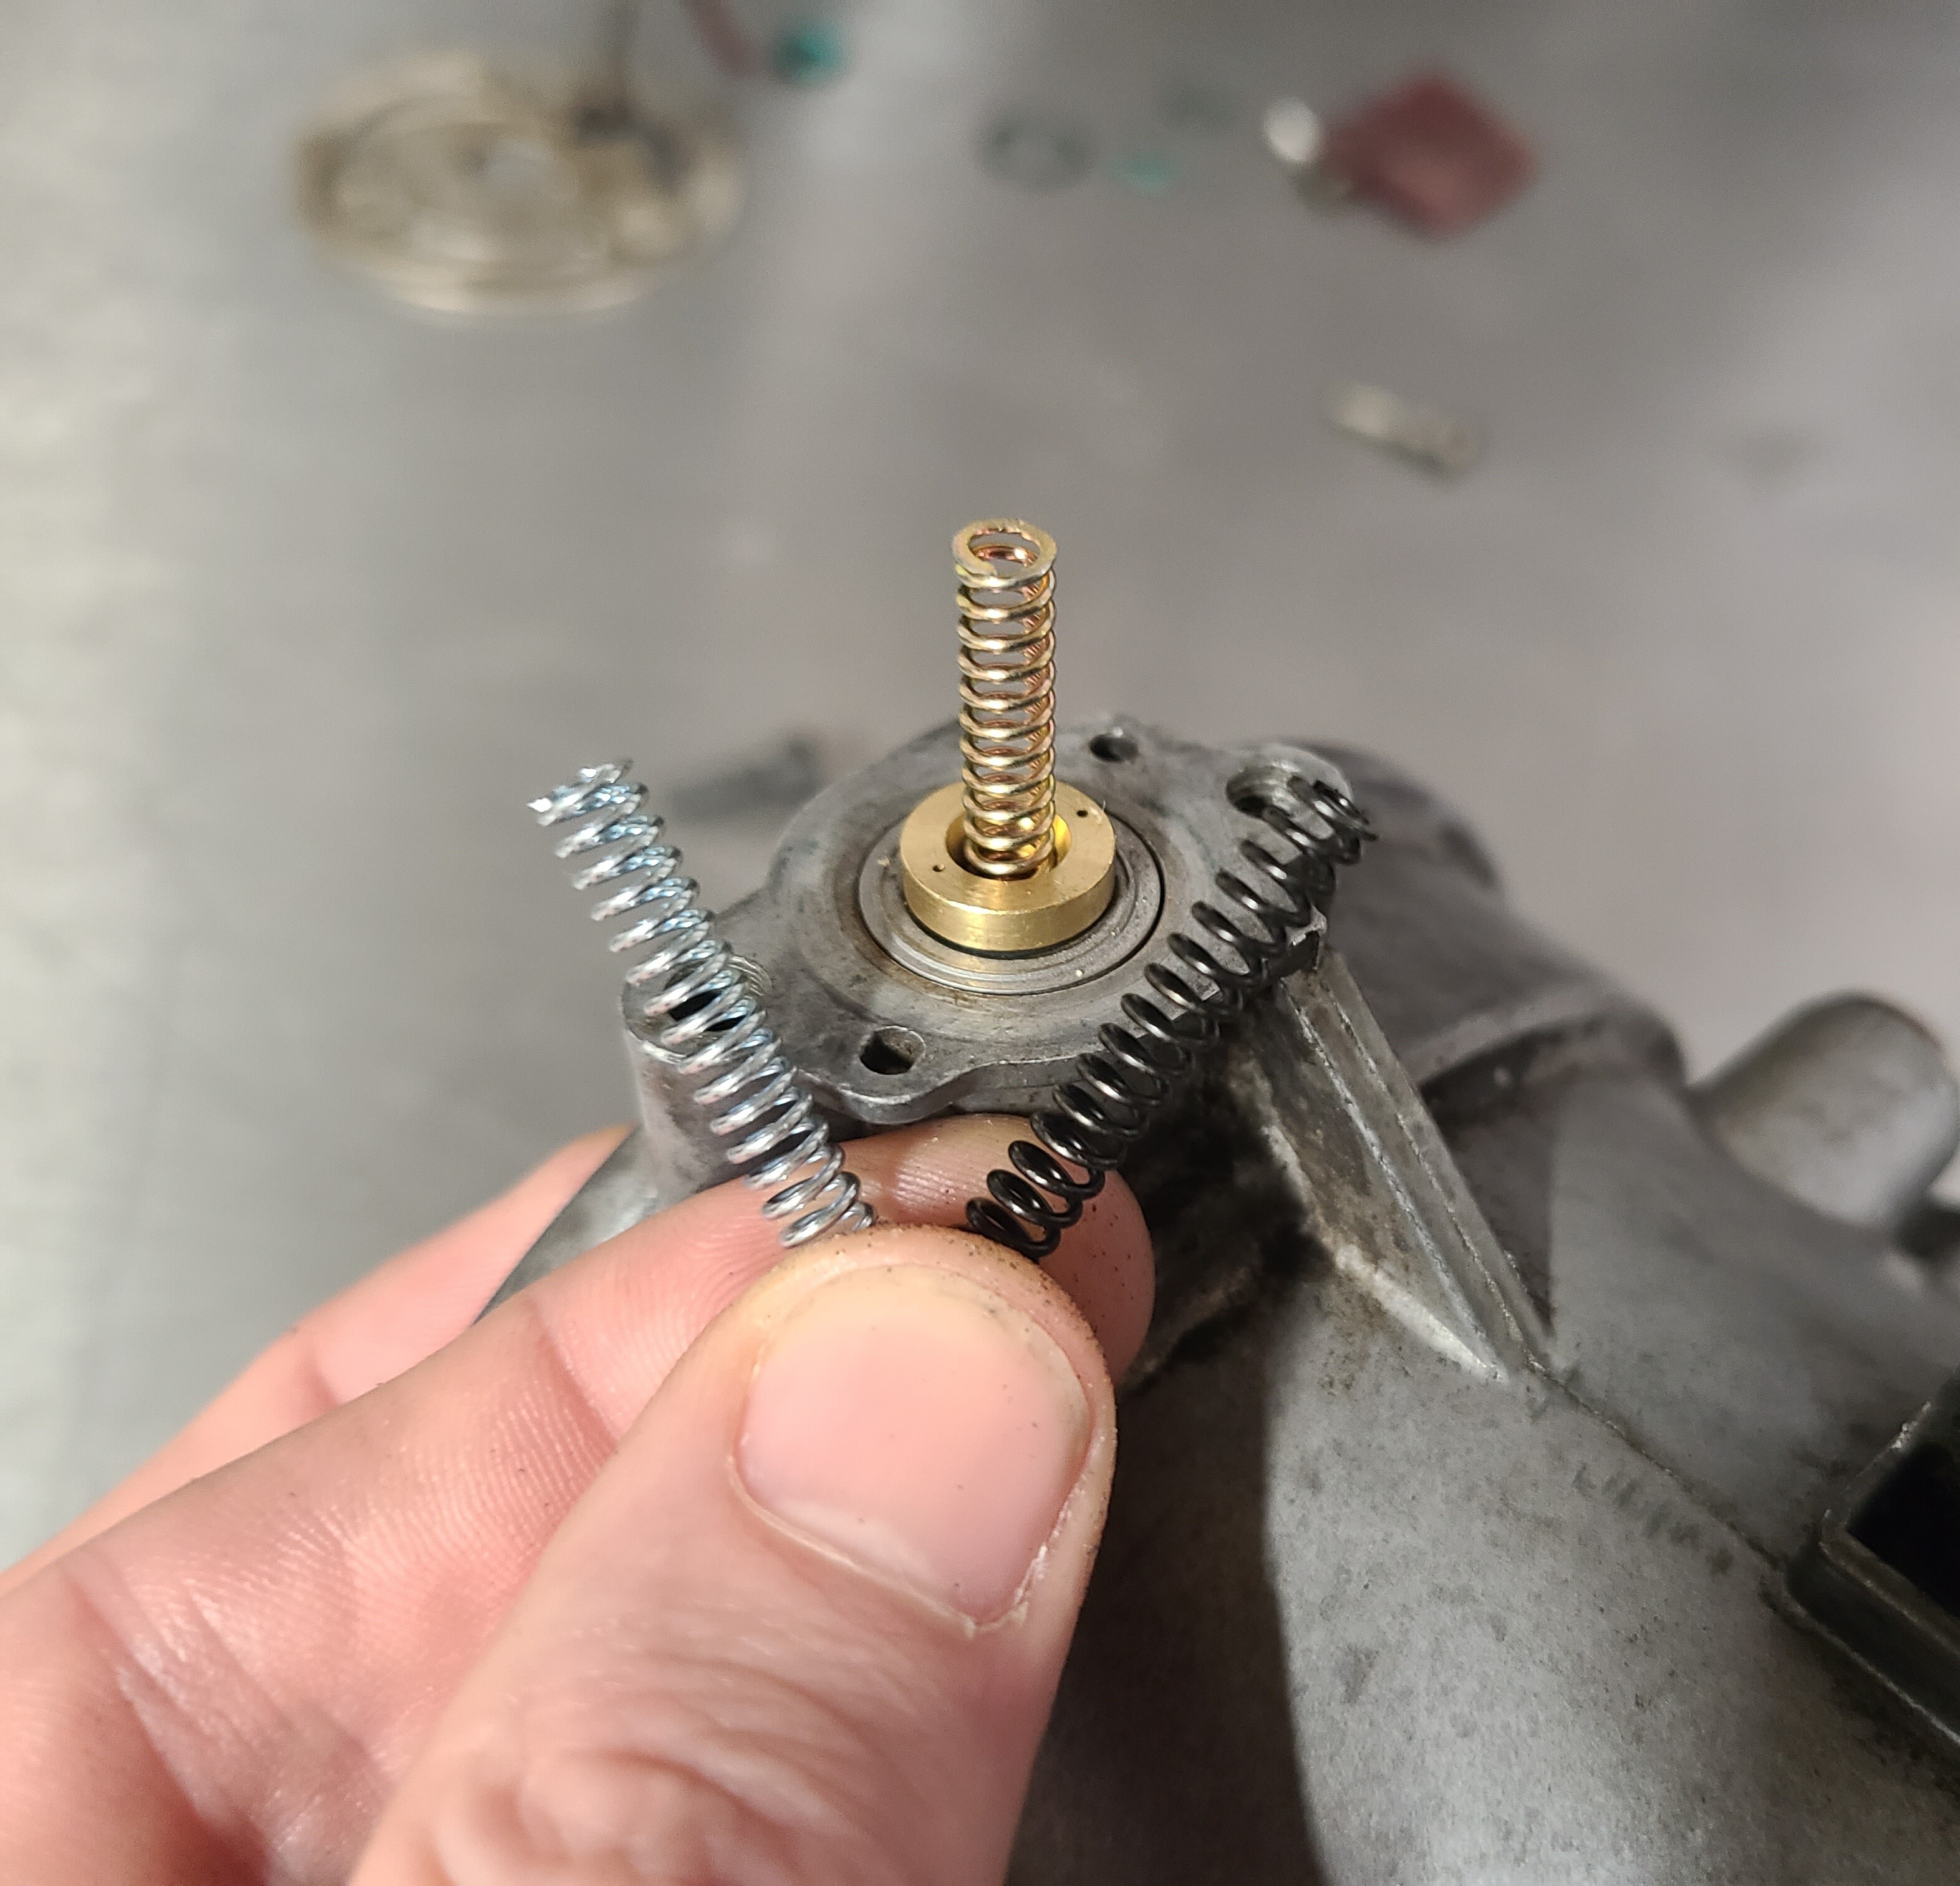
15. Almost to the finish line, the Fuel Pressure Regulator (FPR) is next up. Remove the two T20 Torx screws and the assembly will come off easily. However, this is under pressure from the spring behind it so use caution.
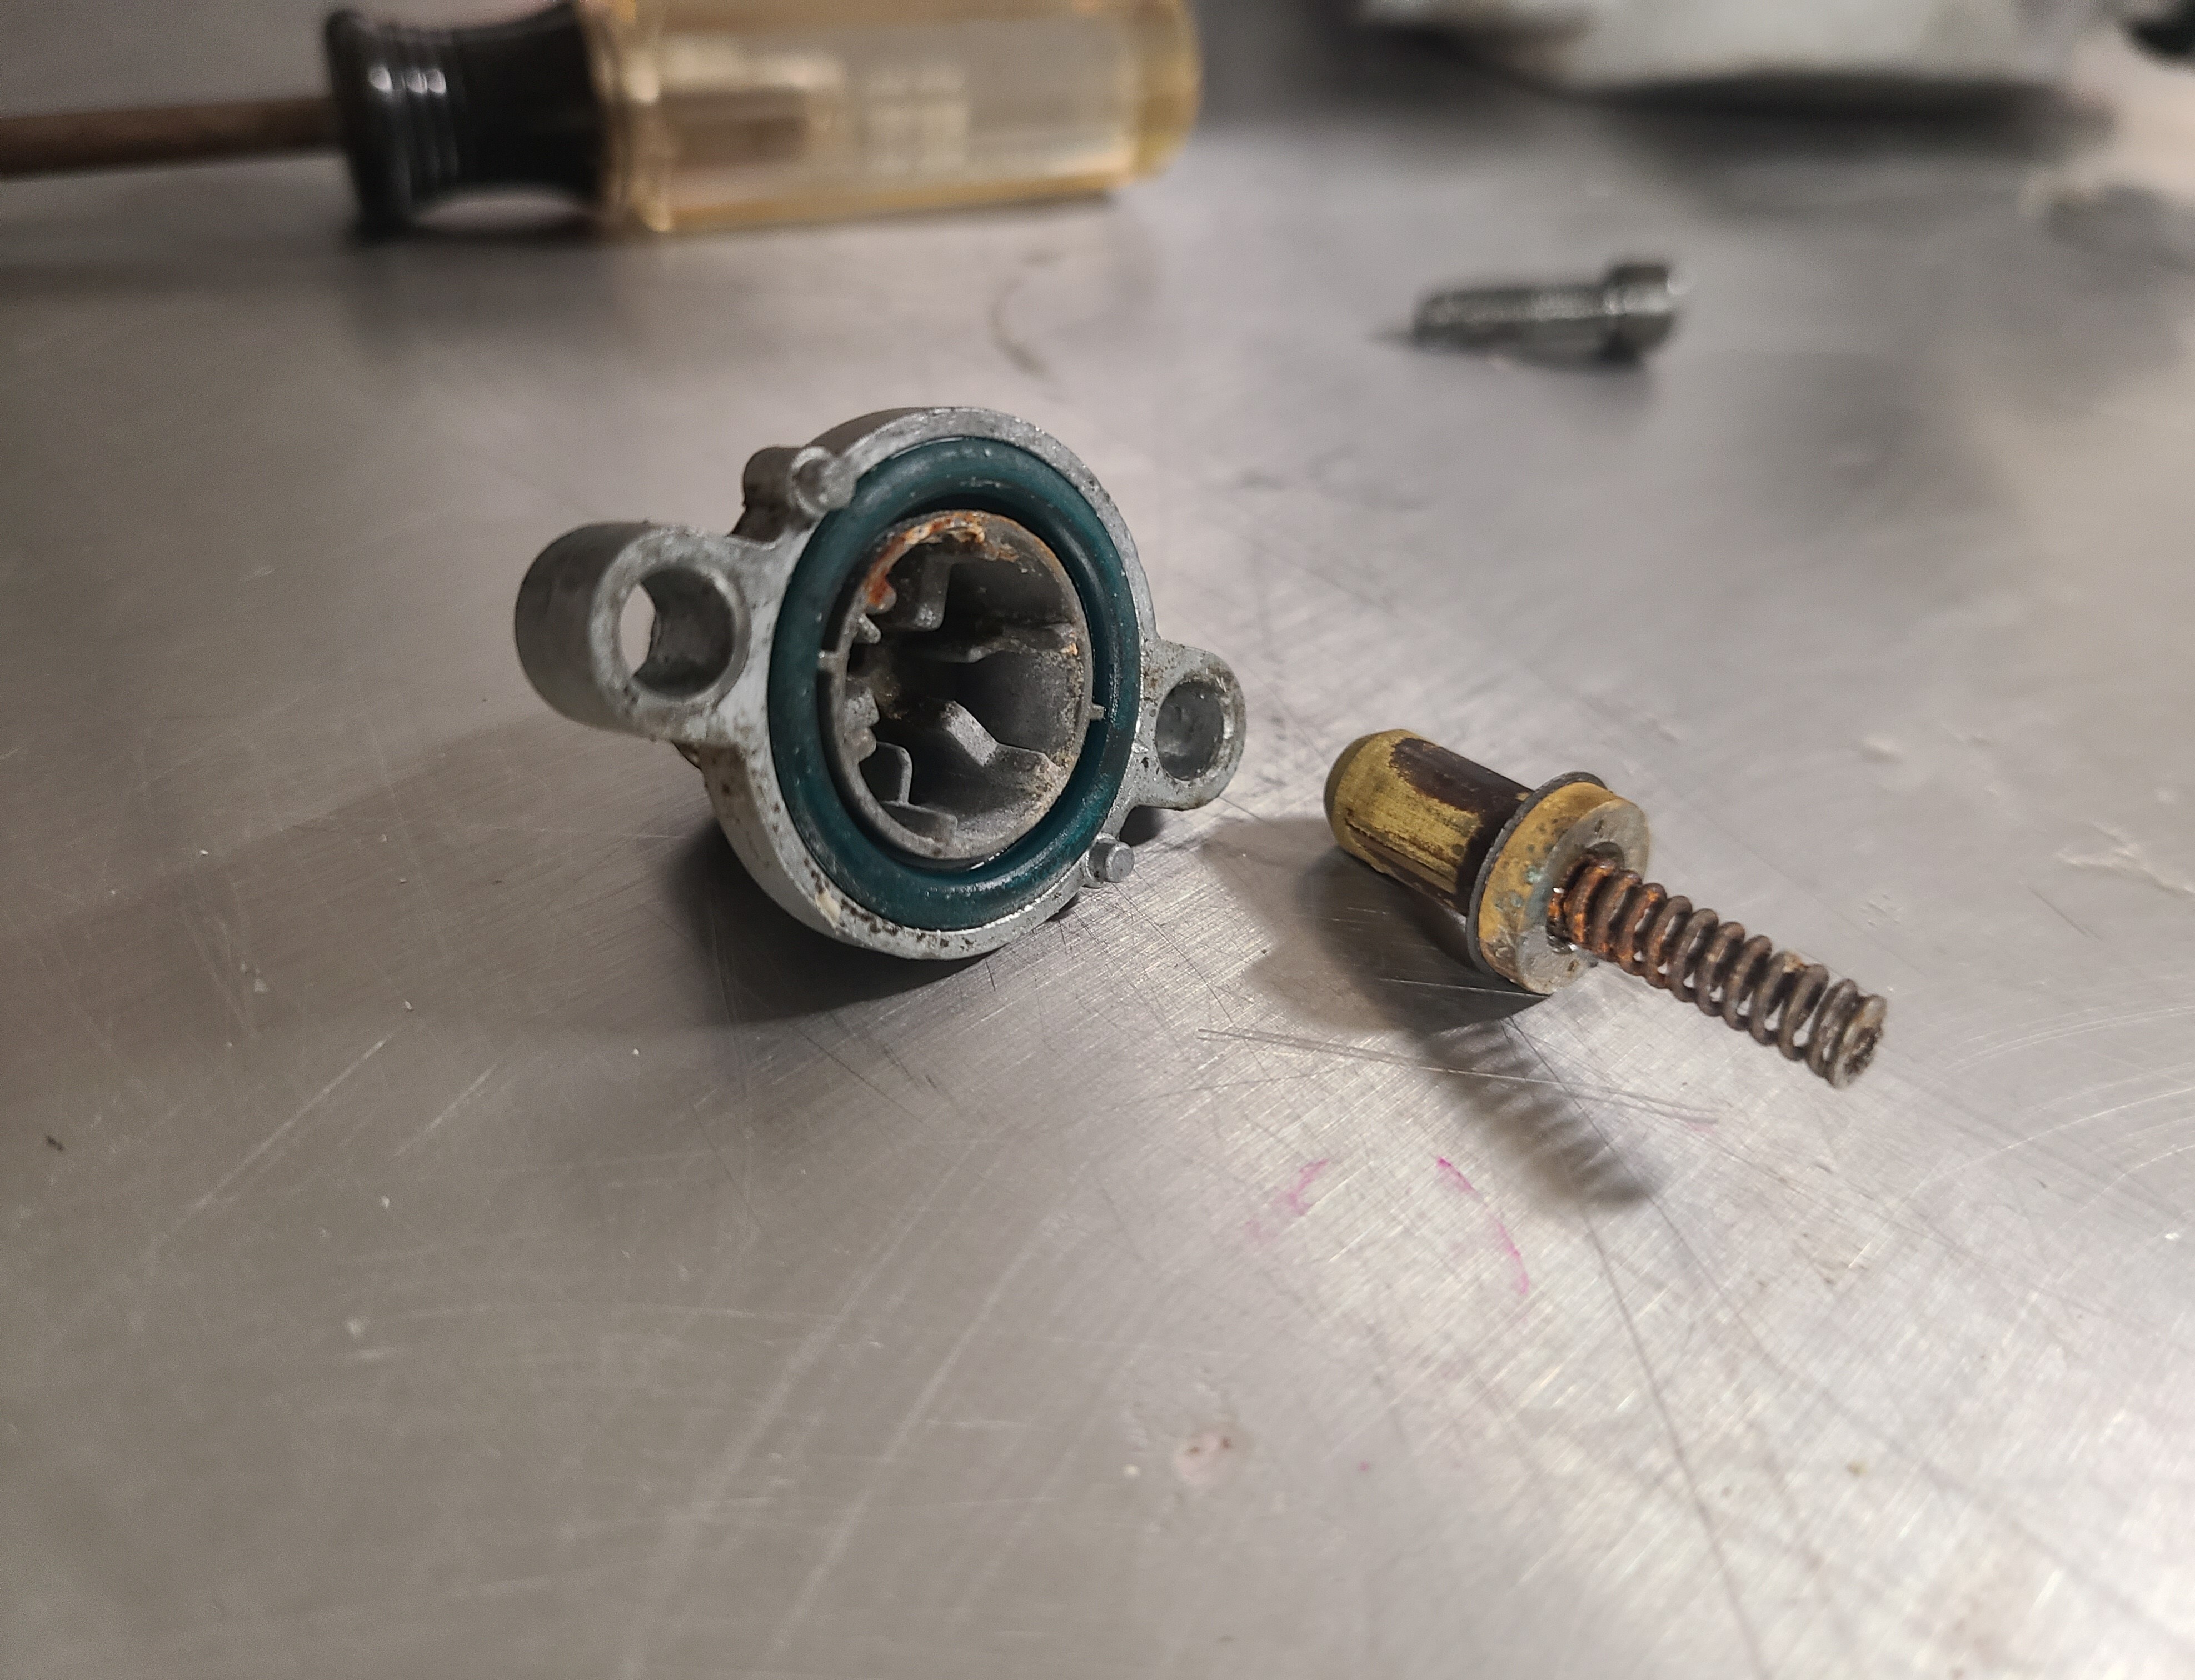
16. The FPR housing will be reused here, with a new O-ring, the brass poppet and spring will not be reused. A new poppet and regulator spring is included in the Riffraff kit.
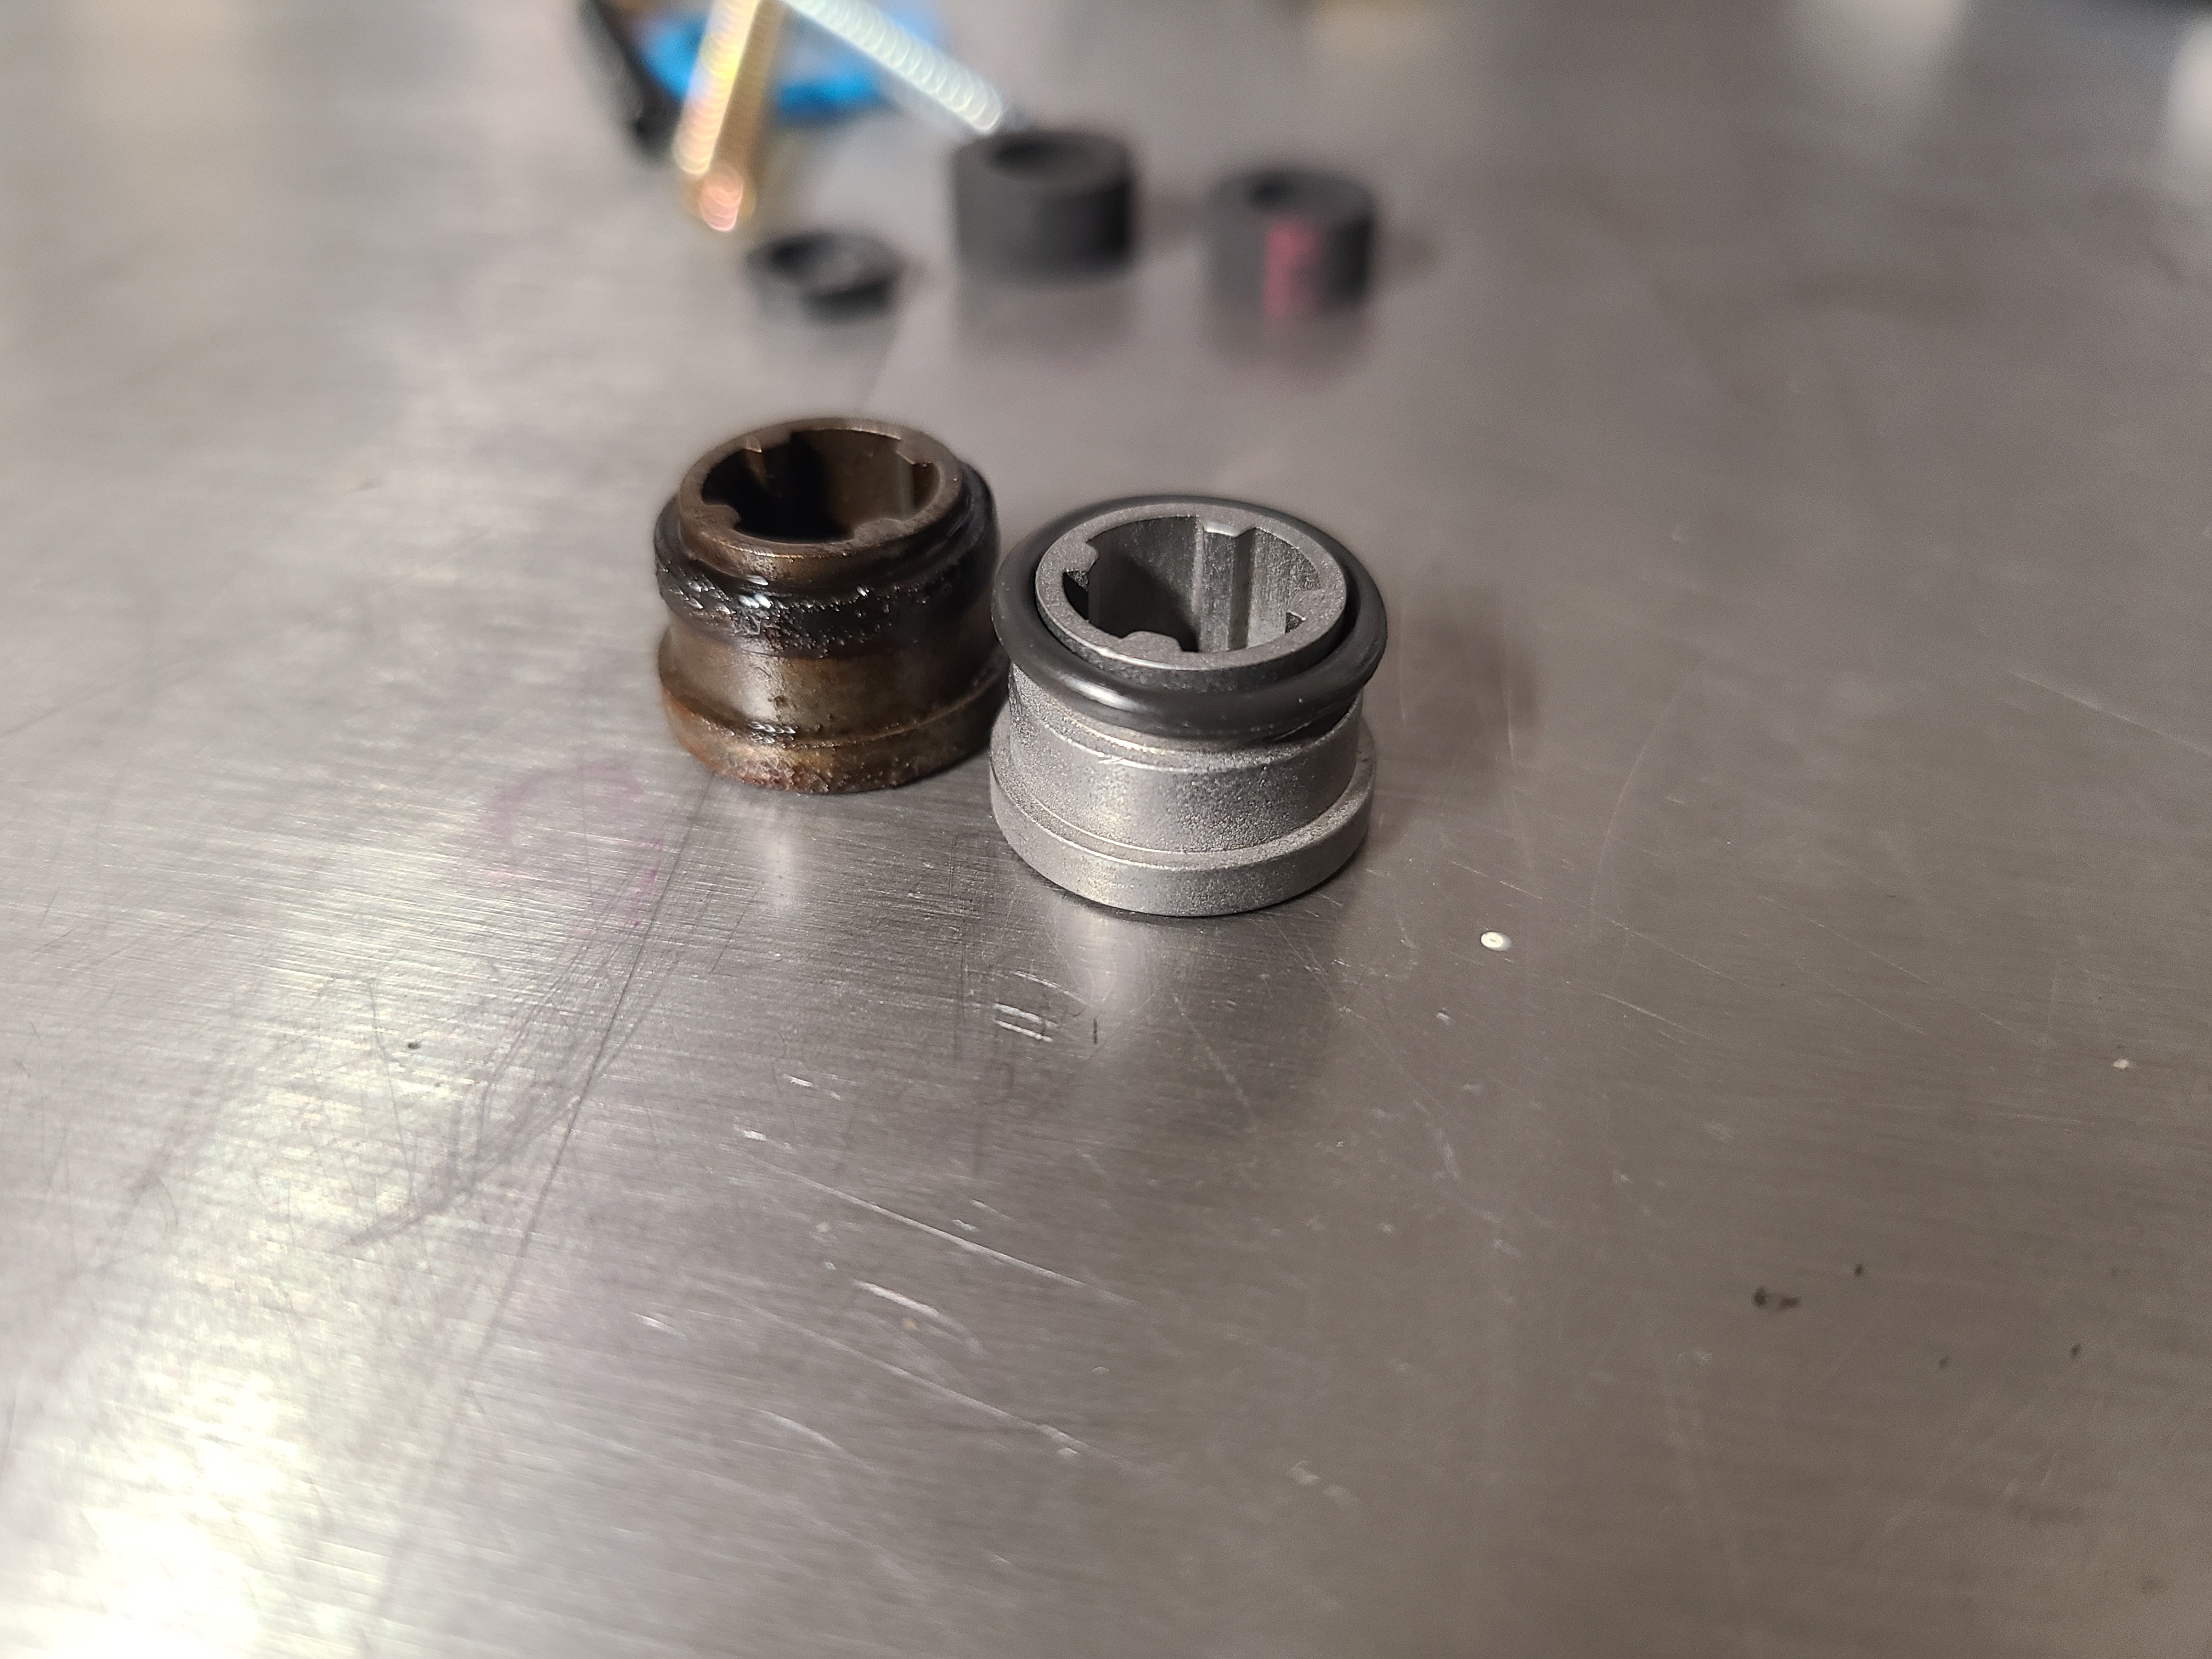
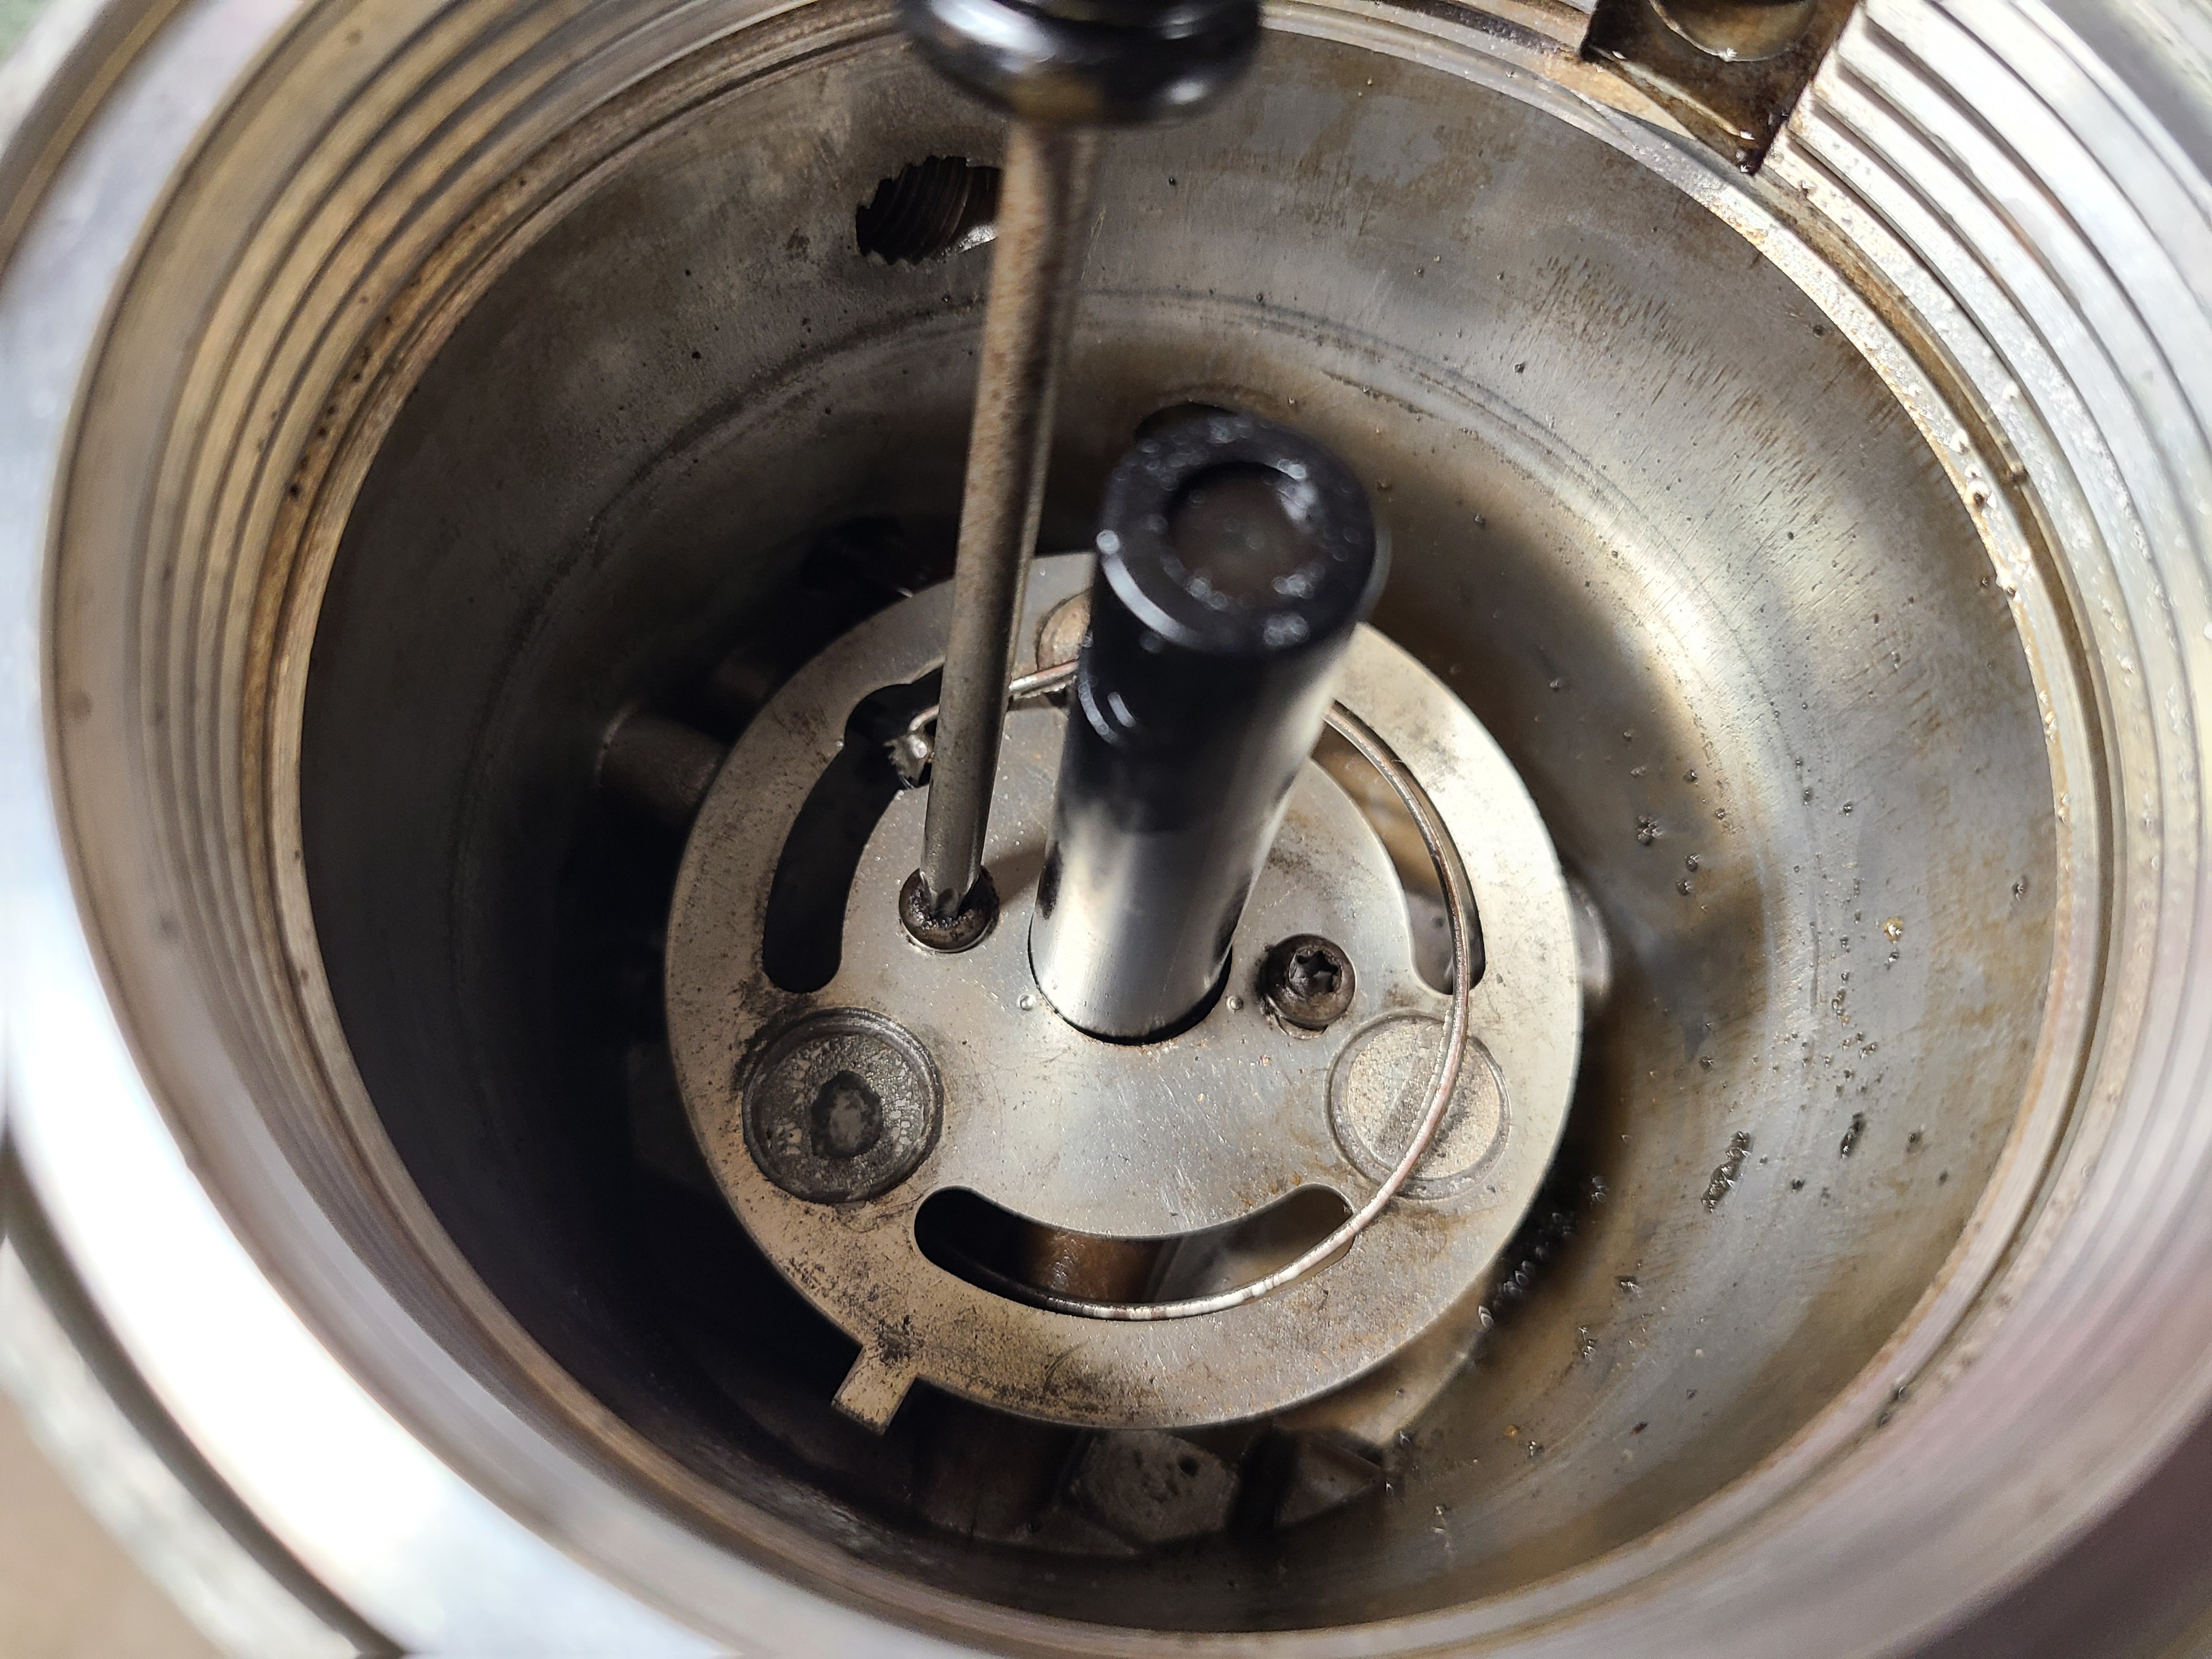
17. The brass poppet sits in this sleeve, in the fuel bowl housing. Removing the sleeve may require pressure from the backside with a punch or other blunt object. We will not be reusing the old sleeve as a new one is included with the kit.
18. With the new O-ring on the new sleeve, it can be pressed back into the fuel bowl assembly followed by the brass poppet and it’s new O-ring.
19. One very popular modification often made to the FPR is increasing fuel pressure with these springs. Riffraff recommends using the Gold spring which is rated at 61-65 psi.
Fuel Pressure Regulator Springs:
- 55-60 psi silver spring
- 61-65 psi gold spring *Recommended
- 66-72 psi black spring
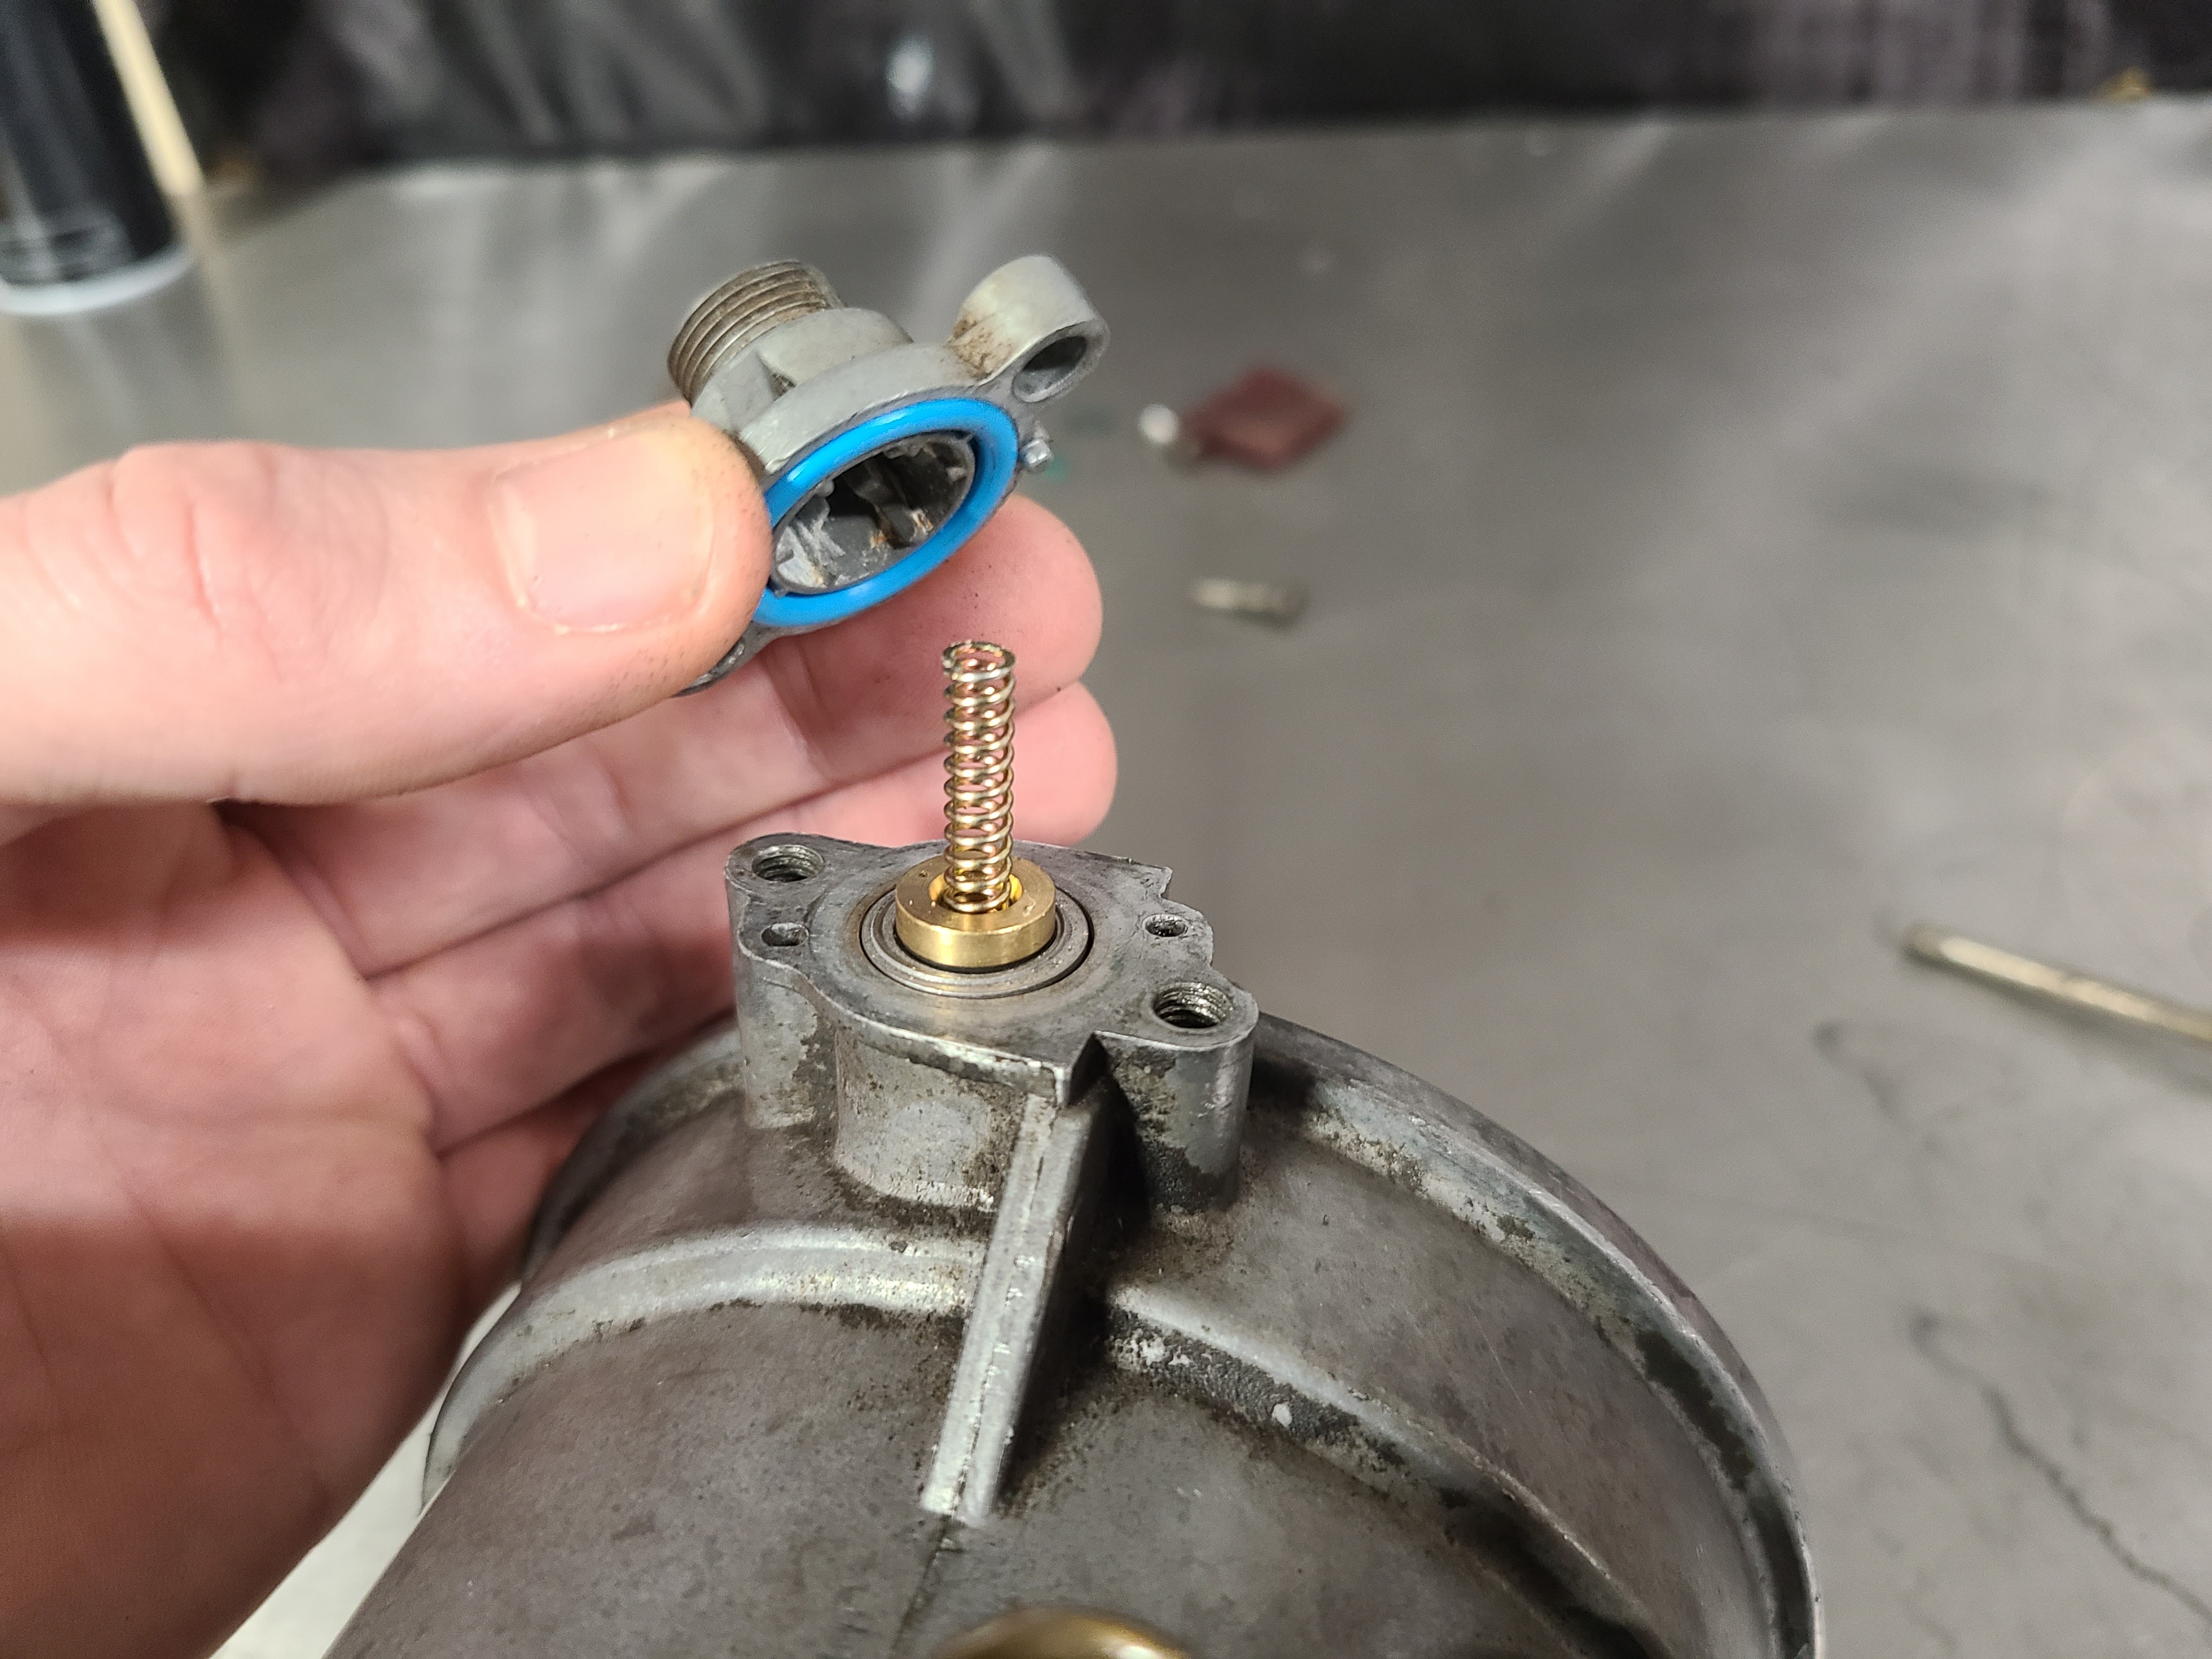
20. The FPR housing (with it’s new O-ring) can then be reinstalled over the new sleeve, poppet, and spring.
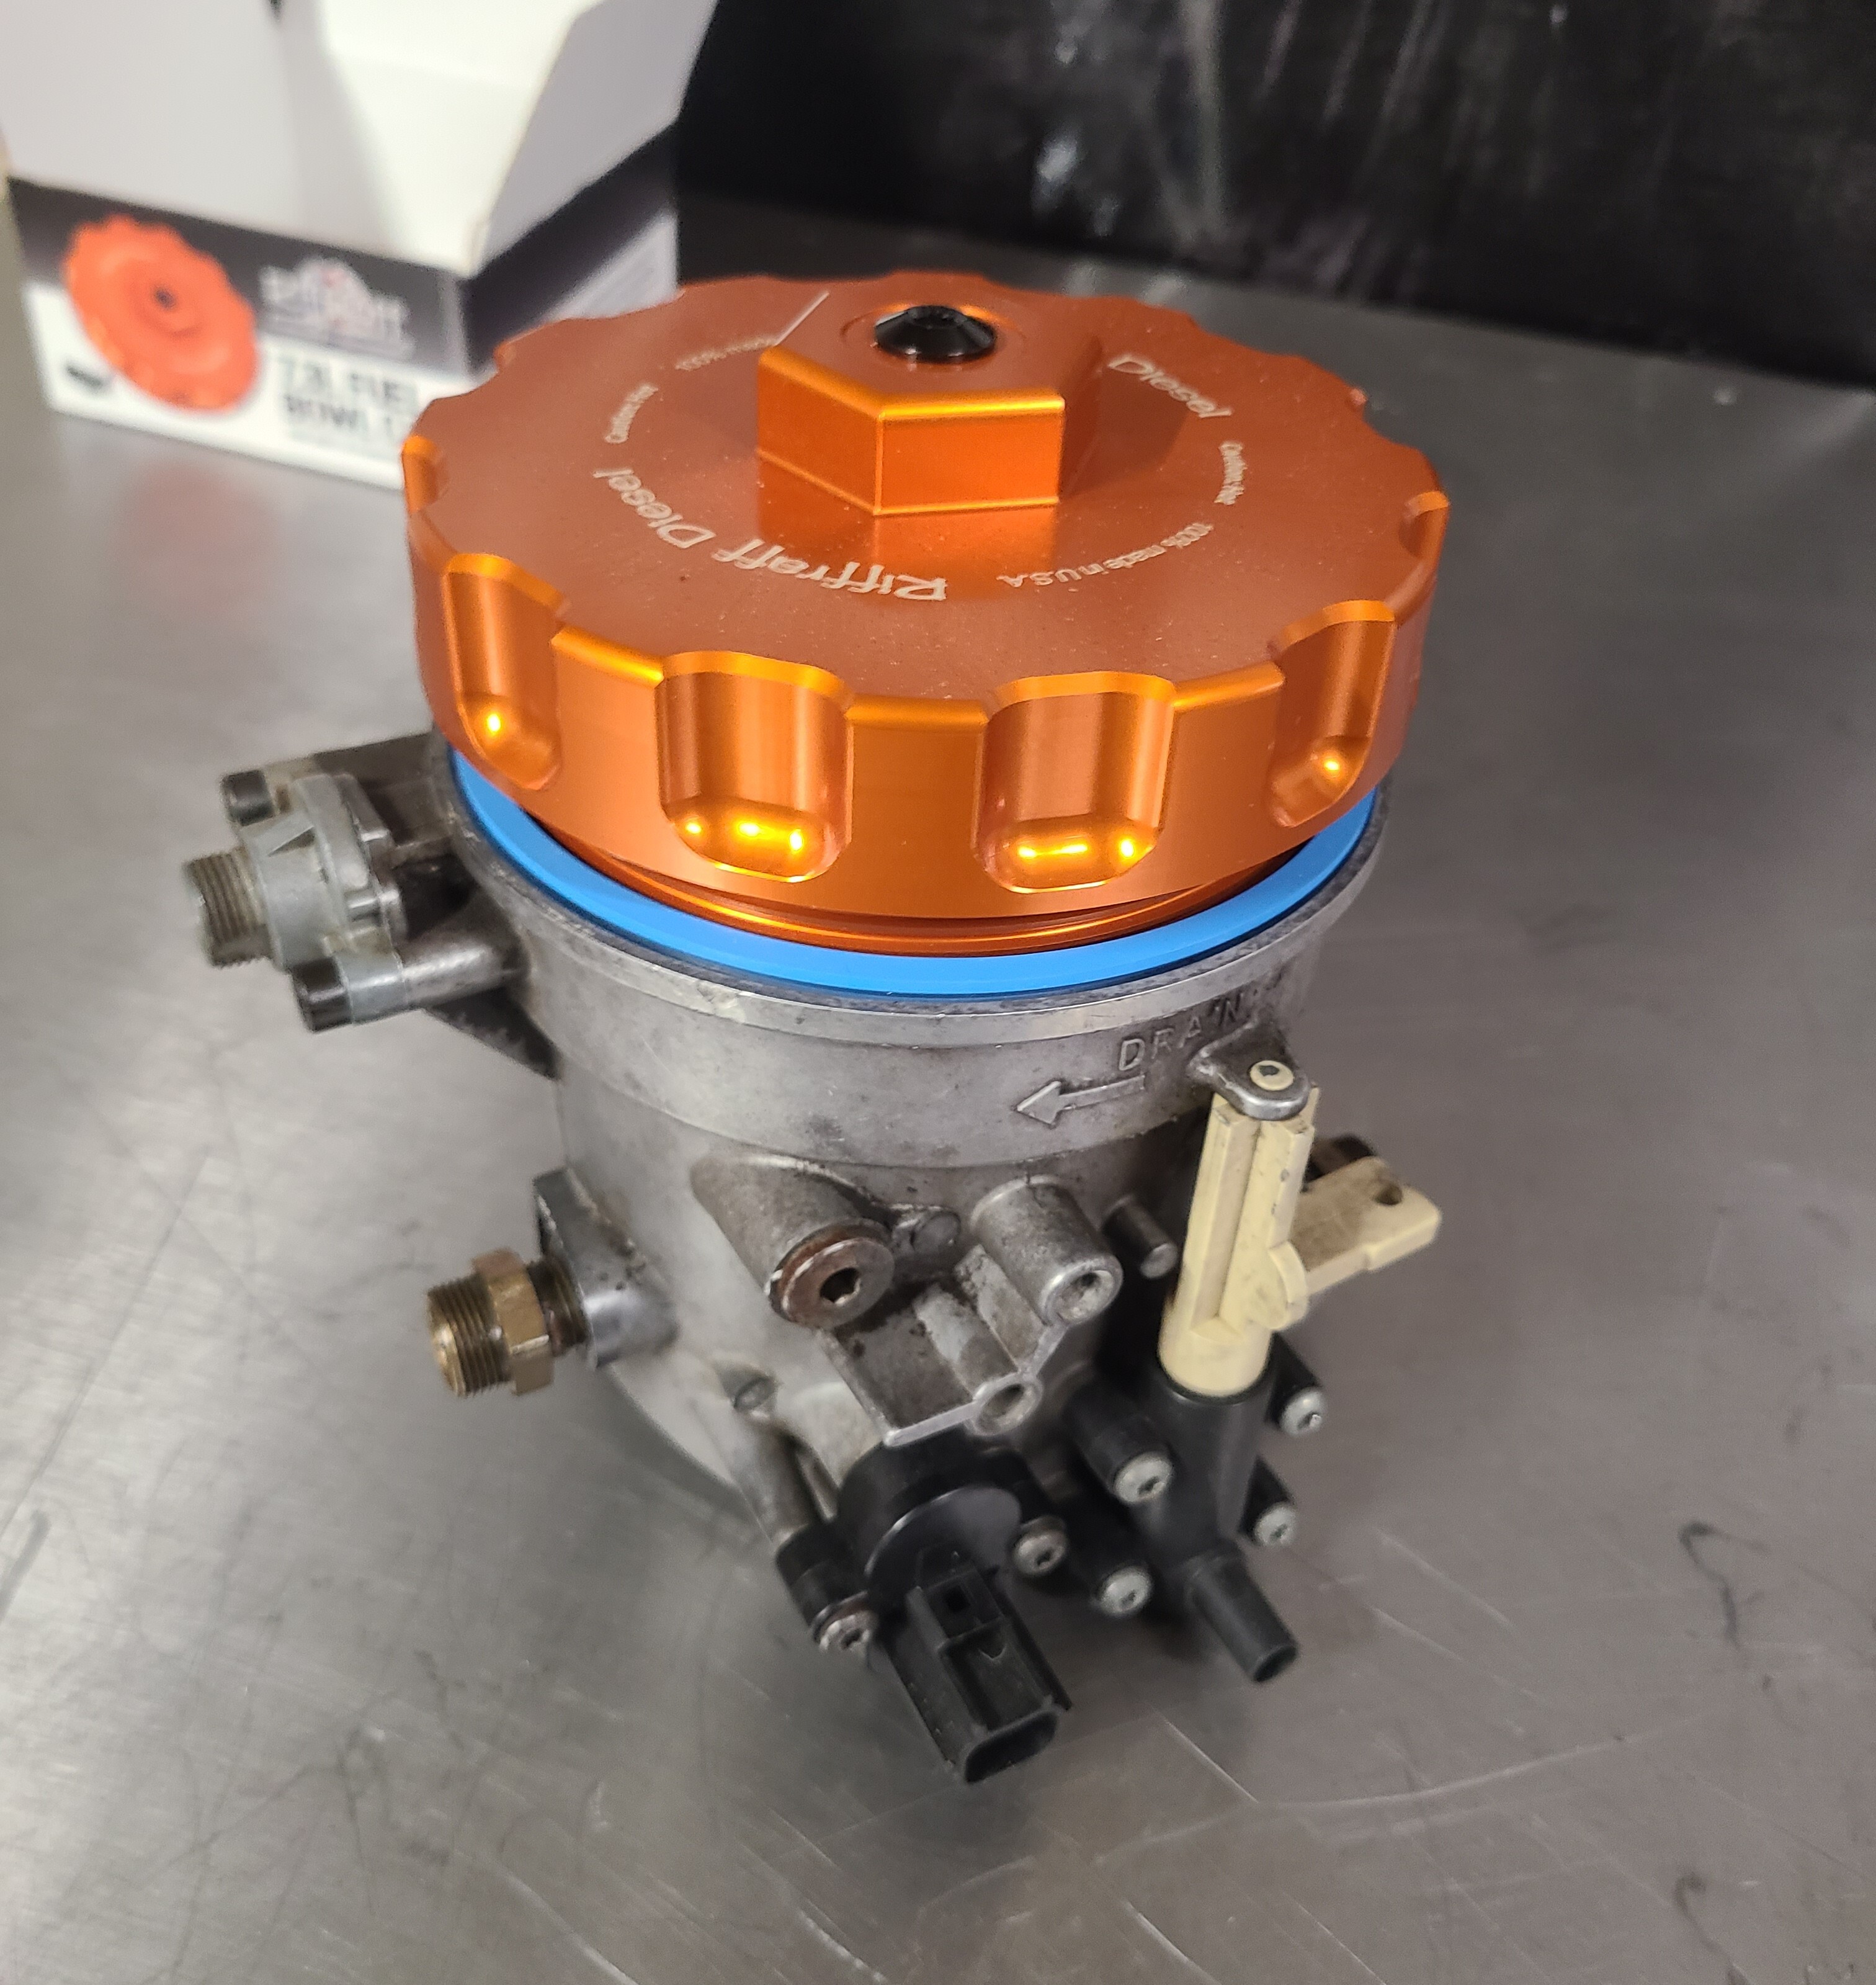
21. Before reinstalling the fuel bowl into the truck, a new Riffraff Diesel Billet Fuel Filter Cap and Motorcraft filter are installed. The Riffraff Billet Fuel Bowl Cap not only looks great, it’s much stronger and features a Viton O-ring for superior sealing.
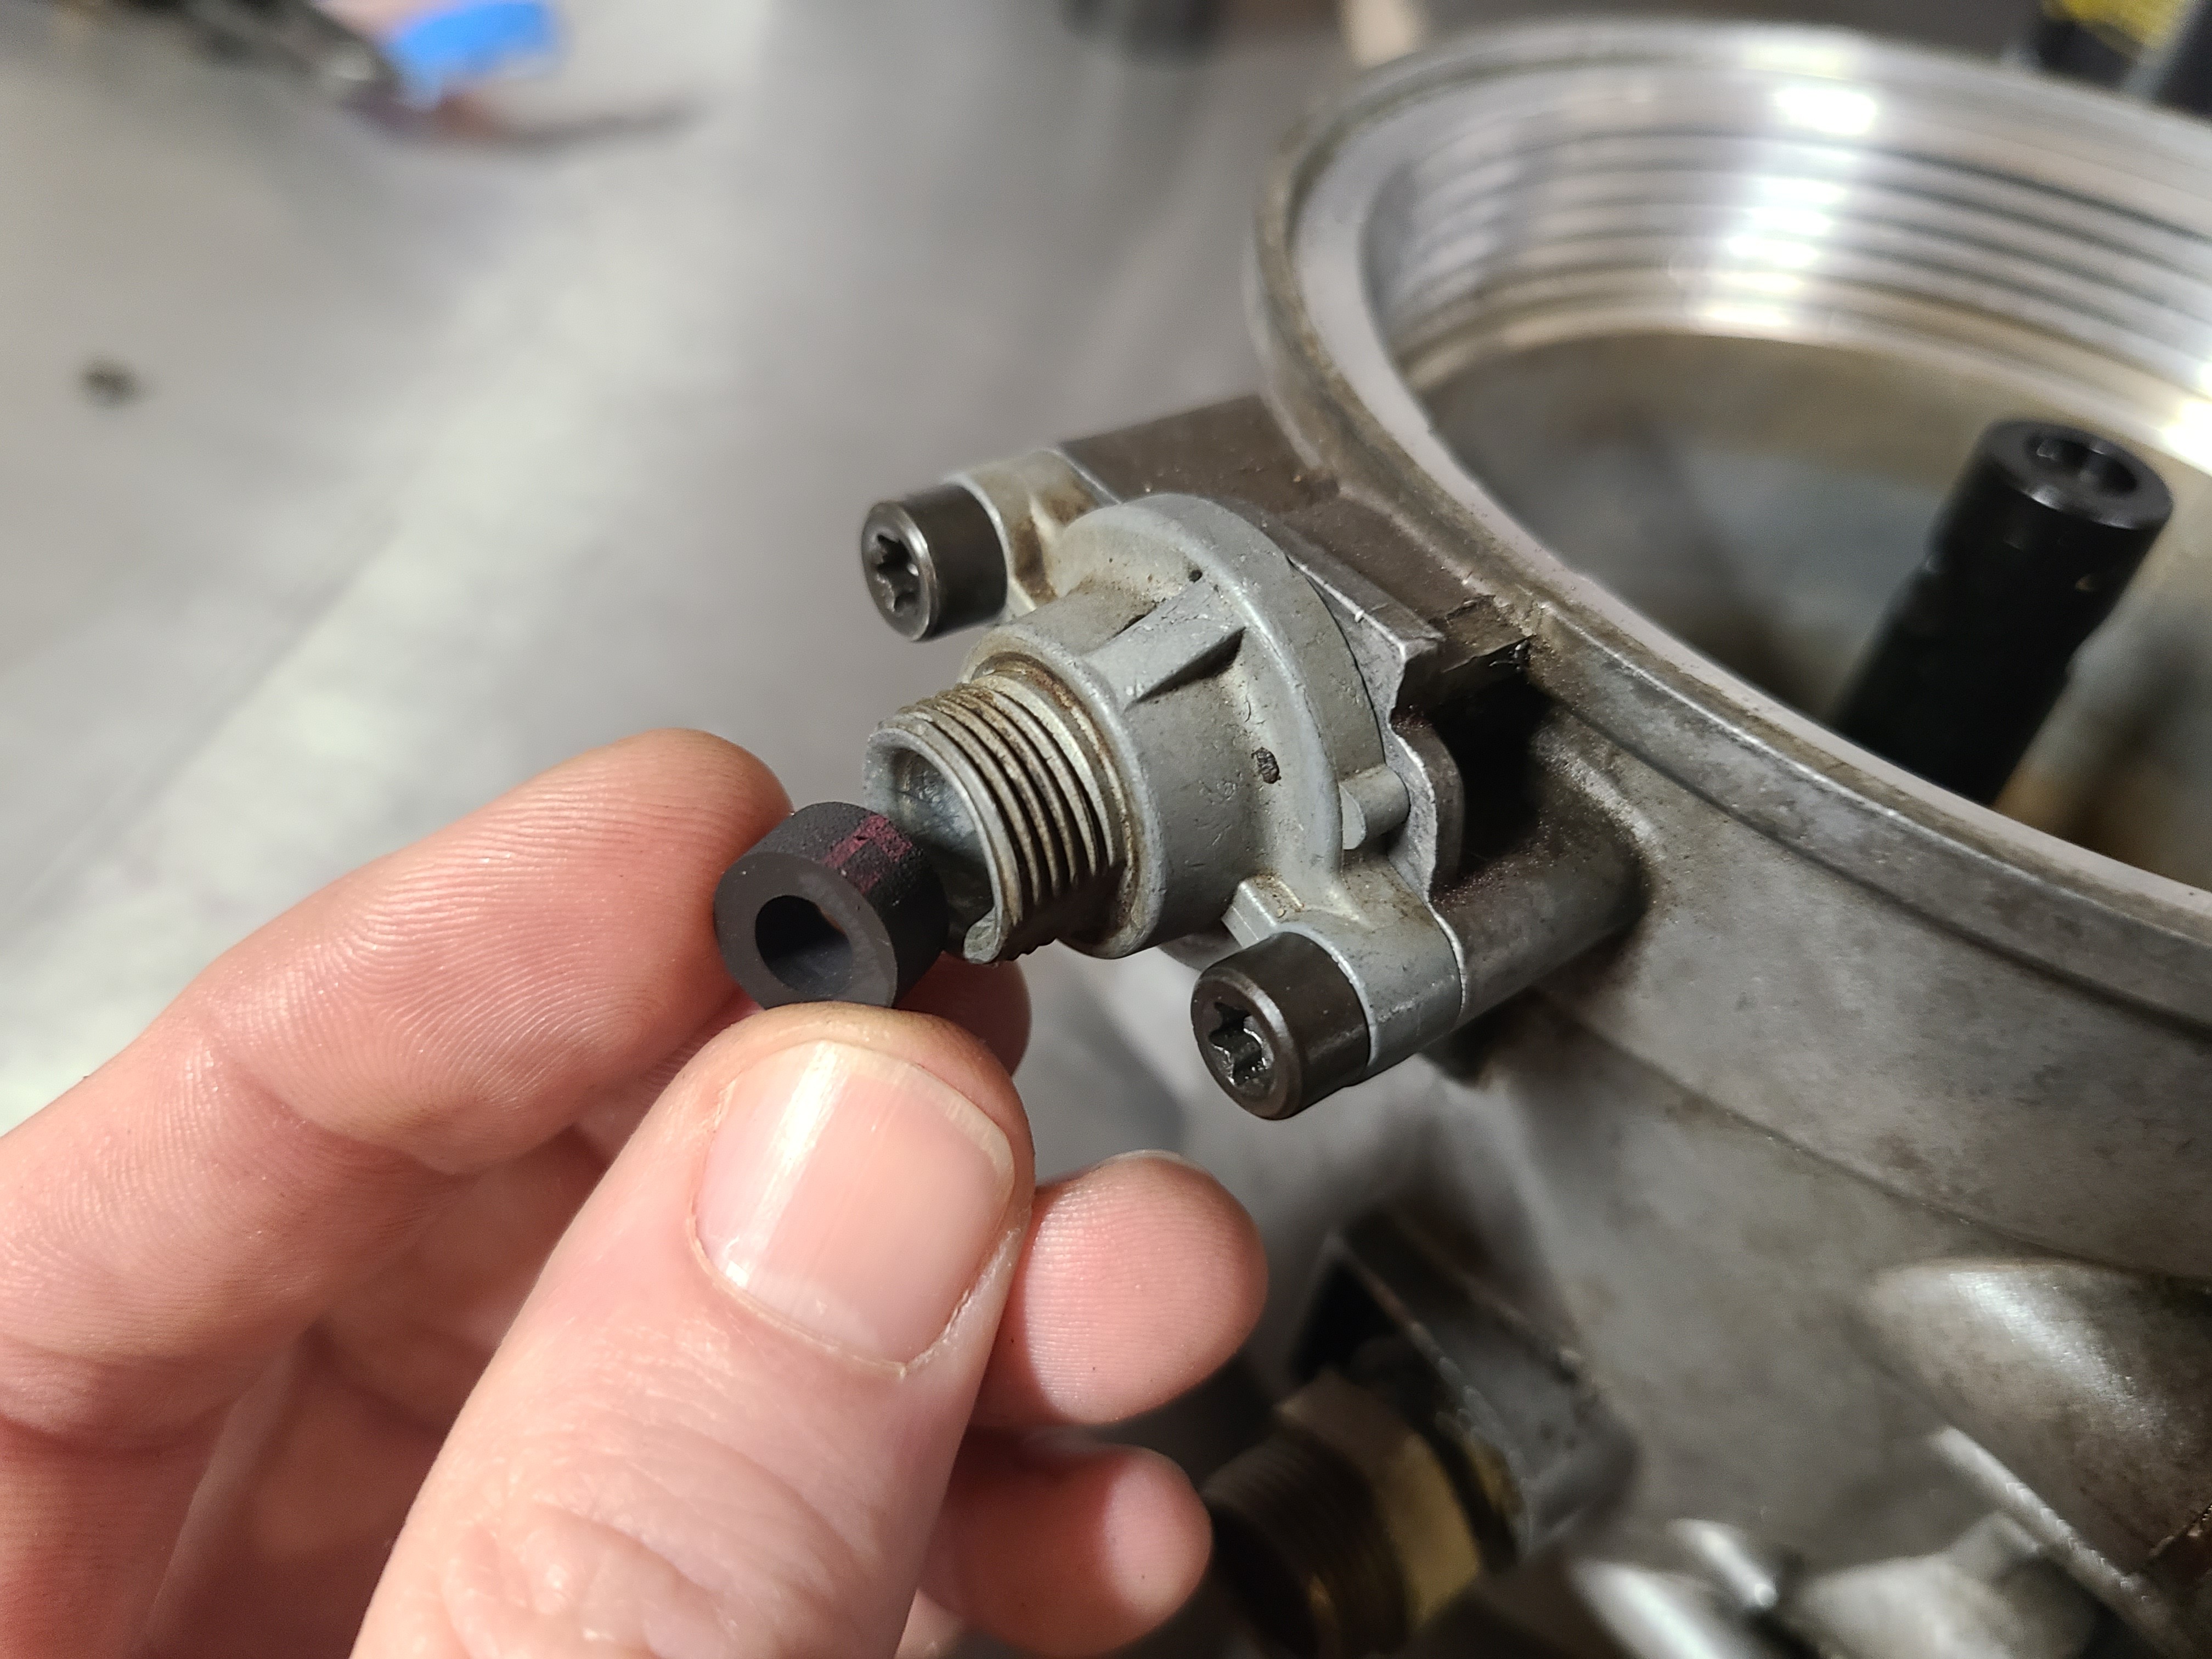
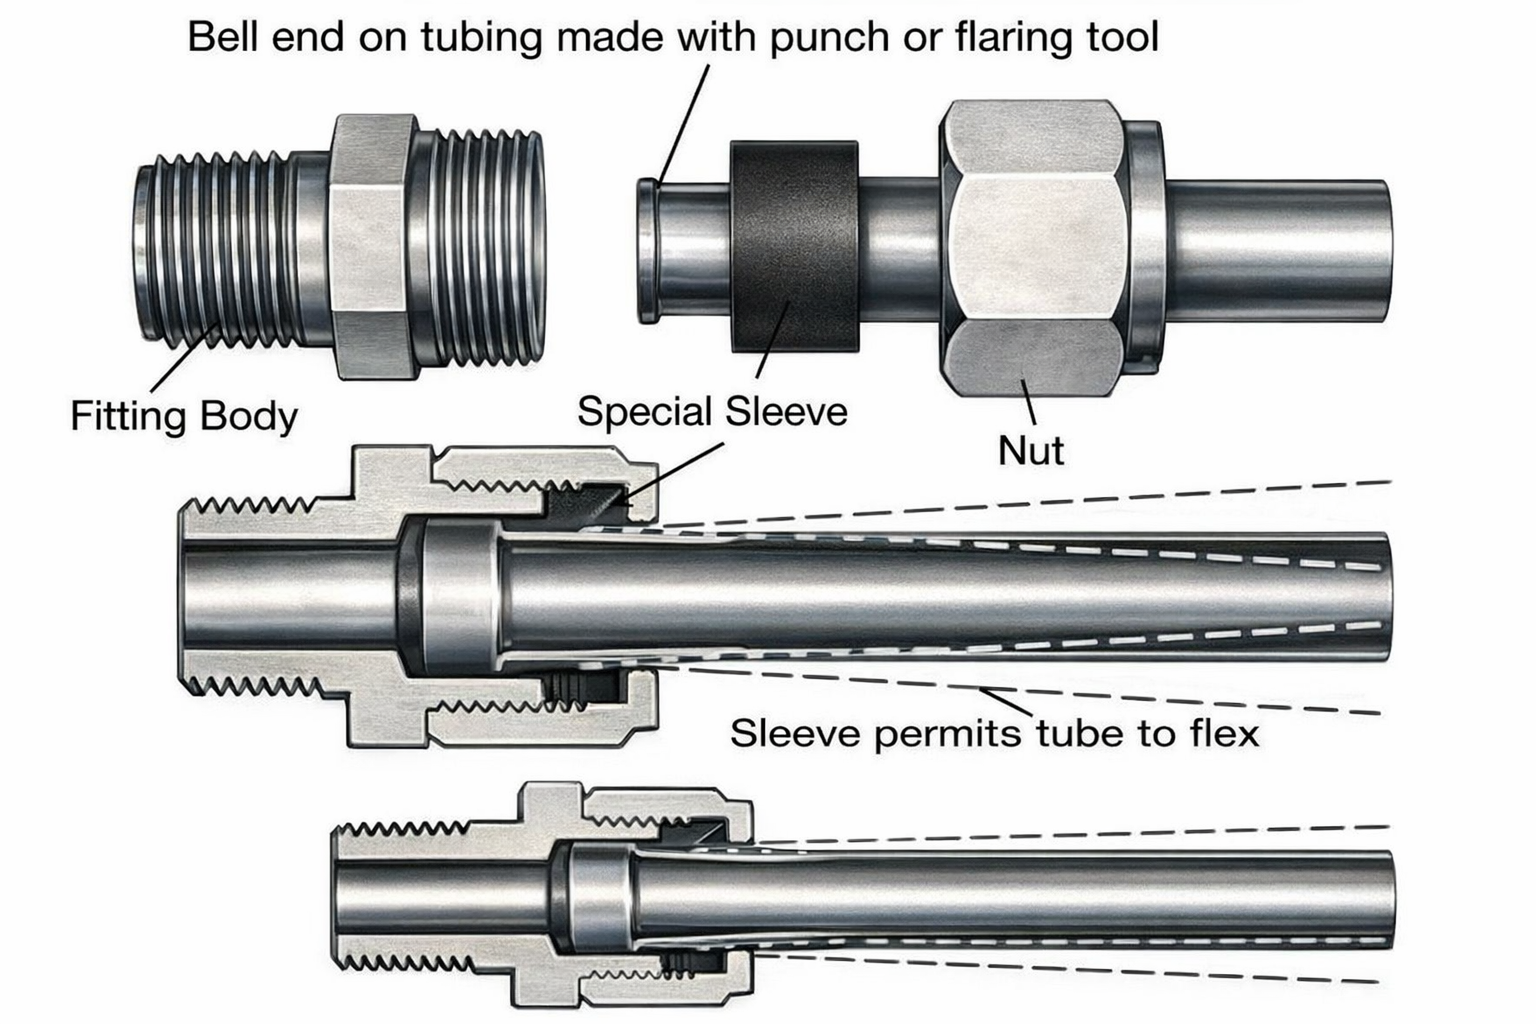
22. Last step, which must be done when the bowl is in the truck but before the lines are reinstalled, the fuel line seals must be replaced. There are four of these seals; one for each supply fitting to the heads, one for the FPR, and one for the supply. These seals go on the fuel lines themselves, between the flare and the nut.
Fuel Filter Replacement Step By Step:
Disclaimer: The information provided on this blog is for informational purposes only. We share our knowledge and experience, but we are not liable for any damages, injuries, or losses that may occur as a result of using this information. Situations are rarely cut and dry in the automotive world. Your situation will likely be somewhat different than what we describe here. Use your best judgment and always consult a qualified professional for automotive repairs and modifications. Your safety is your responsibility.


