
6.0L Powerstroke Coolant Filtration Kit - Full Step By Step How To
Dec 22nd 2025
Full PDF Instructions can be downloaded here: https://www.riffraffdiesel.com/content/RESOURCES/Riffraff%20Diesel%206.0L%20Coolant%20Filter%20Instructions.pdf
Parts Required:
Riffraff Diesel 6.0L Coolant Filter Kit: Part# RDP-COOLFIL-6.0
Recommended Tools: Basic hand tools
IMPORTANT: Before starting installation, please be sure that all items that were supplied with the kit are accounted for.
1. Ensure the vehicle’s coolant system is cold. You will be opening coolant lines and will lose coolant. Hot coolant can scald you.
2. Remove the cap from the coolant reservoir tank and set aside.
3. Assemble the two shut-off valves to the filter head using the supplied Gasoila® Thread Sealant. Install the plug into the extra port using thread sealant, unless you are using a coolant temperature gauge.
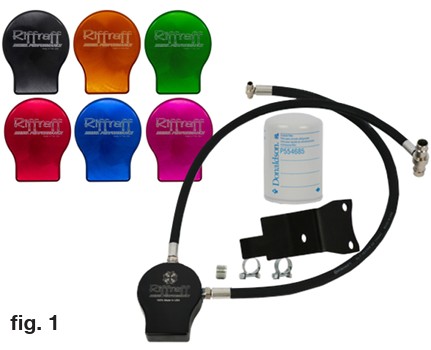
4. Assemble the hoses as shown in the picture. The hose with the smaller fitting gets routed to the coolant tank.
5. Assemble the Filter Head Bracket to the Filter Head using the two supplied Allen Bolts and Lock Washers.
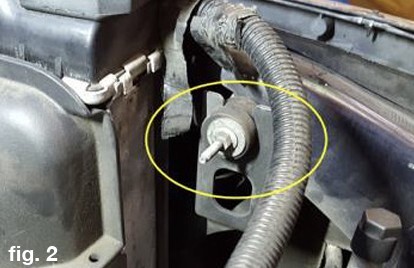
6. On the passenger side of the radiator, remove the 10mm stud from the support bracket. (The battery cable retainer can be pulled off the stud)
7. Install the filter bracket by engaging the lower tab of the bracket into the slot on the support bracket. This will align the filter bracket bolt attach hole with the support bracket hole.
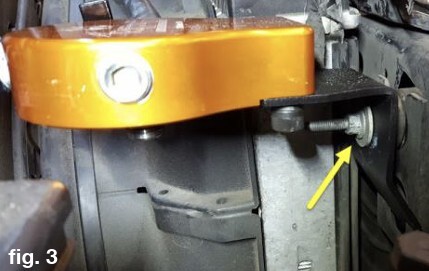
8. Install the previously removed stud through the filter bracket and into the support bracket. (Inset the battery cable retainer between the filter bracket and isolator) then fully insert the stud and tighten down. (fig. 3)
9. Route the hose with the smaller fitting across the radiator fan shroud and to the coolant reservoir hose. You will cut this hose at the location shown to attach the fitting. Use a sharp knife to cut cleanly.
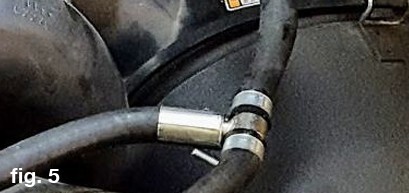
10. Slide the provided (small) hose clamps onto each side of the cut hose. Insert the “tee” fitting into the hose fully and position the hose clamps and tighten.
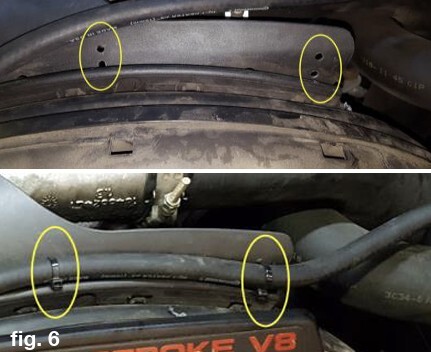
11. To secure the hose to the radiator fan shroud, you can drill small holes and use zip-ties to secure the hose to the shroud. Make the holes appropriately sized for the zip ties you choose to use.
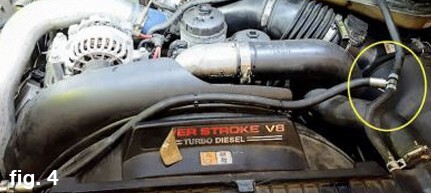
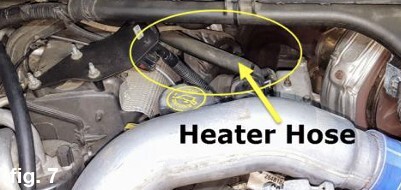
12. Route the hose with the larger fitting to the heater hose on the passenger side of the truck. You can choose the location you cut the hose based on your preference. Route the hose to your preference to ensure it is not riding hard on any components.
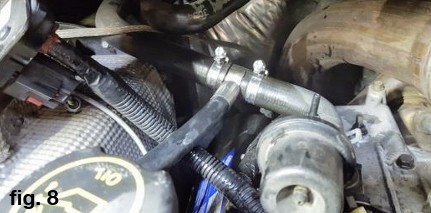
13. Cut the hose in a straight section with a sharp knife. You will lose coolant from this hose. You can clamp the hose upstream and downstream to lessen the loss.
14. Slide the supplied larger hose clamps on to each side of the cut. Insert the “tee” fitting into the hose fully and position clamps. Tighten clamps down to secure them.
15. Install the supplied Coolant Filter to the filter head using a small amount of coolant on the O-ring seal.
16. Start the engine and look for leaks.
17. Replenish coolant and install the reservoir cap.
18. Monitor coolant level for a few days to ensure you have replaced all lost coolant.
19. Filter Maintenance: Typically you will use three filters in the first nine months. Once the initial nine months has passed, you will only need to change the filter once a year.


