
Full Step By Step How To: Riffraff Diesel 7.3 Plenum Reinforcing Inserts
Jan 9th 2026
Parts Required
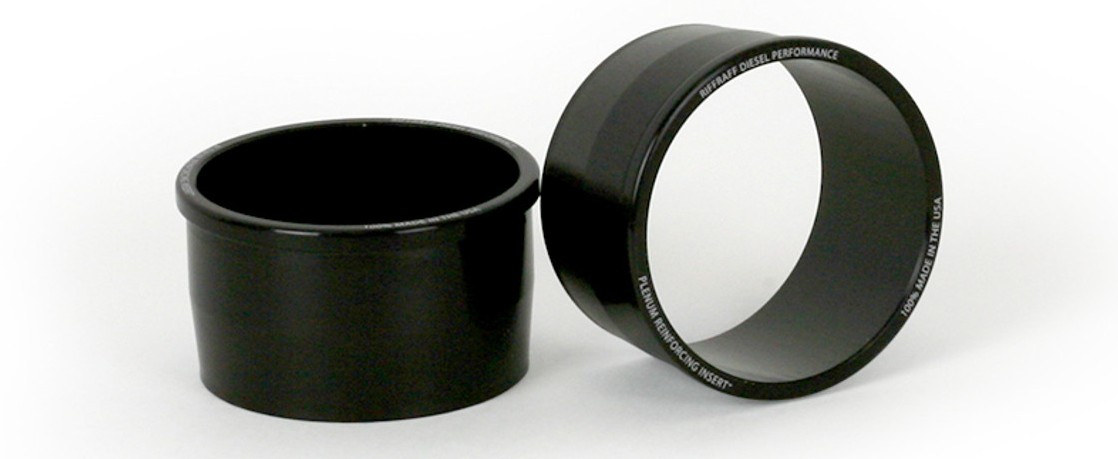
Riffraff Diesel Plenum Reinforcing Inserts:
1999.5-2003: https://www.riffraffdiesel.com/rdp-plenum-reinforcing-inserts-99-5-03/
1994-1999: https://www.riffraffdiesel.com/rdp-plenum-reinforcing-inserts-94-early-99/
Tools Required:
- Standard pliers
- Metric and SAE sockets and ratchets
- Large and long flat blade screwdriver
- Hammer
- Block of wood (2x4, approx 5-6” long) o ra soft, non-marring substitute
Optional Tools/Supplies:
- Degreaser
- SS t-bolt replacement clamps
IMPORTANT: Before starting installation, please be sure that all items which were supplied with the kit are accounted for.
SUGGESTION: BE PREPARED TO TIGHTEN, OR AT LEAST CHECK THE TIGHTNESS OF ALL HOSE/BOOT CLAMPS WHILE YOU’RE UNDER THE HOOD, ESPECIALLY THE CLAMP AROUND THE DOWNPIPE CONNECTION ON THE DISCHARGE SIDE OF THE TURBO EXHAUST HOUSING.
1. If present, remove Powerstroke cover (13mm deep-well socket).
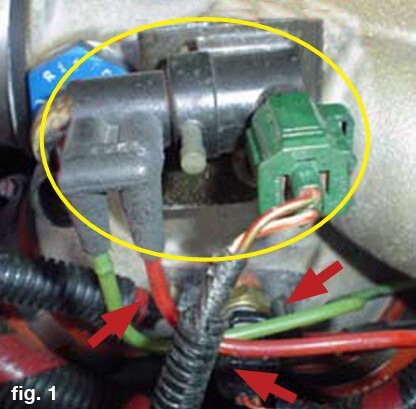
2. If present, disconnect these items from the intake spider (compressor manifold) (fig. 1)
- a) Black rubber hose to MAP sensor
- b) Exhaust pressure regulator
- c) Red tube to wastegate actuator
- d) Intake manifold pressure sensor connector
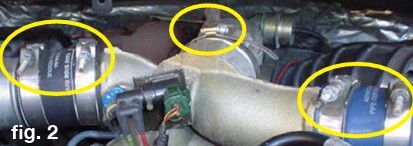
3. As indicated in fig. 2, loosen the following clamps:
- a) Hot intercooler tube boot (upper right)
- b) Cold intercooler tube boot (upper left
- c) Manifold connection to turbo
4. Loosen the four clamps on the two boots at the bottom of the spider where they connect to the intake plenums.
5. Remove the spider. It will take a little bit of wrestling, but be careful to not tear a boot in the process if you have stock boots.
6. Take the plenum boots off (the ones from the bottom of the spider) and clean them out with degreaser if they have oily residue in them.
7. To install the new inserts, place the tapered end into the plenum opening, and then simply lay the block of wood across the top and tap the inserts all the way in until the top lip of the insert is flush with the top edge of the plenum inlet tube. This top lip prevents the inserts from going too far. (fig. 3, fig. 4)
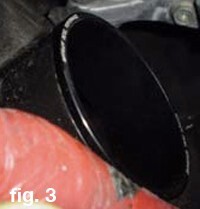

NOTE: MAKE SURE THAT THE BLOCK OF WOOD IS COMPLETELY FLAT ACROSS THE TOP OF THE INSERT, AND TAP IT EVENLY SO THE INSERT DOES NOT GO IN CROOKED OR COCKED TO ONE SIDE. ALSO, WHILE TAPPING IN THE INSERT, IT WILL SOUND SORT OF LIKE TAPPING ON AN EMPTY SODA CAN. ONCE THE INSERT IS COMPLETELY SEATED, THE SOUND OF YOUR TAPPING WILL CHANGE NOTICEABLY AND WILL BECOME MUCH MORE SOLID SOUNDING.
8. Reverse steps 1-6, making sure to get all your clamps tight. T-bolt clamps are suggested since you are now able to clamp aggressively on the plenums.
9. Make sure that you remove all your tools, rags, etc. from under the hood.
10. Double check your connections to make sure all sensors and clamps are securely connected.
Instructions and pictures provided by Clay, Pete (250_), and the whole FTE crew.


