
7.3 Powerstroke Up Pipes: Step By Step How To Installation
Nov 18th 2025
Full PDF Instructions can be downloaded here: https://www.riffraffdiesel.com/content/RESOURCES/Riffraff_Diesel_Bellowed_Up-Pipe_Instructions.pdf
Parts Link:
Riffraff Diesel Bellowed Up-pipe Kit 94-Early 99: https://www.riffraffdiesel.com/riffraff-diesel-bellowed-up-pipe-kit-94-early-99/
Riffraff Diesel Bellowed Up-pipe Kit 99.5-03: https://www.riffraffdiesel.com/riffraff-diesel-bellowed-stainless-up-pipe-kit-99-5-03/
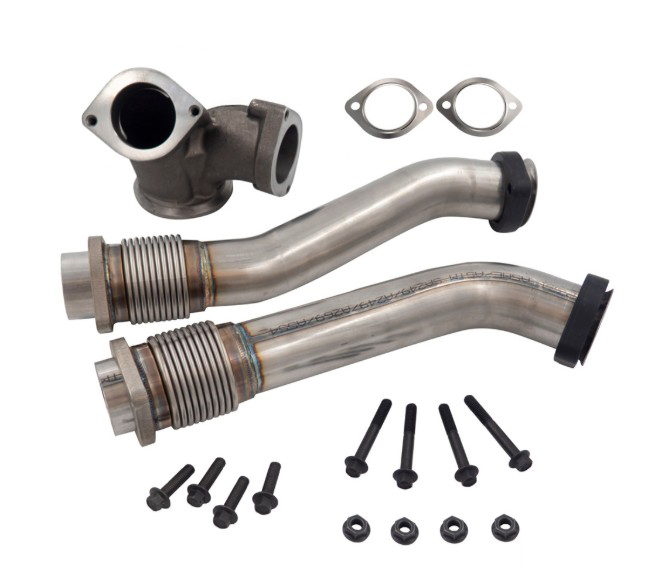
Required Parts:
- Collector
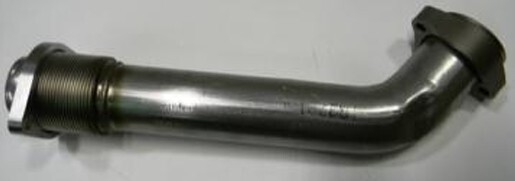
- L/H Pipe
- R/H Pipe
- Bolt & Gasket Kit (2 gaskets, 4 short bolts, 4 long bolts, & 4 nuts)
Recommended Parts:
- Turbo Reinstall Kit P/N GZ-14-009
Recommended Tools:
- Standard and Metric Sockets and Wrenches
- Socket Extensions (several)
- Torque Wrench
- Eye Protection
- PB Blaster or similar penetrating oil
- Anti-Seize Lubricant
- Various pry bars
1. Soak all exhaust bolts and turbo clamps down with penetrating oil several times over a couple days prior to starting replacement. This will make the job go a little easier.
2. Disconnect the batteries.
3. Remove turbo from engine to gain access to the up-pipe collector. (see Riffraff Diesel Turbo R&R Instructions also located on our Resources page)
4. Remove the exhaust downpipe if possible (not required but allows greater access.)
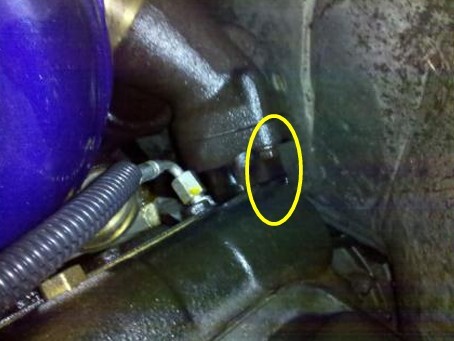
5. Loosen or remove the bolts (4) using a 10mm wrench/socket from the up-pipe collector flanges. Loosening may be all that is required as the pipes will often slide out of the donuts when bolts are loosened. Access to these may be easier from underneath the truck, use long extensions to reach them.
6. Slide the up-pipe collector off of the up-pipes, it may be required to remove the manifold to up-pipe bolts for this task.
7. Remove the (2) bolts using a 10mm and a 13mm wrench/socket from the up-pipe to manifold at both the drivers and the passenger side of the engine.
8. Remove the OEM up-pipes from the manifolds.
9. Assemble the passenger side bellowed up-pipe (double bent pipe) to the collector using (1) metal gasket and (2) short bolts from the kit. Use anti-seize lubricant on the bolts and the flanges prior to tightening up the bolts fully.

10. Feed the up-pipe and collector from the top down. Install the passenger side up-pipe to manifold bolts and nuts loose, apply antiseize to the bolts and flange.
12. Insert the drivers side up-pipe down from the top. Moving the loose collector will allow the pipe to be inserted and aligned properly.
13. Assemble the drivers side bellowed up-pipe onto the collector using (1) metal gasket and (2) short bolts from the kit.
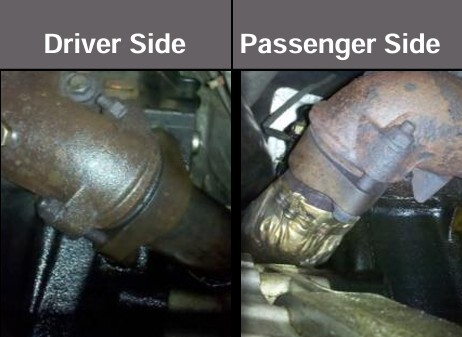
NOTE: the drivers side up-pipe has a preformed depression for clearance. The flared end should point outward and forward to align with the manifold. Leave these bolts loose for now.
14. Install the drivers side up-pipe to manifold bolts loose, apply antiseize to the bolts and the flange.
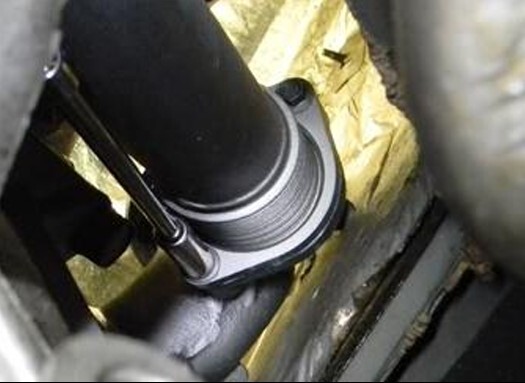
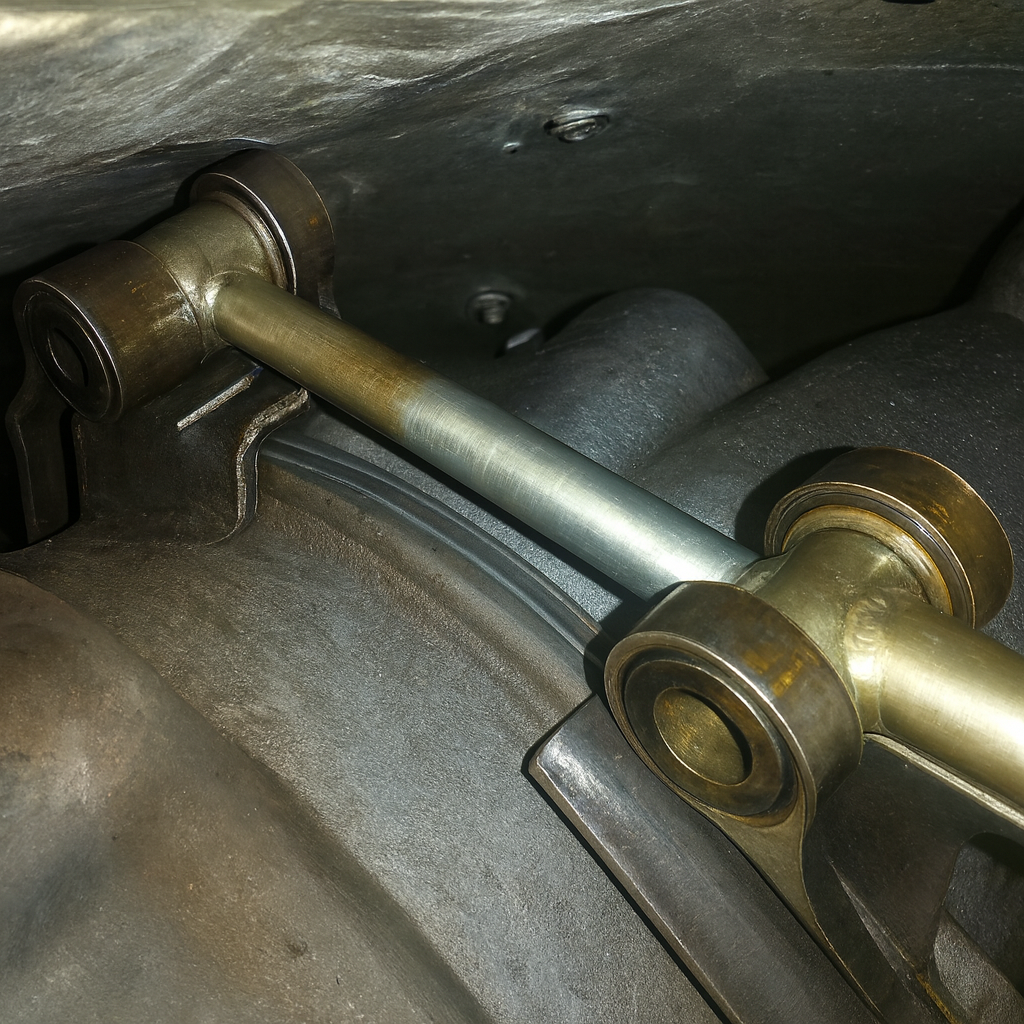
15. Tighten the drivers side up-pipe to collector bolts completely now. This may be done from either the top or from the bottom using extensions and a socket. (fig 7)
16. Re-install turbo to the pedestal.
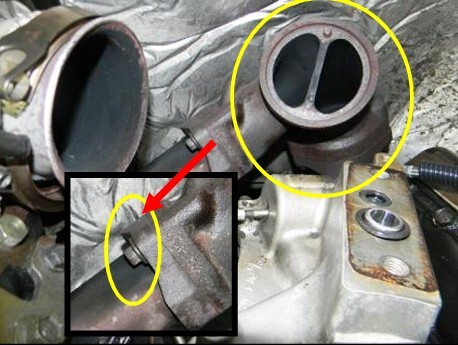
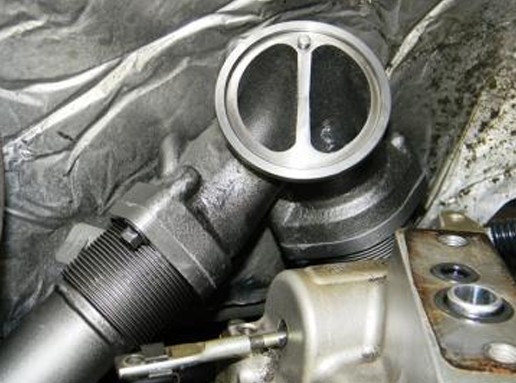
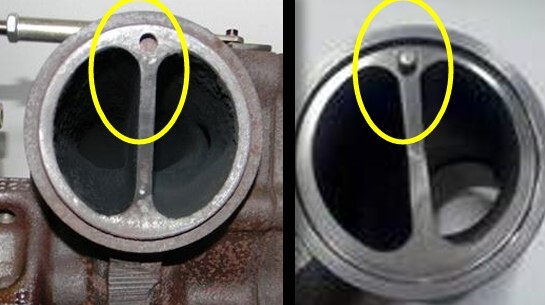
17. Align the up-pipe collector to the turbo flange. Make sure the pin from the collector is engaged in the hole on the turbo. Once the flanges are lined up, install the Marmon clamp to the flange. Using a bungee cord around the up-pipe collector may make it easier to hold the two together. Tighten the clamp to 60 in/lbs.
18. Tighten the drivers side and passenger side manifold to up-pipe bolts fully now. There will be a gap of ¼”- ½” between the up-pipe and manifold. Tighten the bolts (2) on each manifold evenly, this will expand the bellowed section of the up-pipe as it is designed. The gap will close as the bolts are tightened.
19. Reinstall down pipe if removed, and connect to turbo outlet.
20. Make sure the up-pipes do not interfere with anything at the back of the engine.
21. Re-install all removed components
22. Reconnect the batteries.
23. Start the truck and check for leaks.
24. After driving and reaching operating temperature, check the bolts for tightness after a heat and cool cycle (or a few).
Pictures and instructions provided by Ken (Woodnthings) and the whole FTE crew!


